Rebuilding our 1973 Porsche 911T.
After a devastating engine fire in 2020 that destroyed this car we have started, 917 number 2.
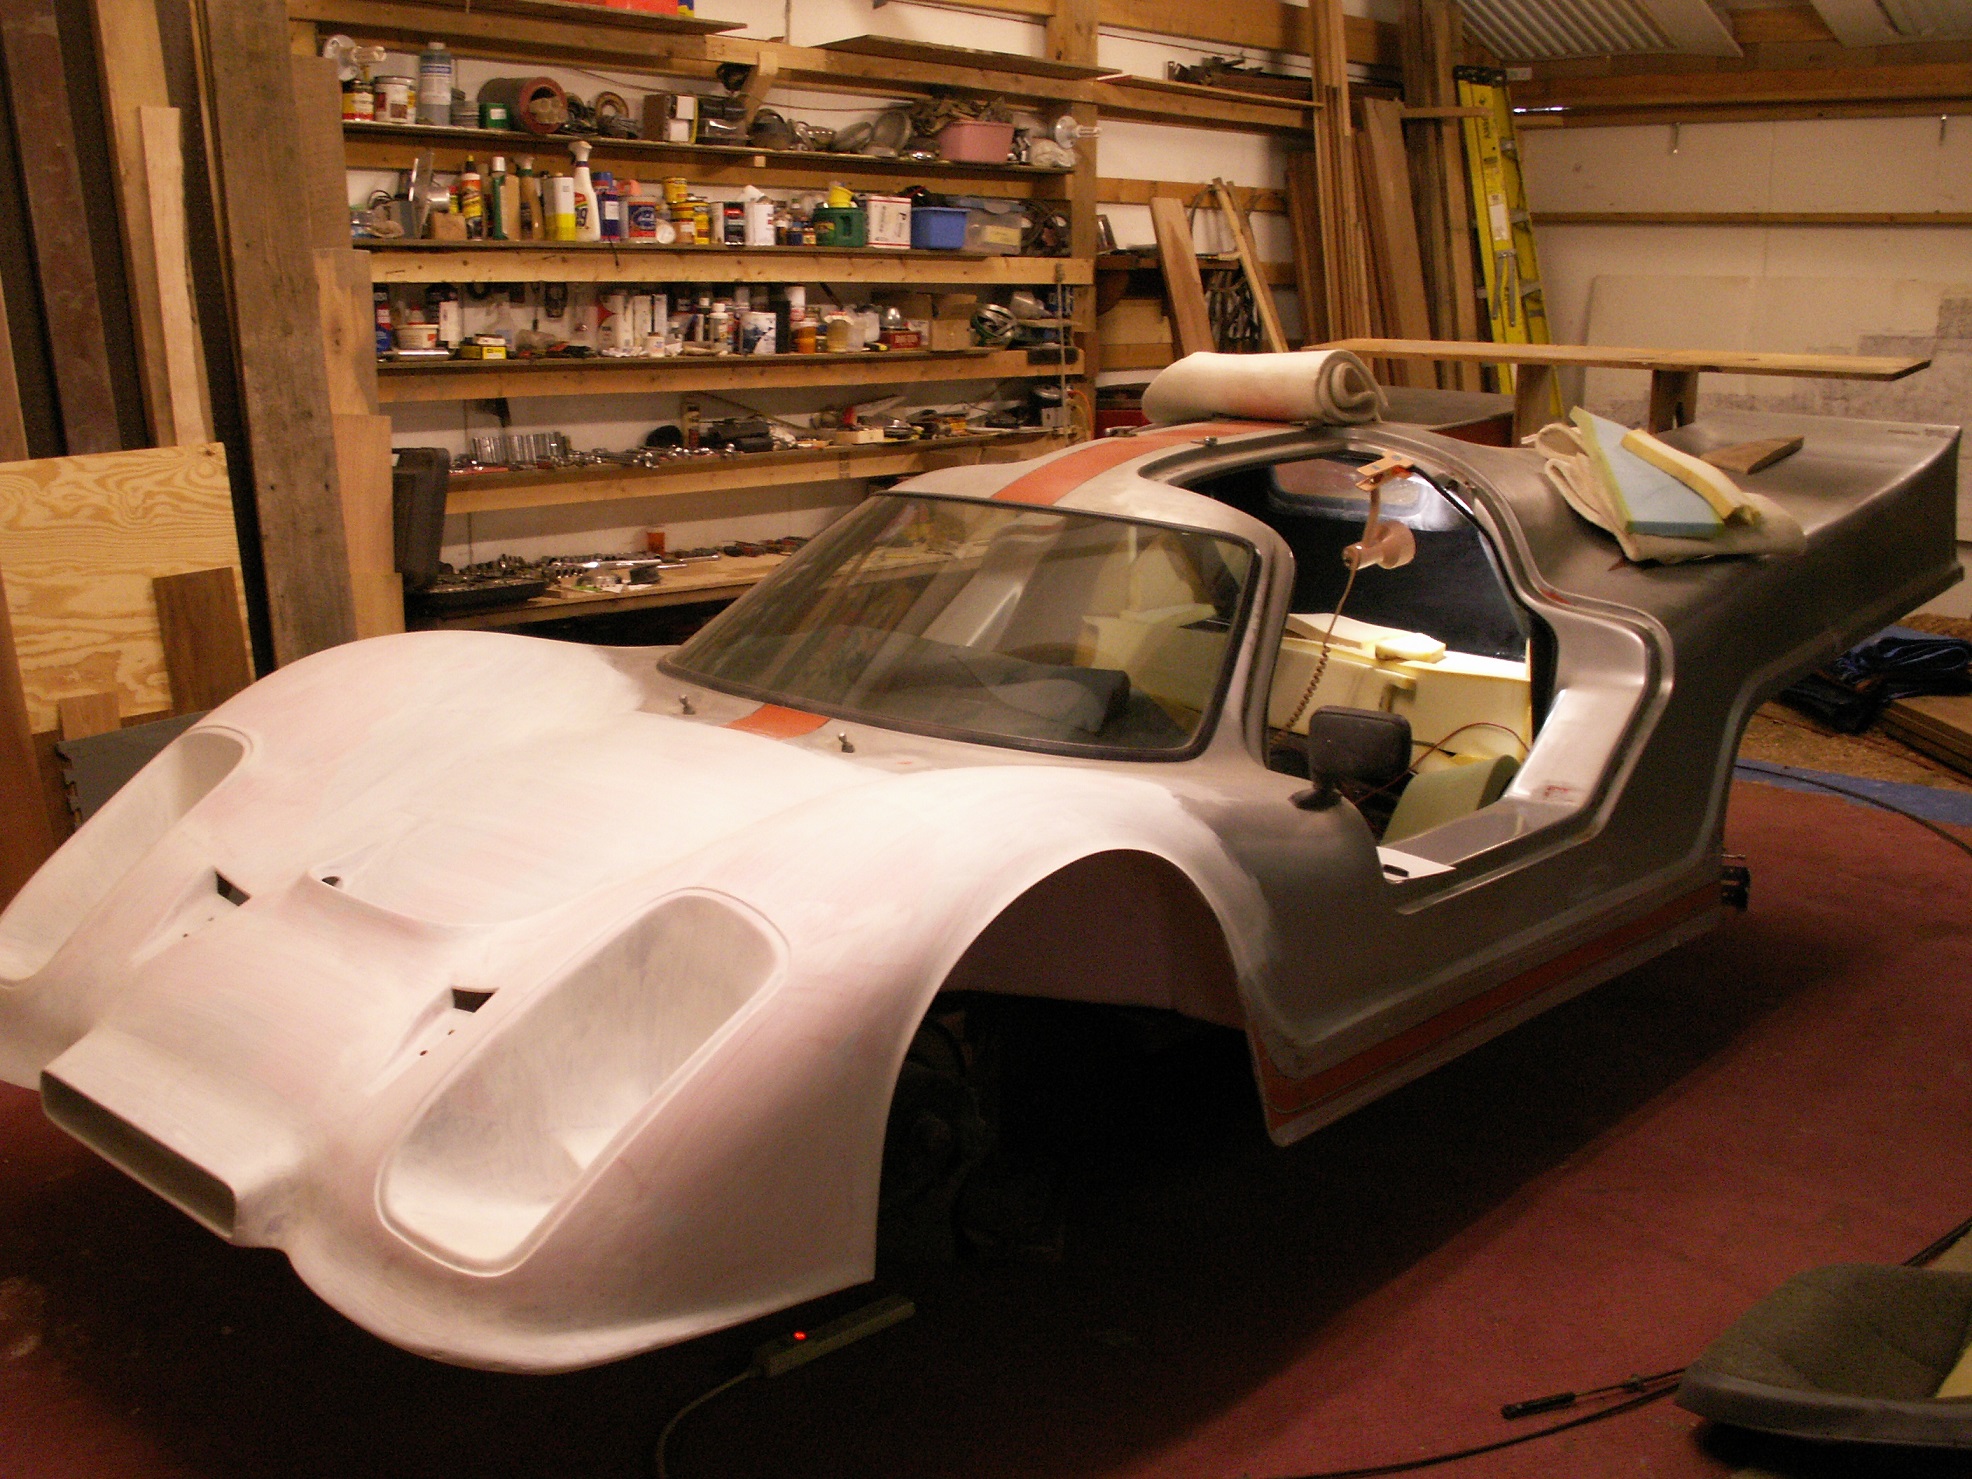
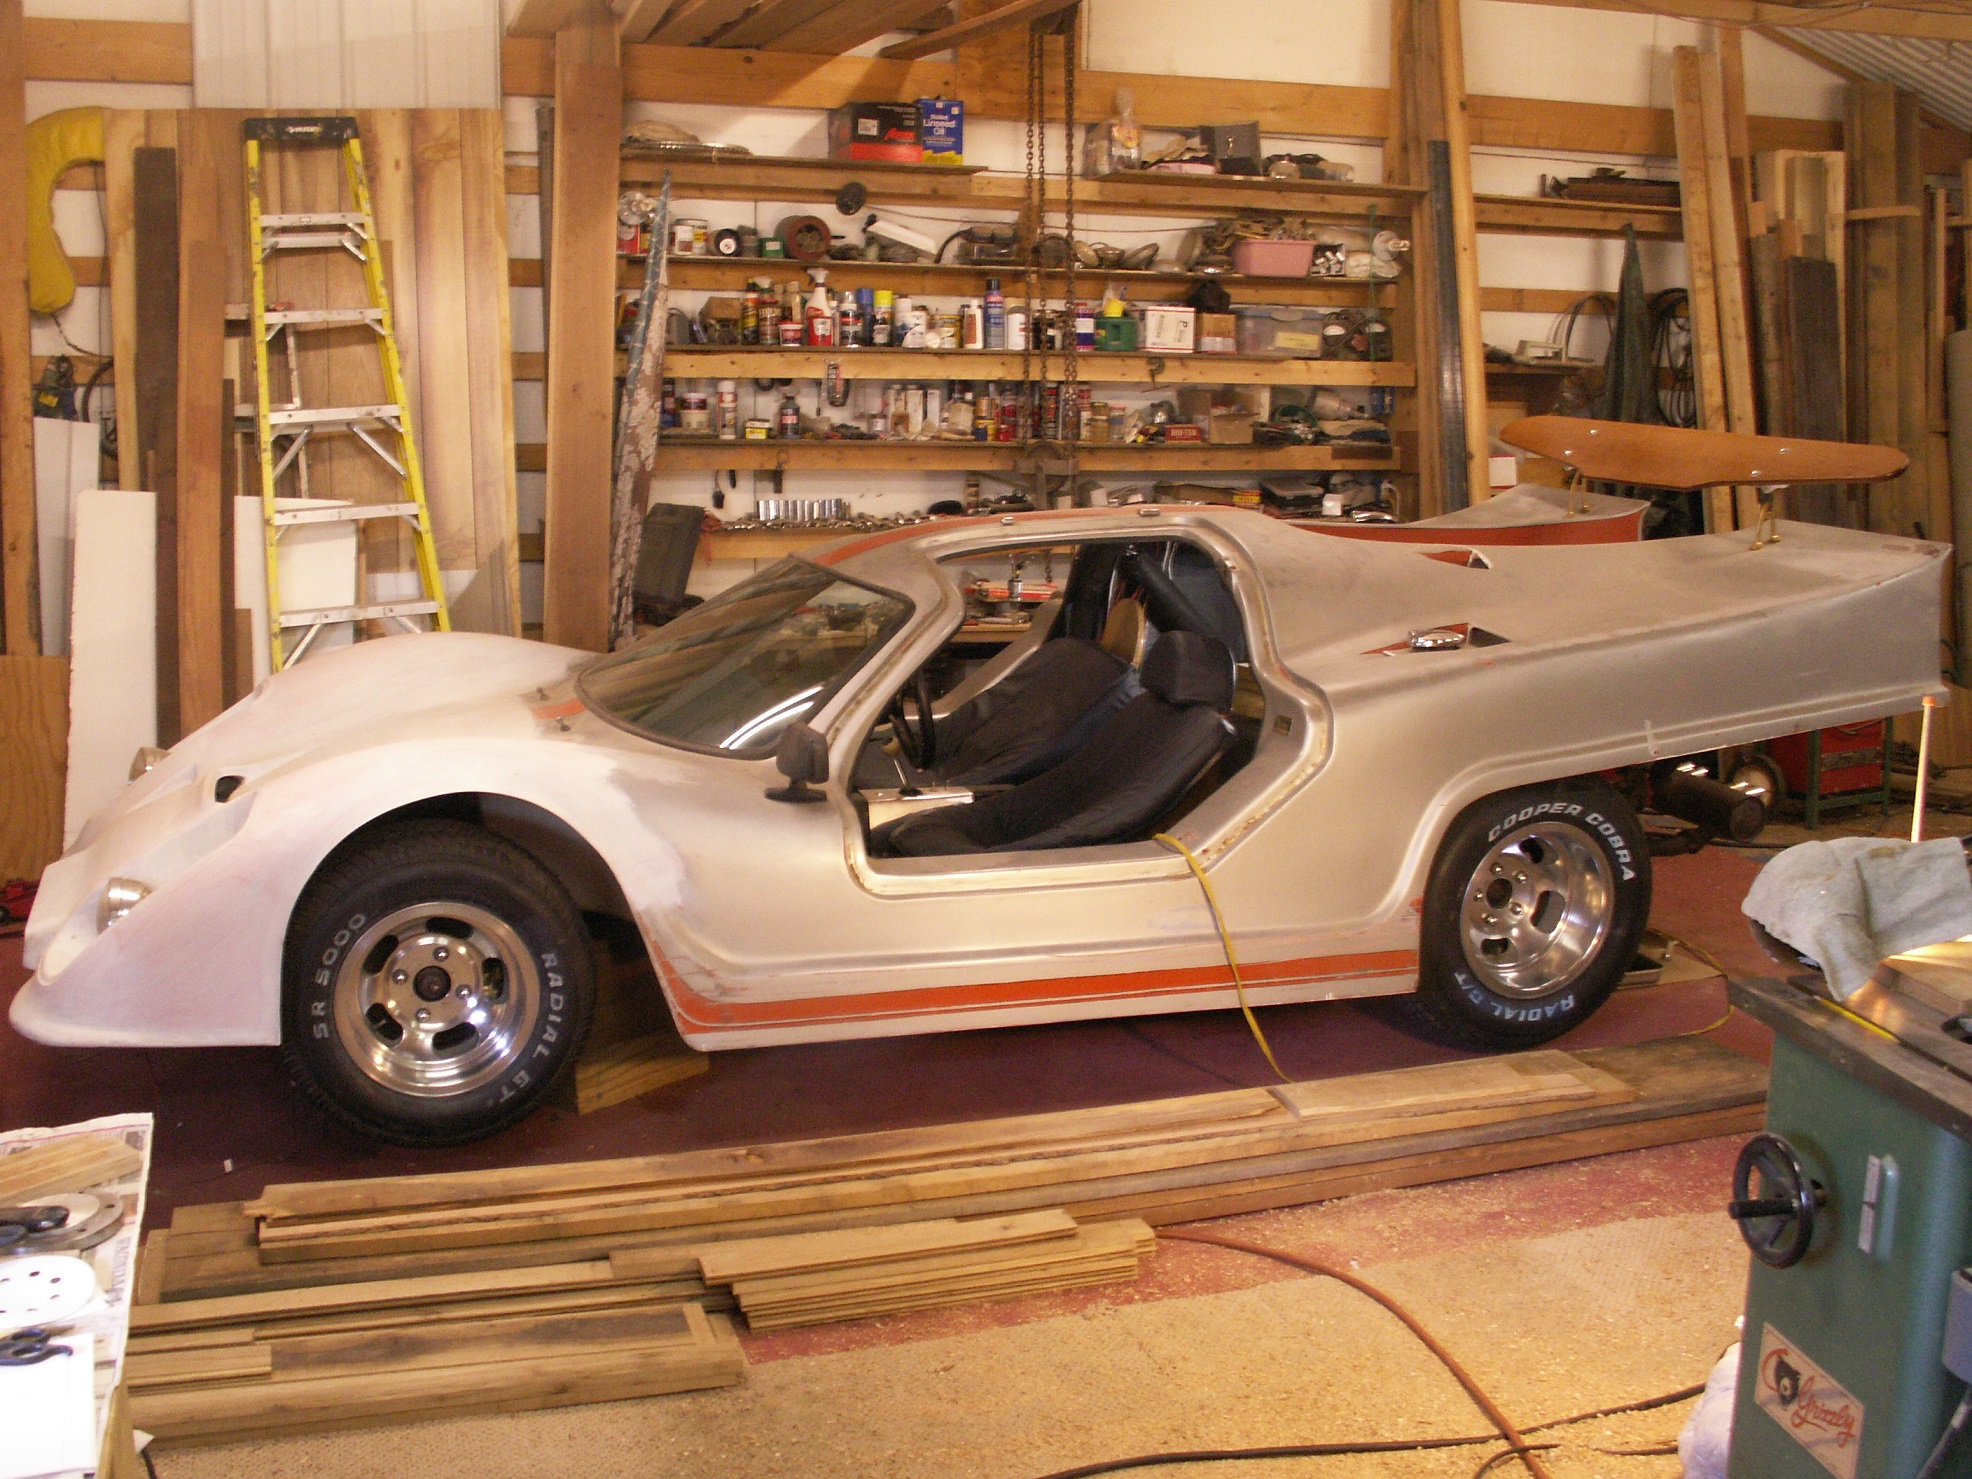
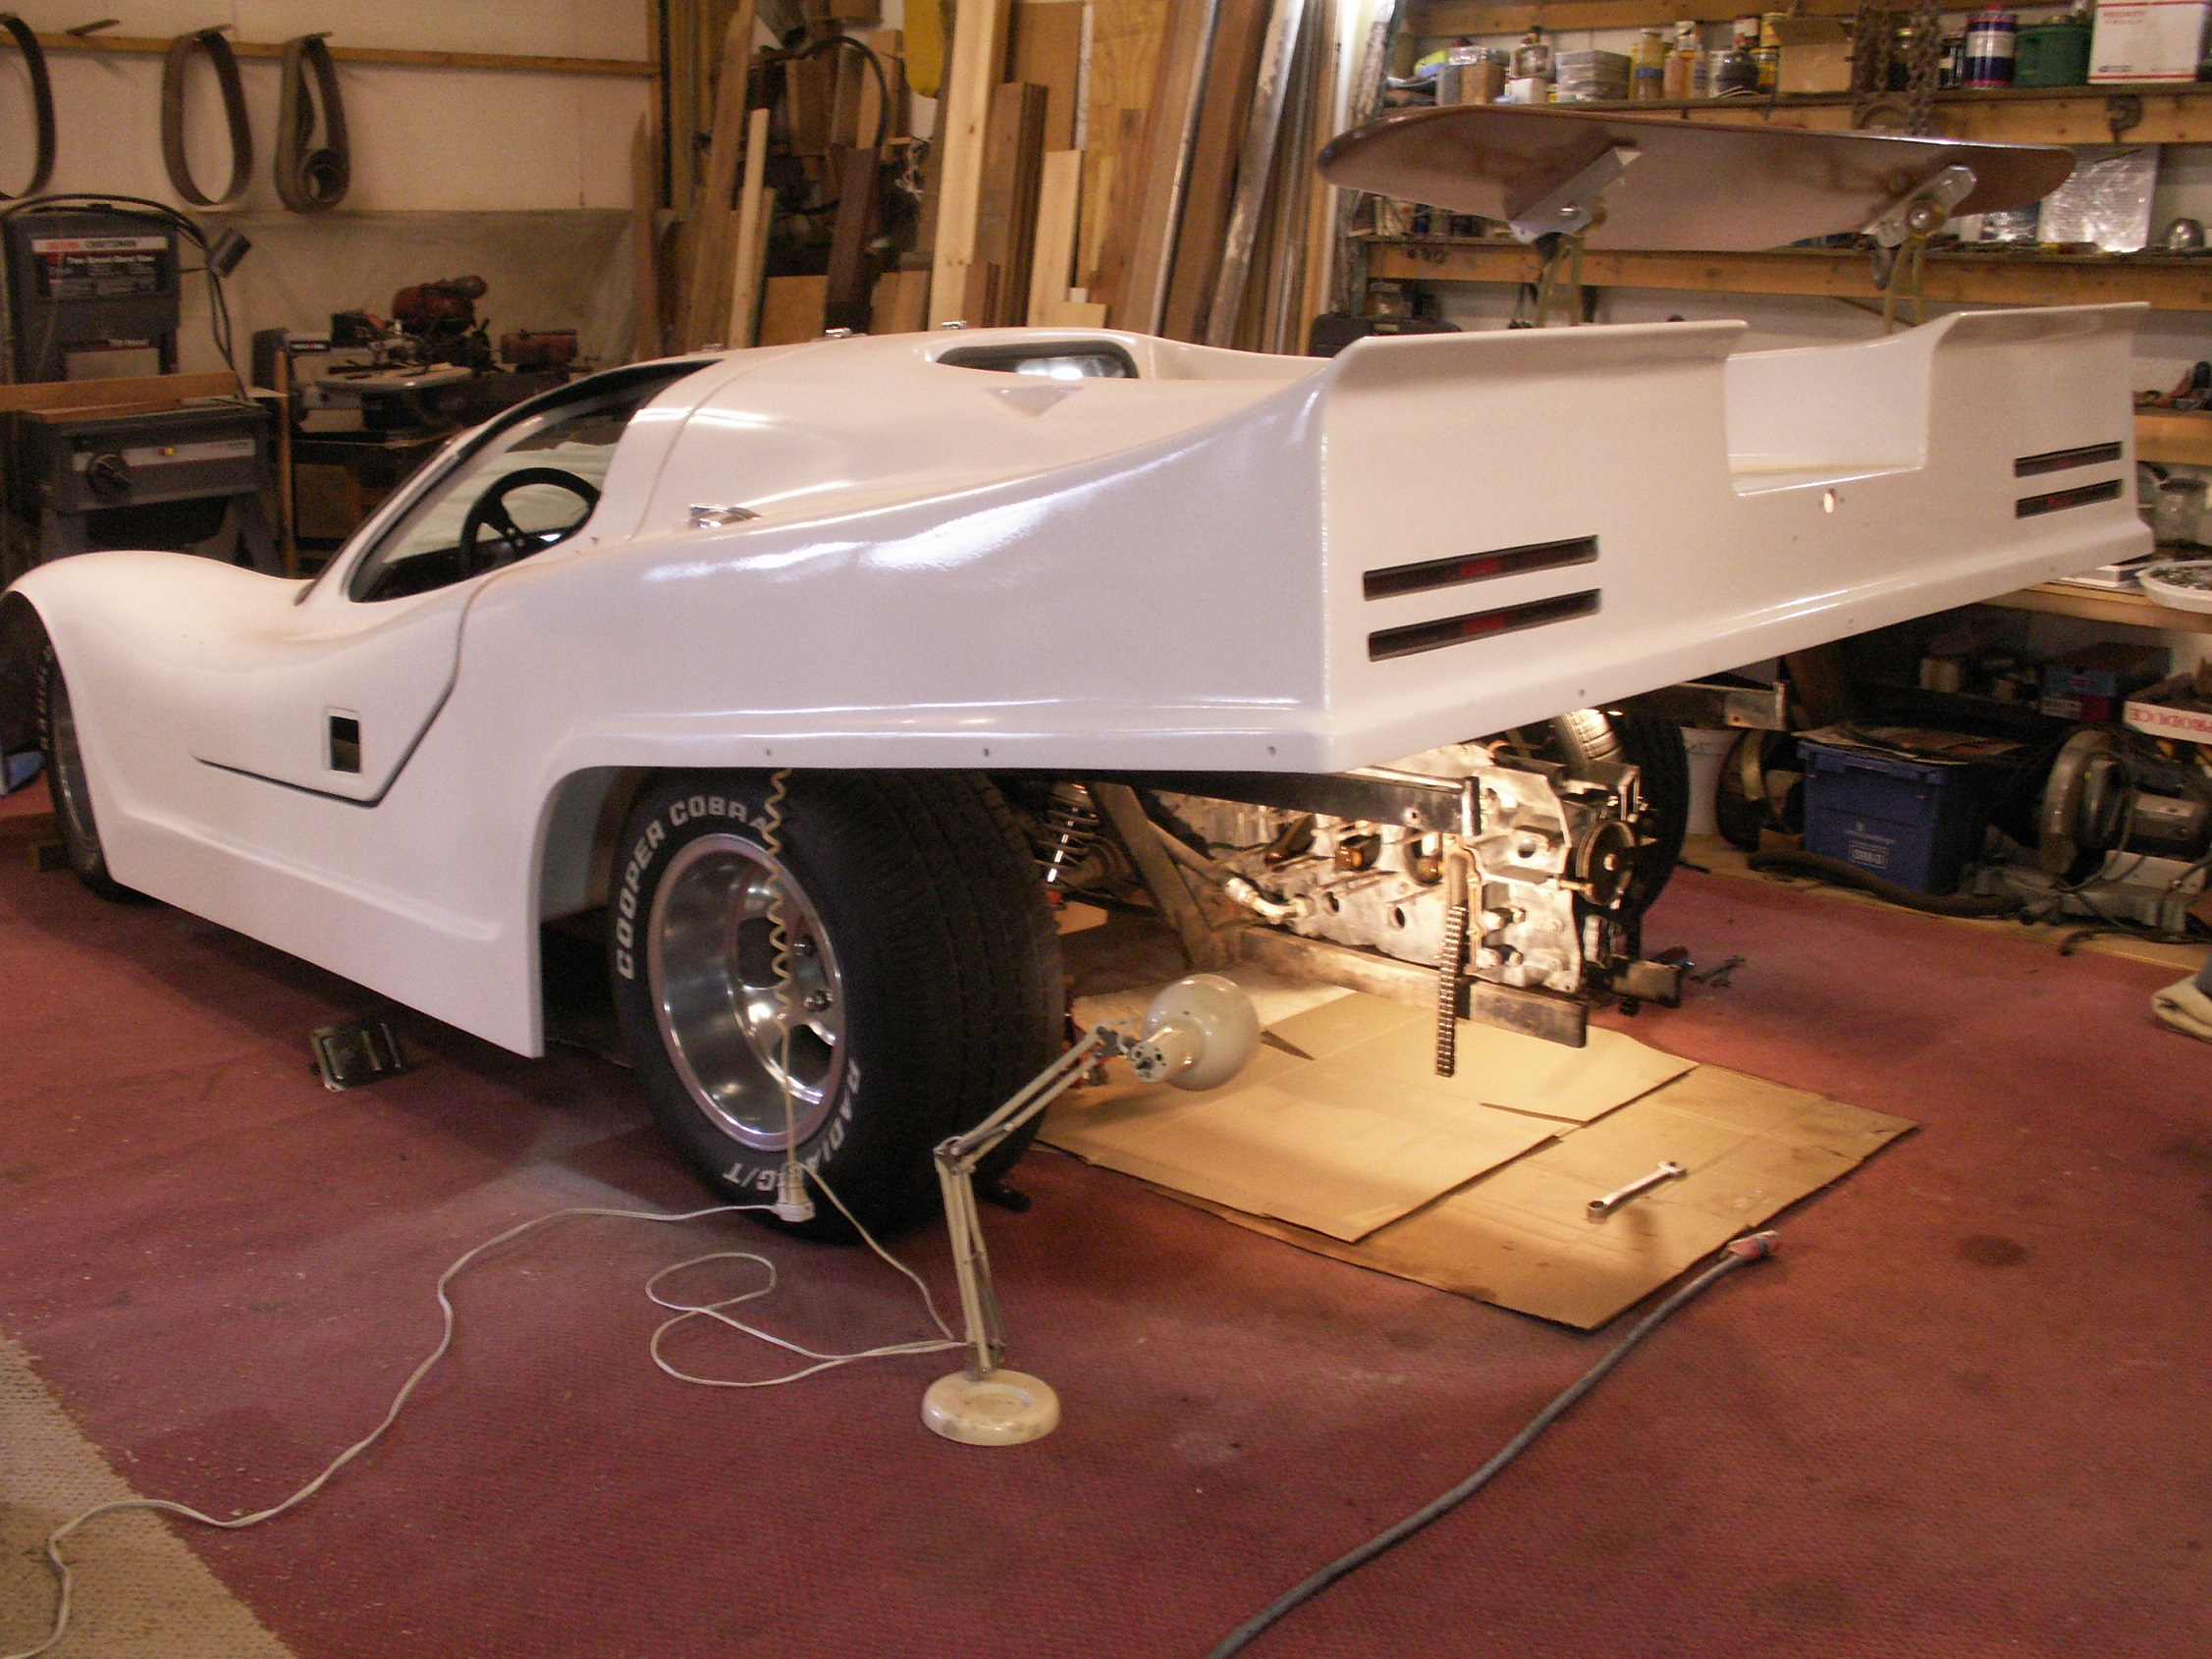
This is the build diary of our first 917. It's a 1972 Porsche 911-T running gear with a Porsche 917 style body total weight of around 1500 lbs.
The body is number 007 (out of 679 made) first registered in 1973 in Arizona and it has been in storage for the last 20 years. Our plan is to mostly work on the interior and body this winter. Than hopefully do an engine rebuild next winter, I can do all the work myself except the valve grind.
I will post more pictures as the project goes along.
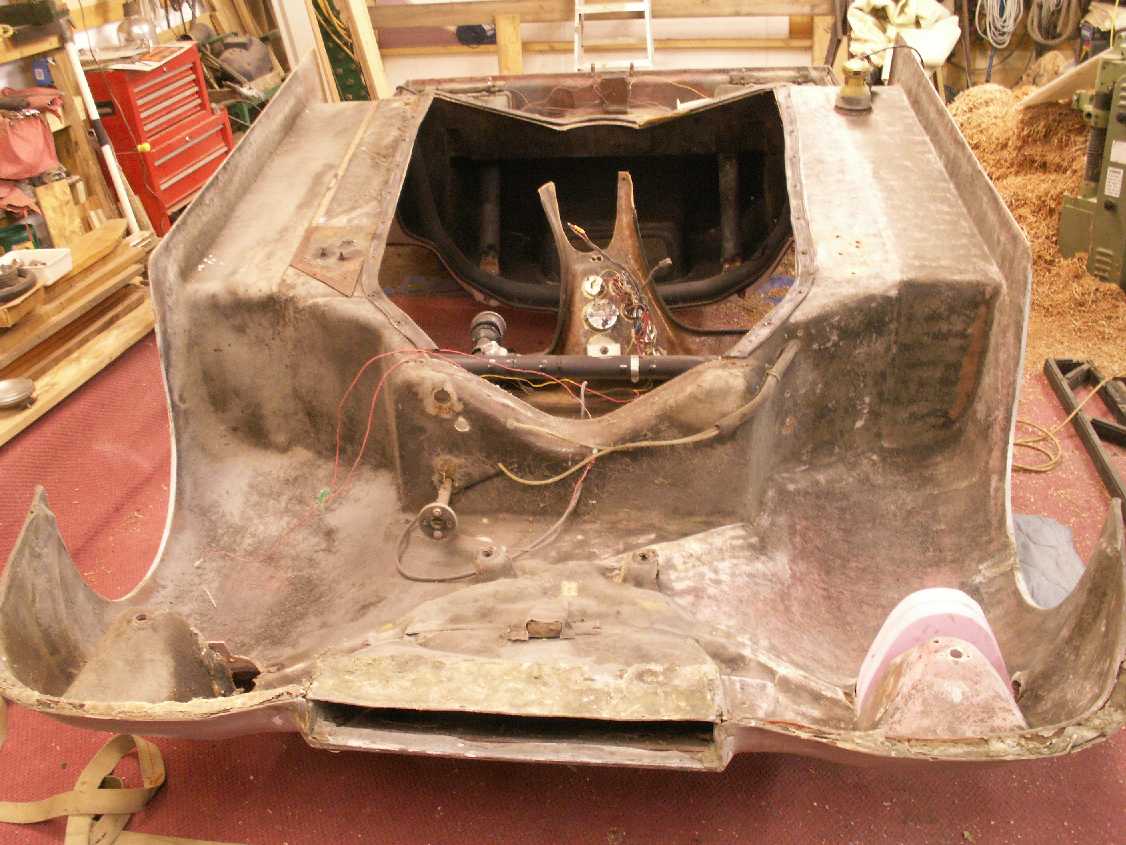
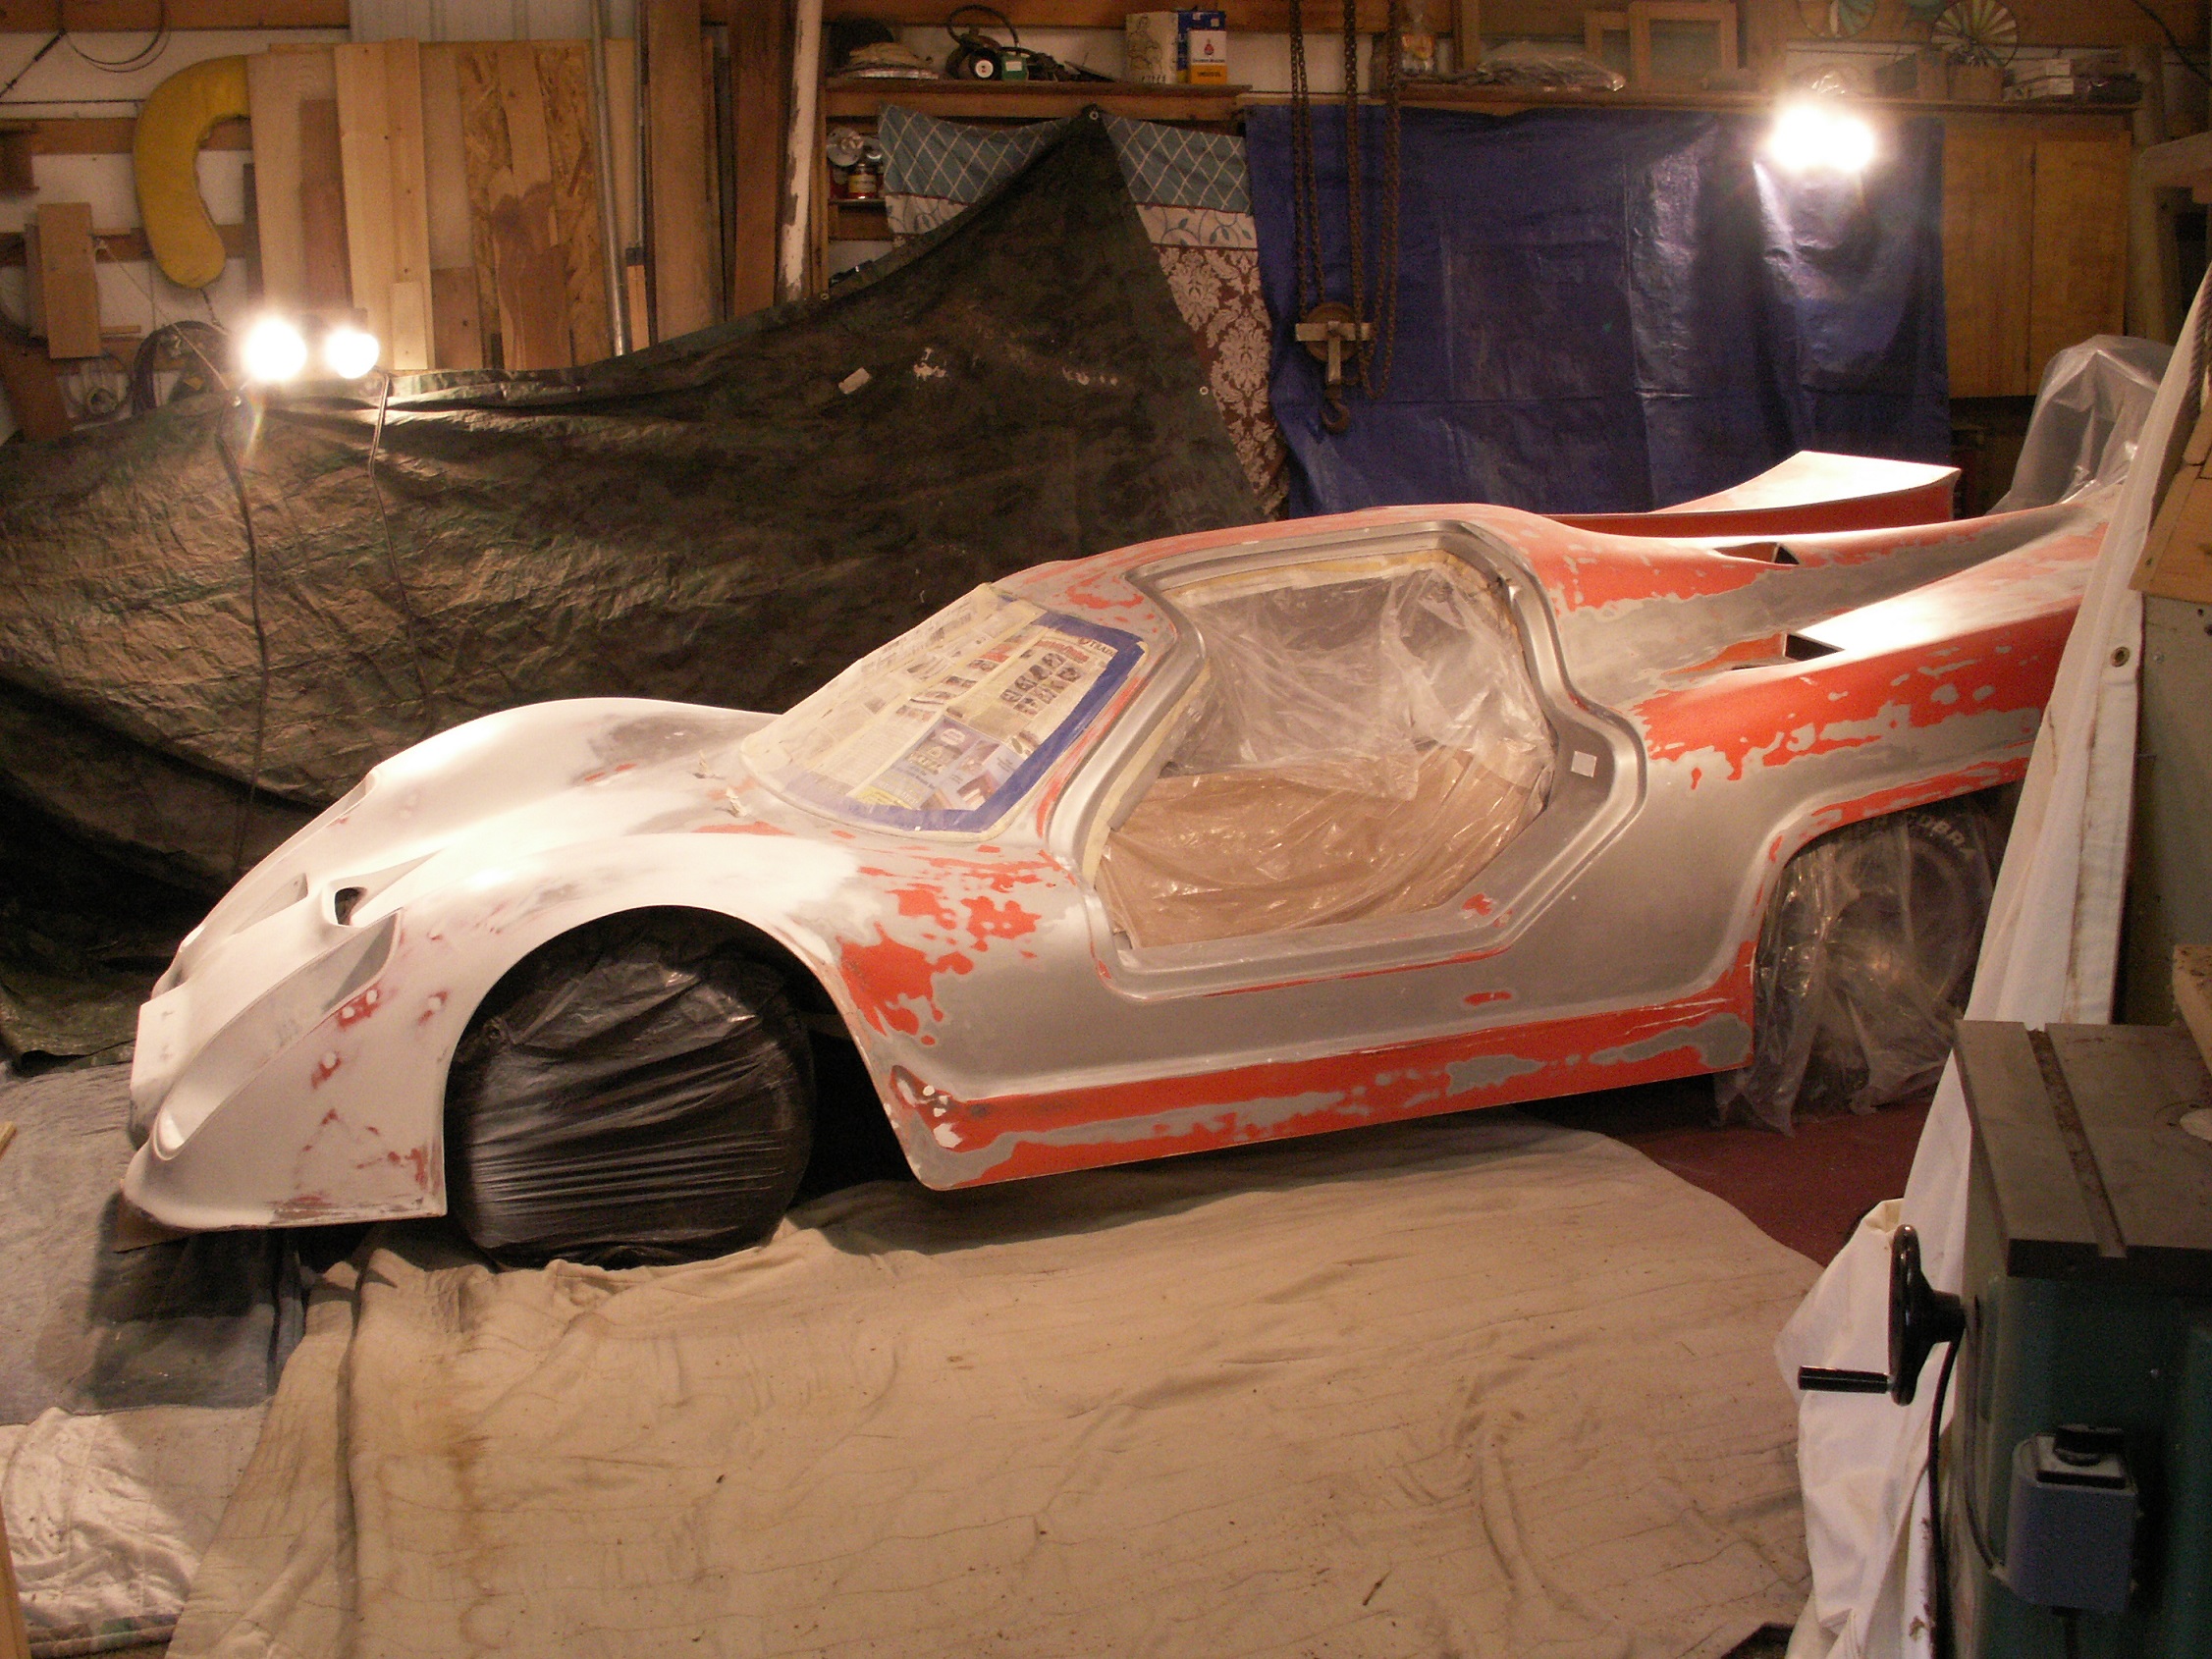
This is pretty much as found.
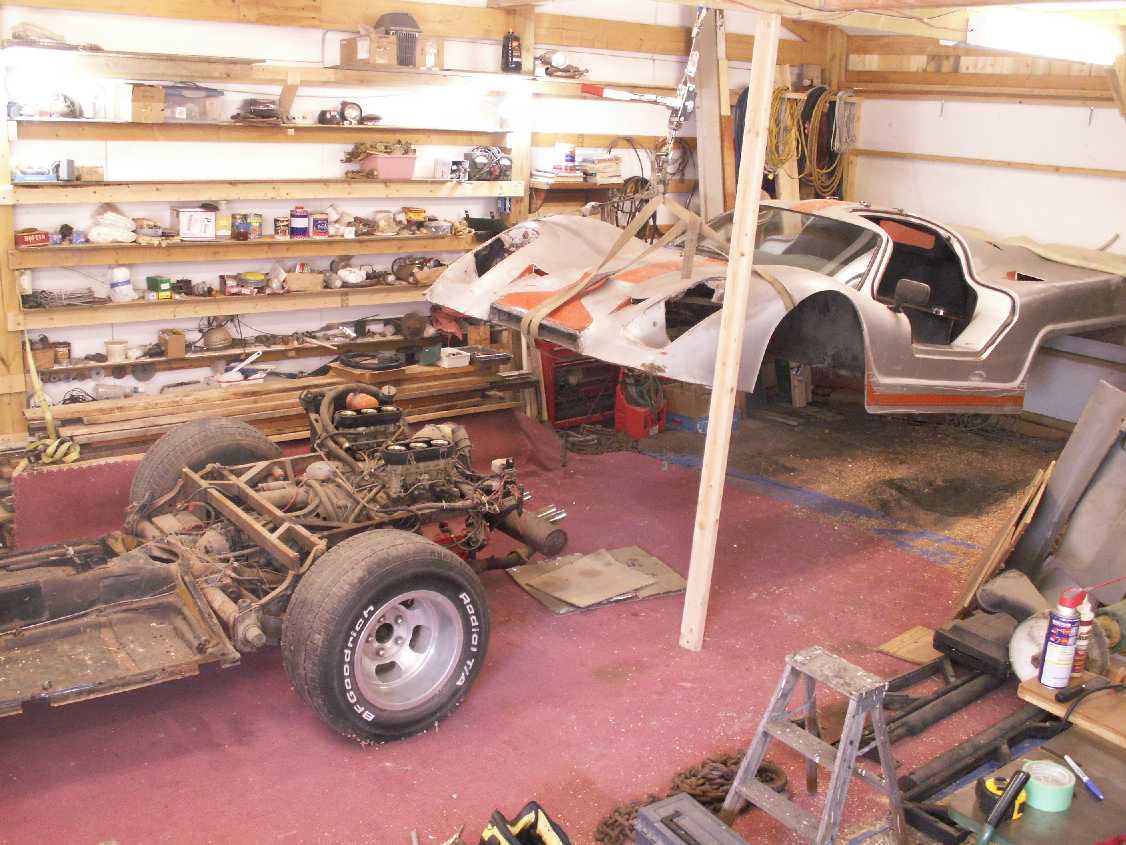
Update, 8-28-14. We now have a new shop and I'm working on getting the body off.
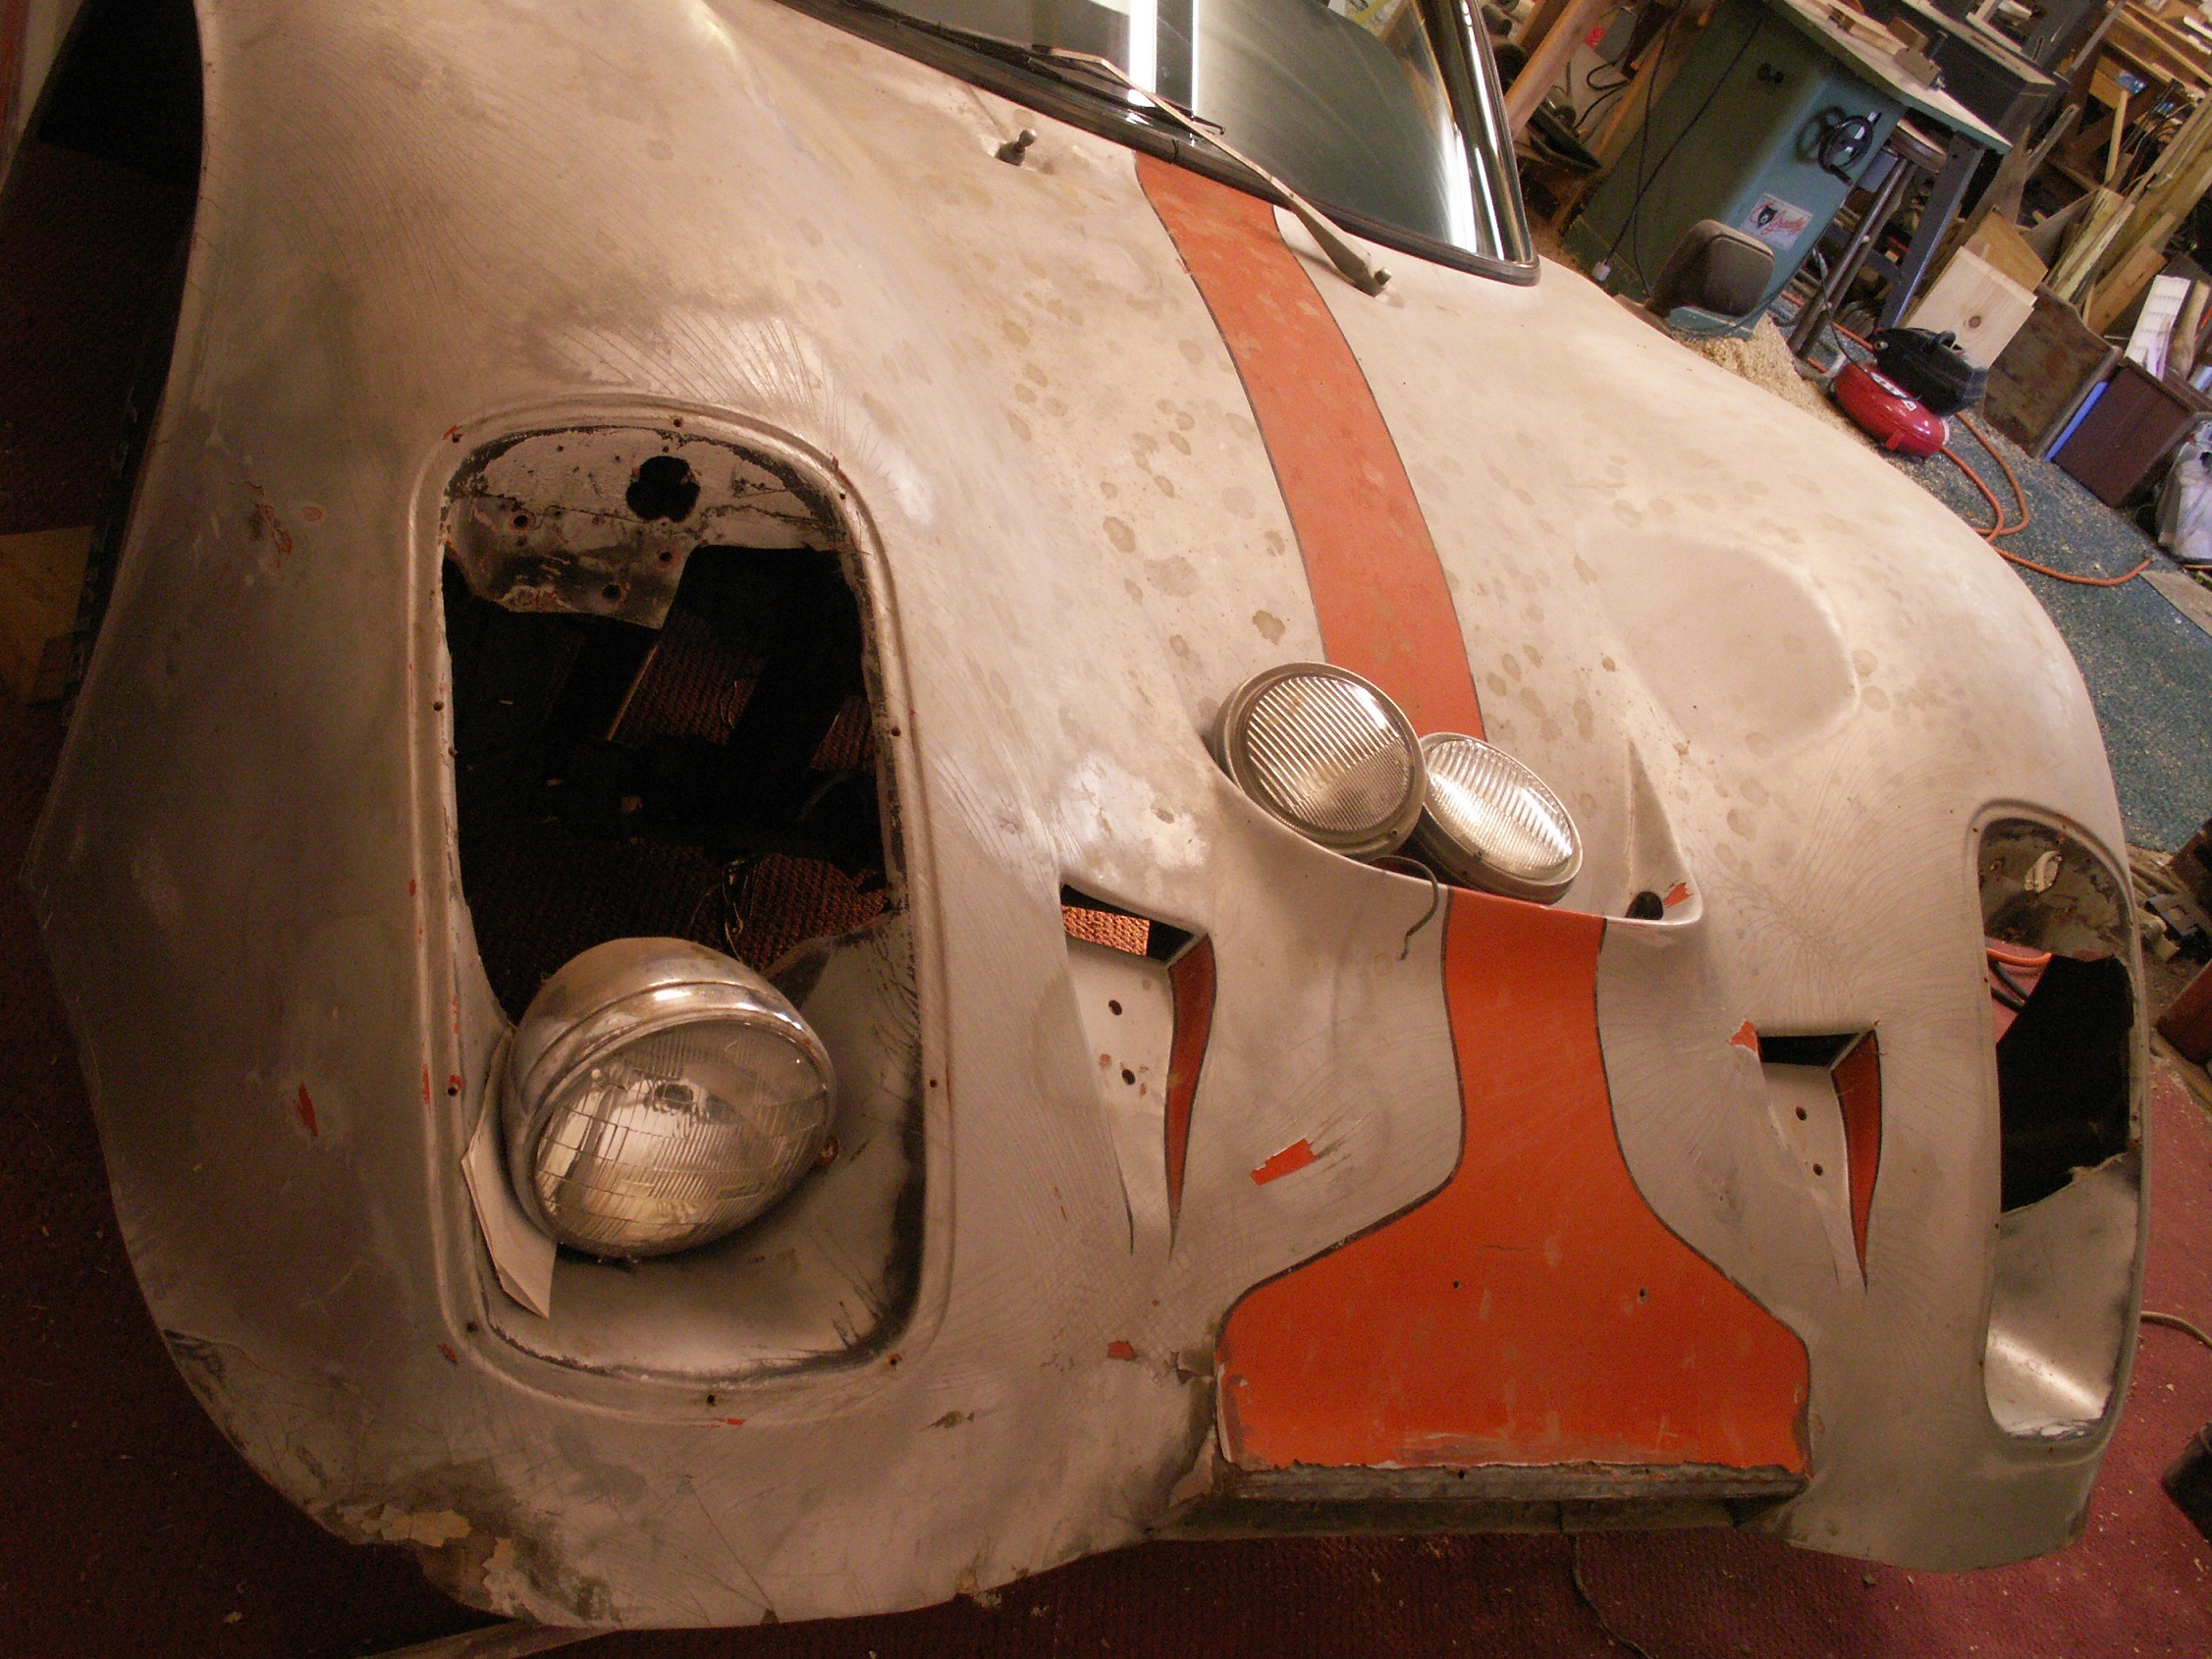
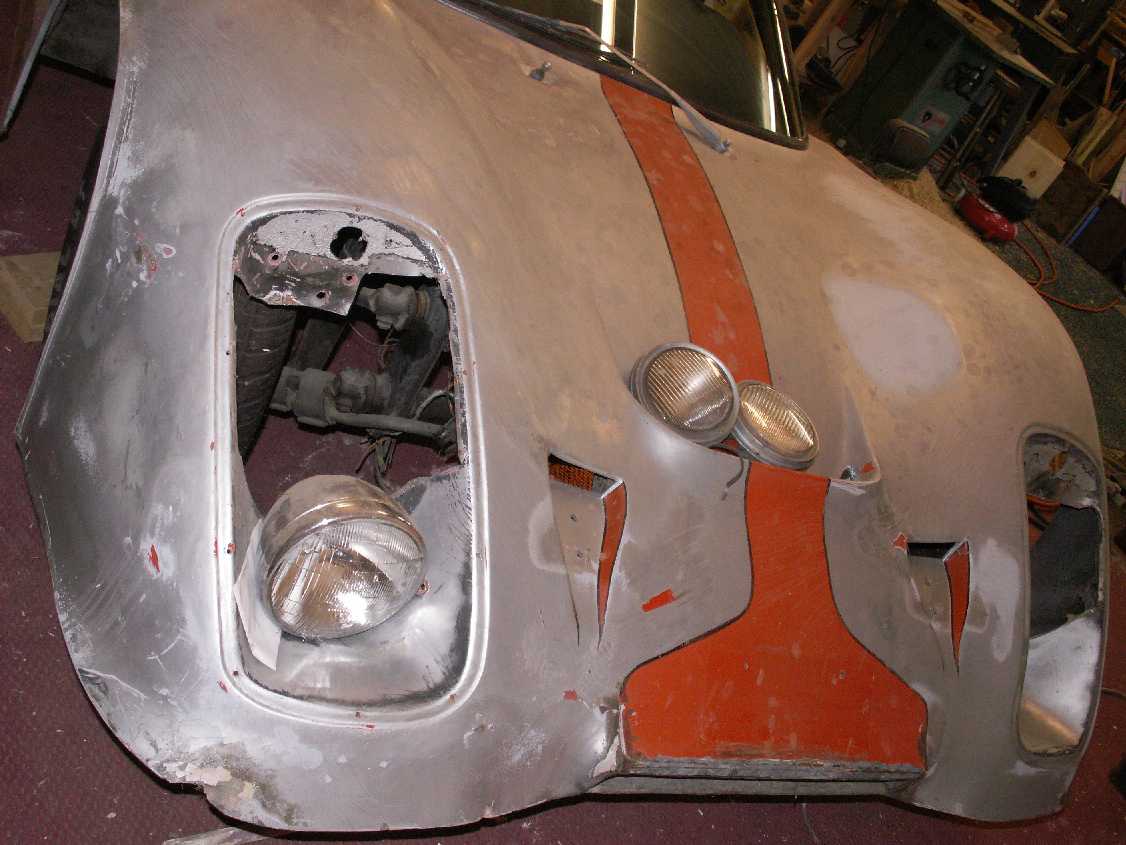
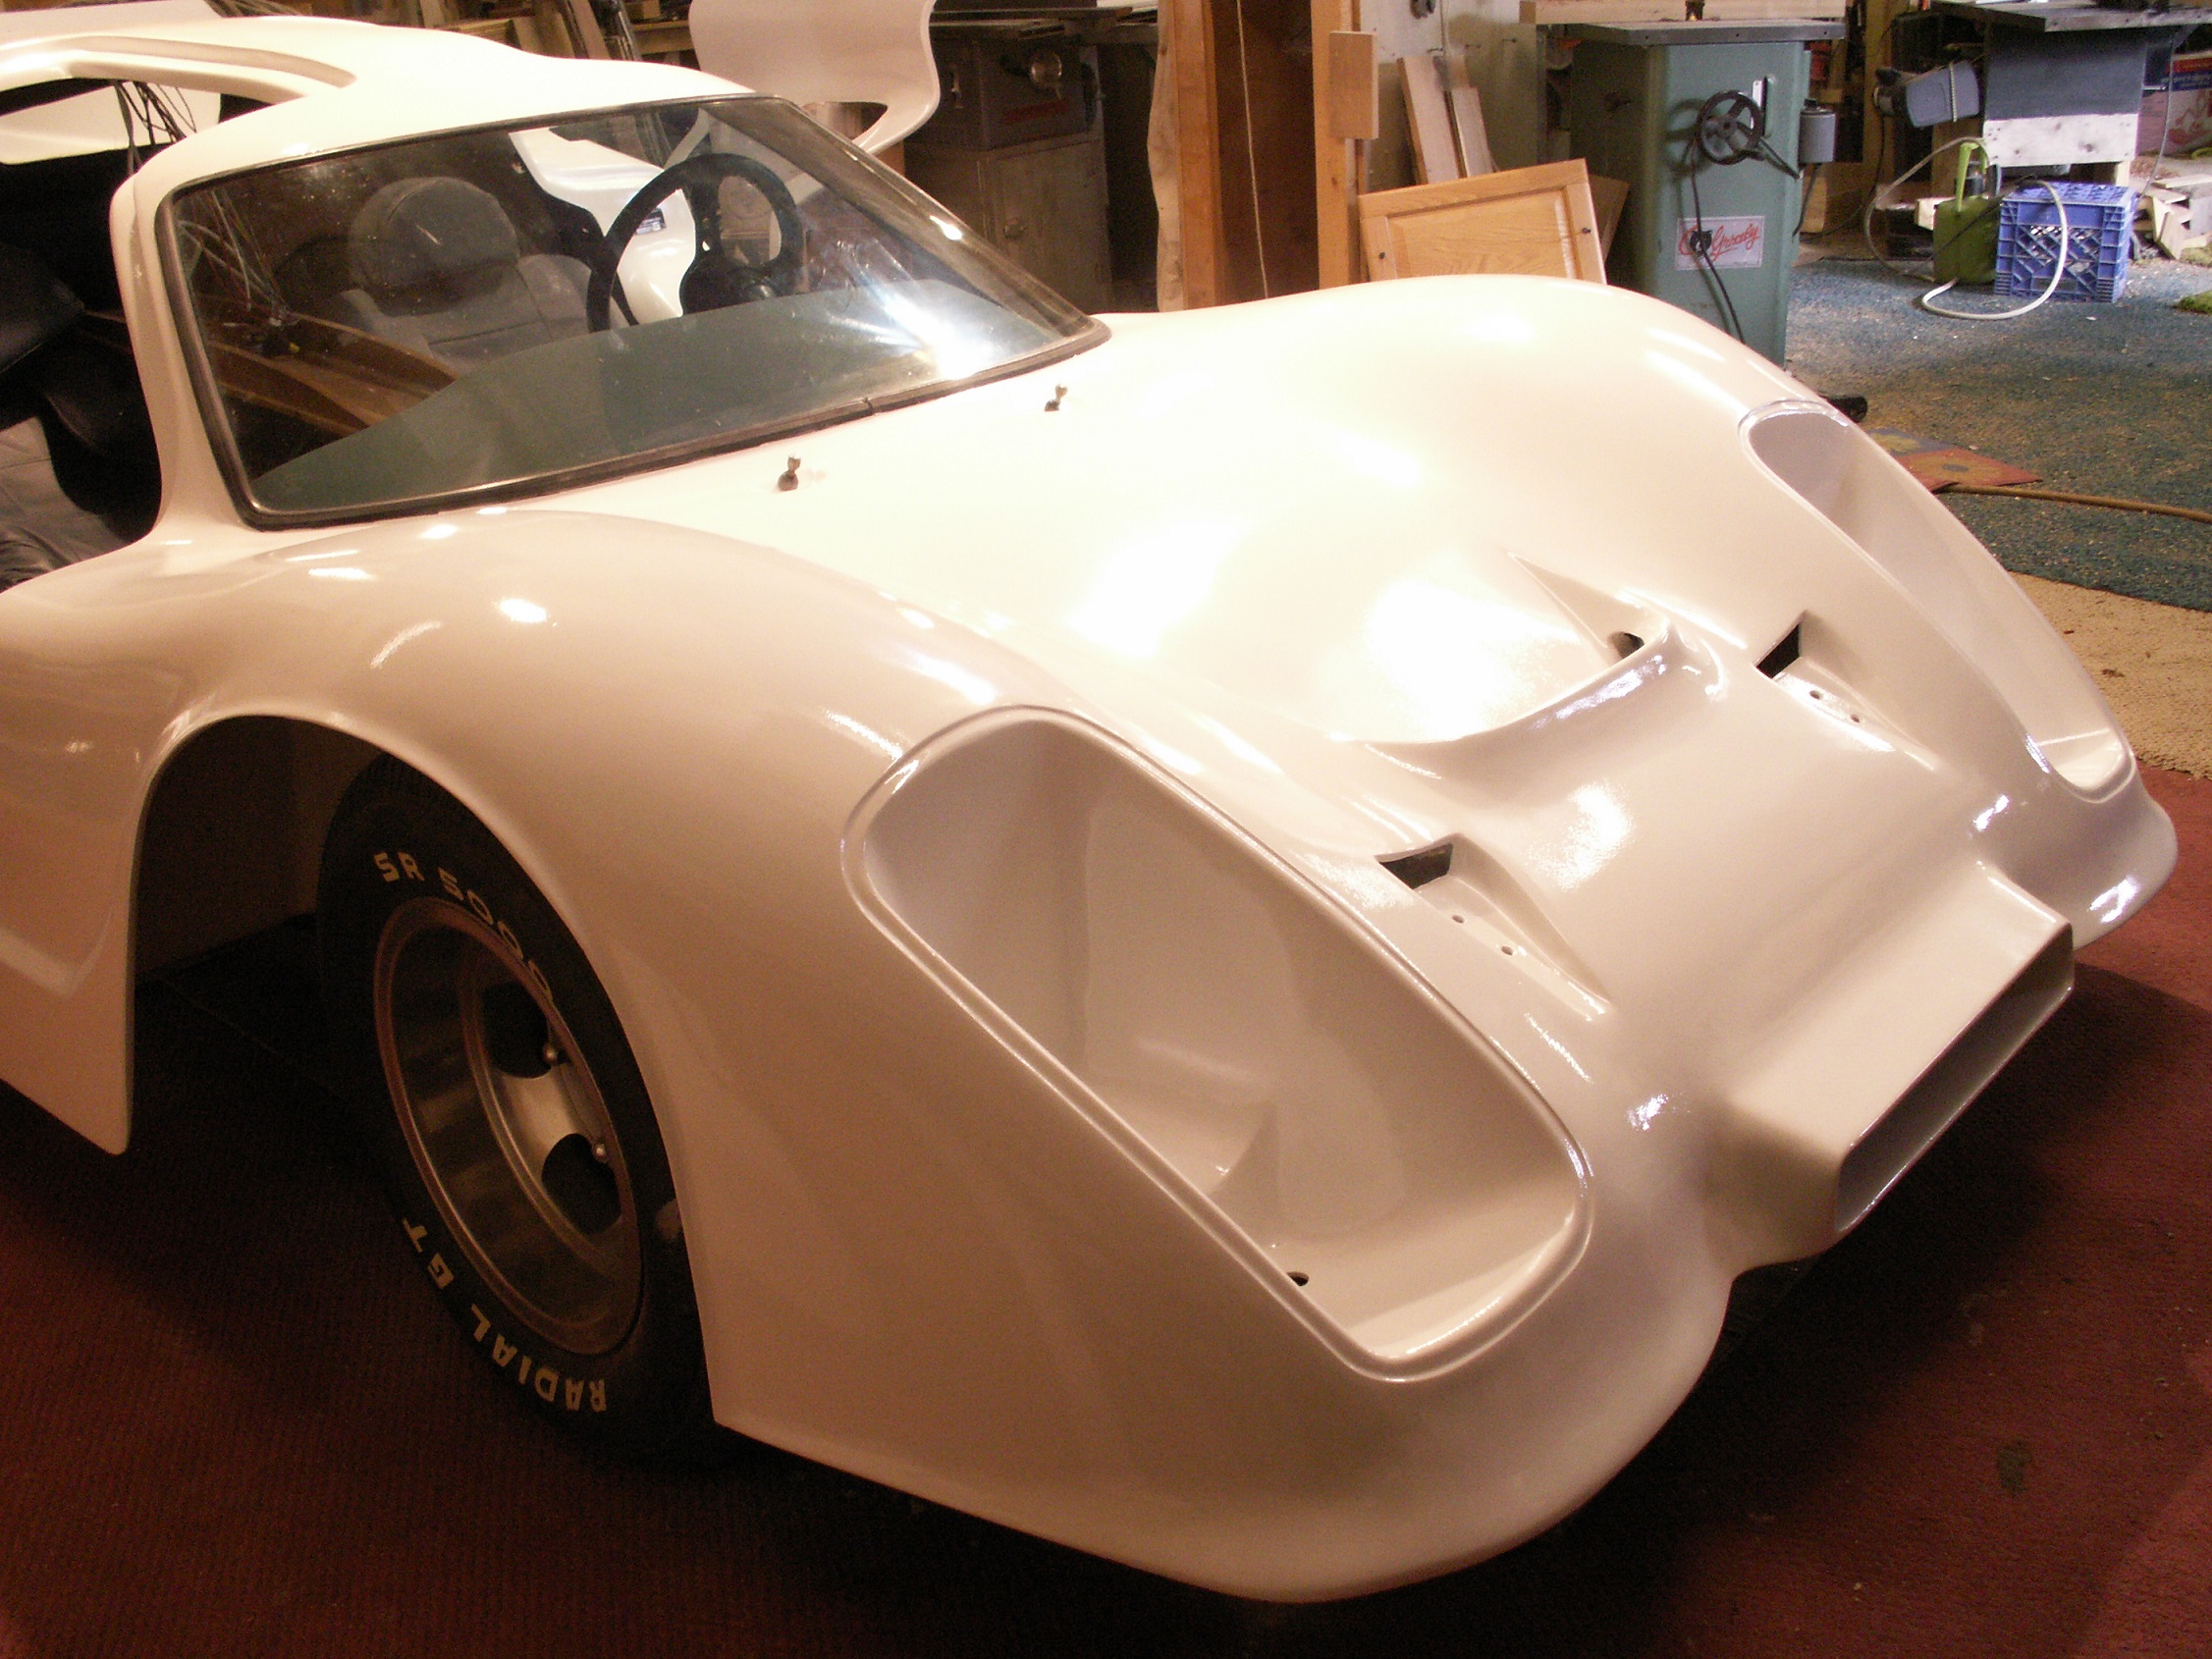
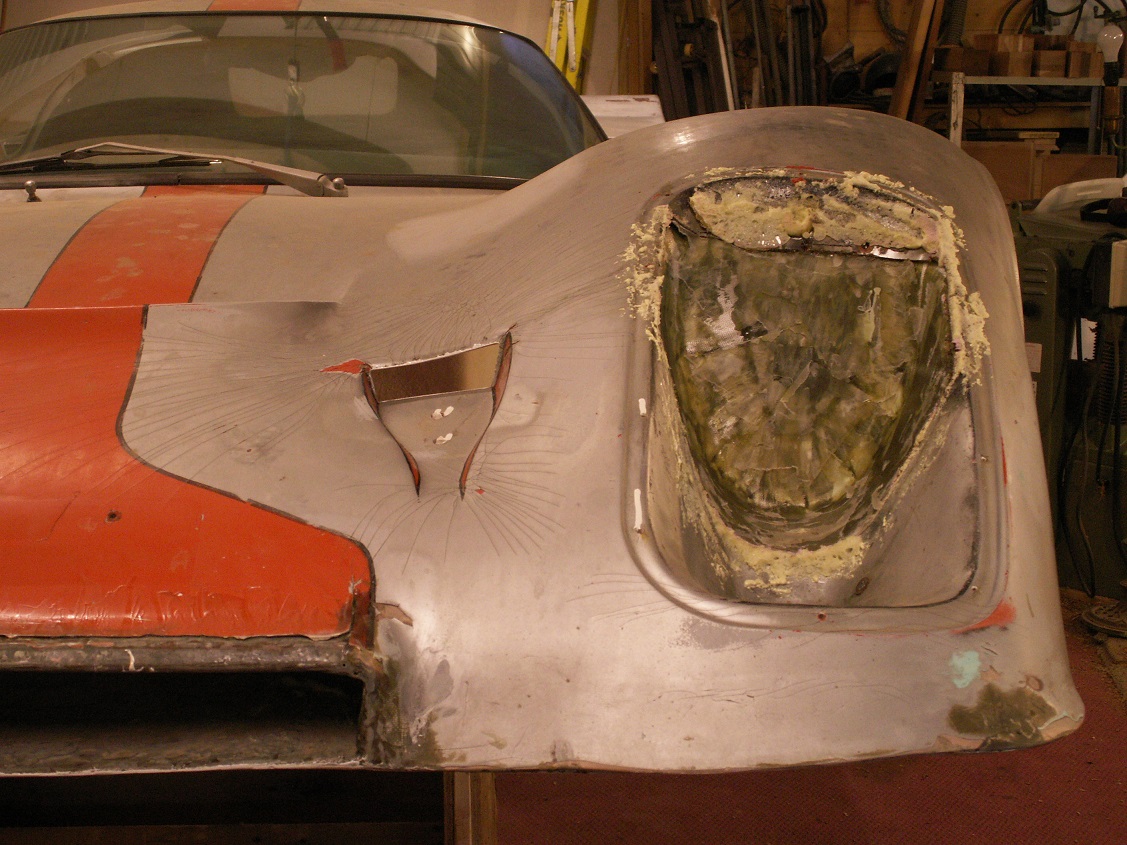
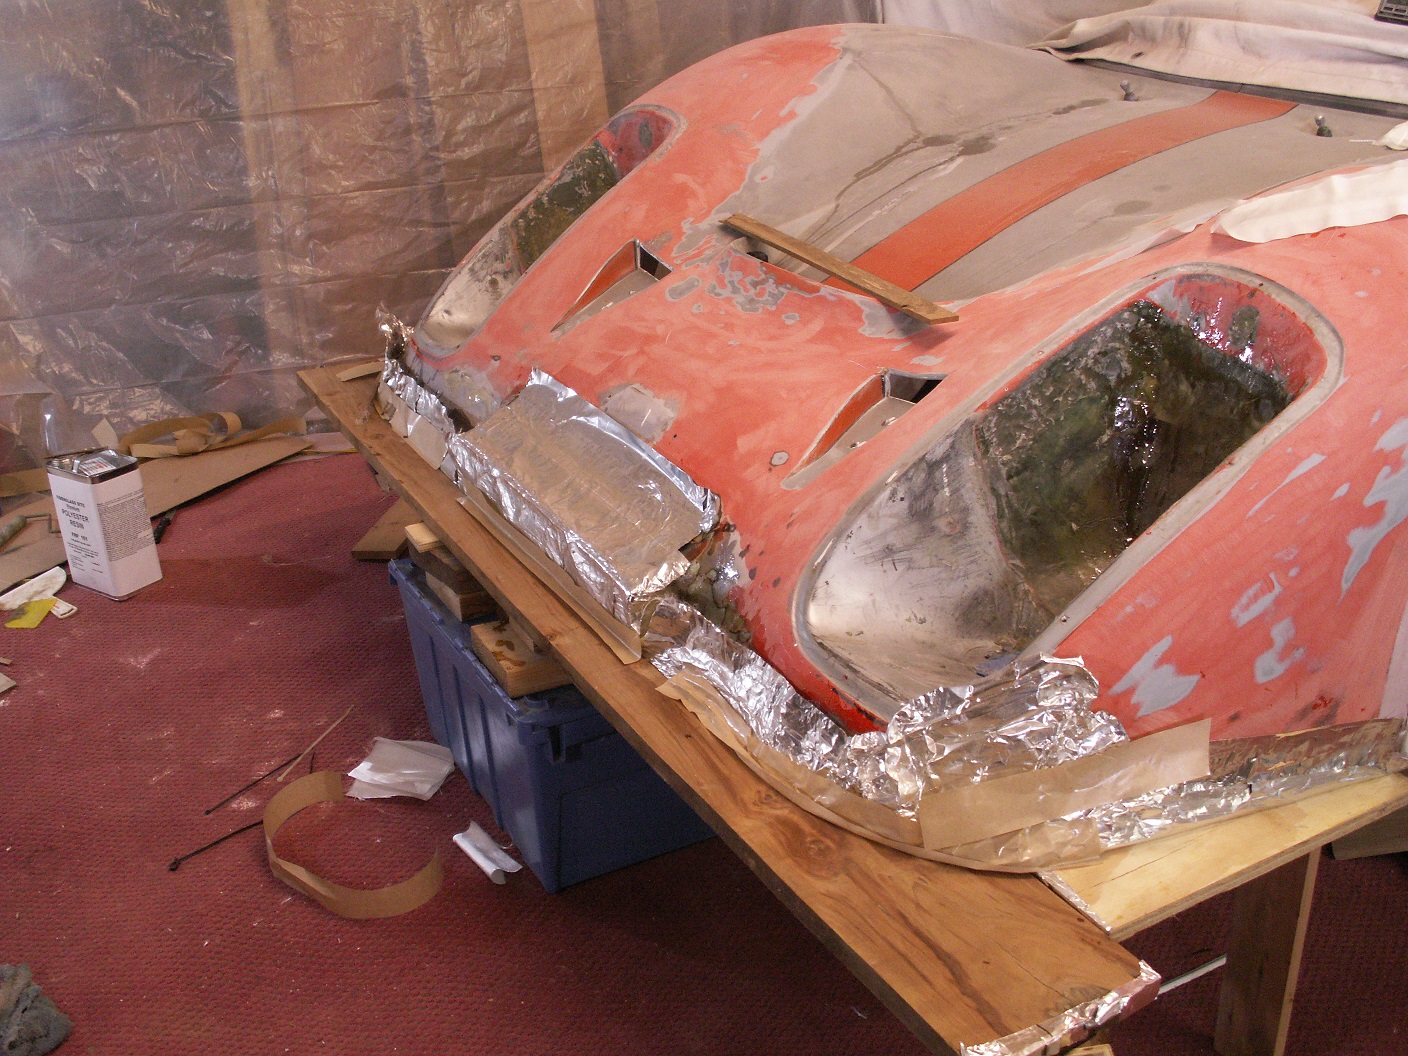
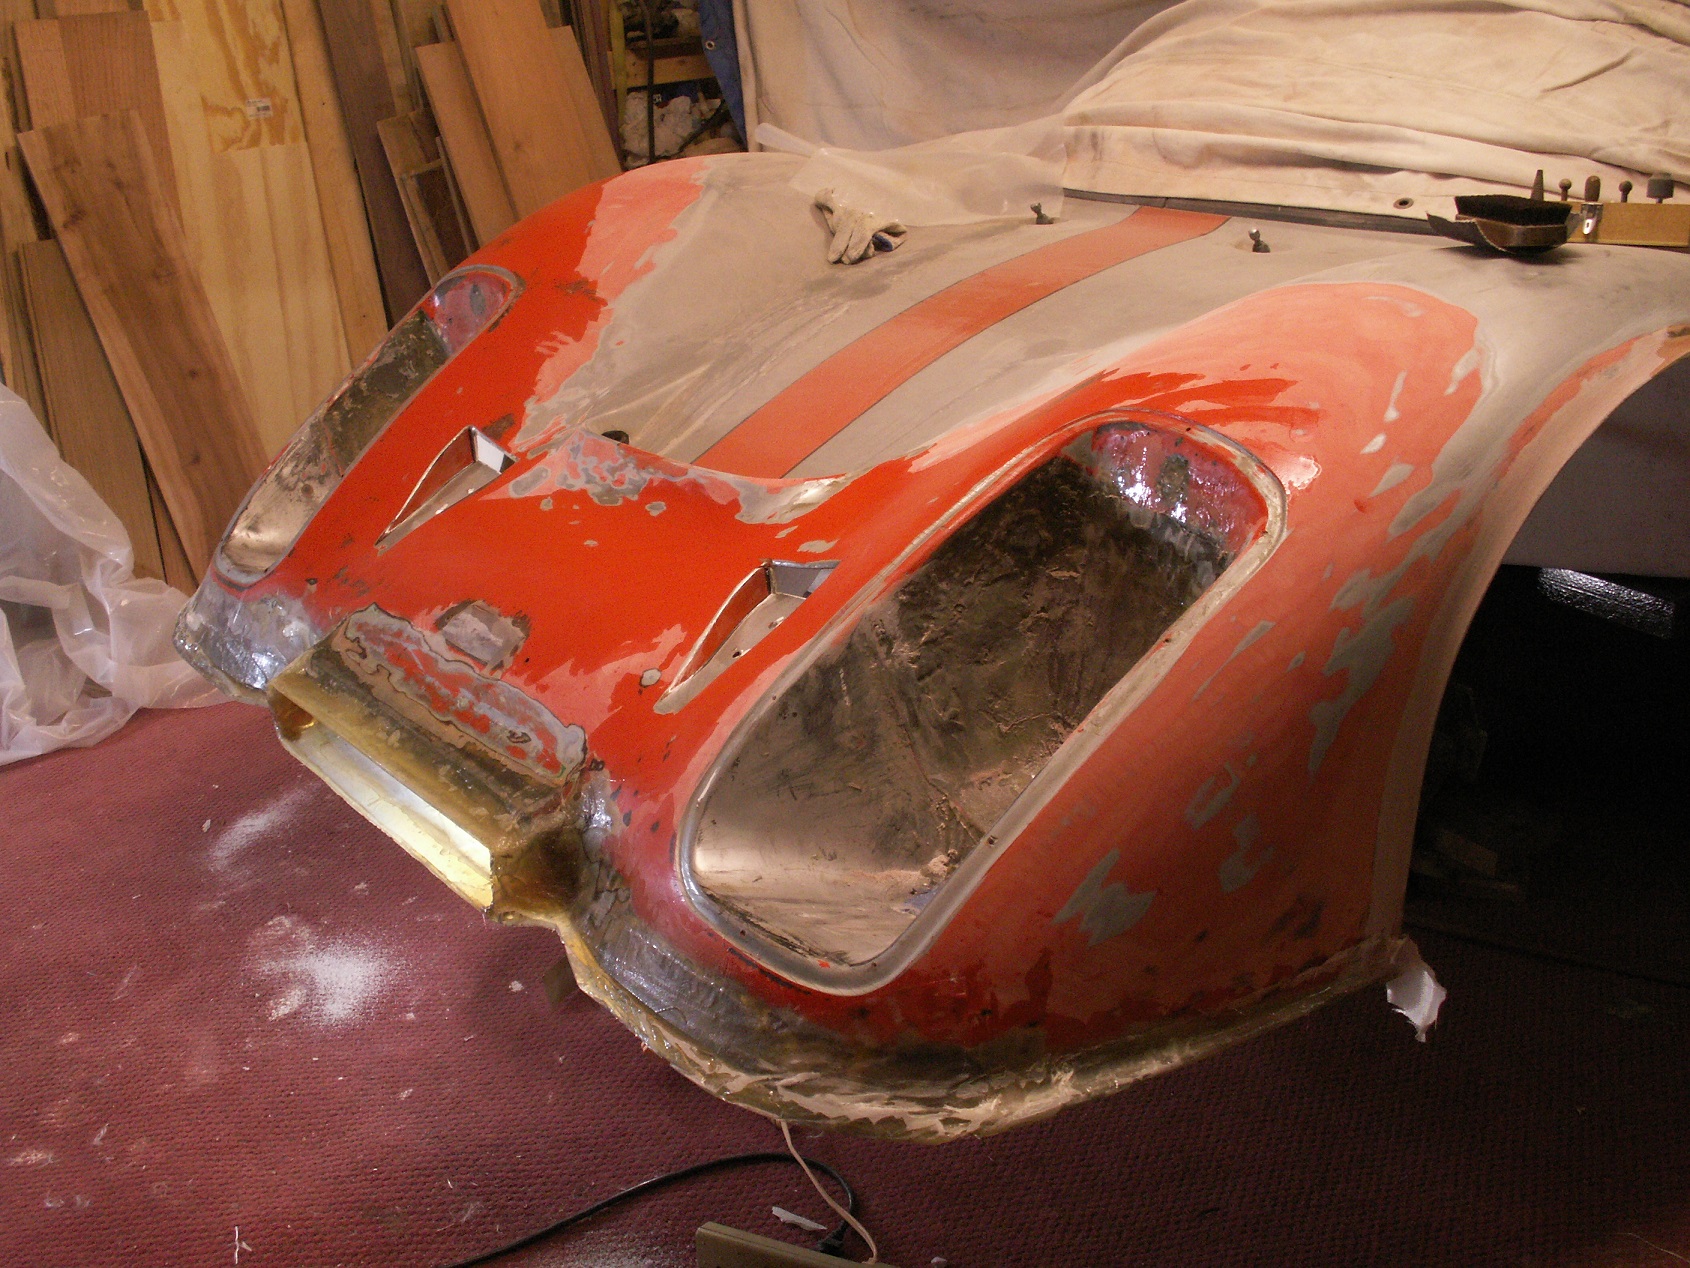
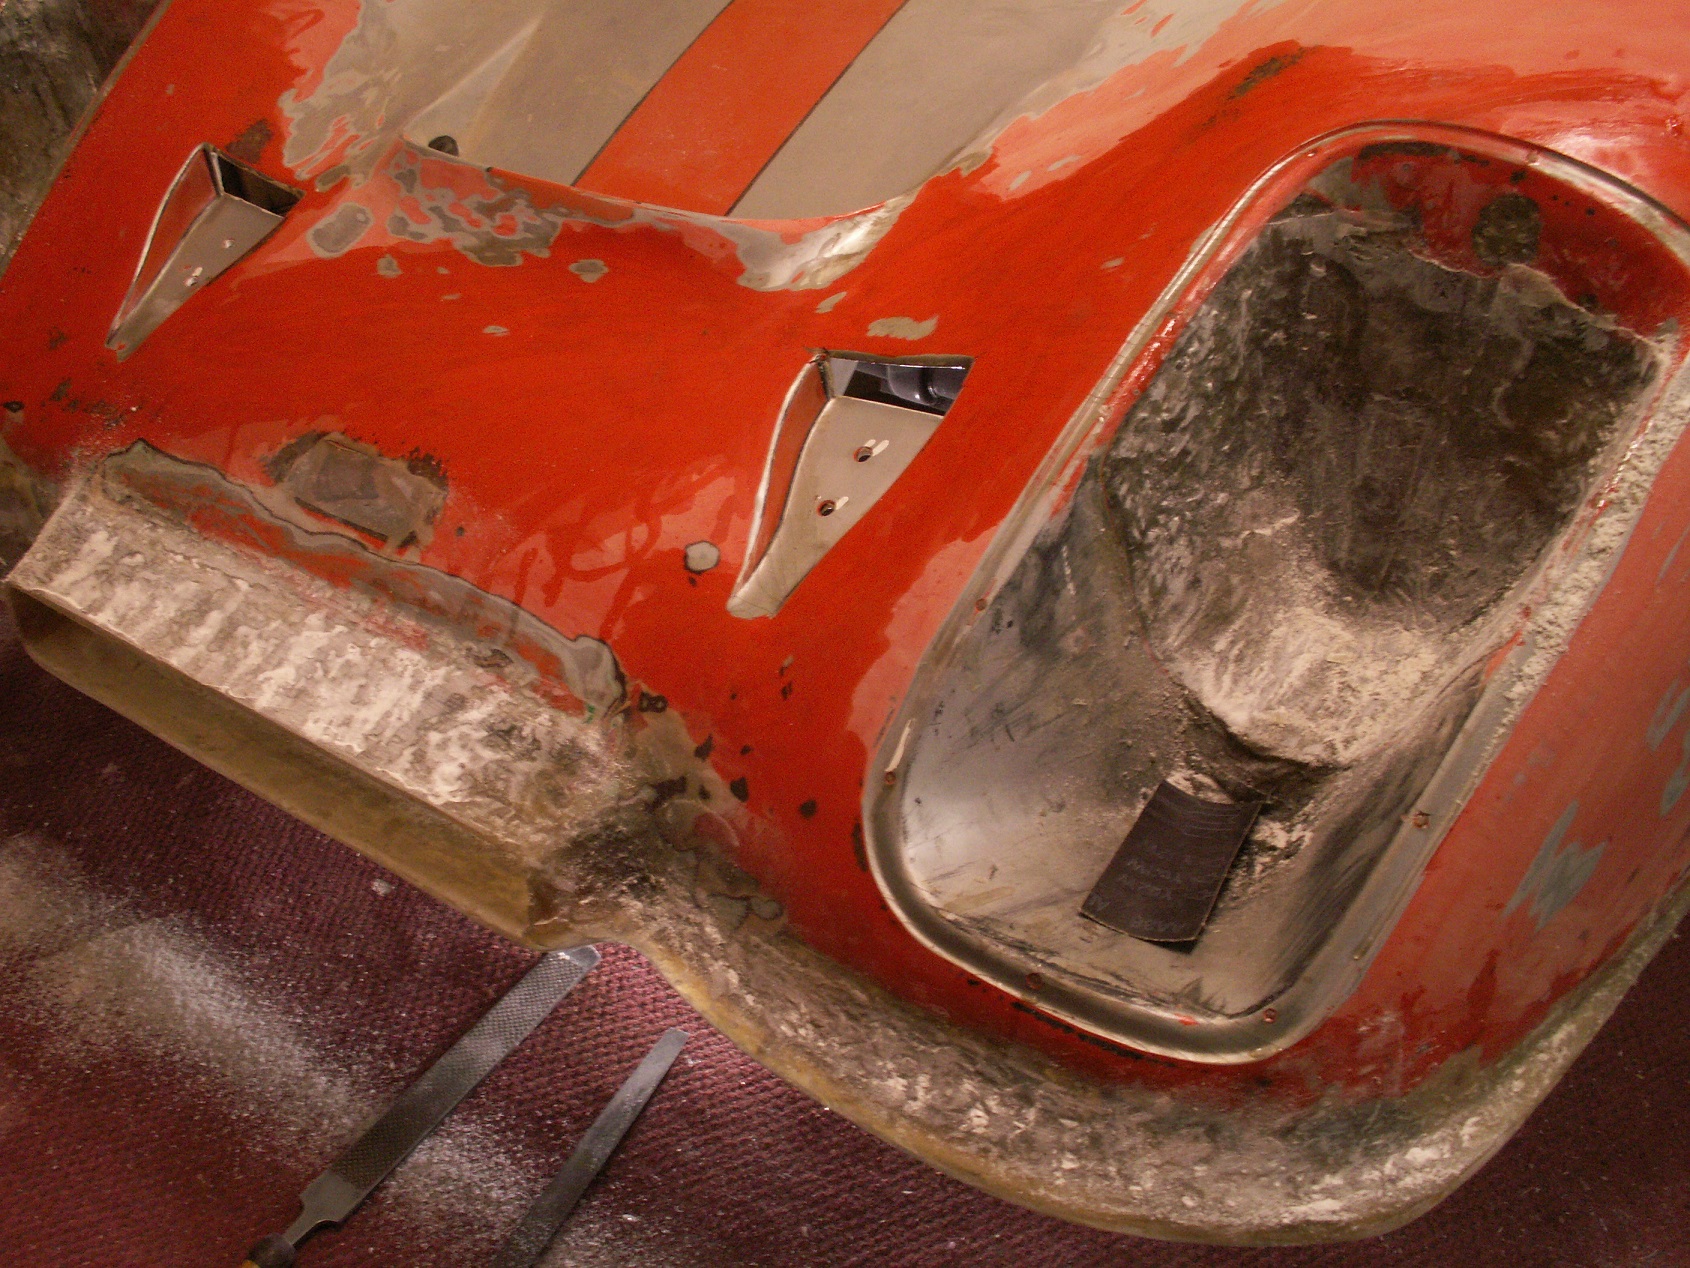
UPDATE, 11-13-14. We have some work to do, the headlight sockets were cut out and now I will have to reform and fiberglass them as well as front end work.
Looks like it may have hit something in the front at one time. Easier to work on once I get the body upside down.
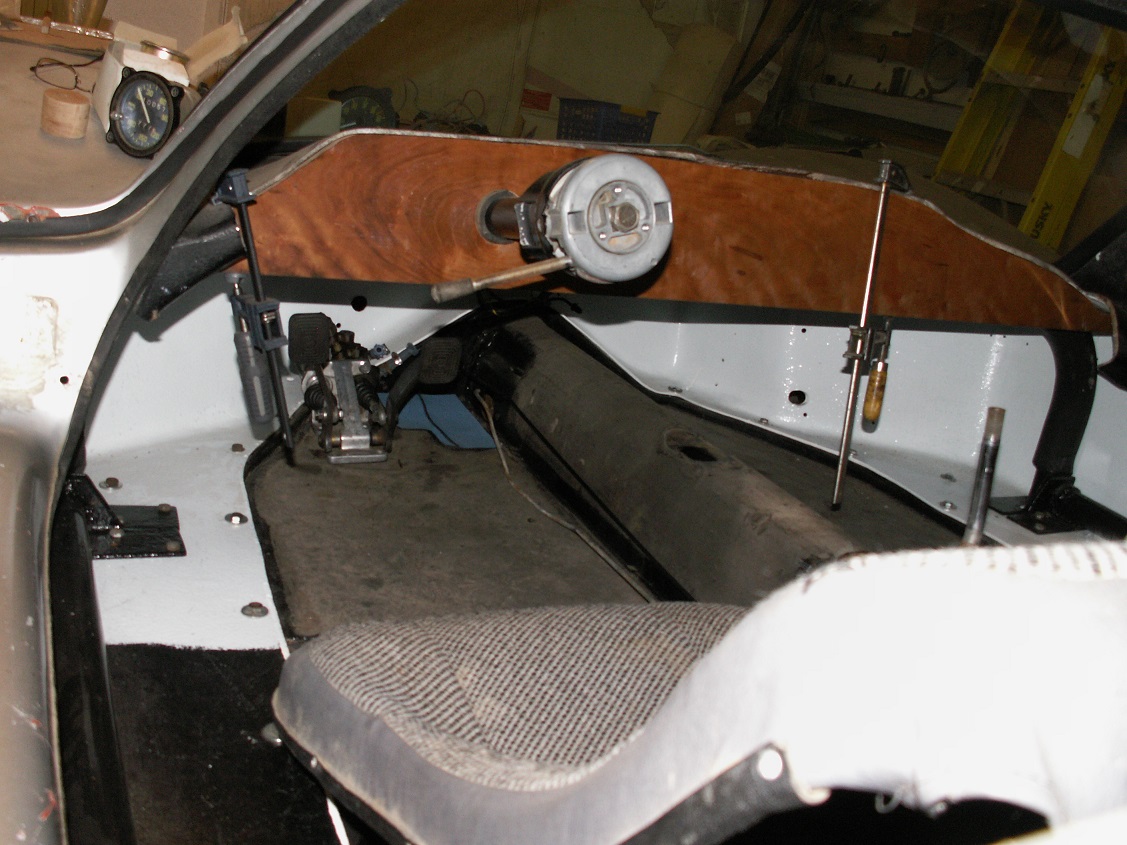
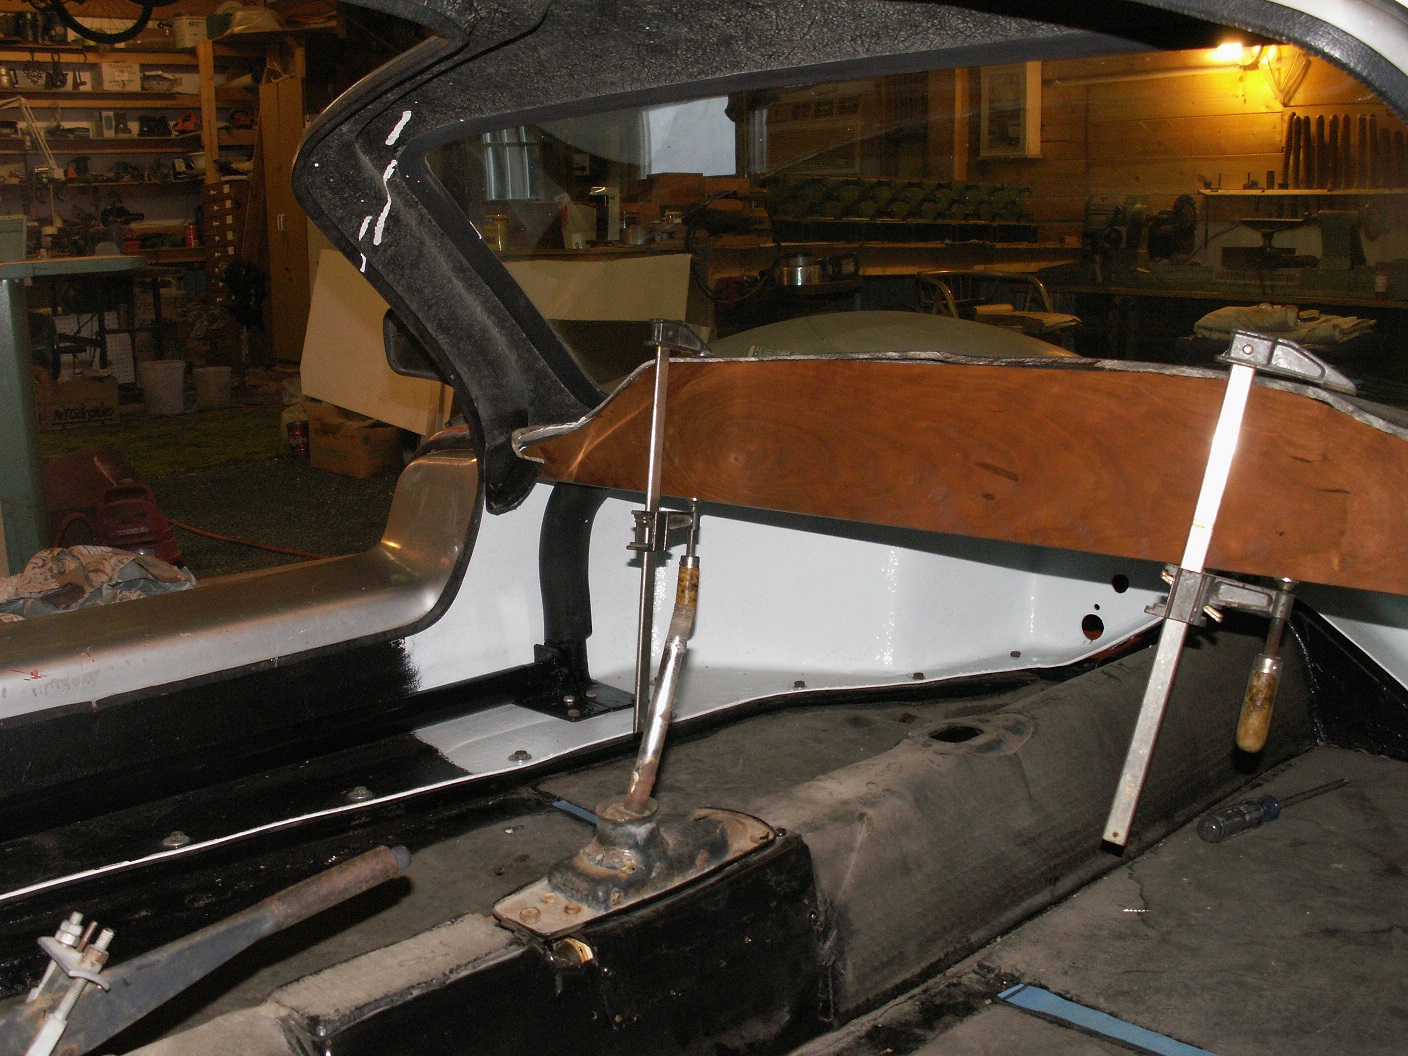
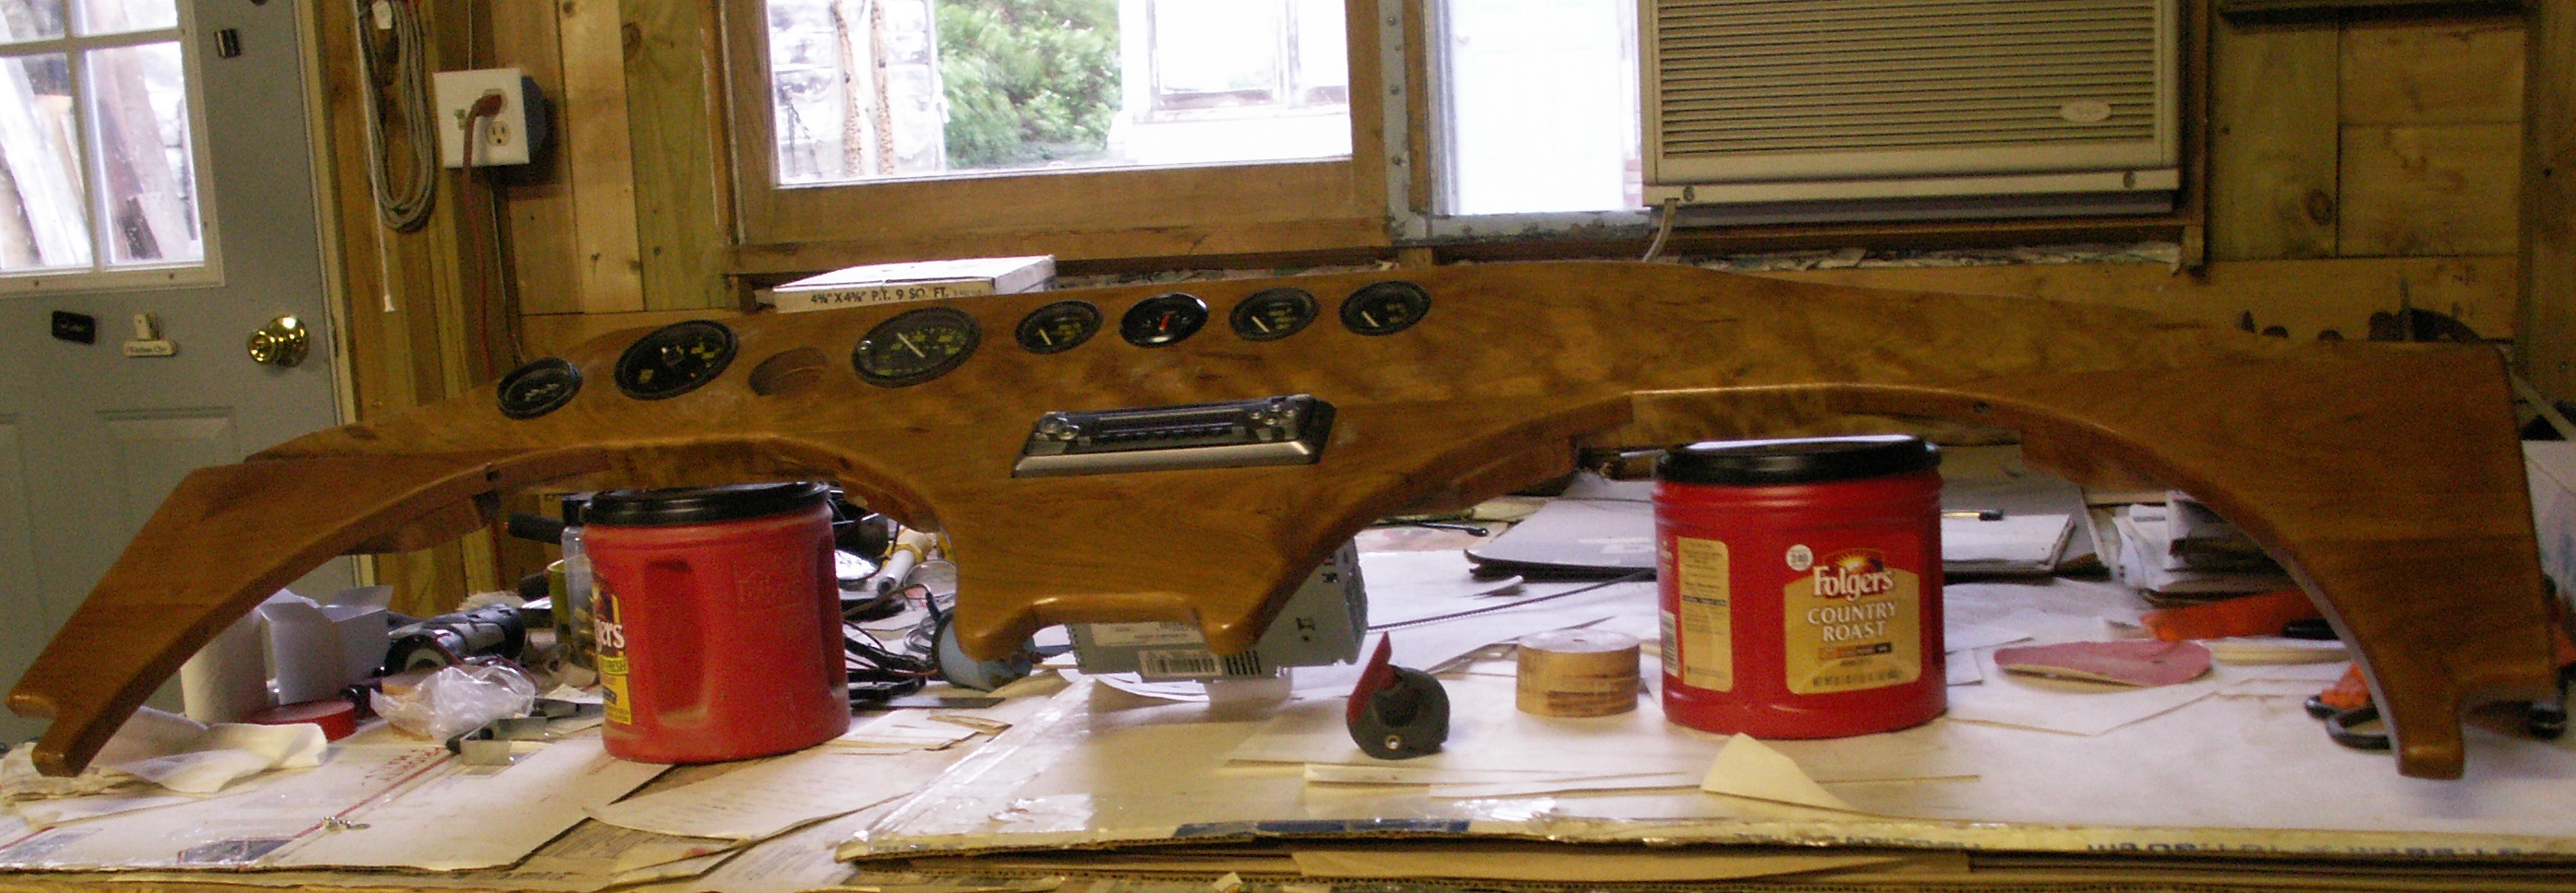
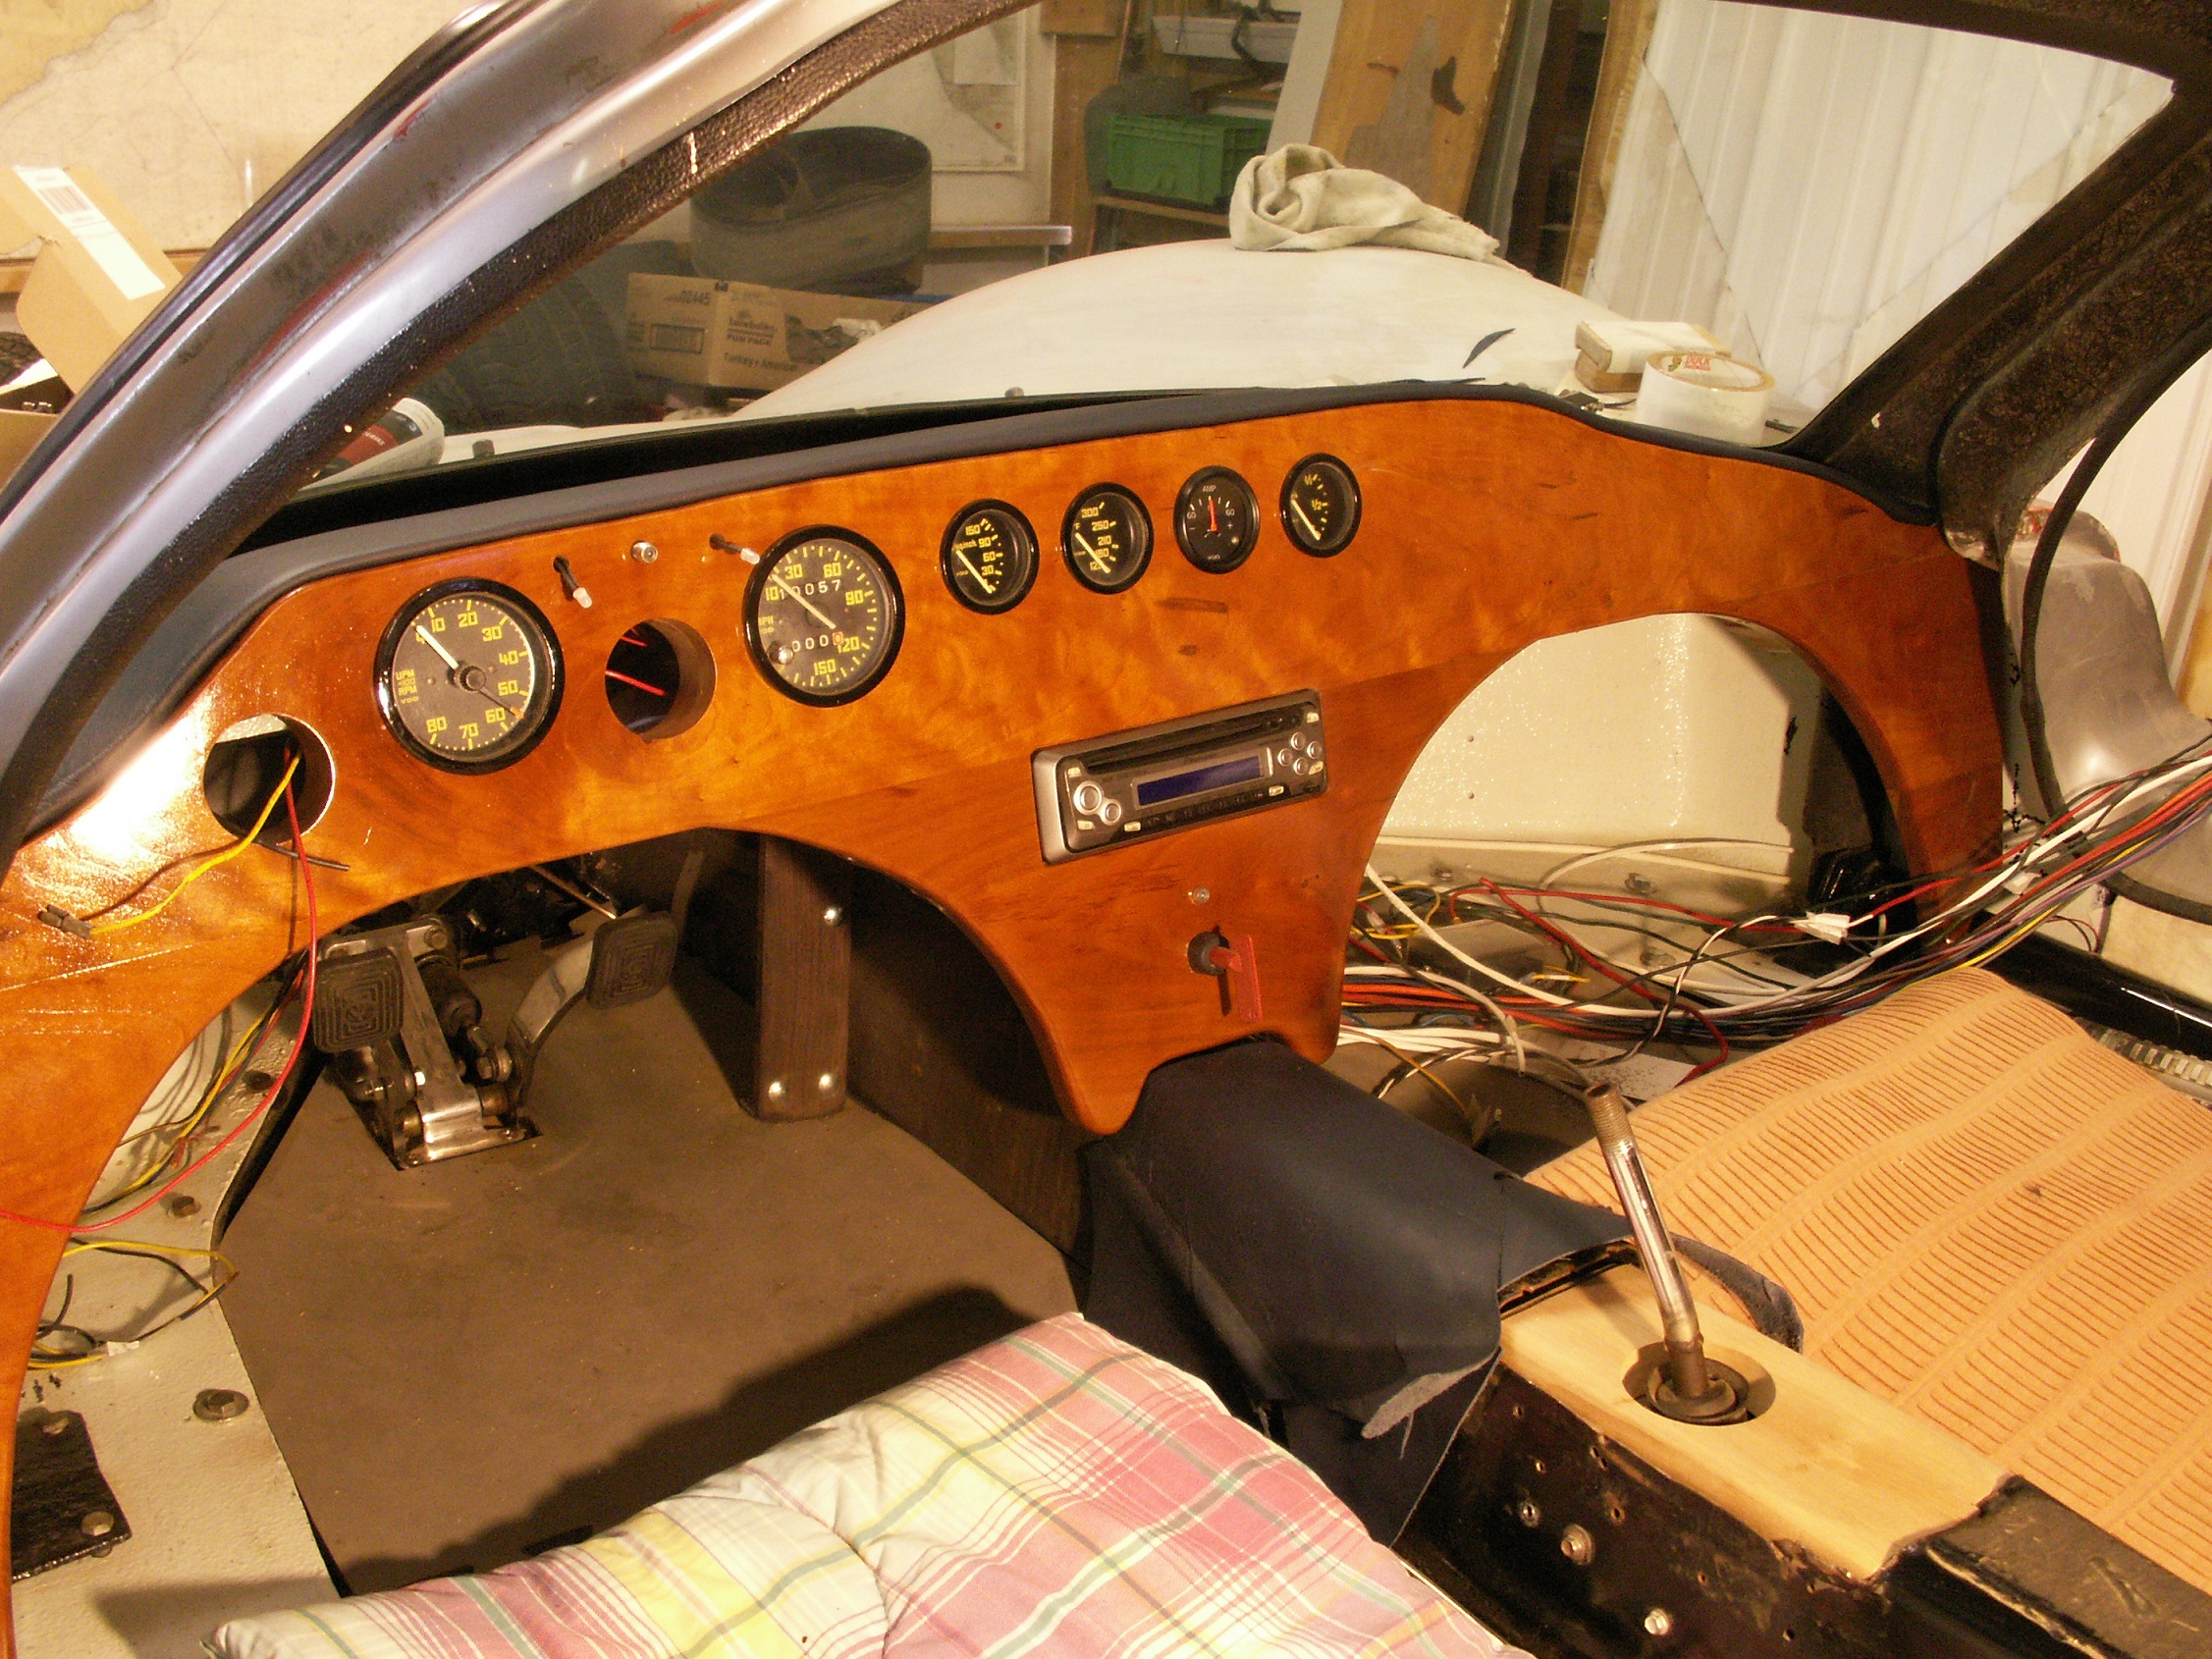
We have a really nice piece of figured cherry I plan to remake the dash with.
THE BODY IS OFF !
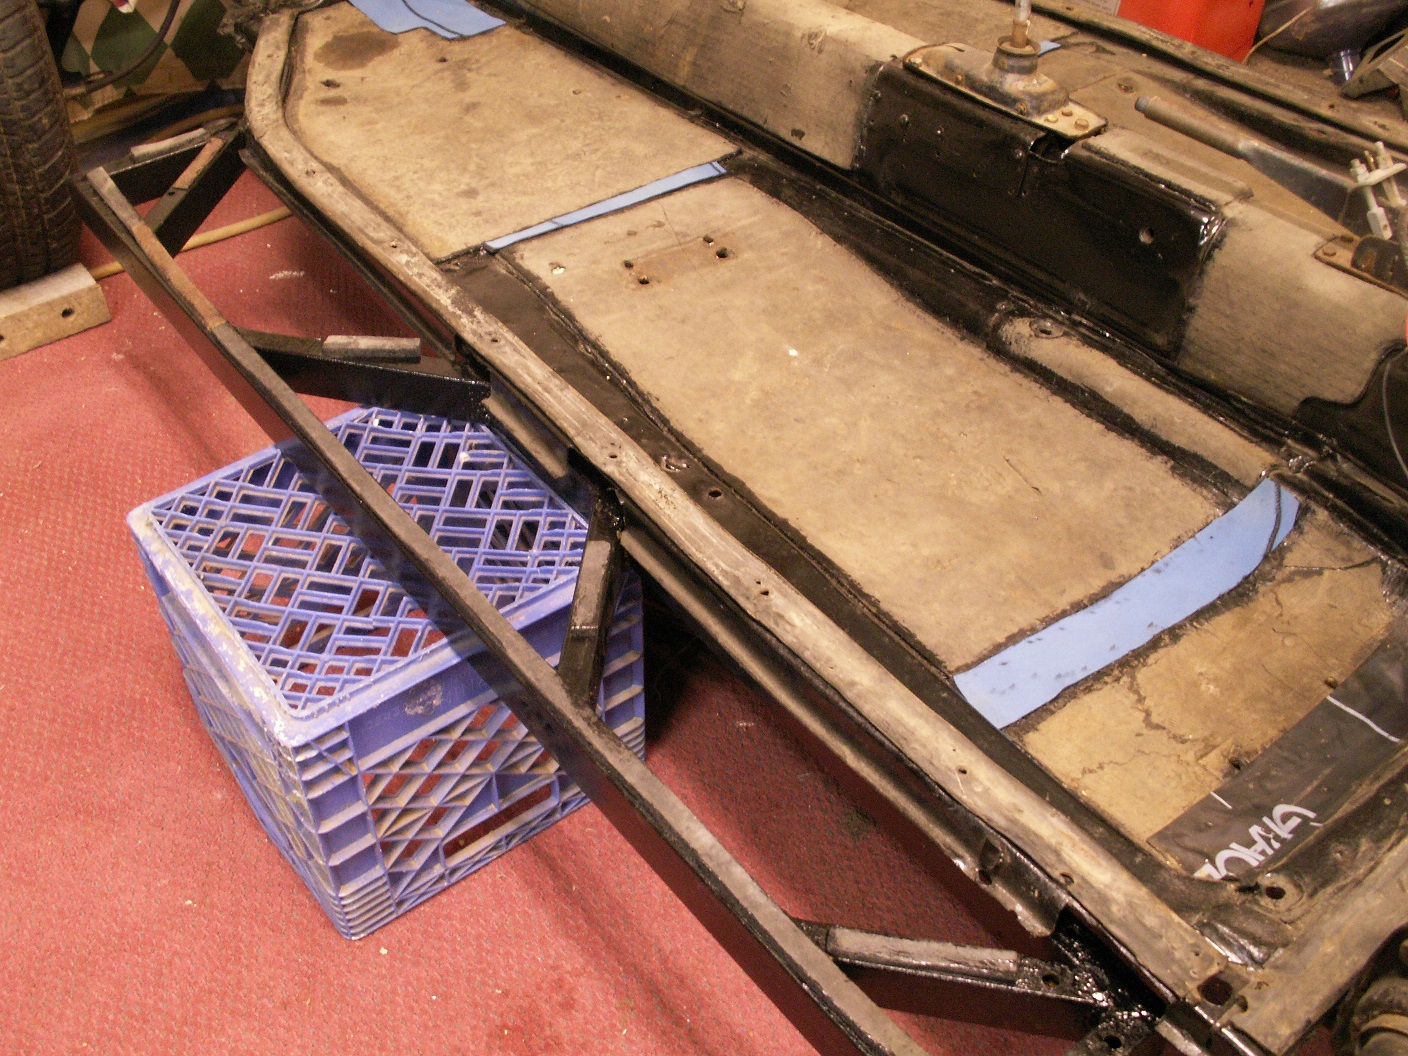
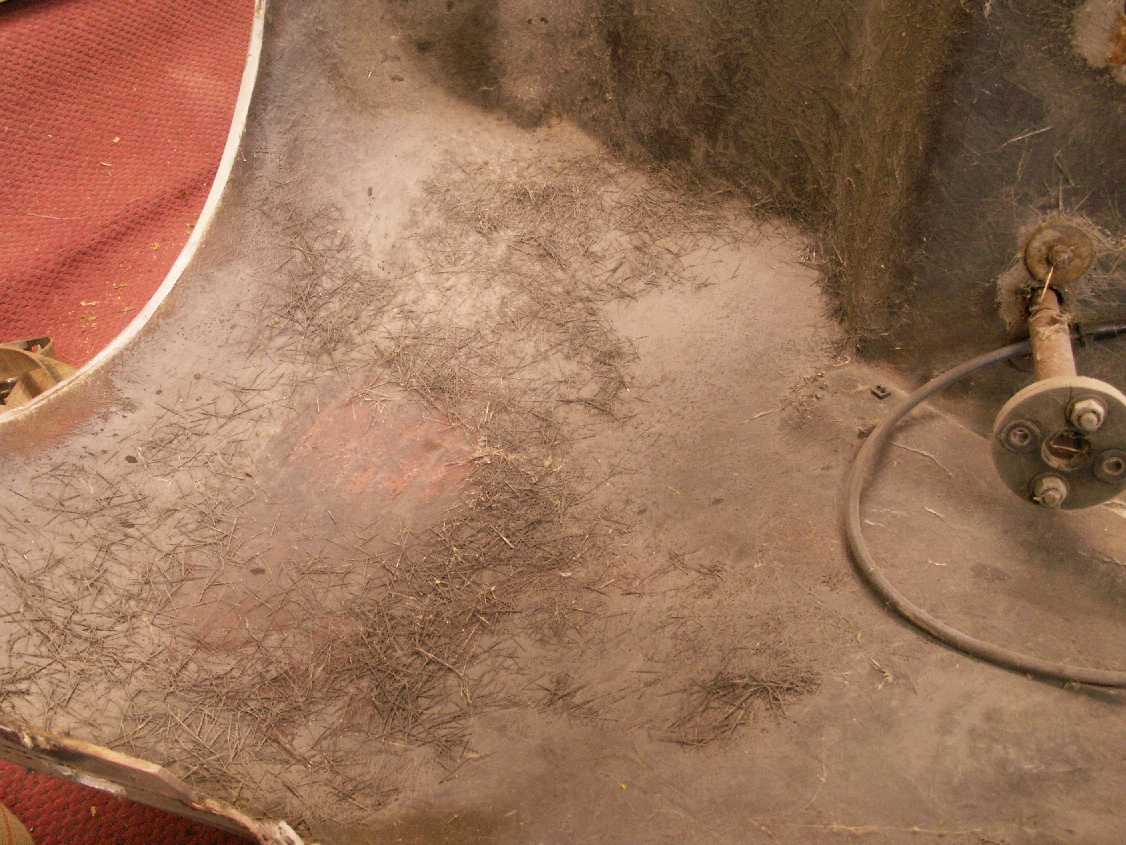
The underside of the body is covered in fiberglass threads from the chopper gun when the body was still in the mold.
Don't know why it was not cleaned up when it was made. So now I'm scraping and sanding and scraping and sanding.
Than we will paint the whole underside white.
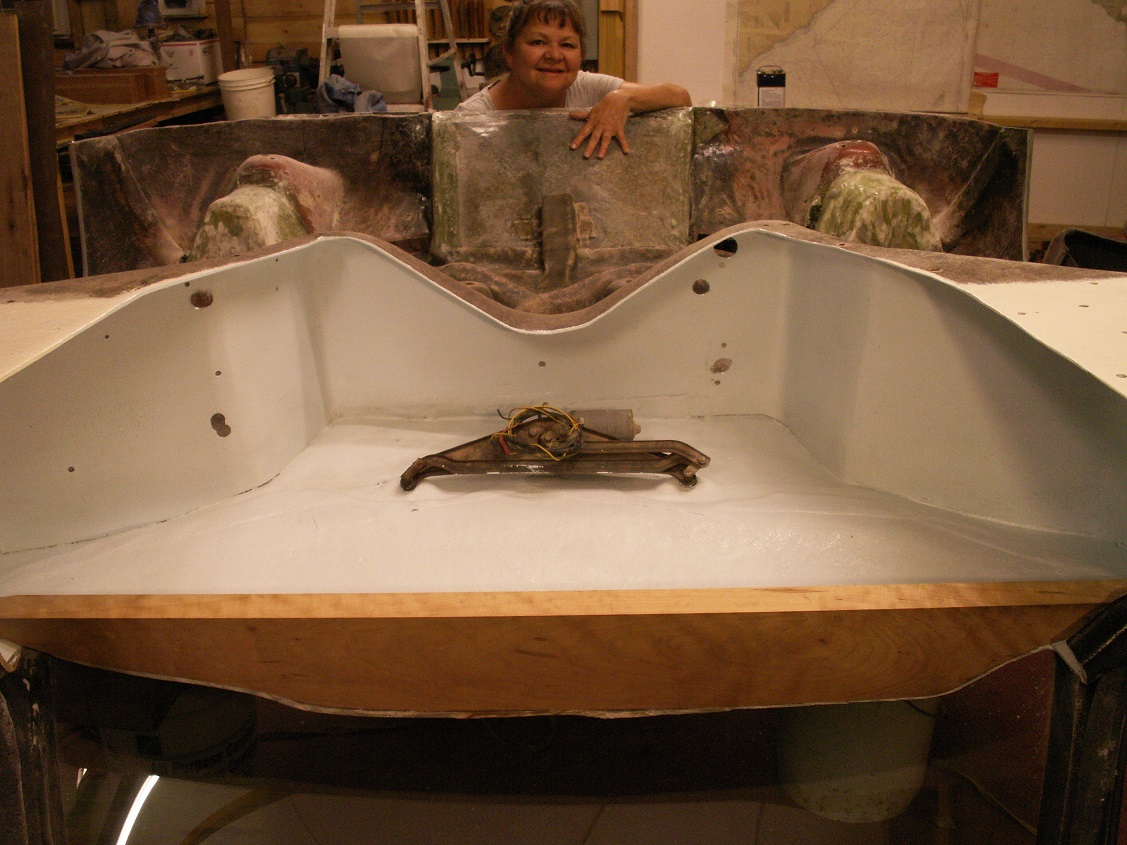
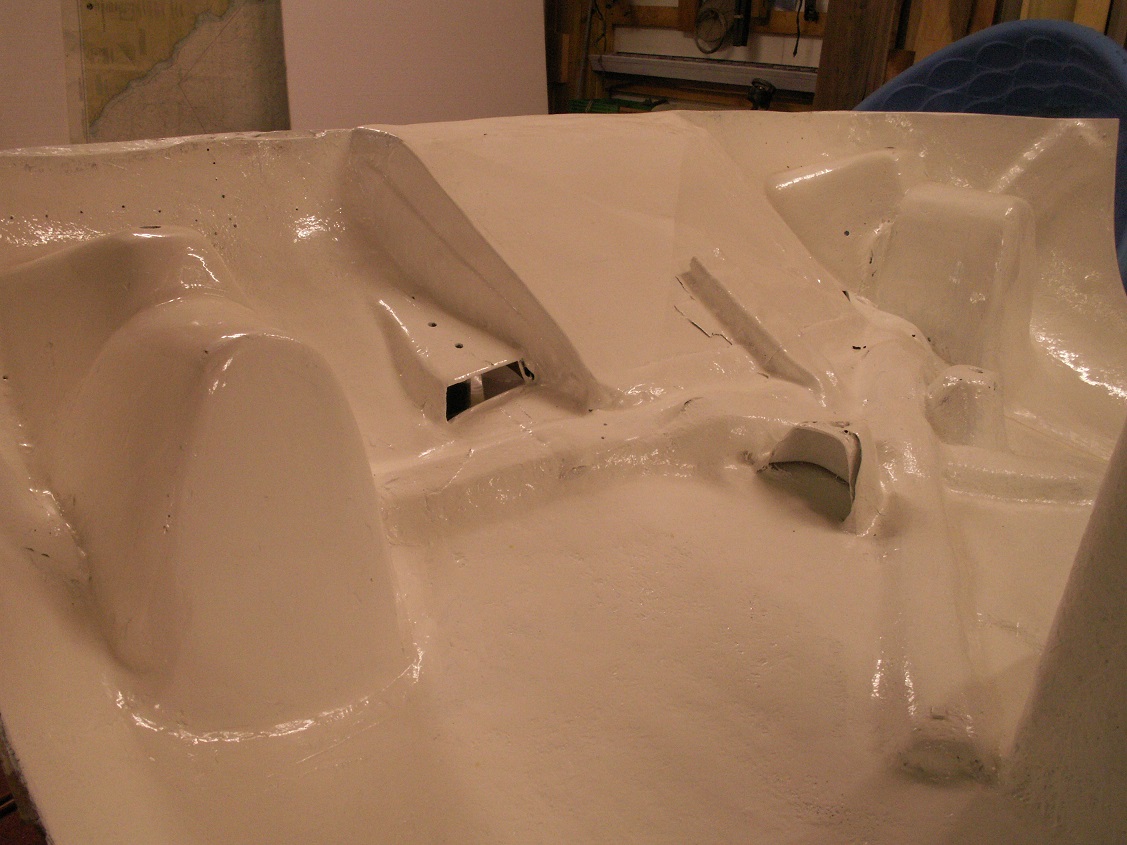
Spring 2016, got the body turned upside down. Sanded smooth the whole underside and painted with a really tough high gloss white. Something we learned while working on our boat
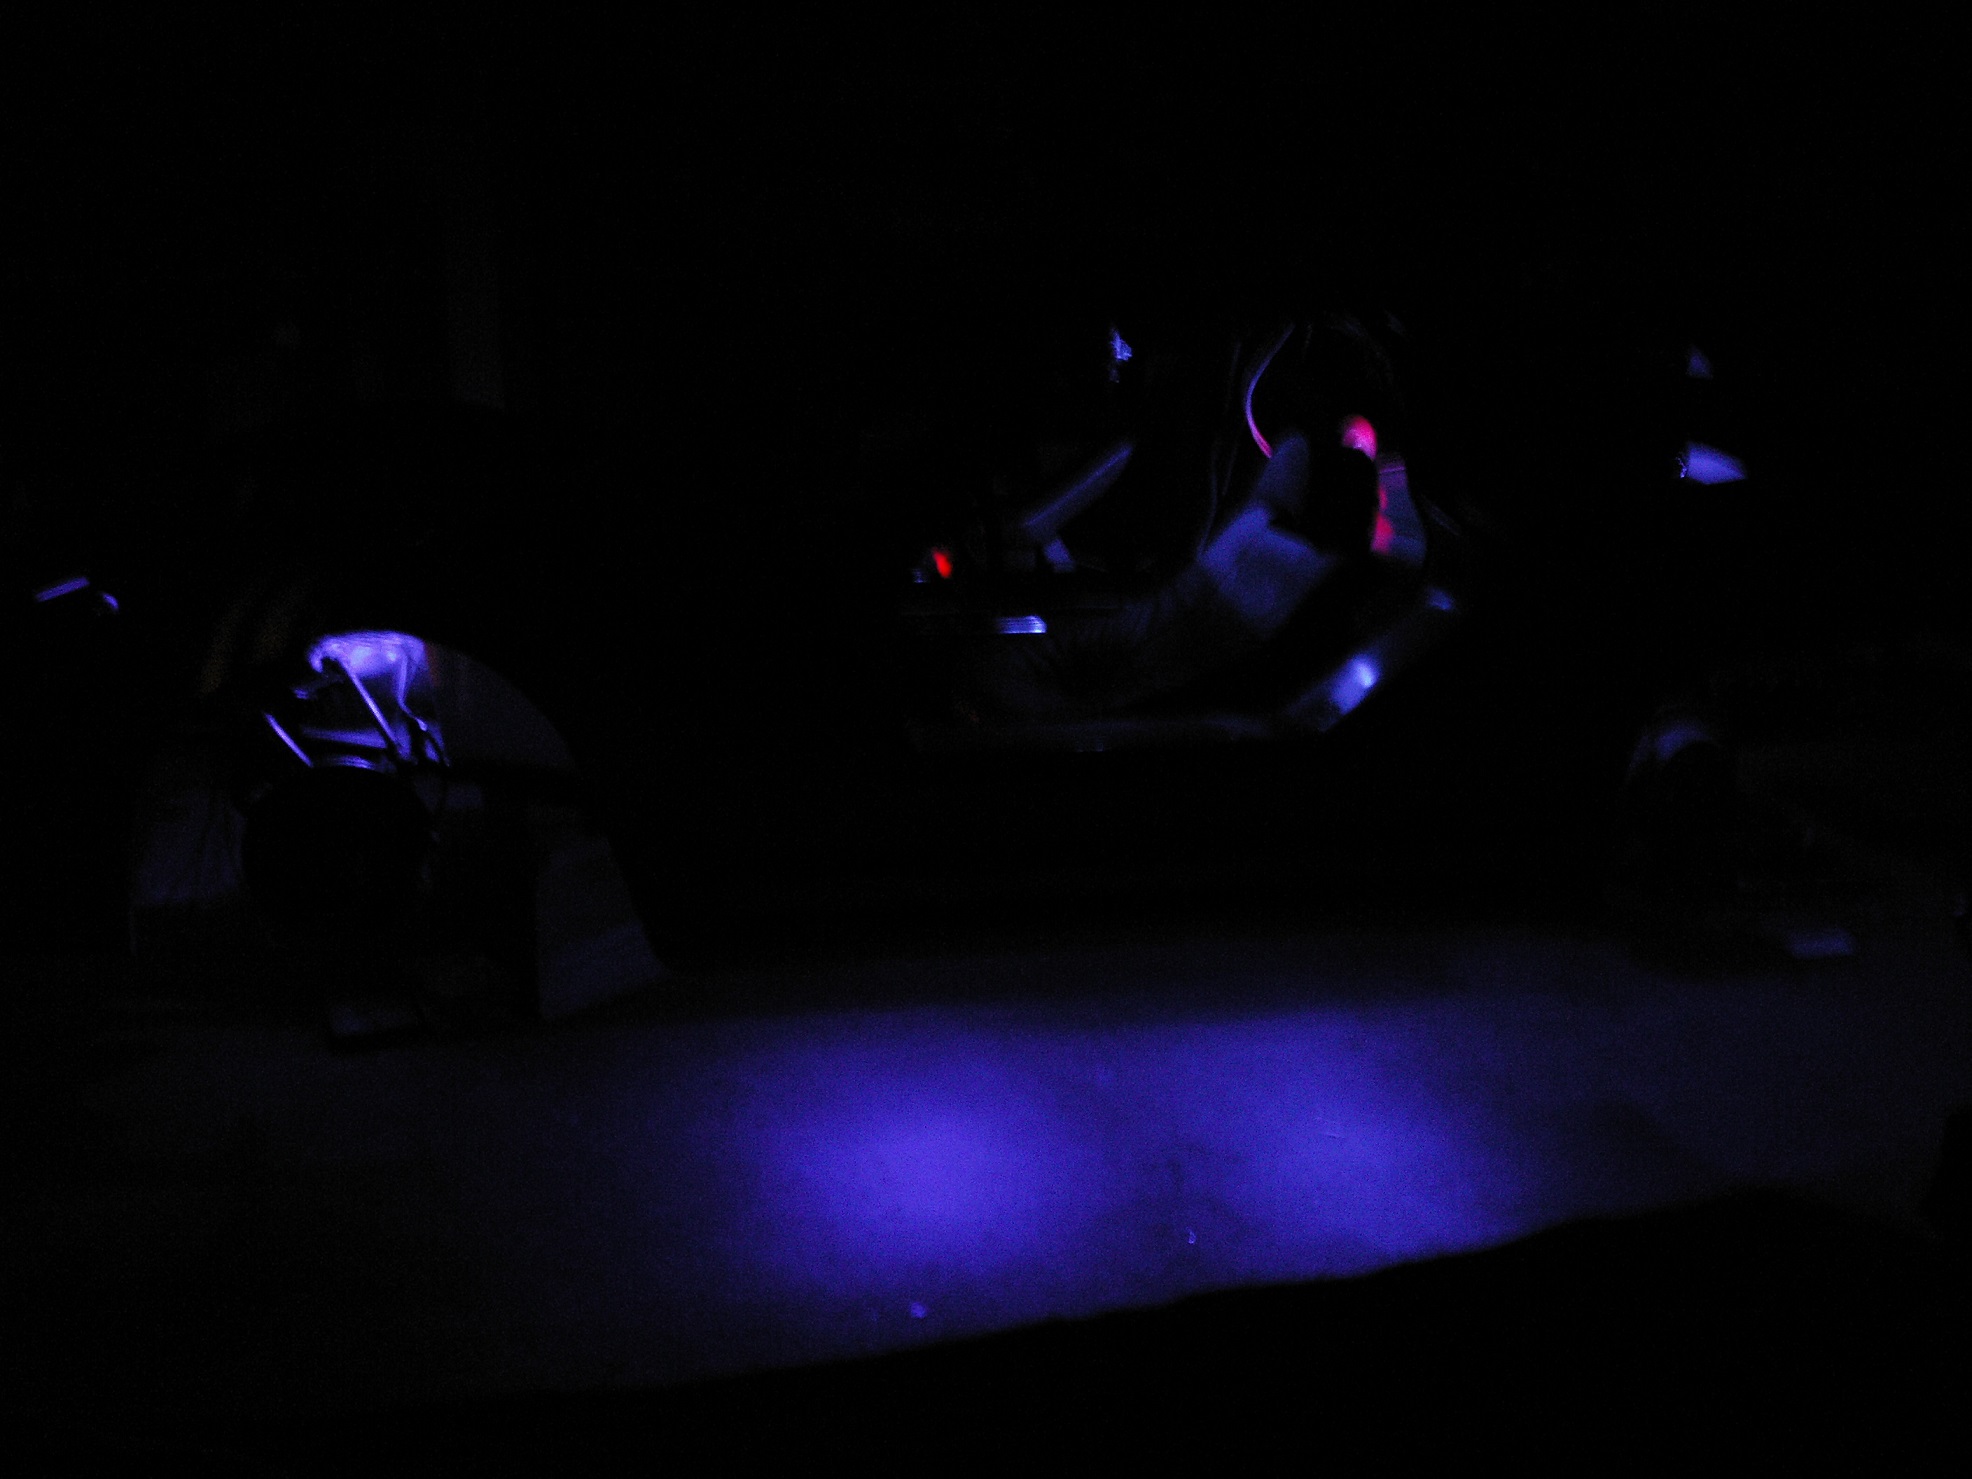
it is a marine paint called EasyPoxy, you can put it on decks and walk on it and it still keeps a shine. Later I want to add blue LED lights under here for ground effects lighting.
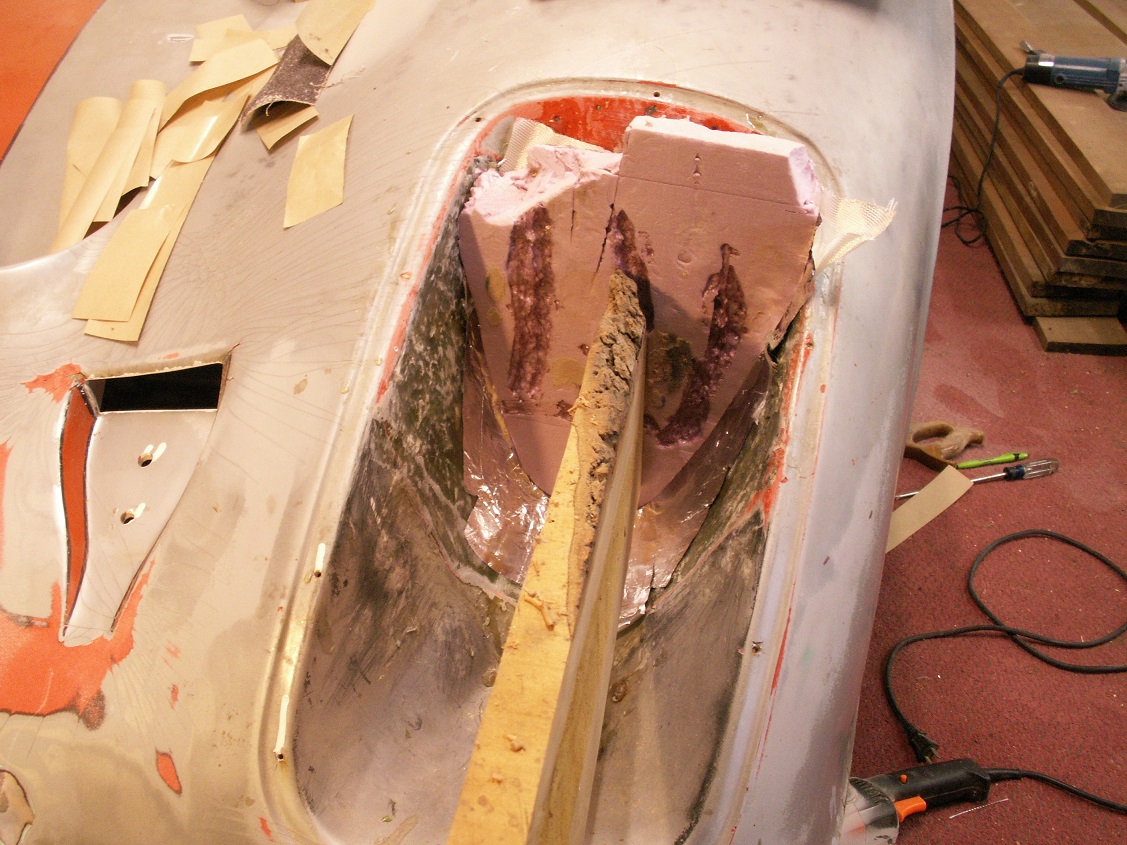
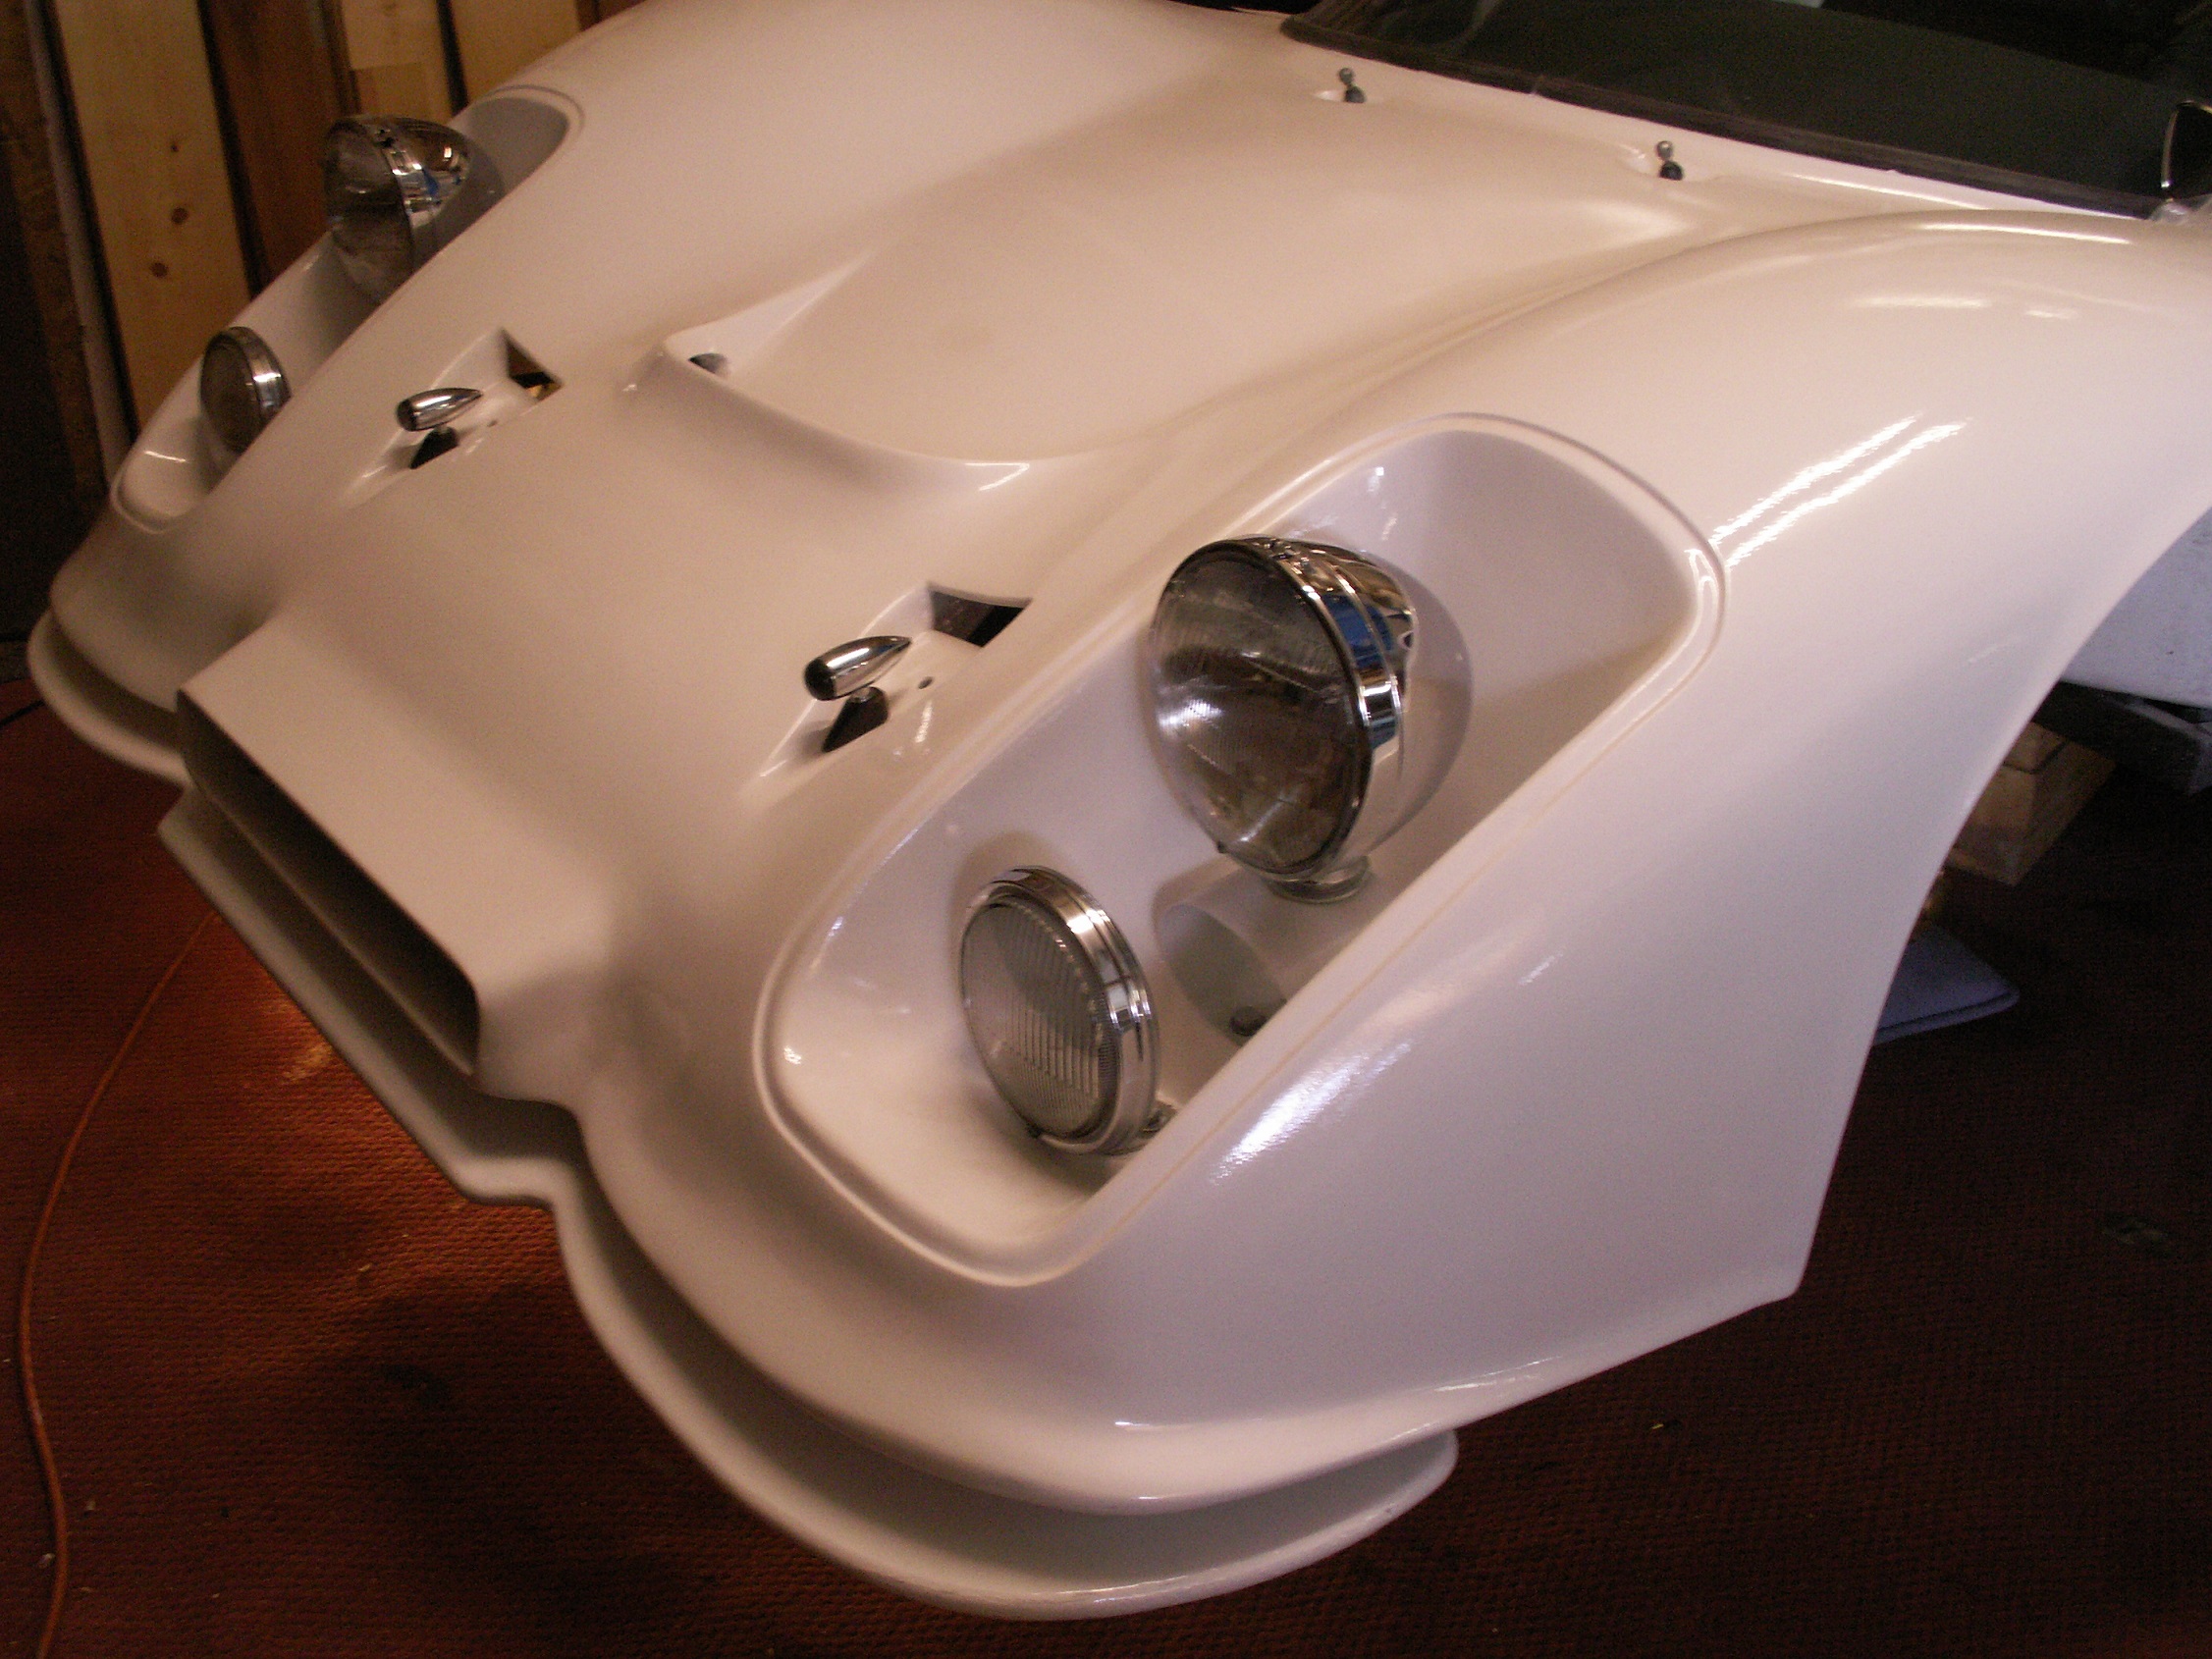
It also made it much easier to do the fiberglass repairs to the front end and start the reform of the headlight pods.

Also started shaping on the new dash. 1 1/2 inch solid cherry should make for a good base.
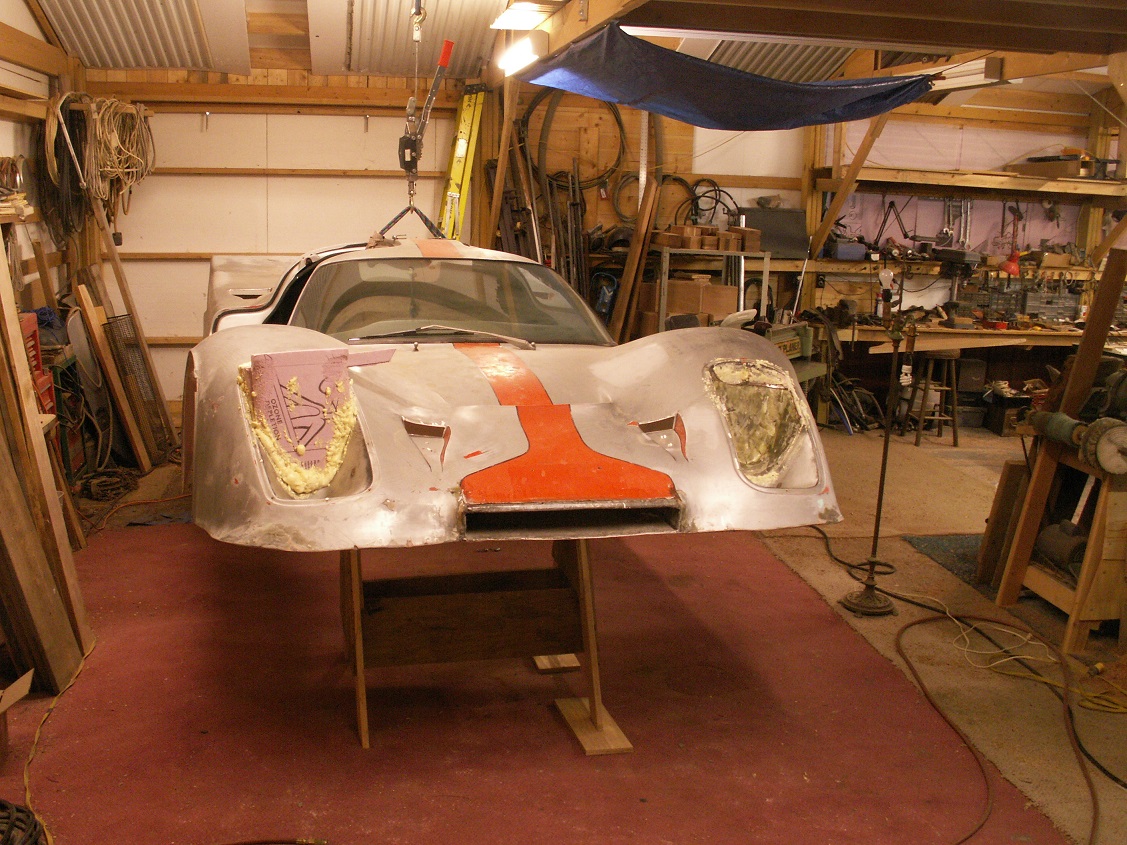
Fall 2016, Thanks to a bunch of guys from the high school, the body is turned back over and start working on the top side.
Well it's now after the first of the year 2017.
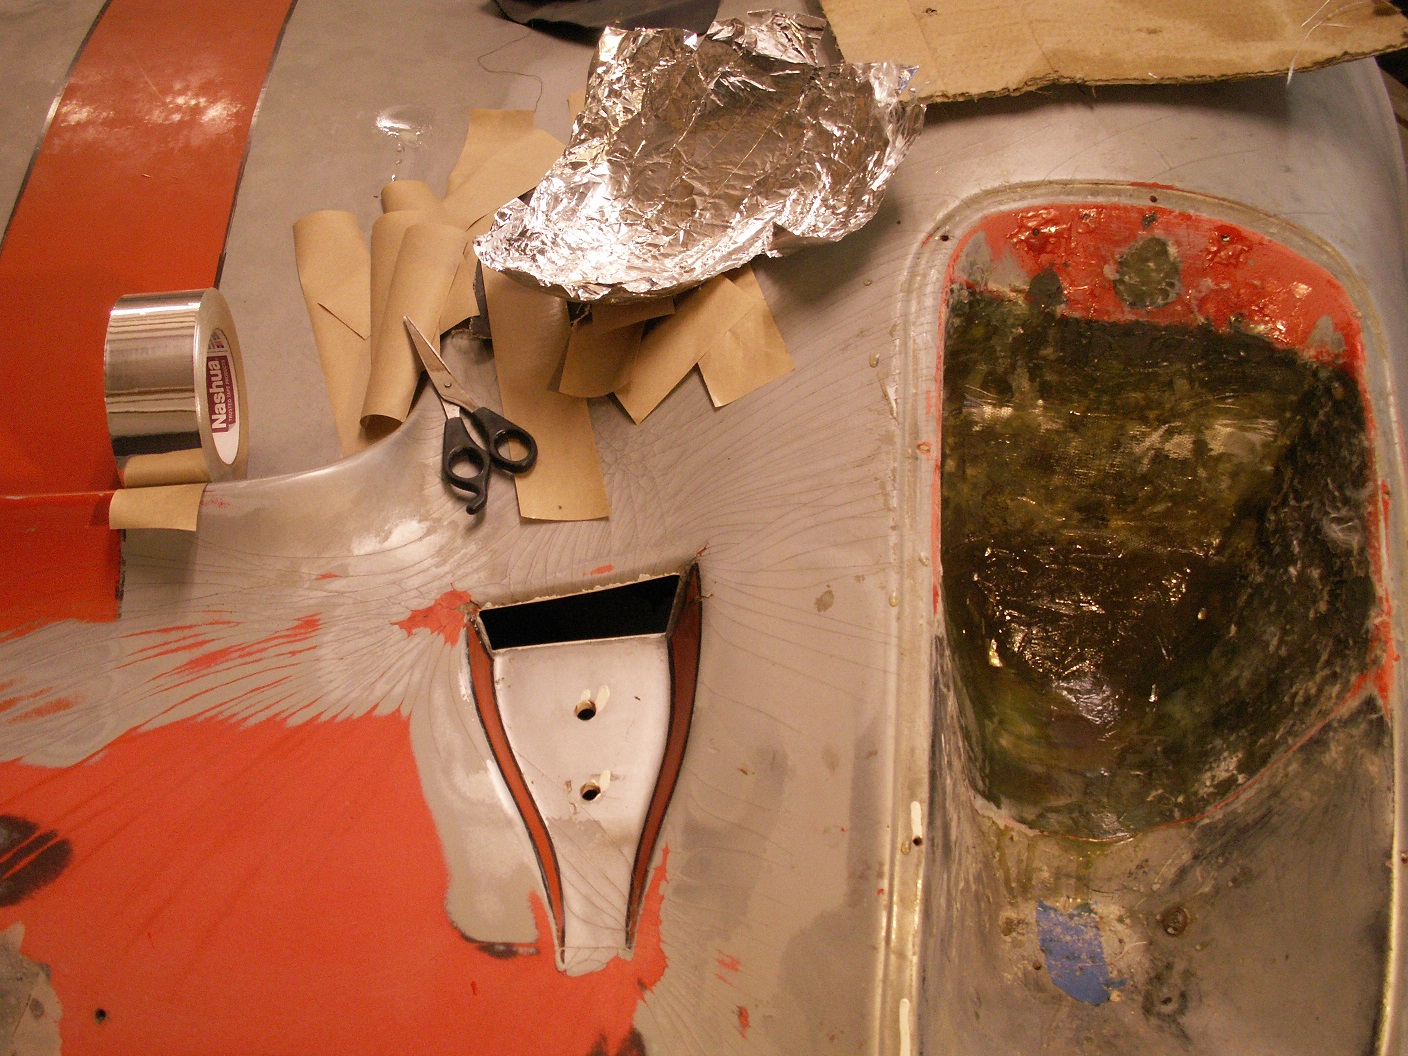
Learning a lot about molding with fiberglass. Come to find out, where I used wax paper to cover my mold, resin doesn't stick to aluminum tape. So you can than push around the resin and fiberglass mating from the back
side of the tape, including pushing it up hill and holding it there till it sets up, than peel off the tape. Boy, this opens up a whole new area.
Also starting on the wiring, come to find out the engine is a 1974, 911T. Yet the car was first registered in 1973.
Got the roll cage back in and the body bolted down.
OK, back to body work.
The front of the body is covered with a bazillion cracks. Like maybe someone bumped into something enough to flex the body but not brake it.
I have always heard cracks are really hard to repair with out coming back sometime after it's painted again. So I put the question out to some really smart guys that
have been playing with fiberglass body's for a long time. From all of their responses, the most sure fire way is to sand off paint and as much layer underneath as you dare than anything left of the cracks, use a penetrating epoxy to seal the cracks,
wait about a week to cure, than glass over the whole area. If you can add a layer of fiberglass it would be very strong, the strength is in the fibers of the glass, other wise the resin could crack again with out it.
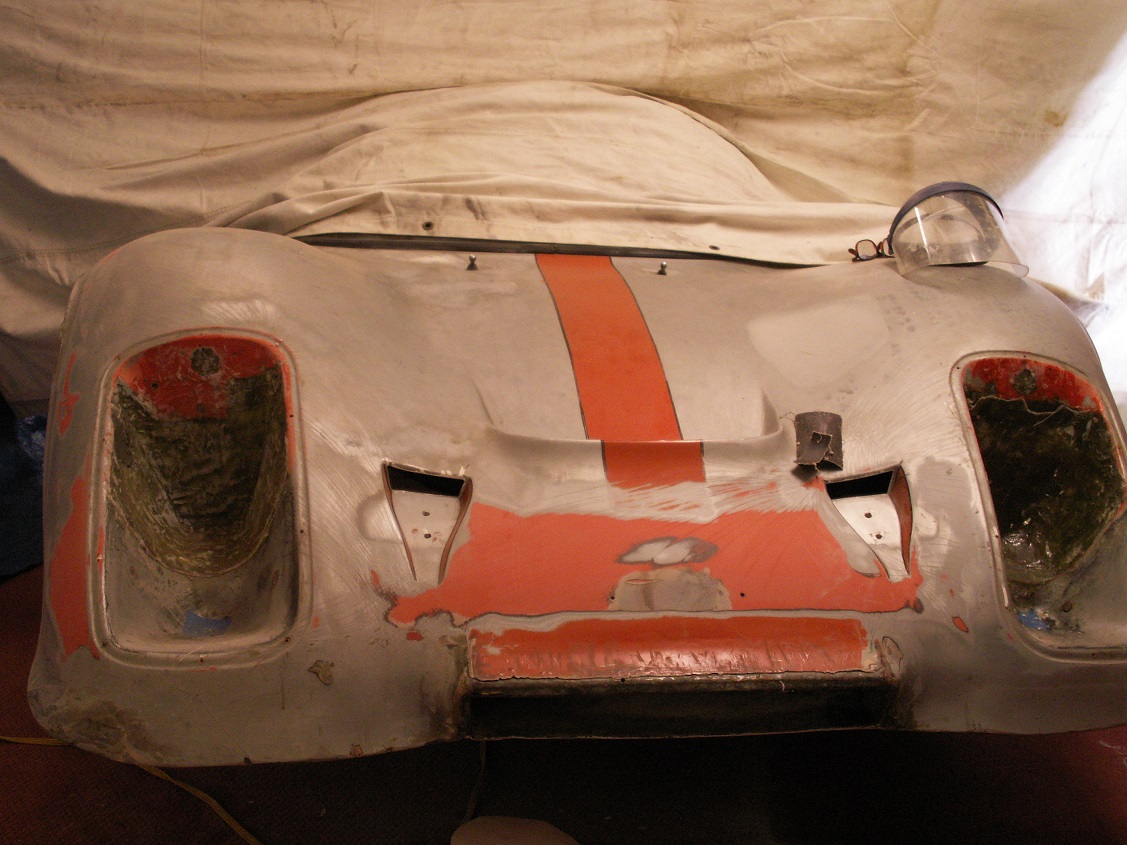
So to start out with, I've sanded off the paint and tried to get as much base as I could with out changing the shape, I'm not a body guy and I've noticed I have made a bunch of flat spots so far. I'm hoping hand sanding will give me the smooth lines back.
Update 4-27-17
Using a board and tape as forms.
Getting the basic shape. Sanding and more sanding...
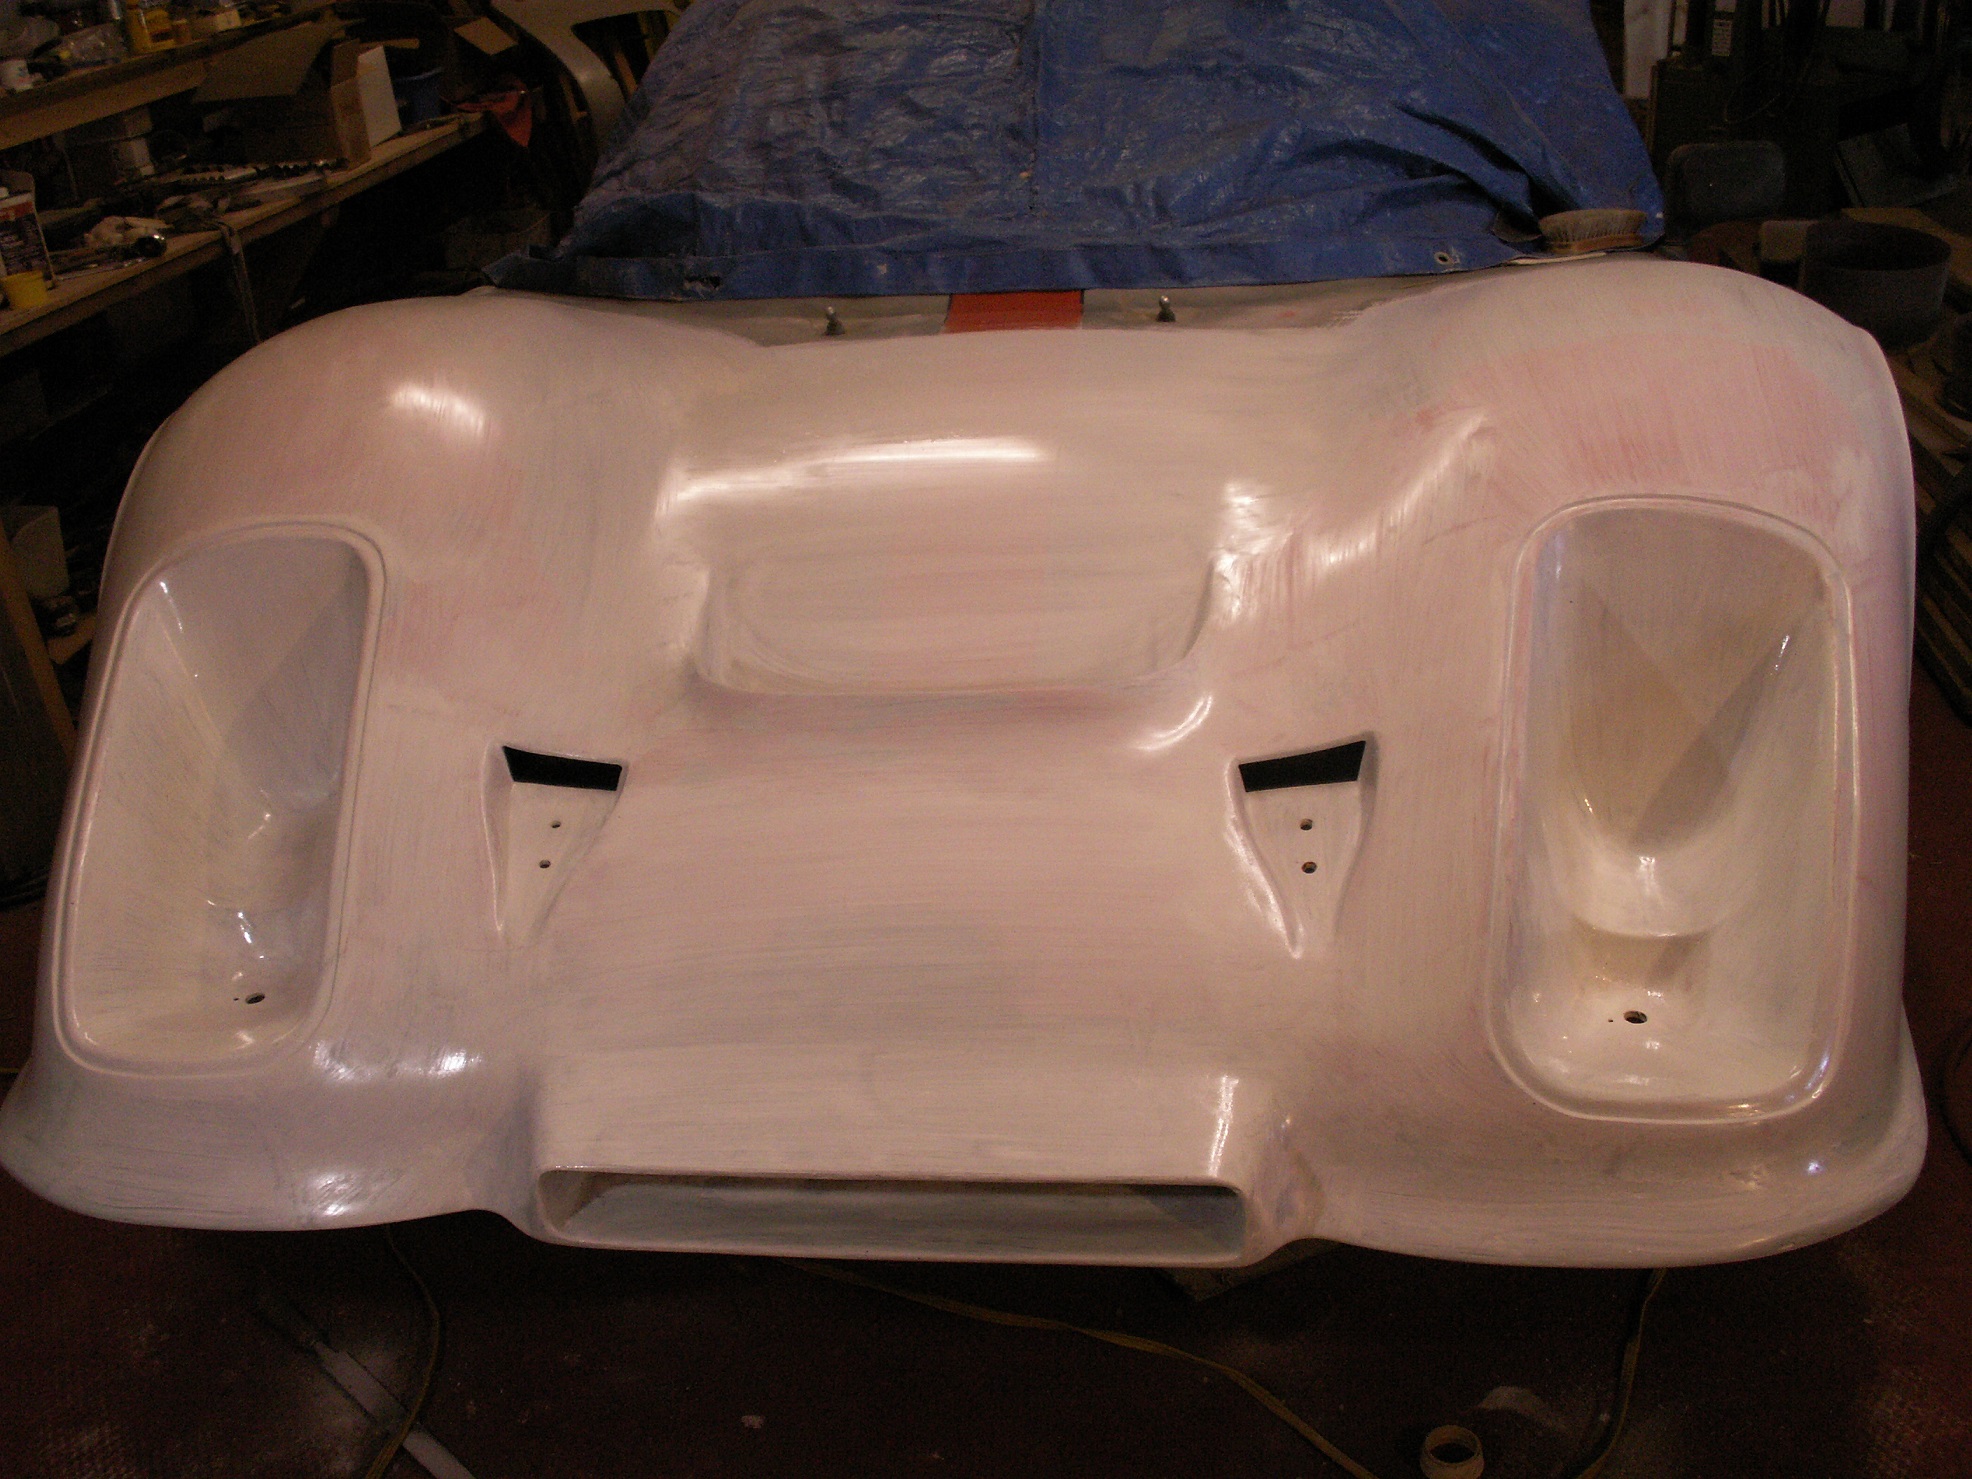
This is the plan for repairing the cracks. First a good coat of penetrating epoxy, it soaks into the cracks and stays flexible, next do the repairs and reshaping than another soak with
the penetrating epoxy before a first coat of primer. So far it is all fiberglass and resin. The primer and top coat is a marine Easypoxy polyurethane paint that is super tough and stays flexible so hopefully the cracks will not reappear.
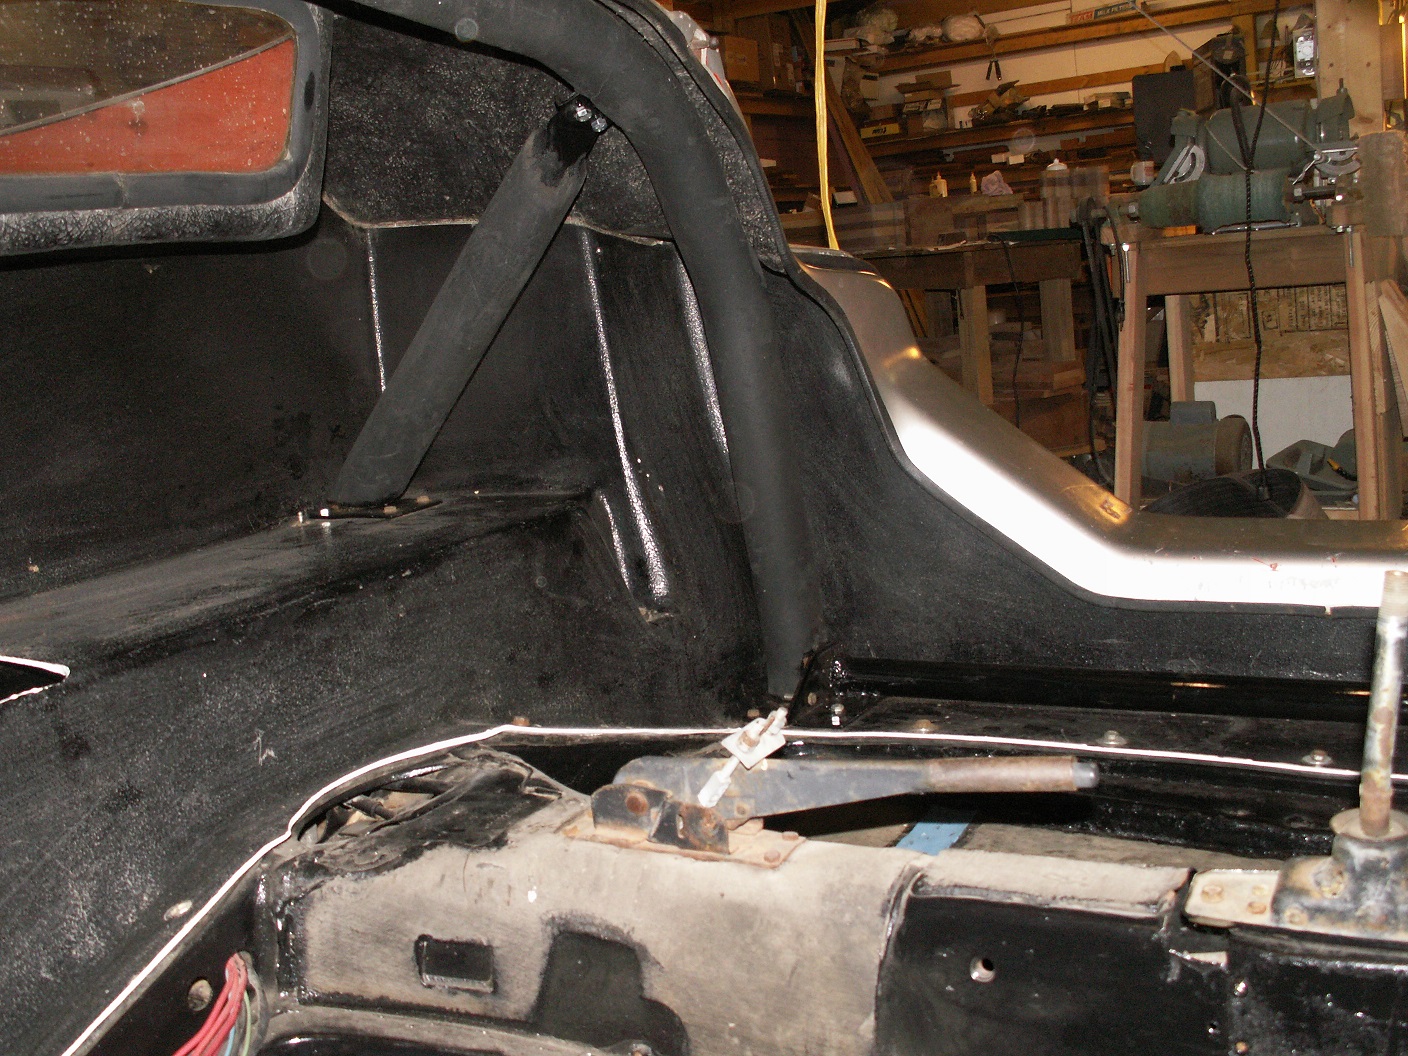
Now concentrating on the interior, the white stuff is 3/4 inch felt followed by 1 1/4 inch memory foam glued to the engine wall and behind the dash, trying to keep engine and body road noise down, and working on the new dash...
Align steering column in dash.

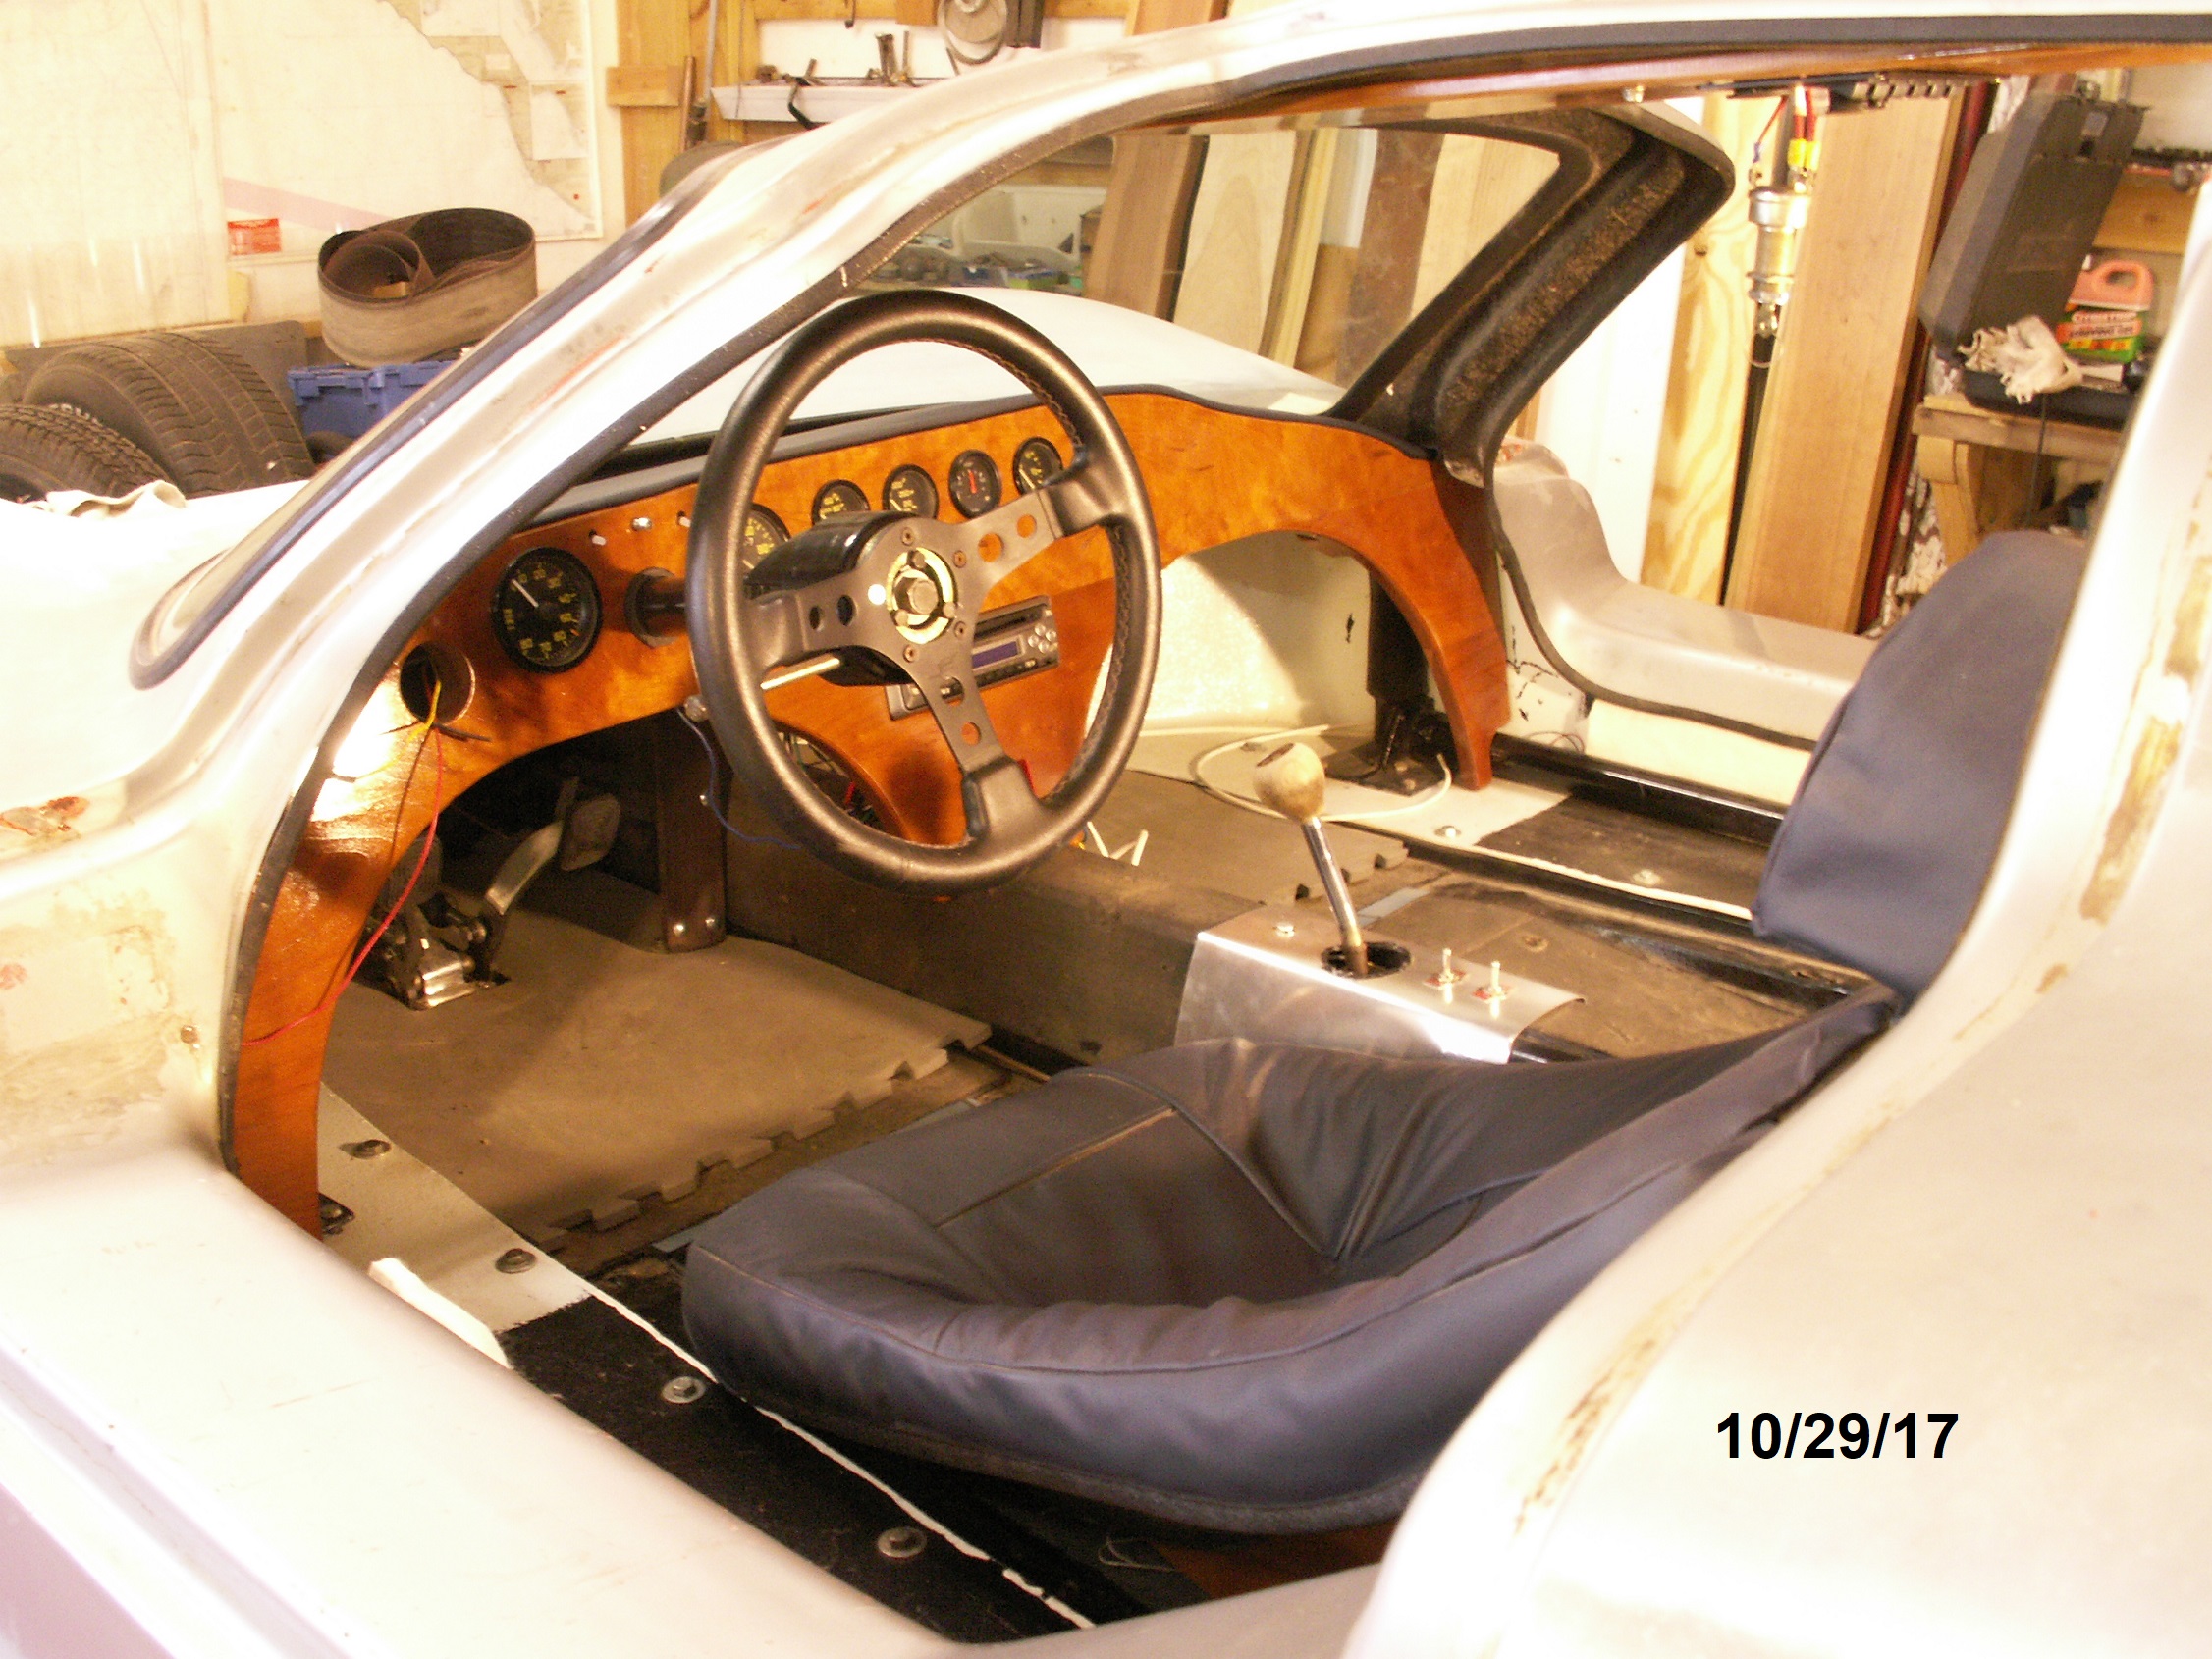
Dry fit dash. Note, I lowered the shifter.
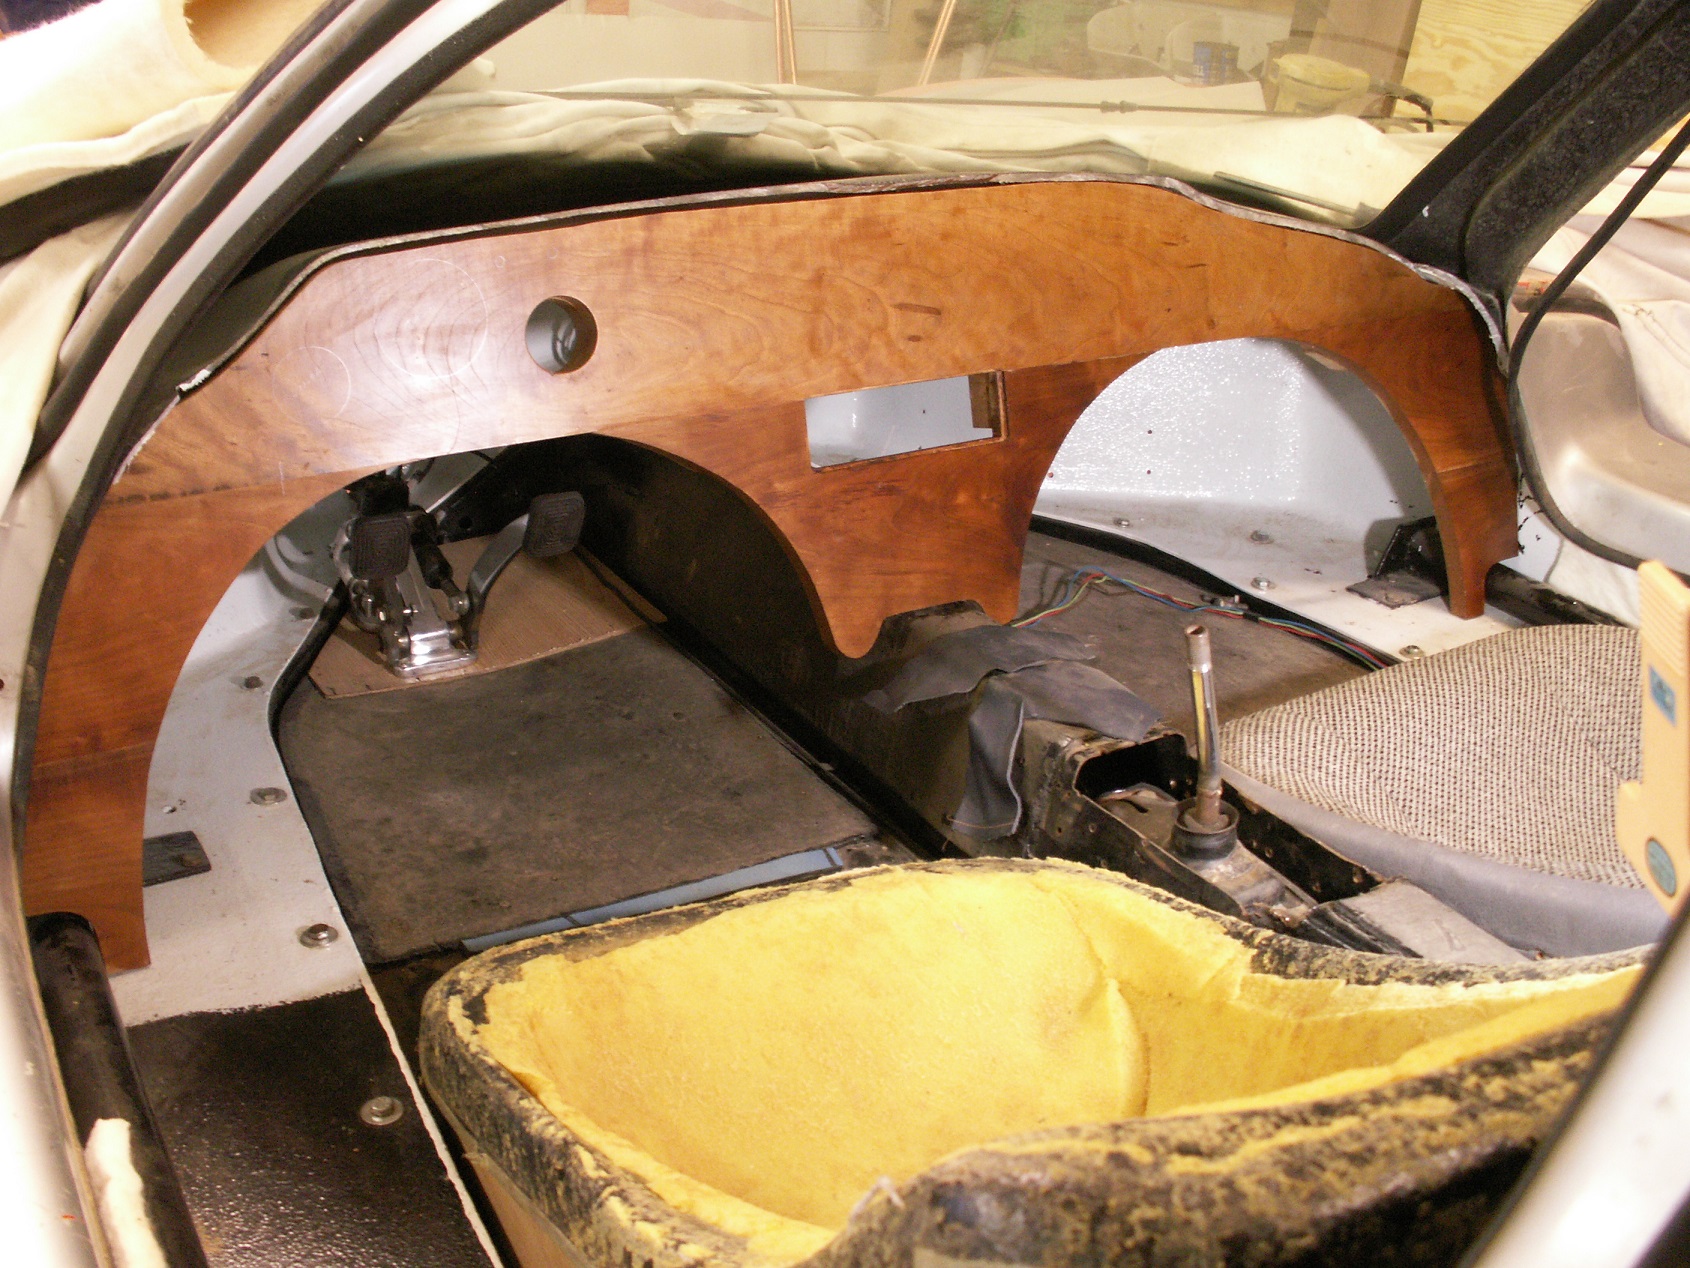
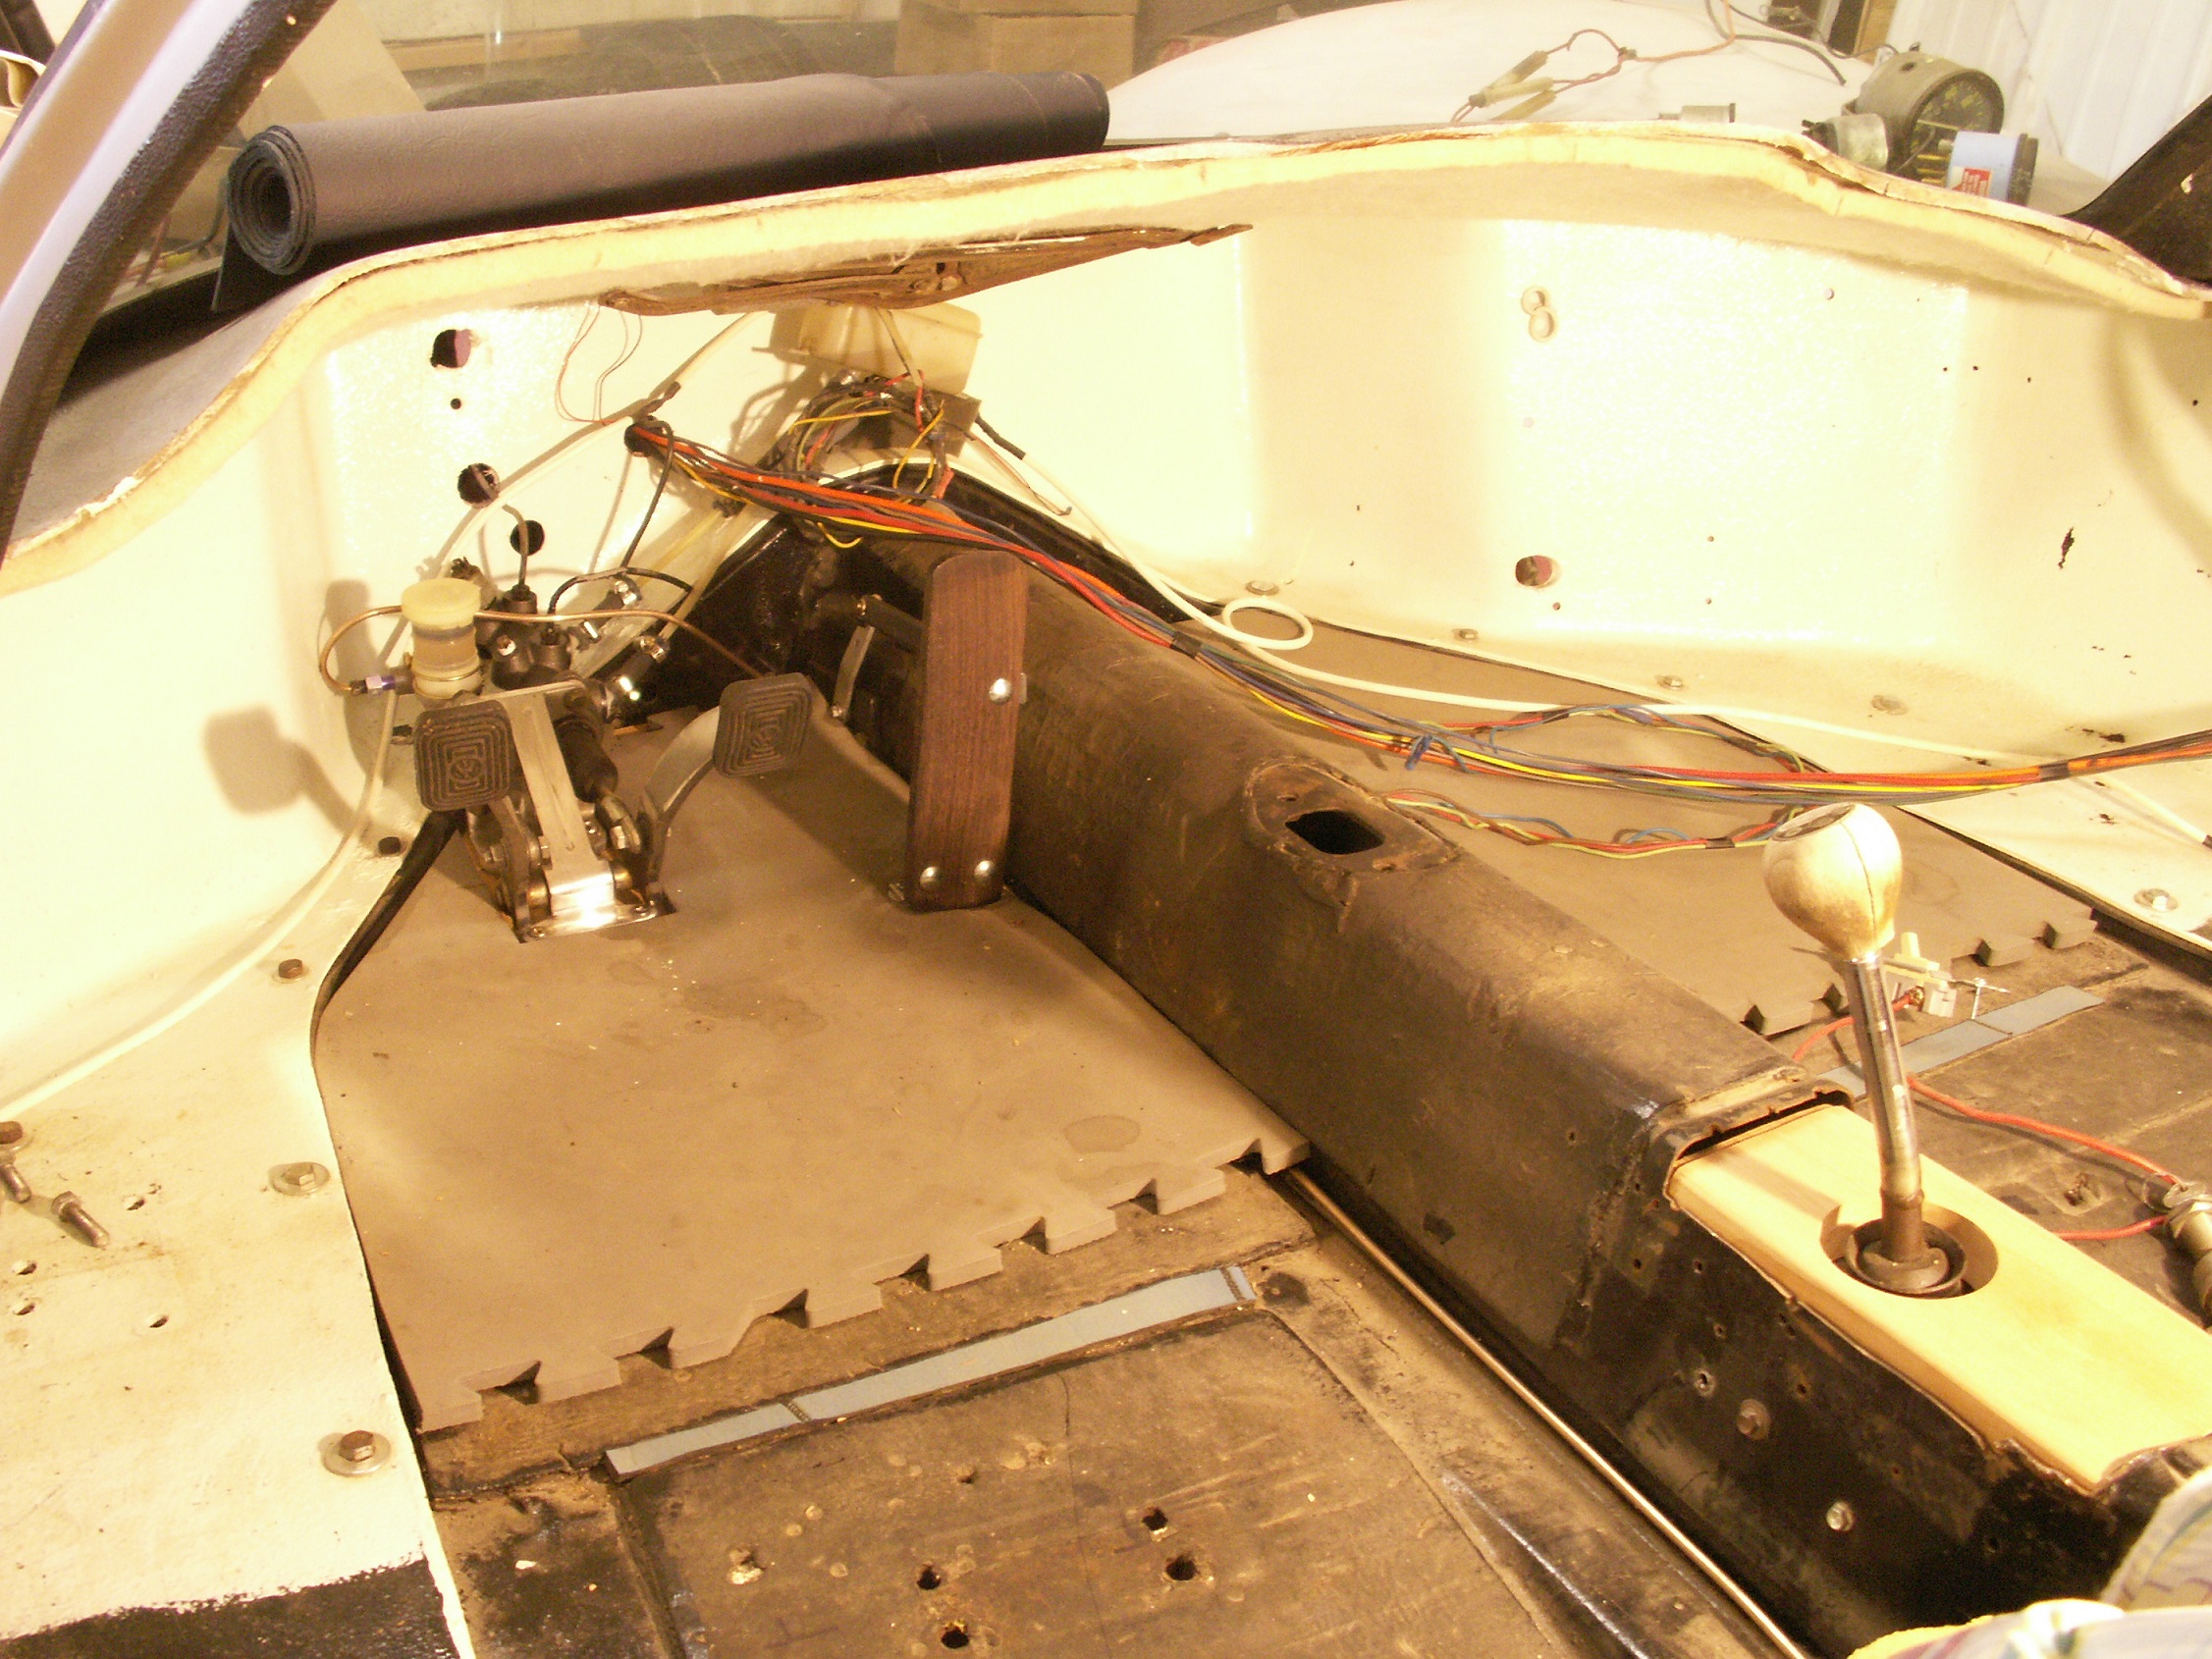
New clutch cylinders and line (check), Gas peddle and linkage (check),
All new brake cylinders, lines and hoses. (waiting for final parts for the rear cylinders).
Once that is done I can reinstall the front roll bar, dash, steering column and finish wiring.
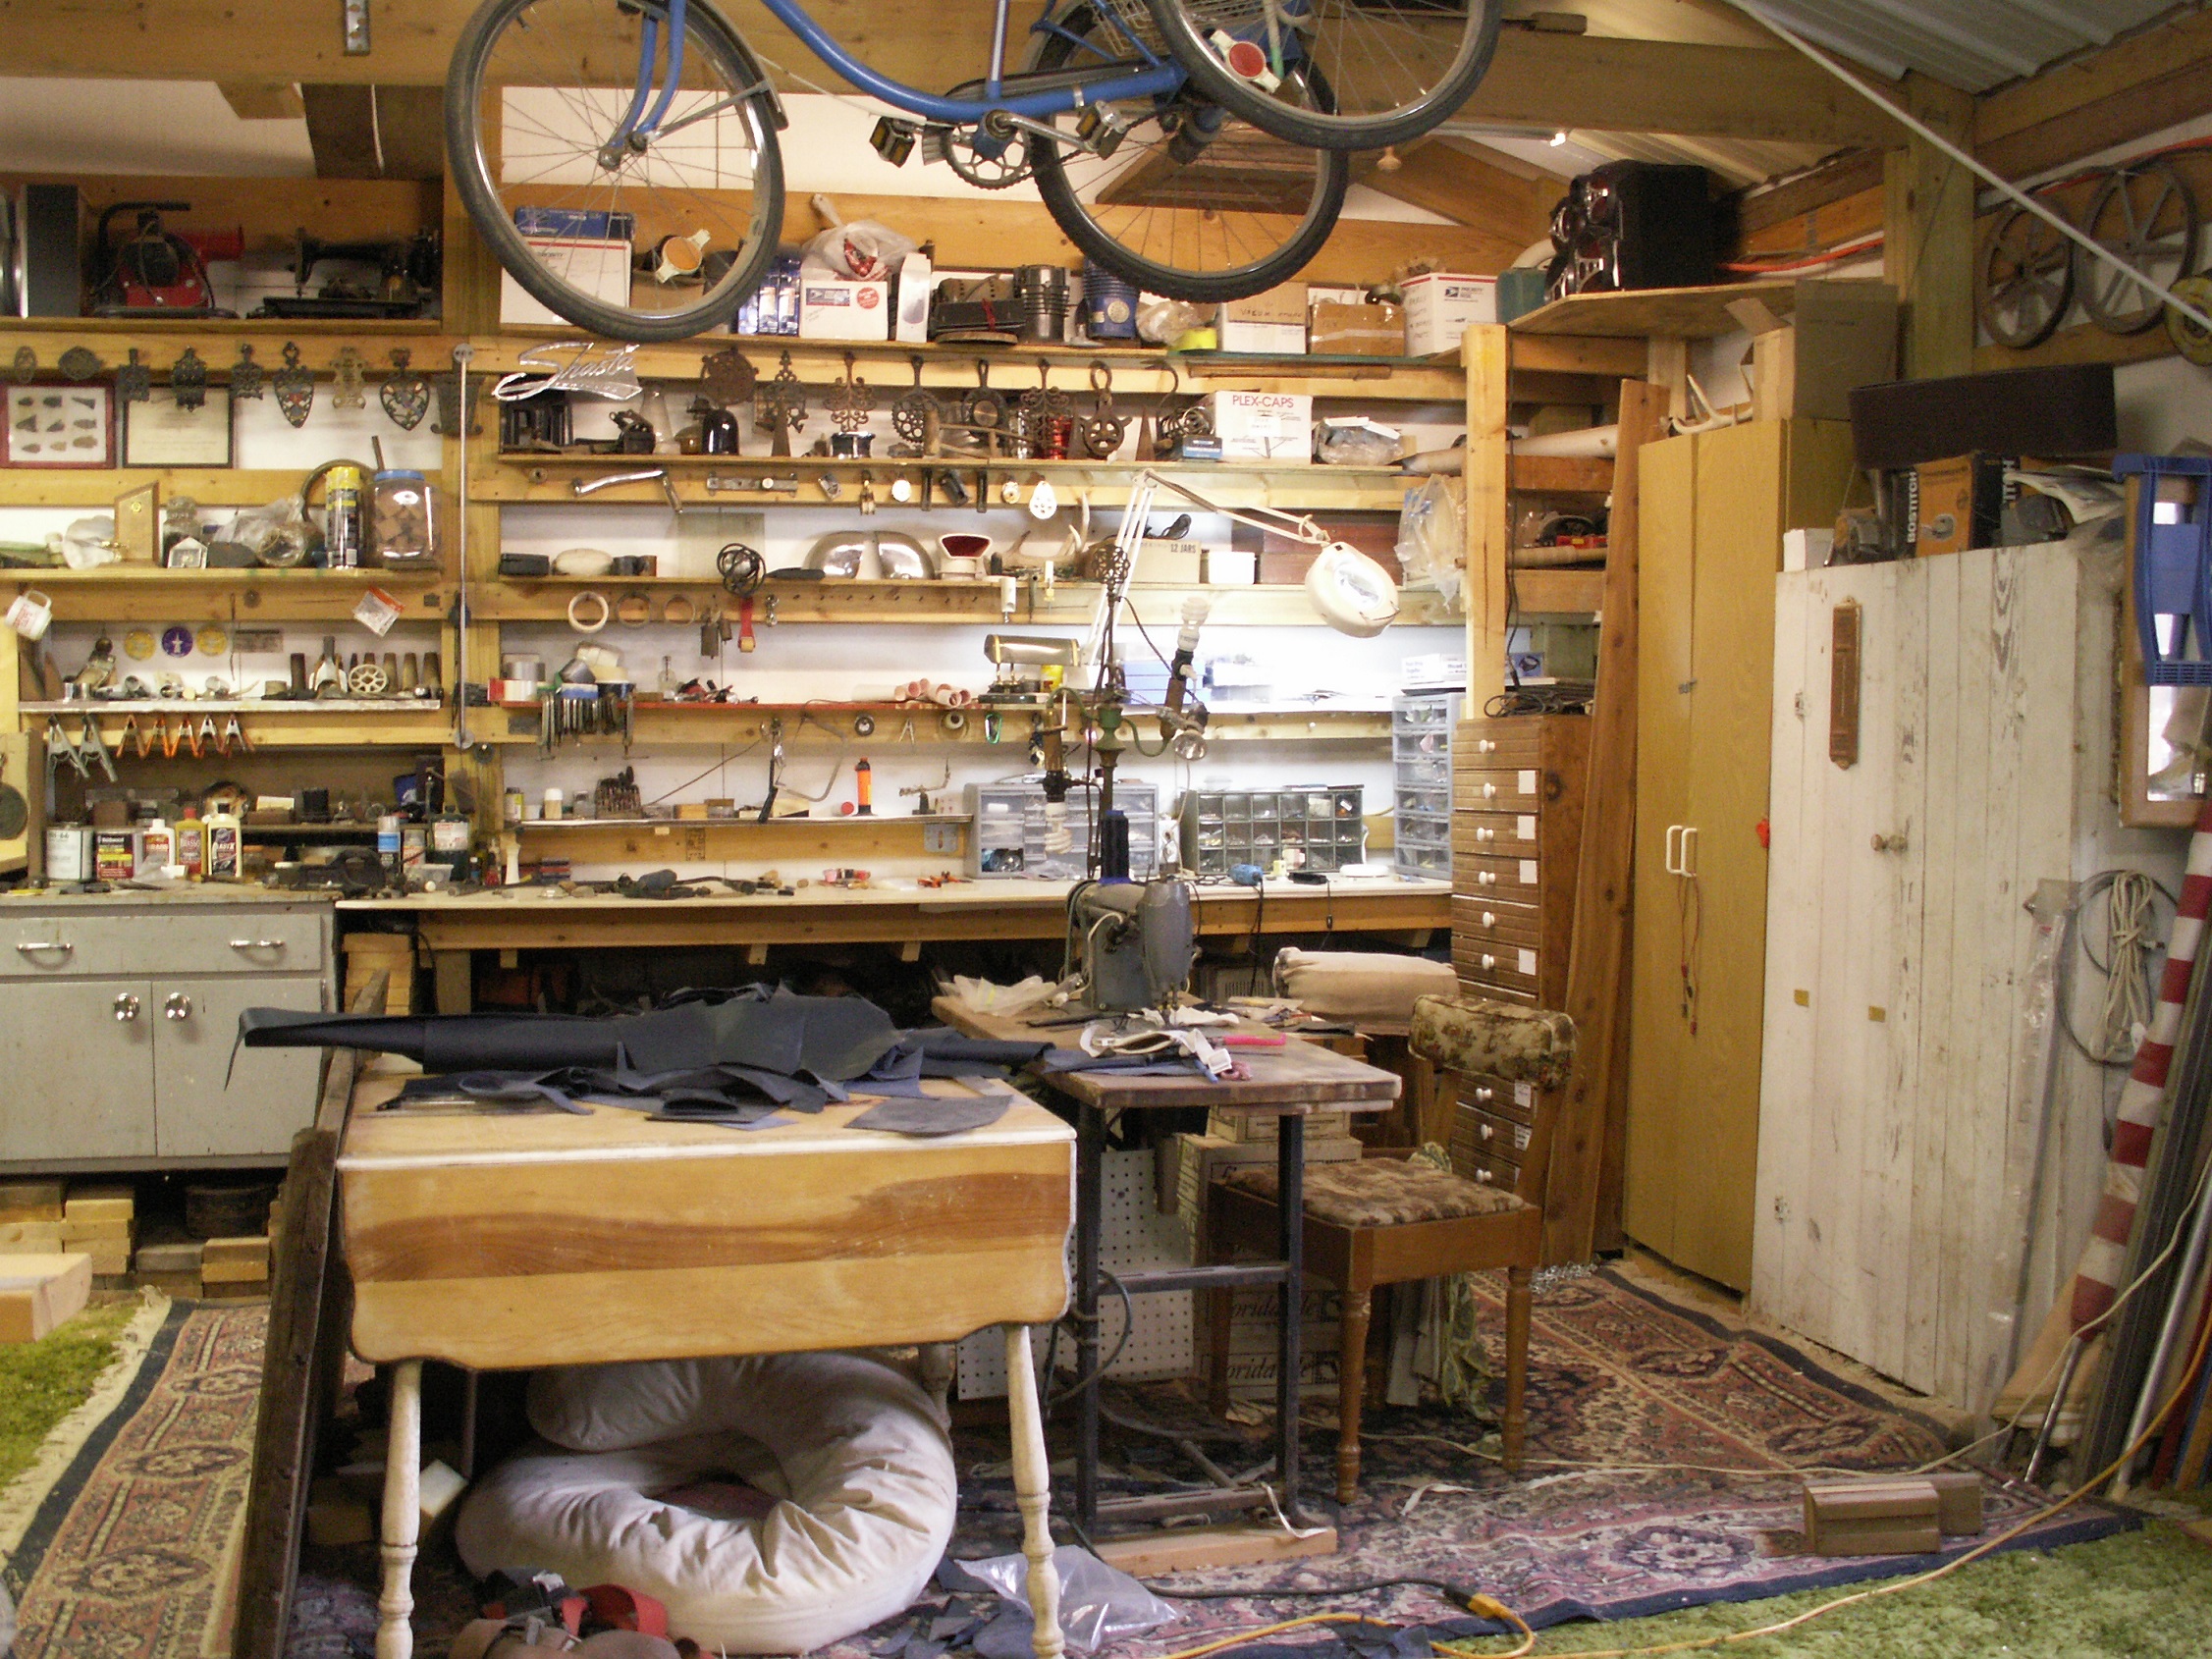
Meanwhile we re-setup the corner of the shop,
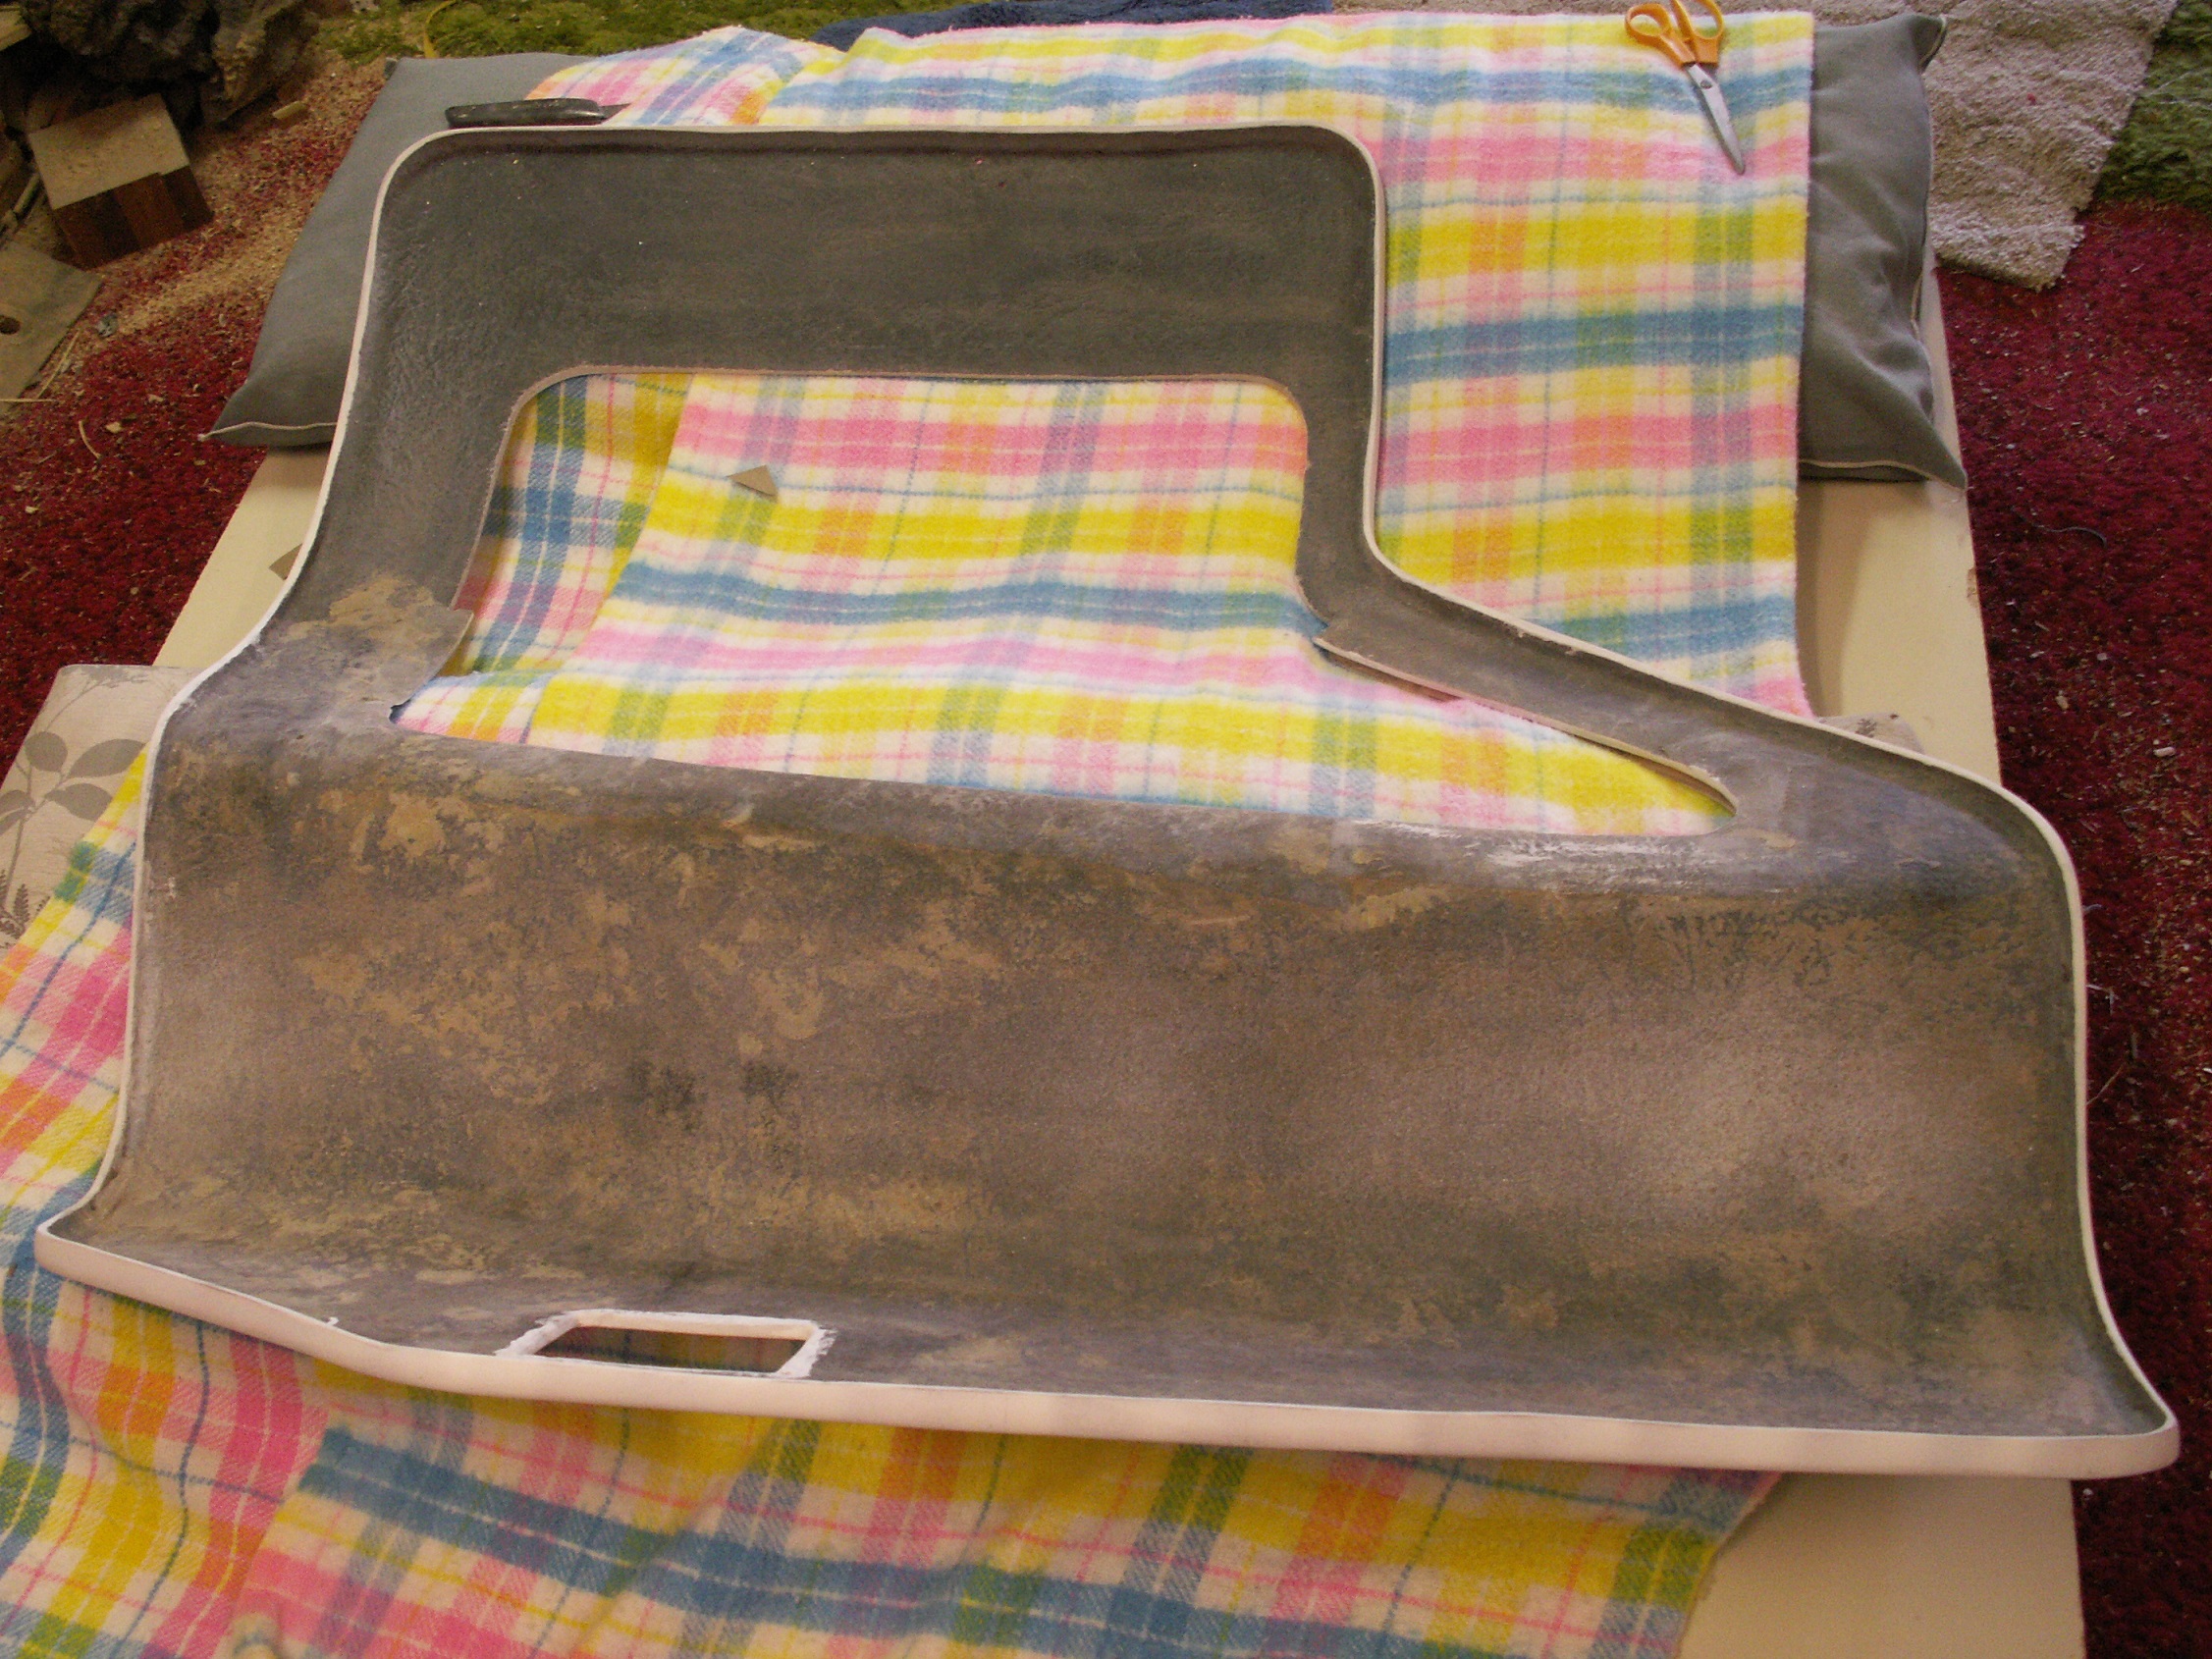
And started the new seats in Navy Blue leather.
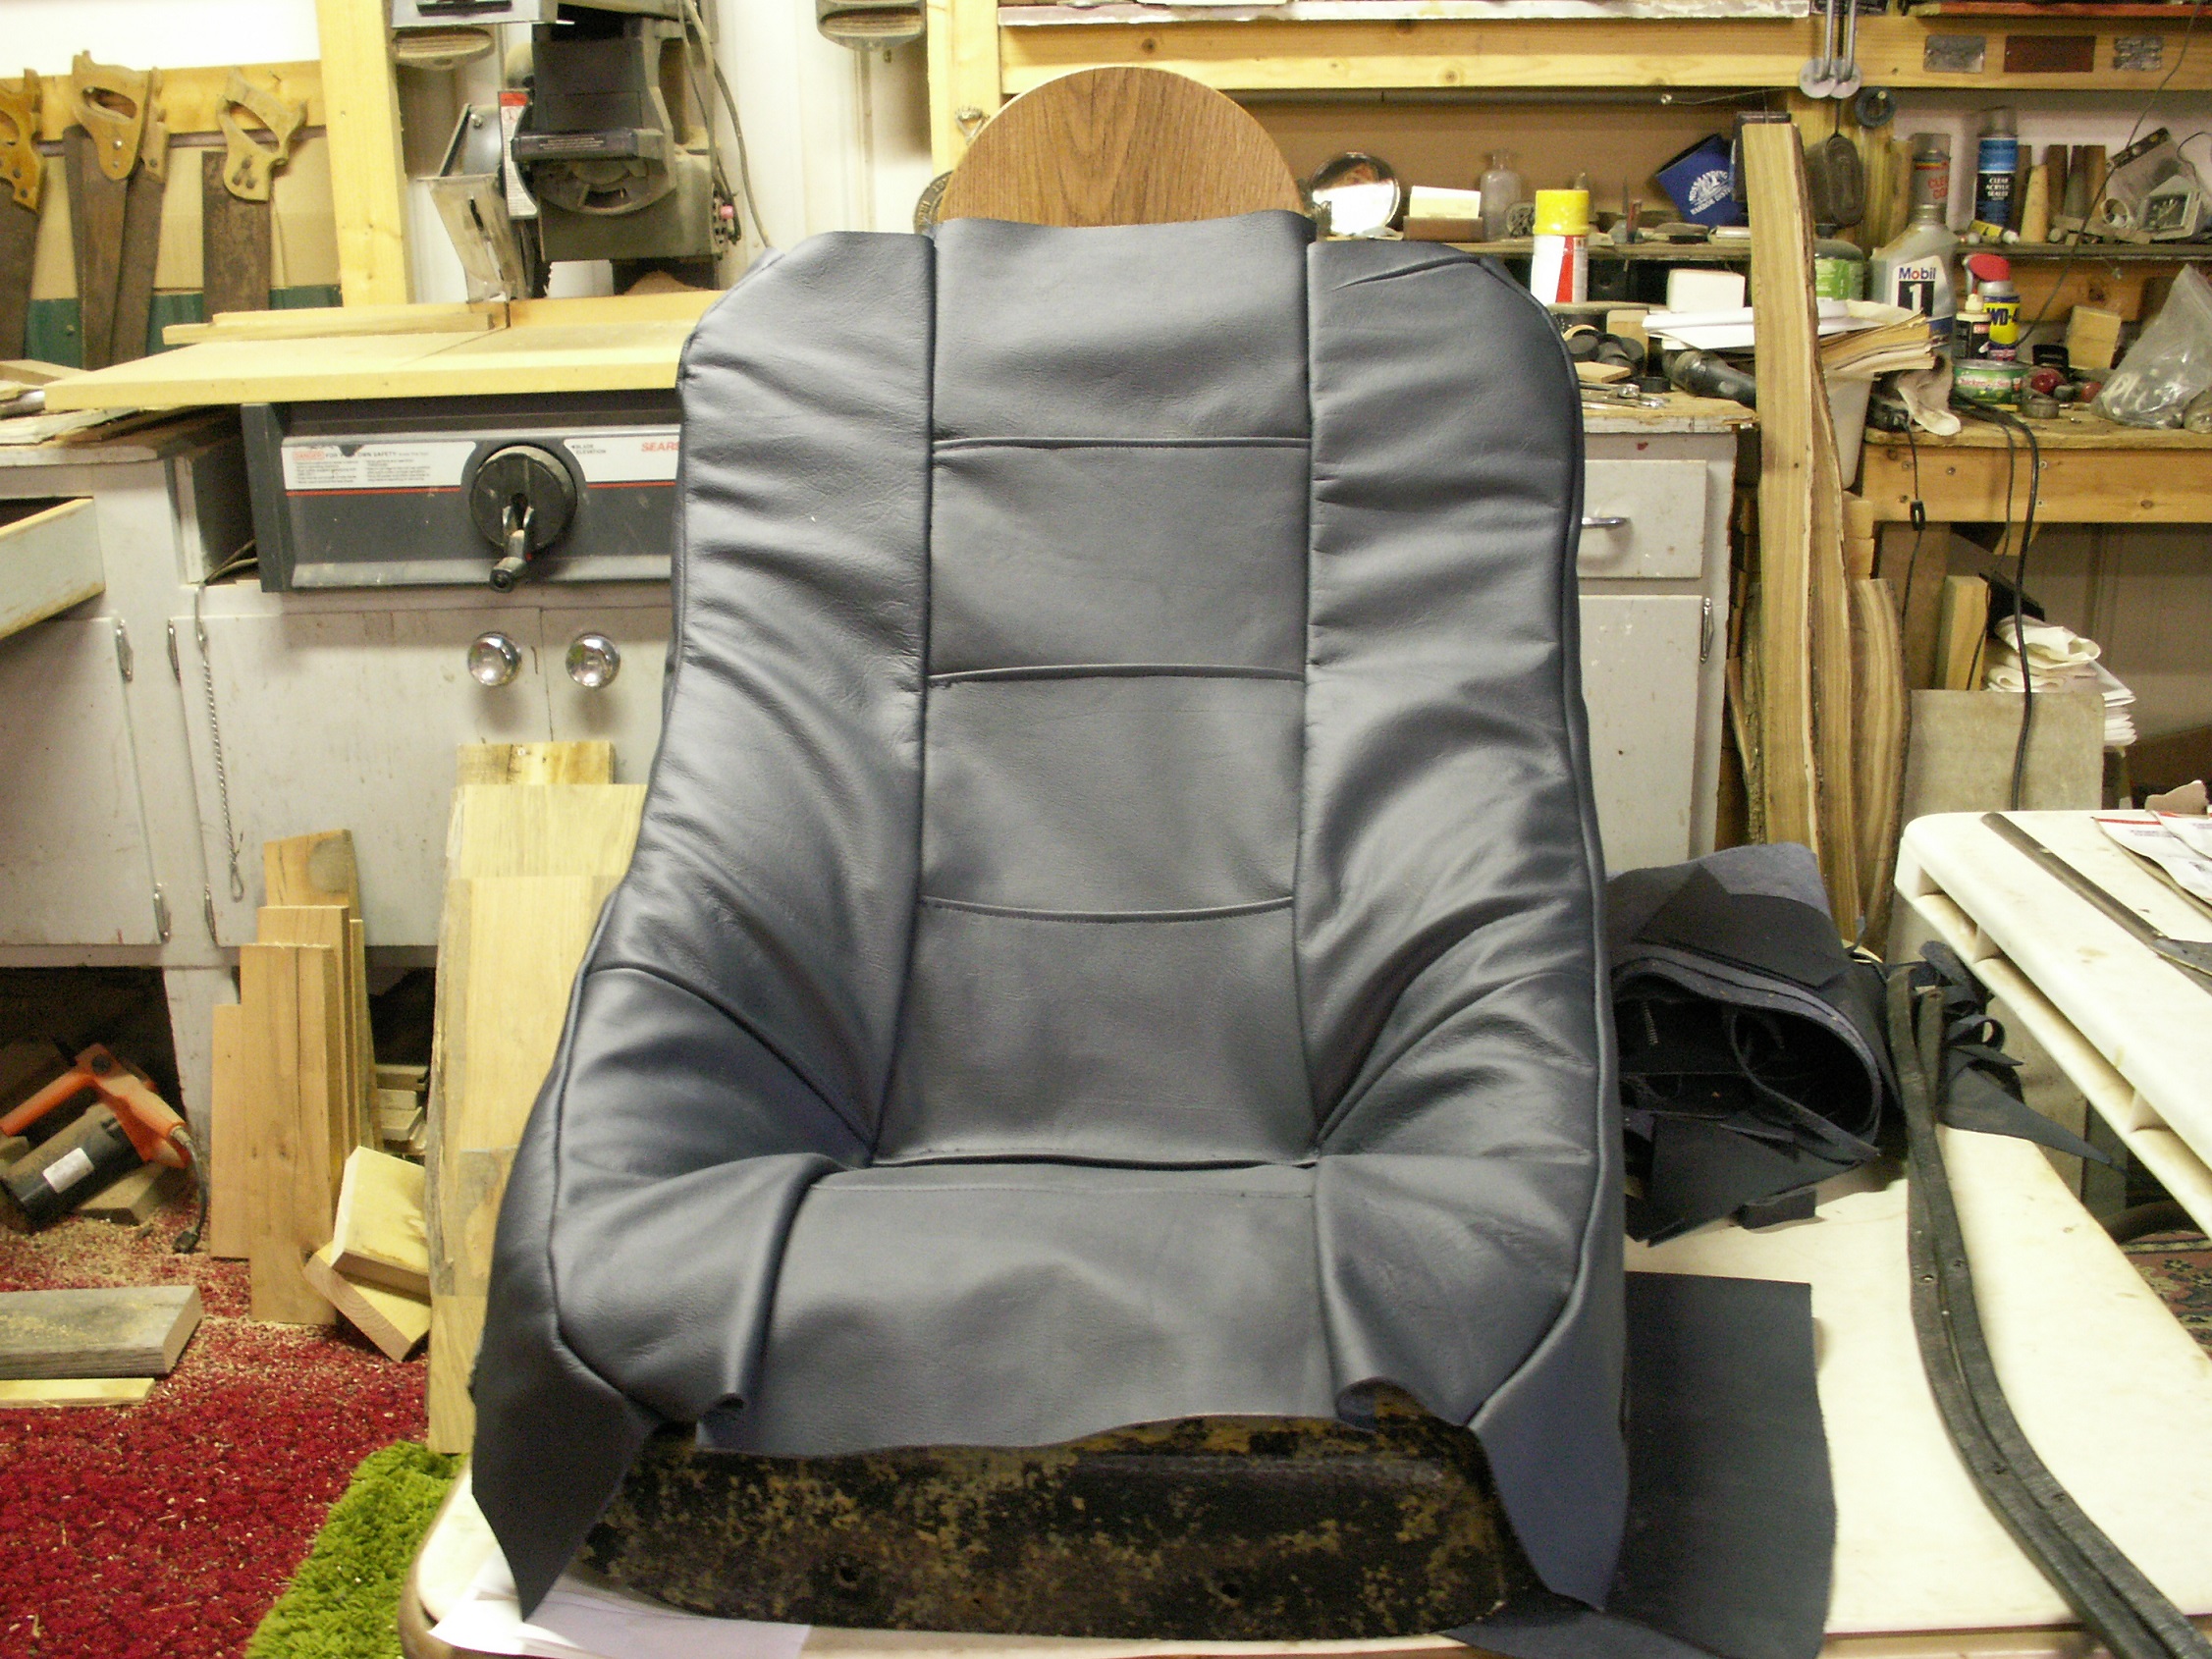
Not real happy with the headrest, think we will redesign them.

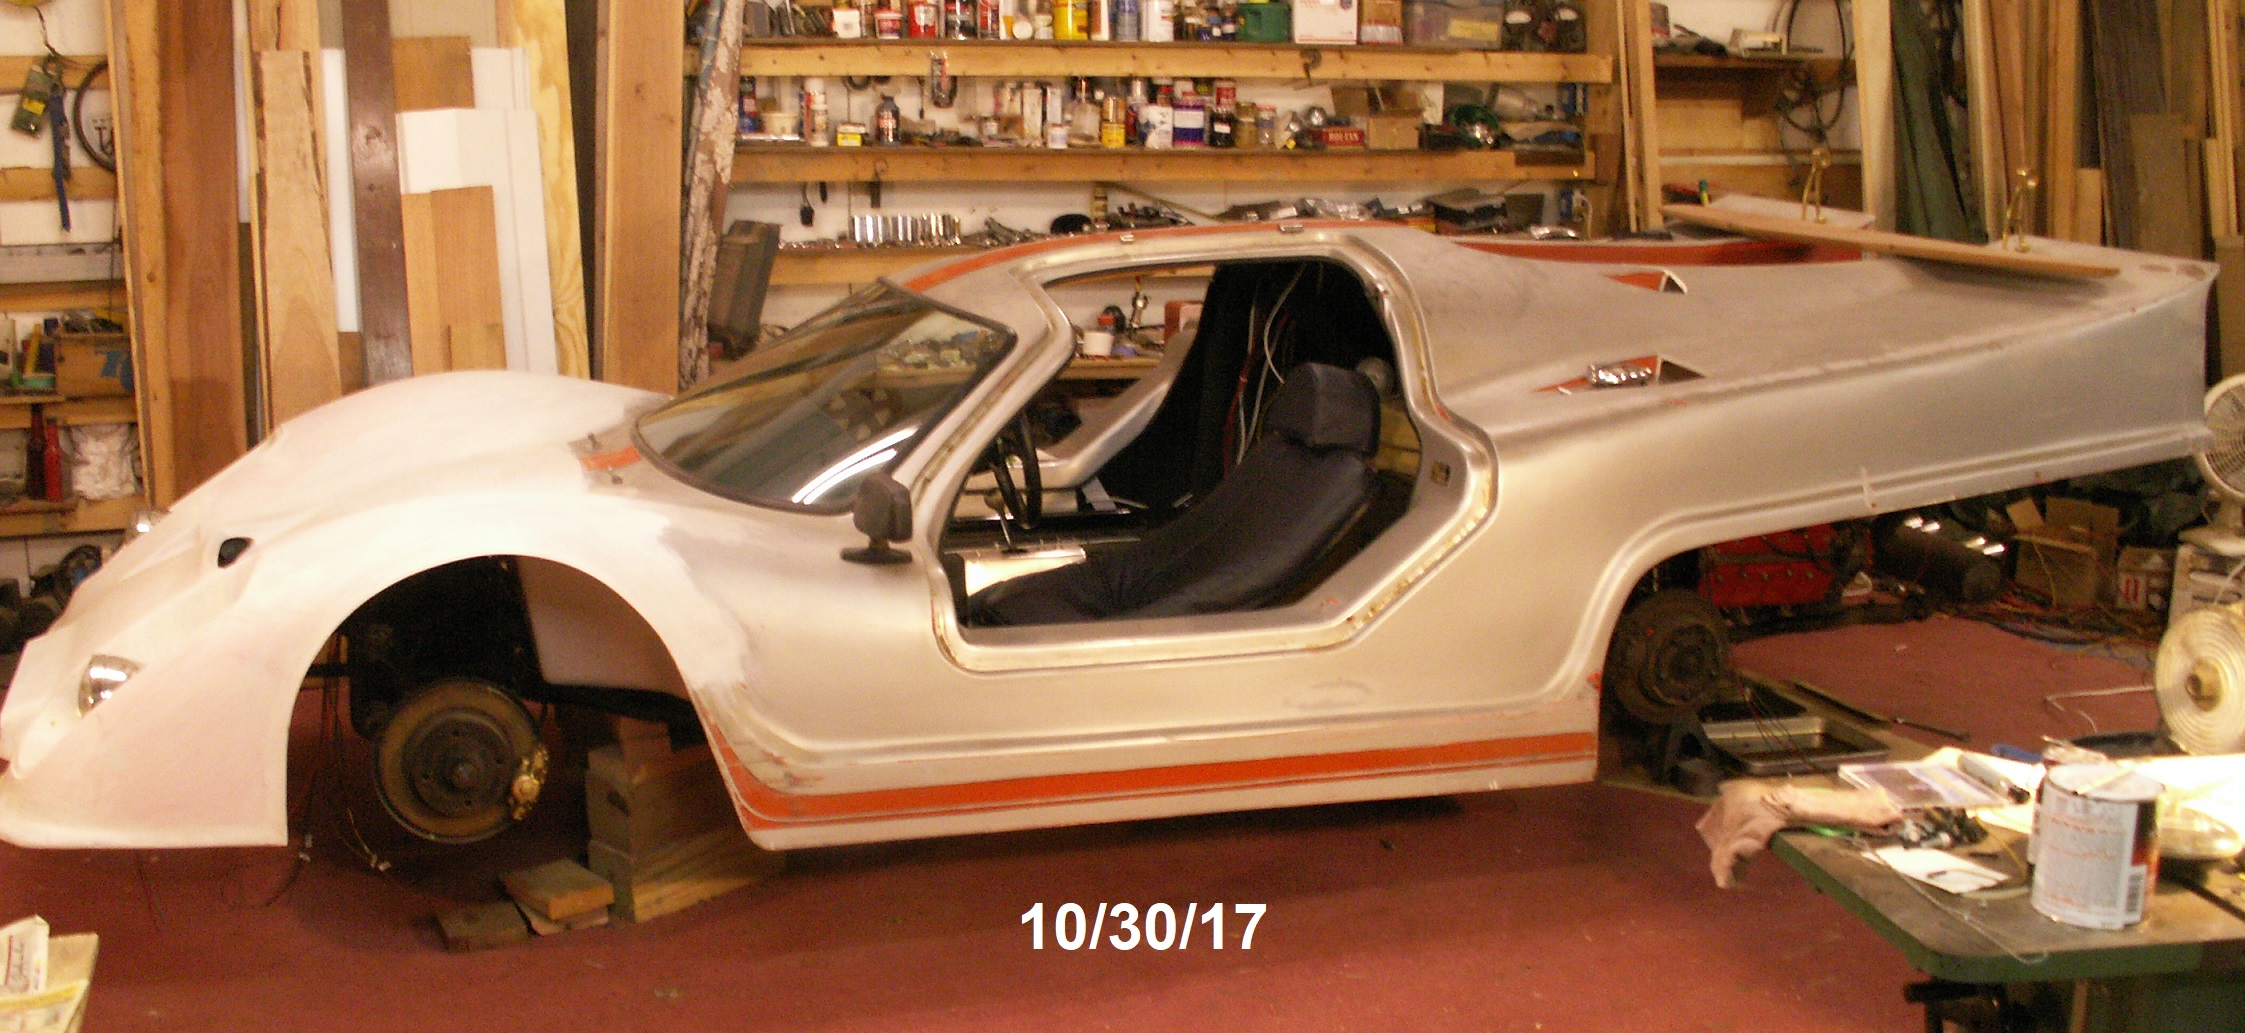
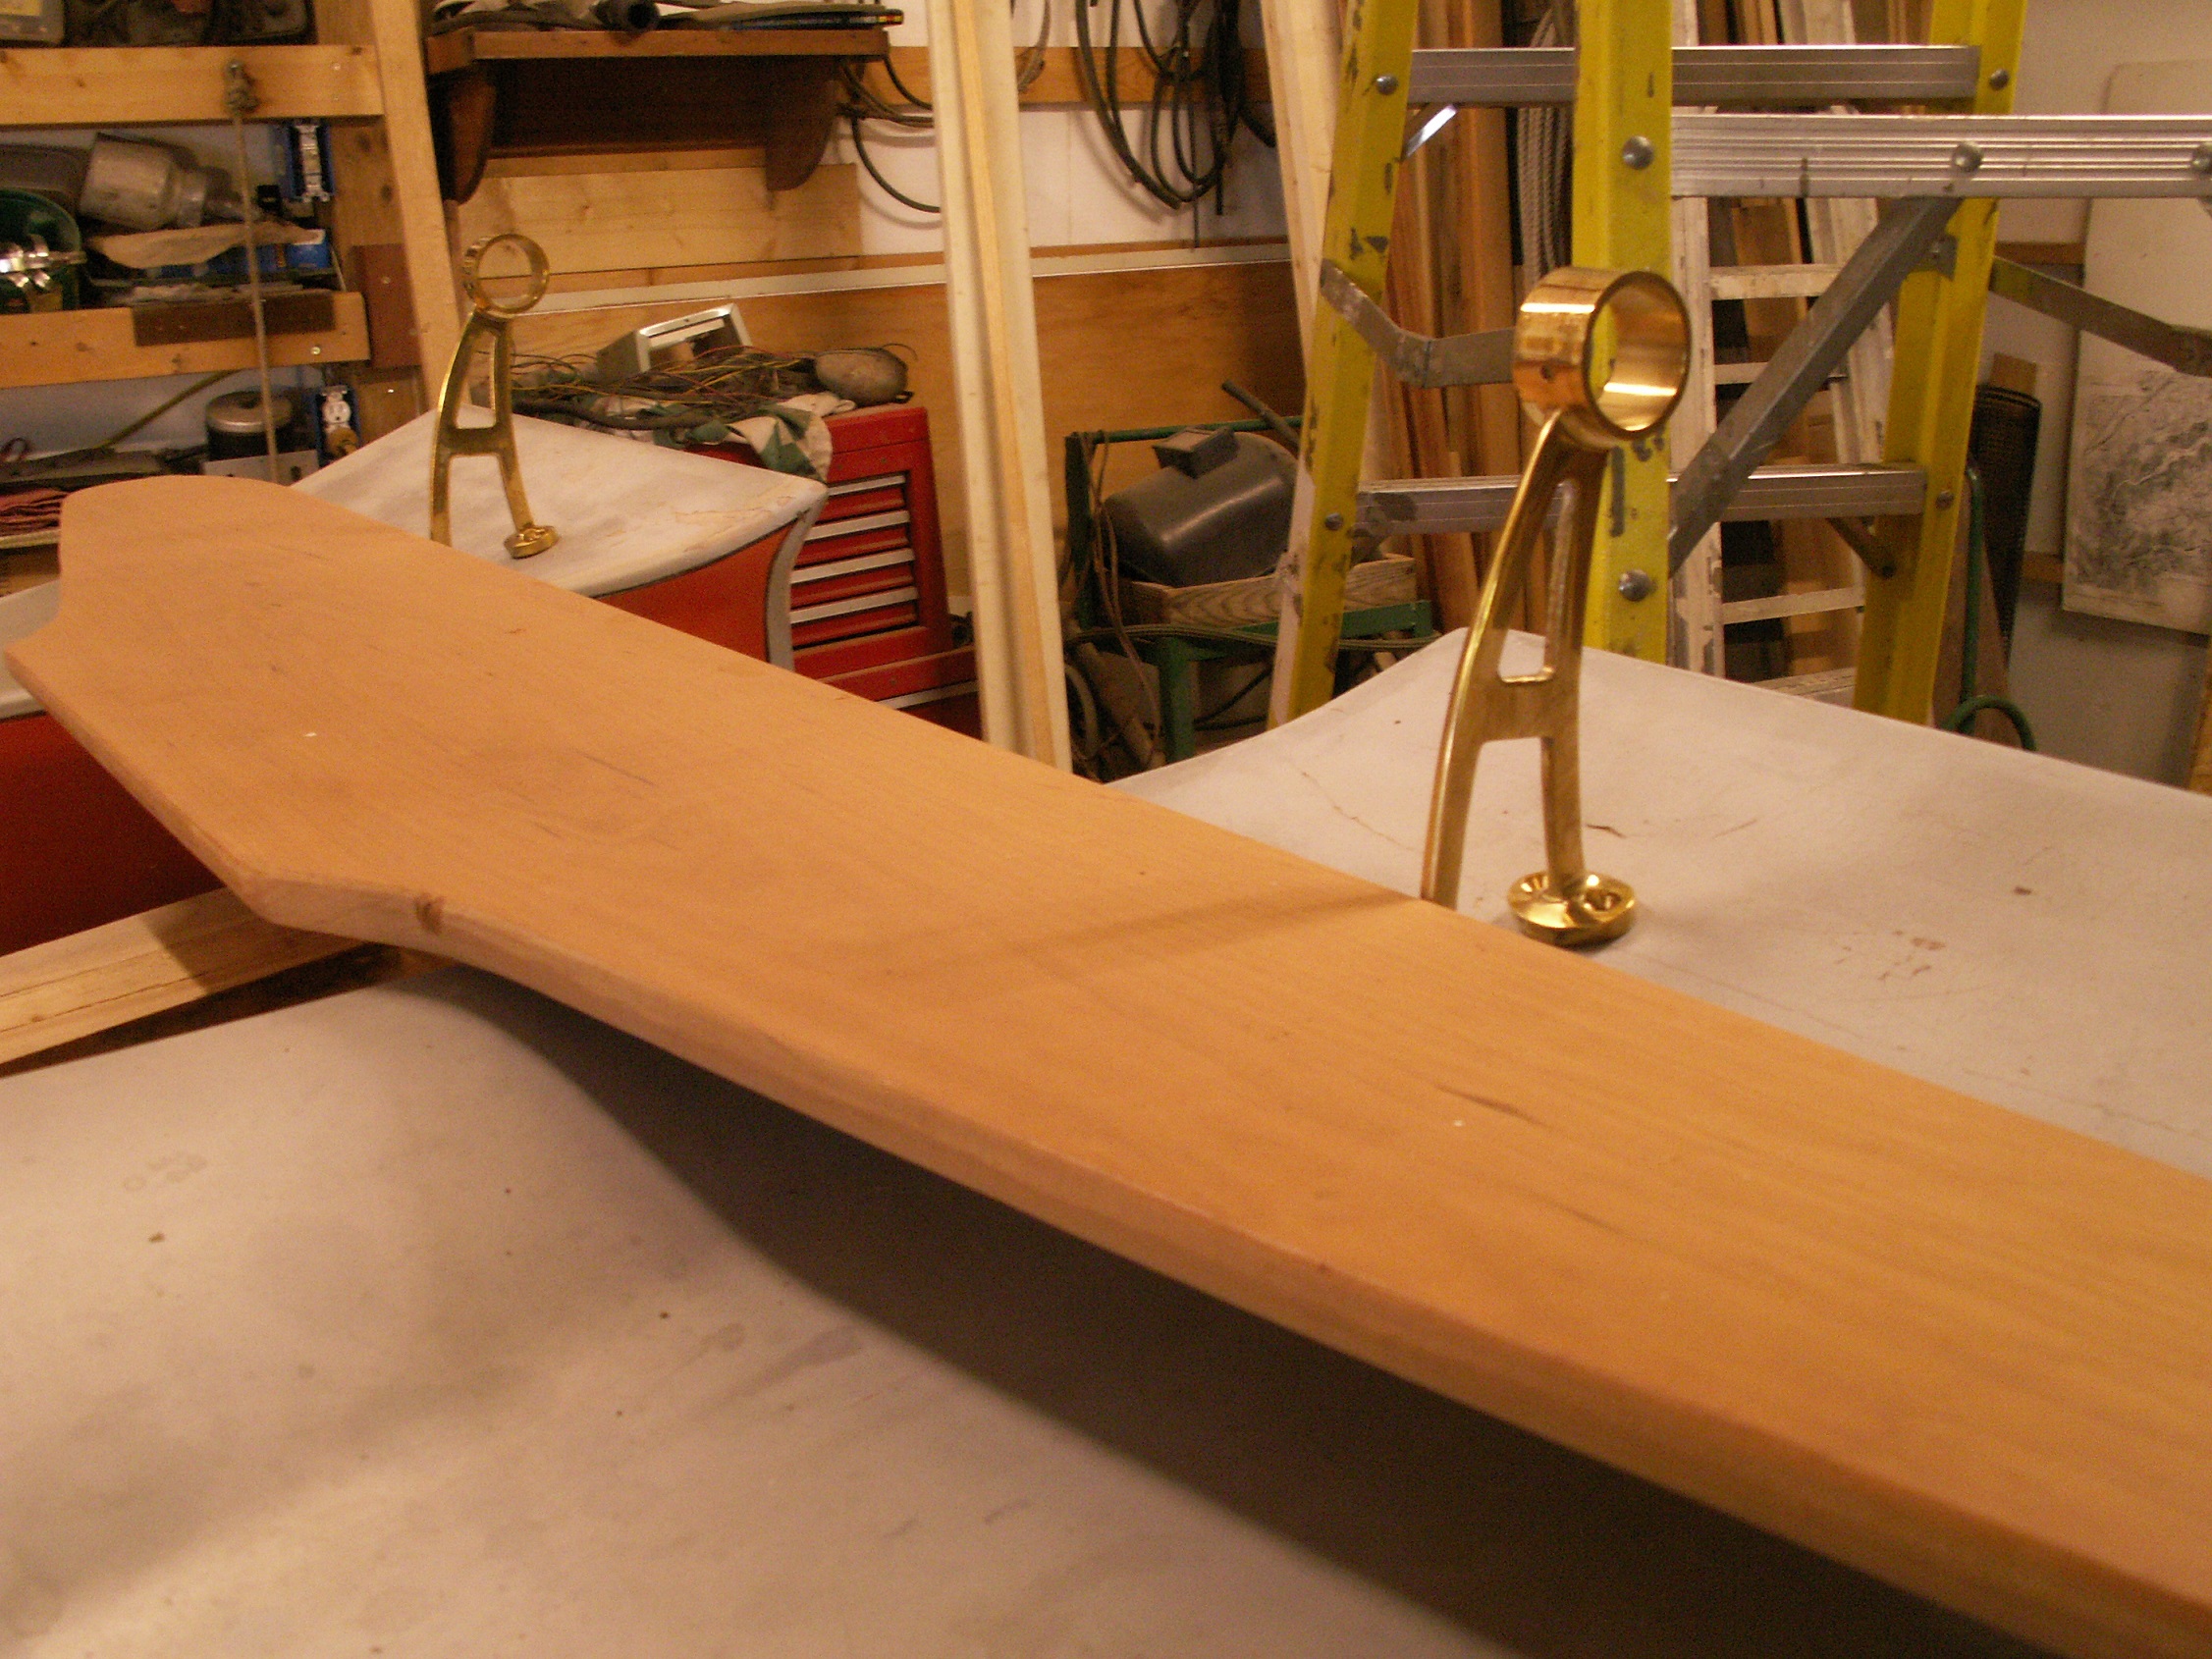
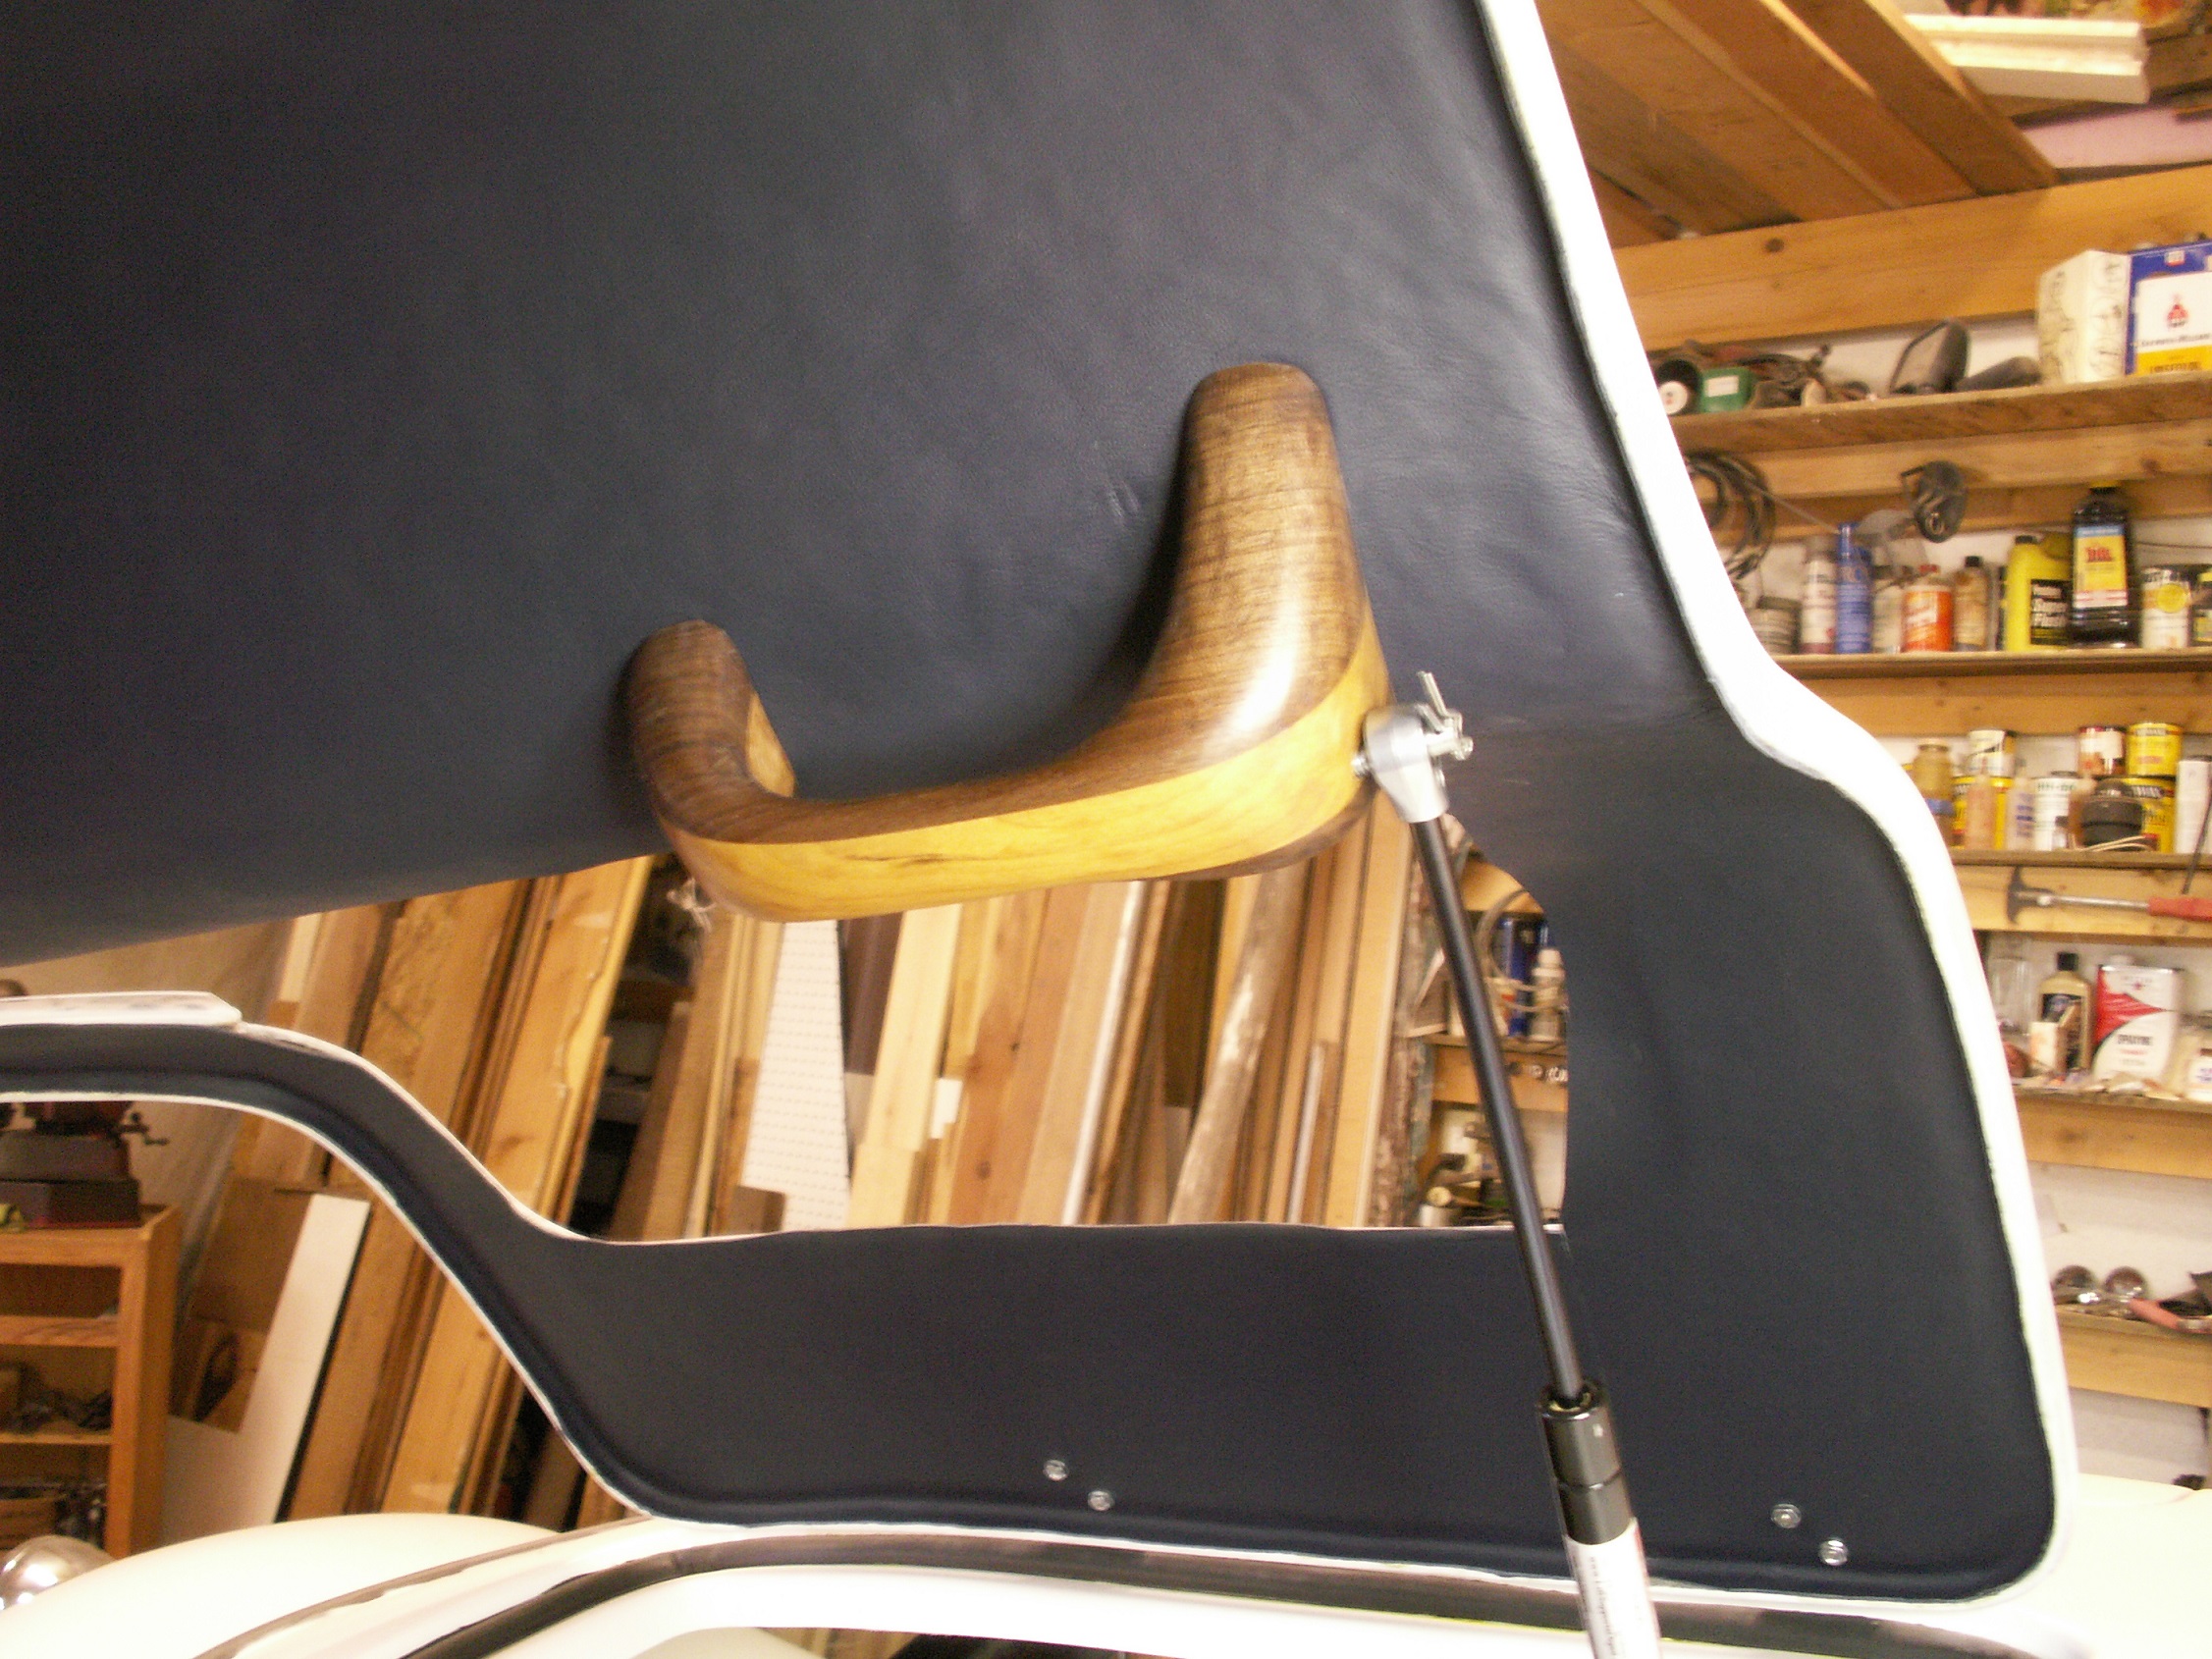
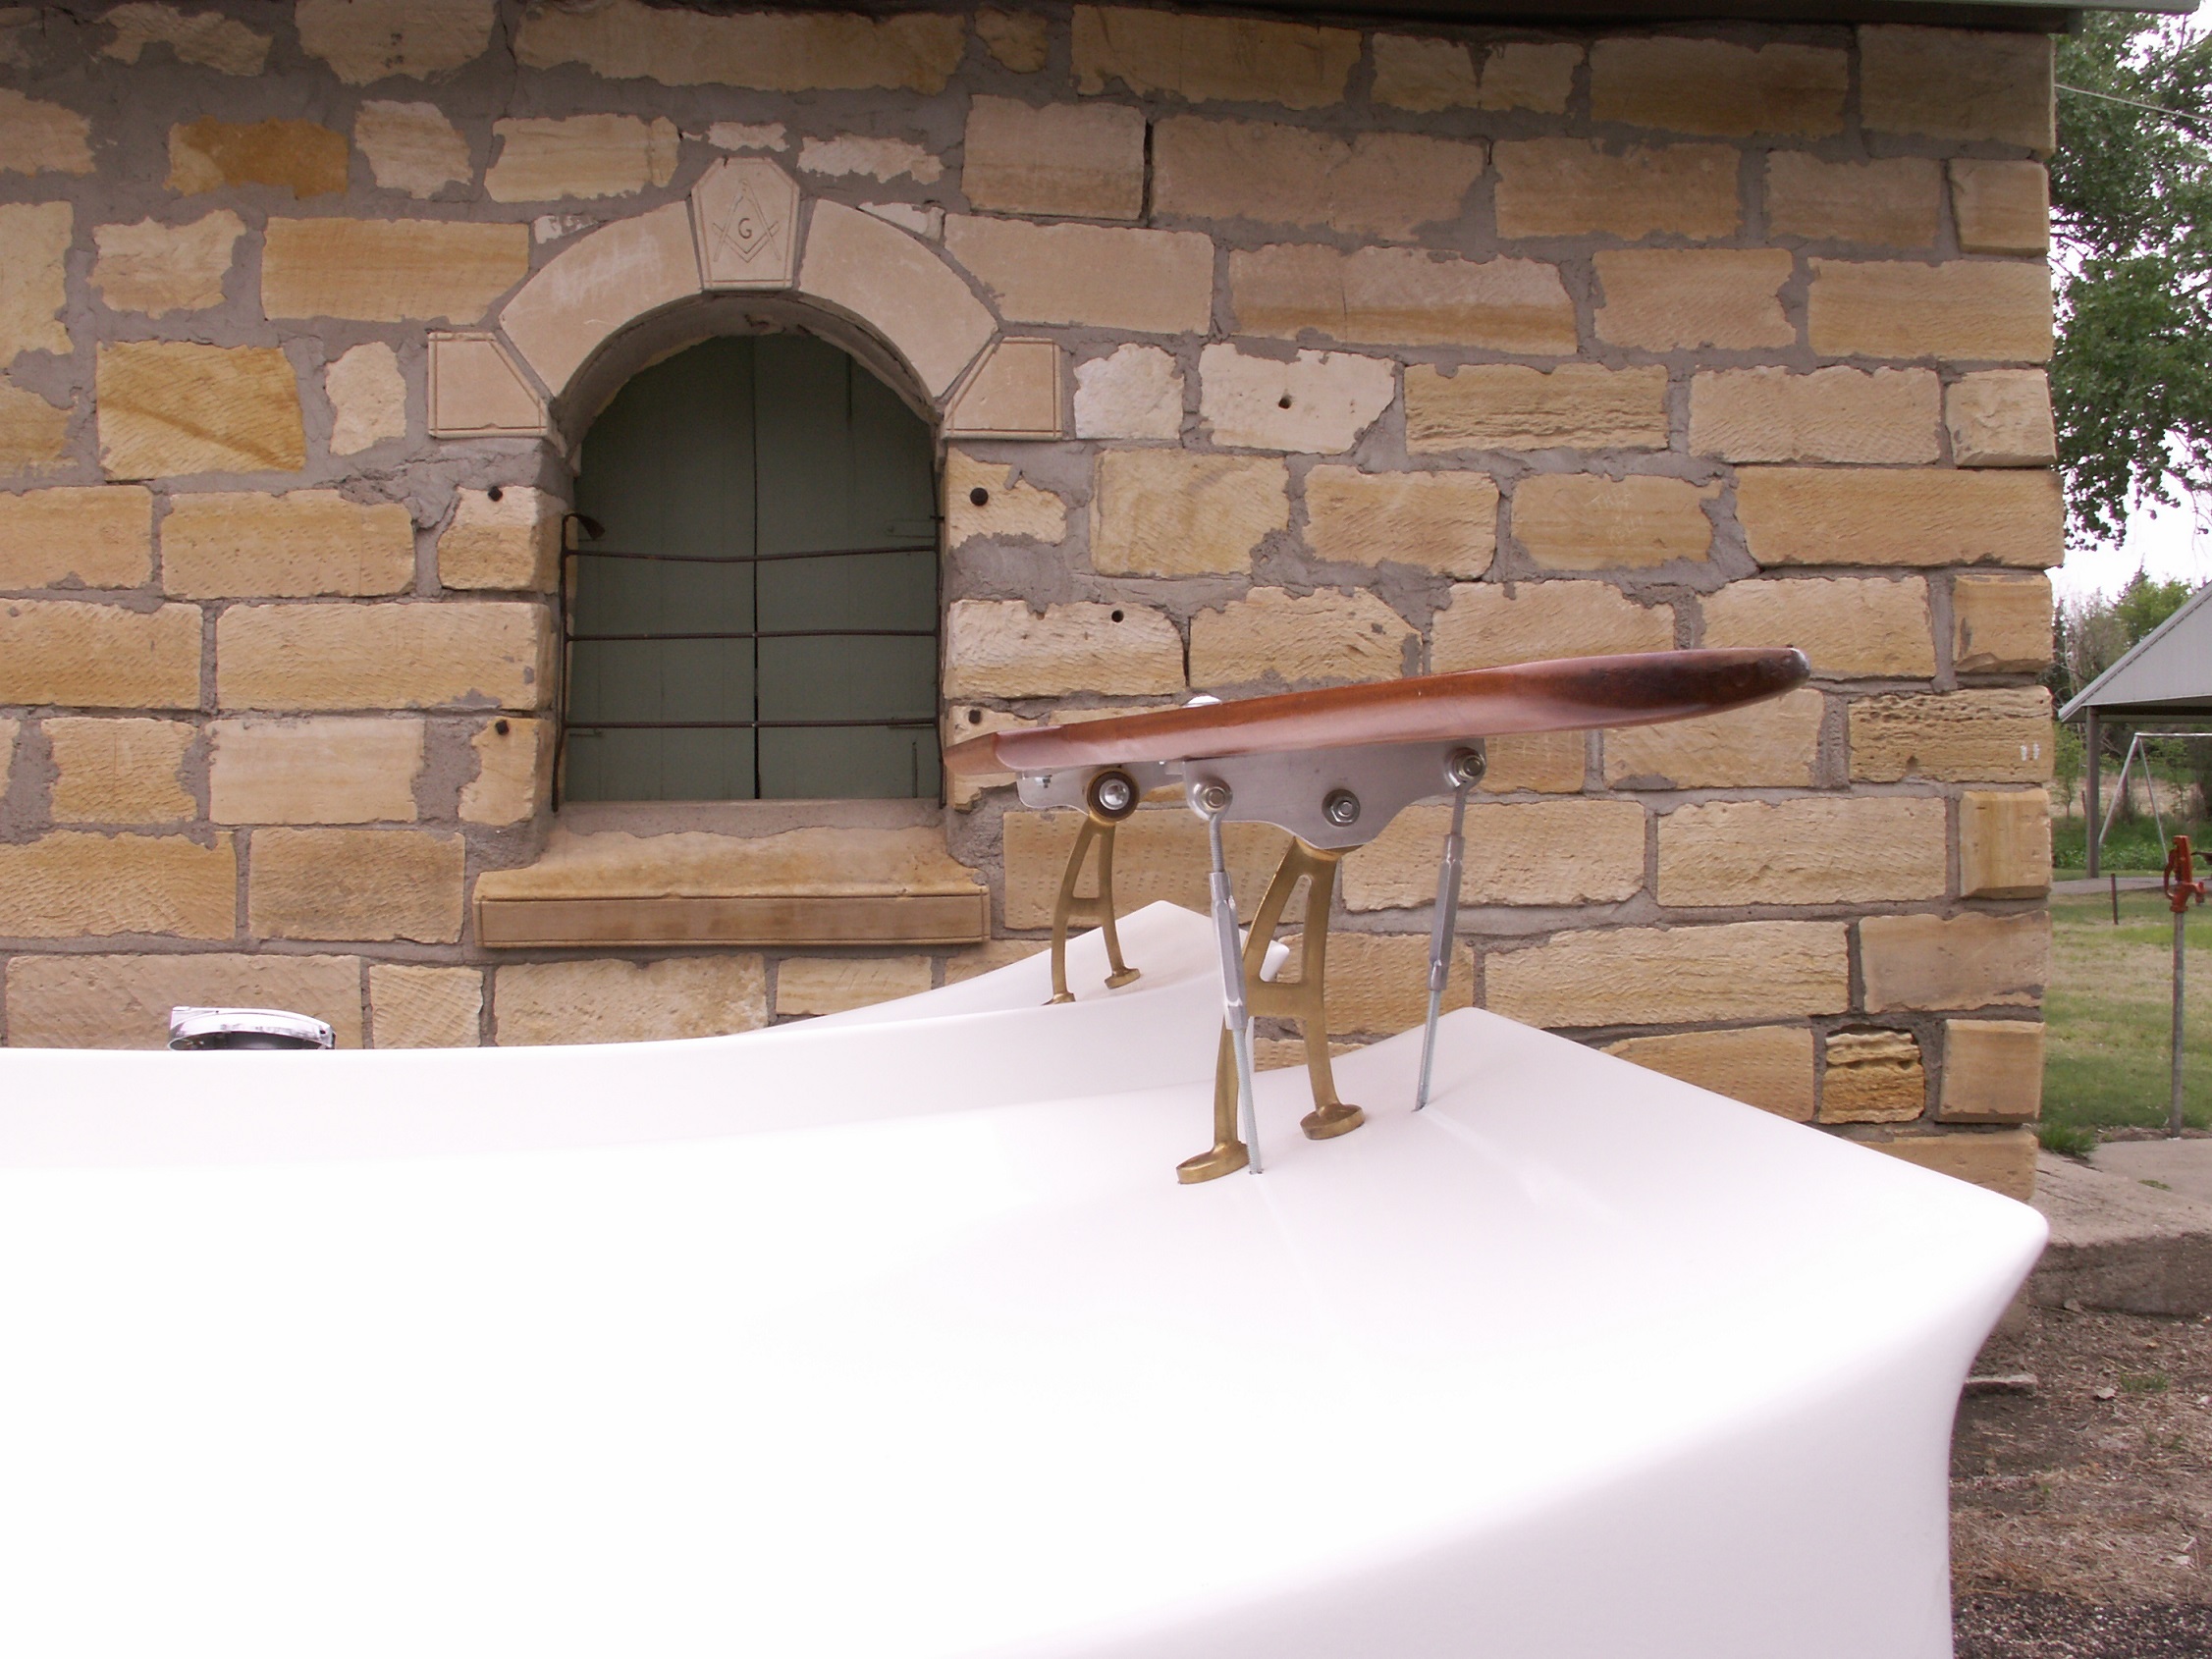
Got the mounts for the rear spoiler. Going with an inverted wing design connected to a lever in the cockpit to go from down-force to brake. The wing is cherry of course...
10/30/17
Got the brake and clutch done, moved on to putting in the dash, getting it prewired.
Dash mounted with navy blue leather dash cover. I dropped the gear shift 2 inches...
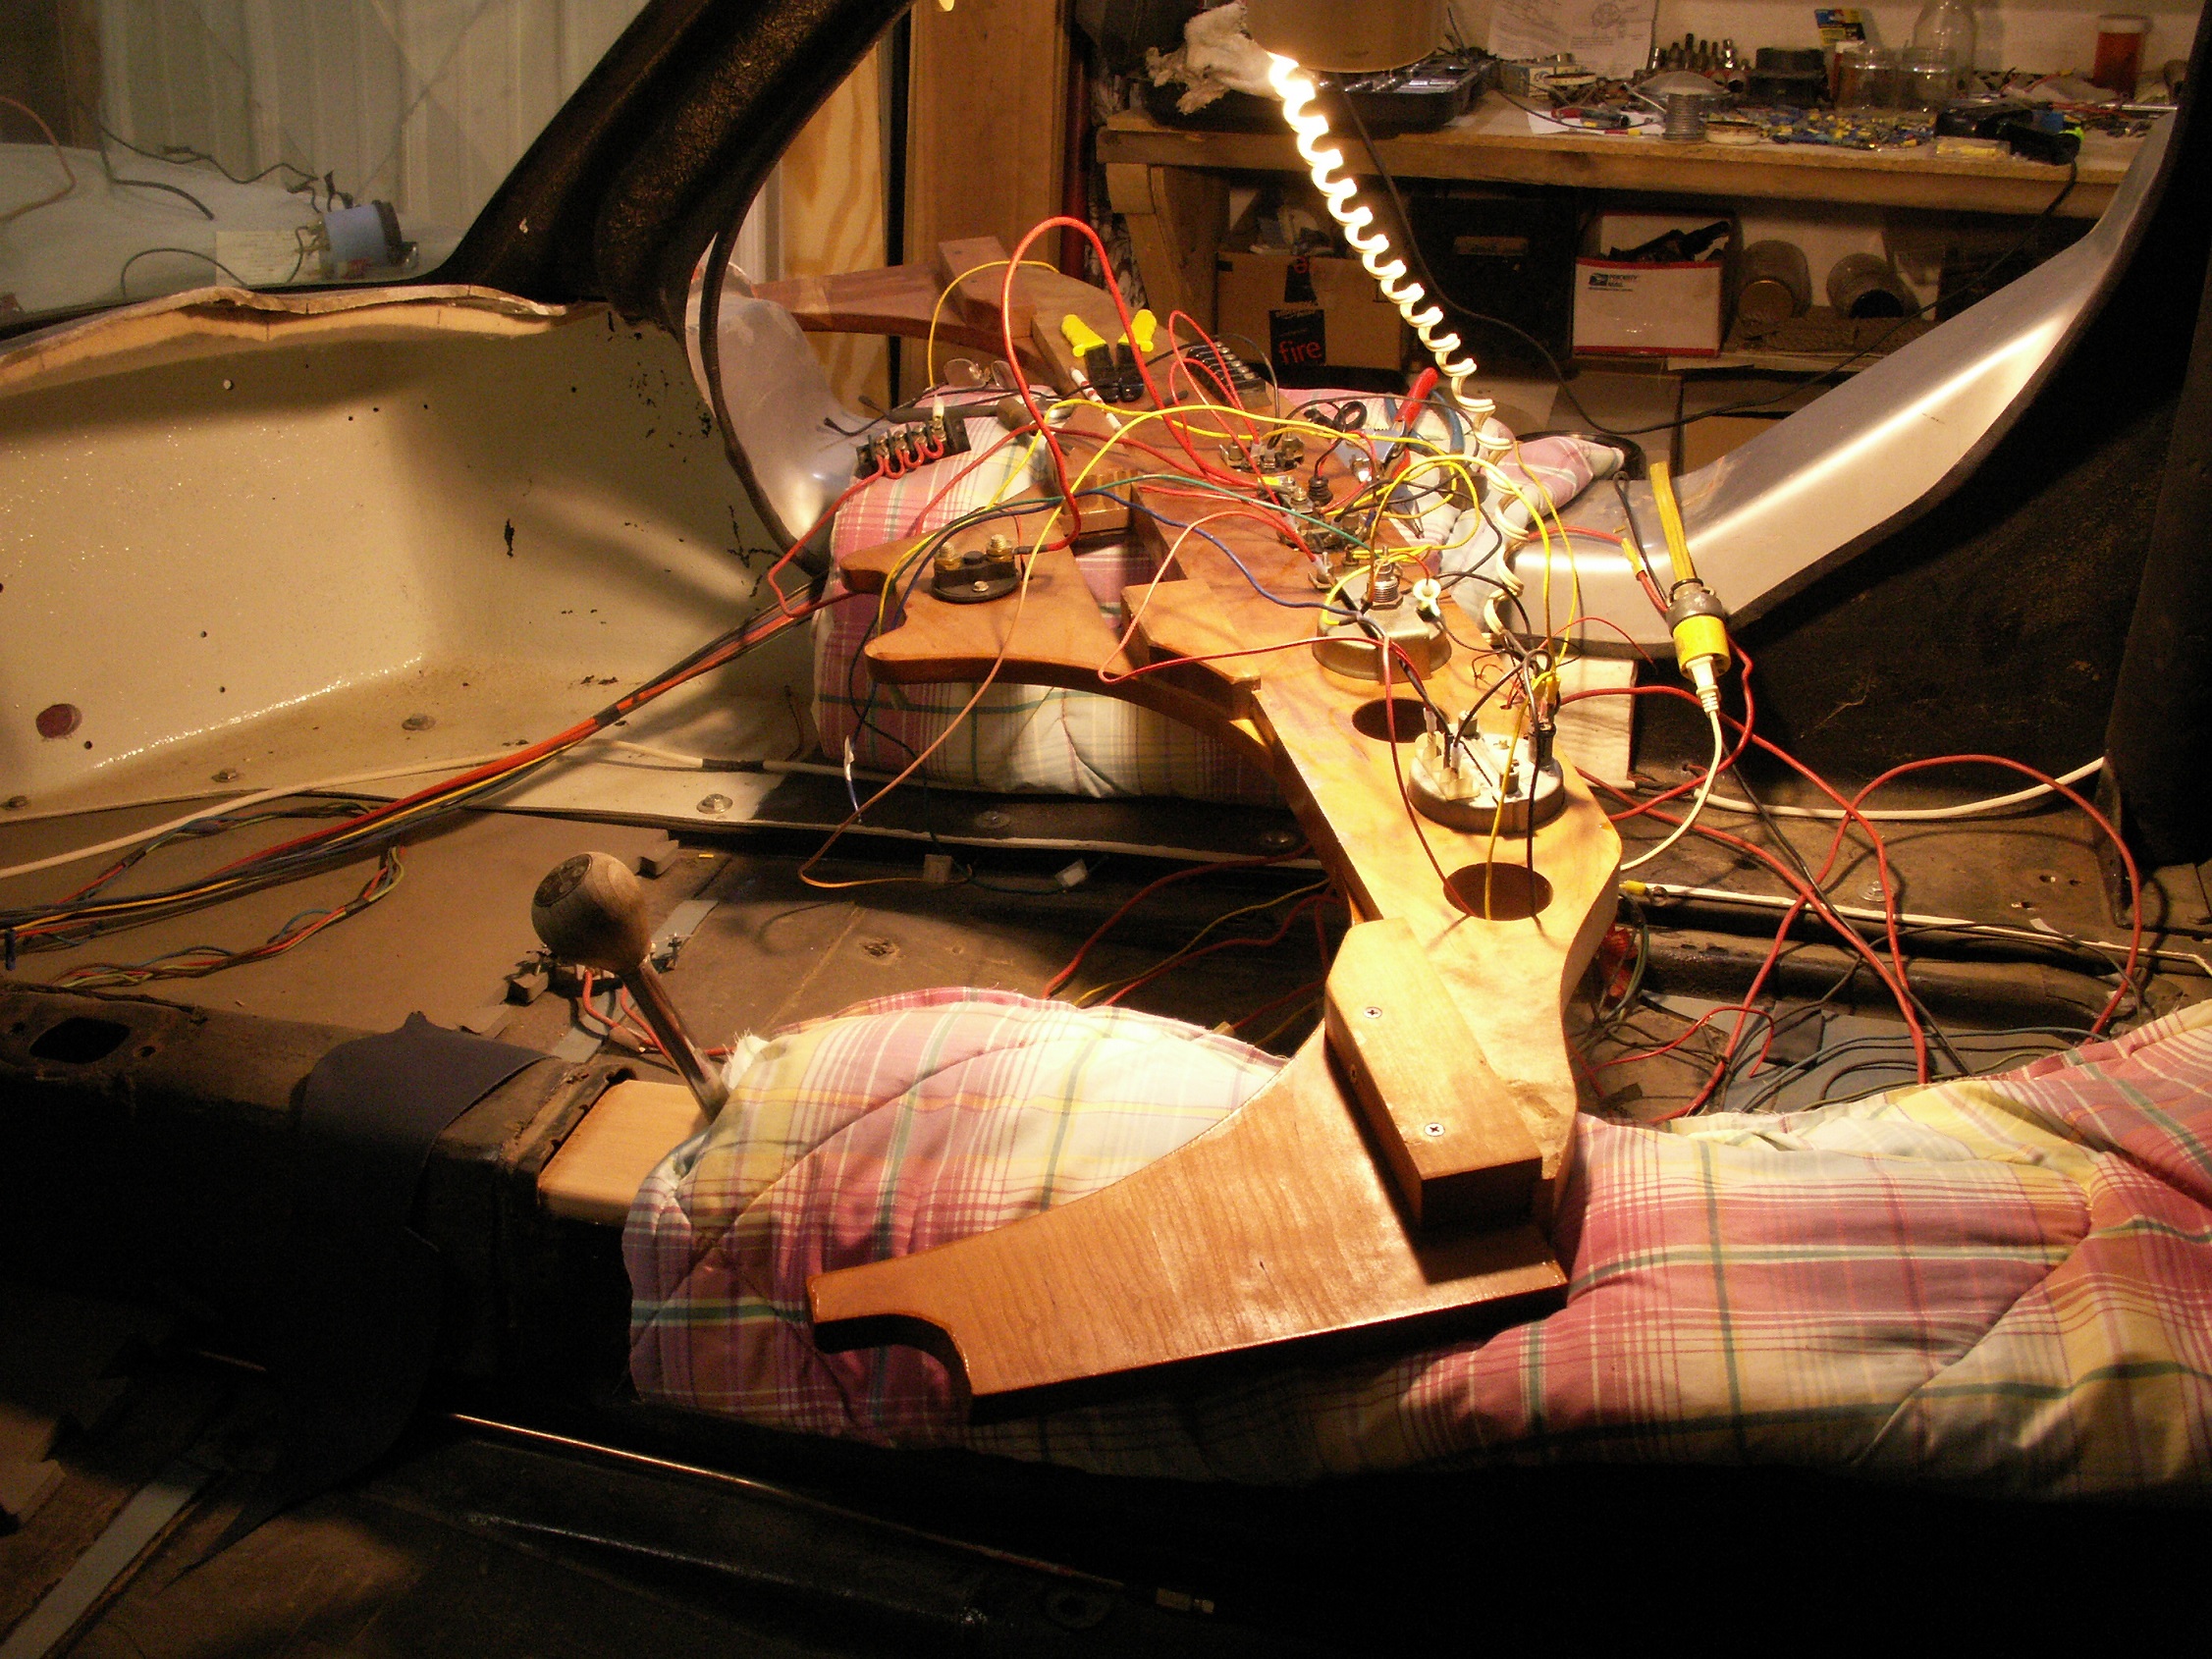
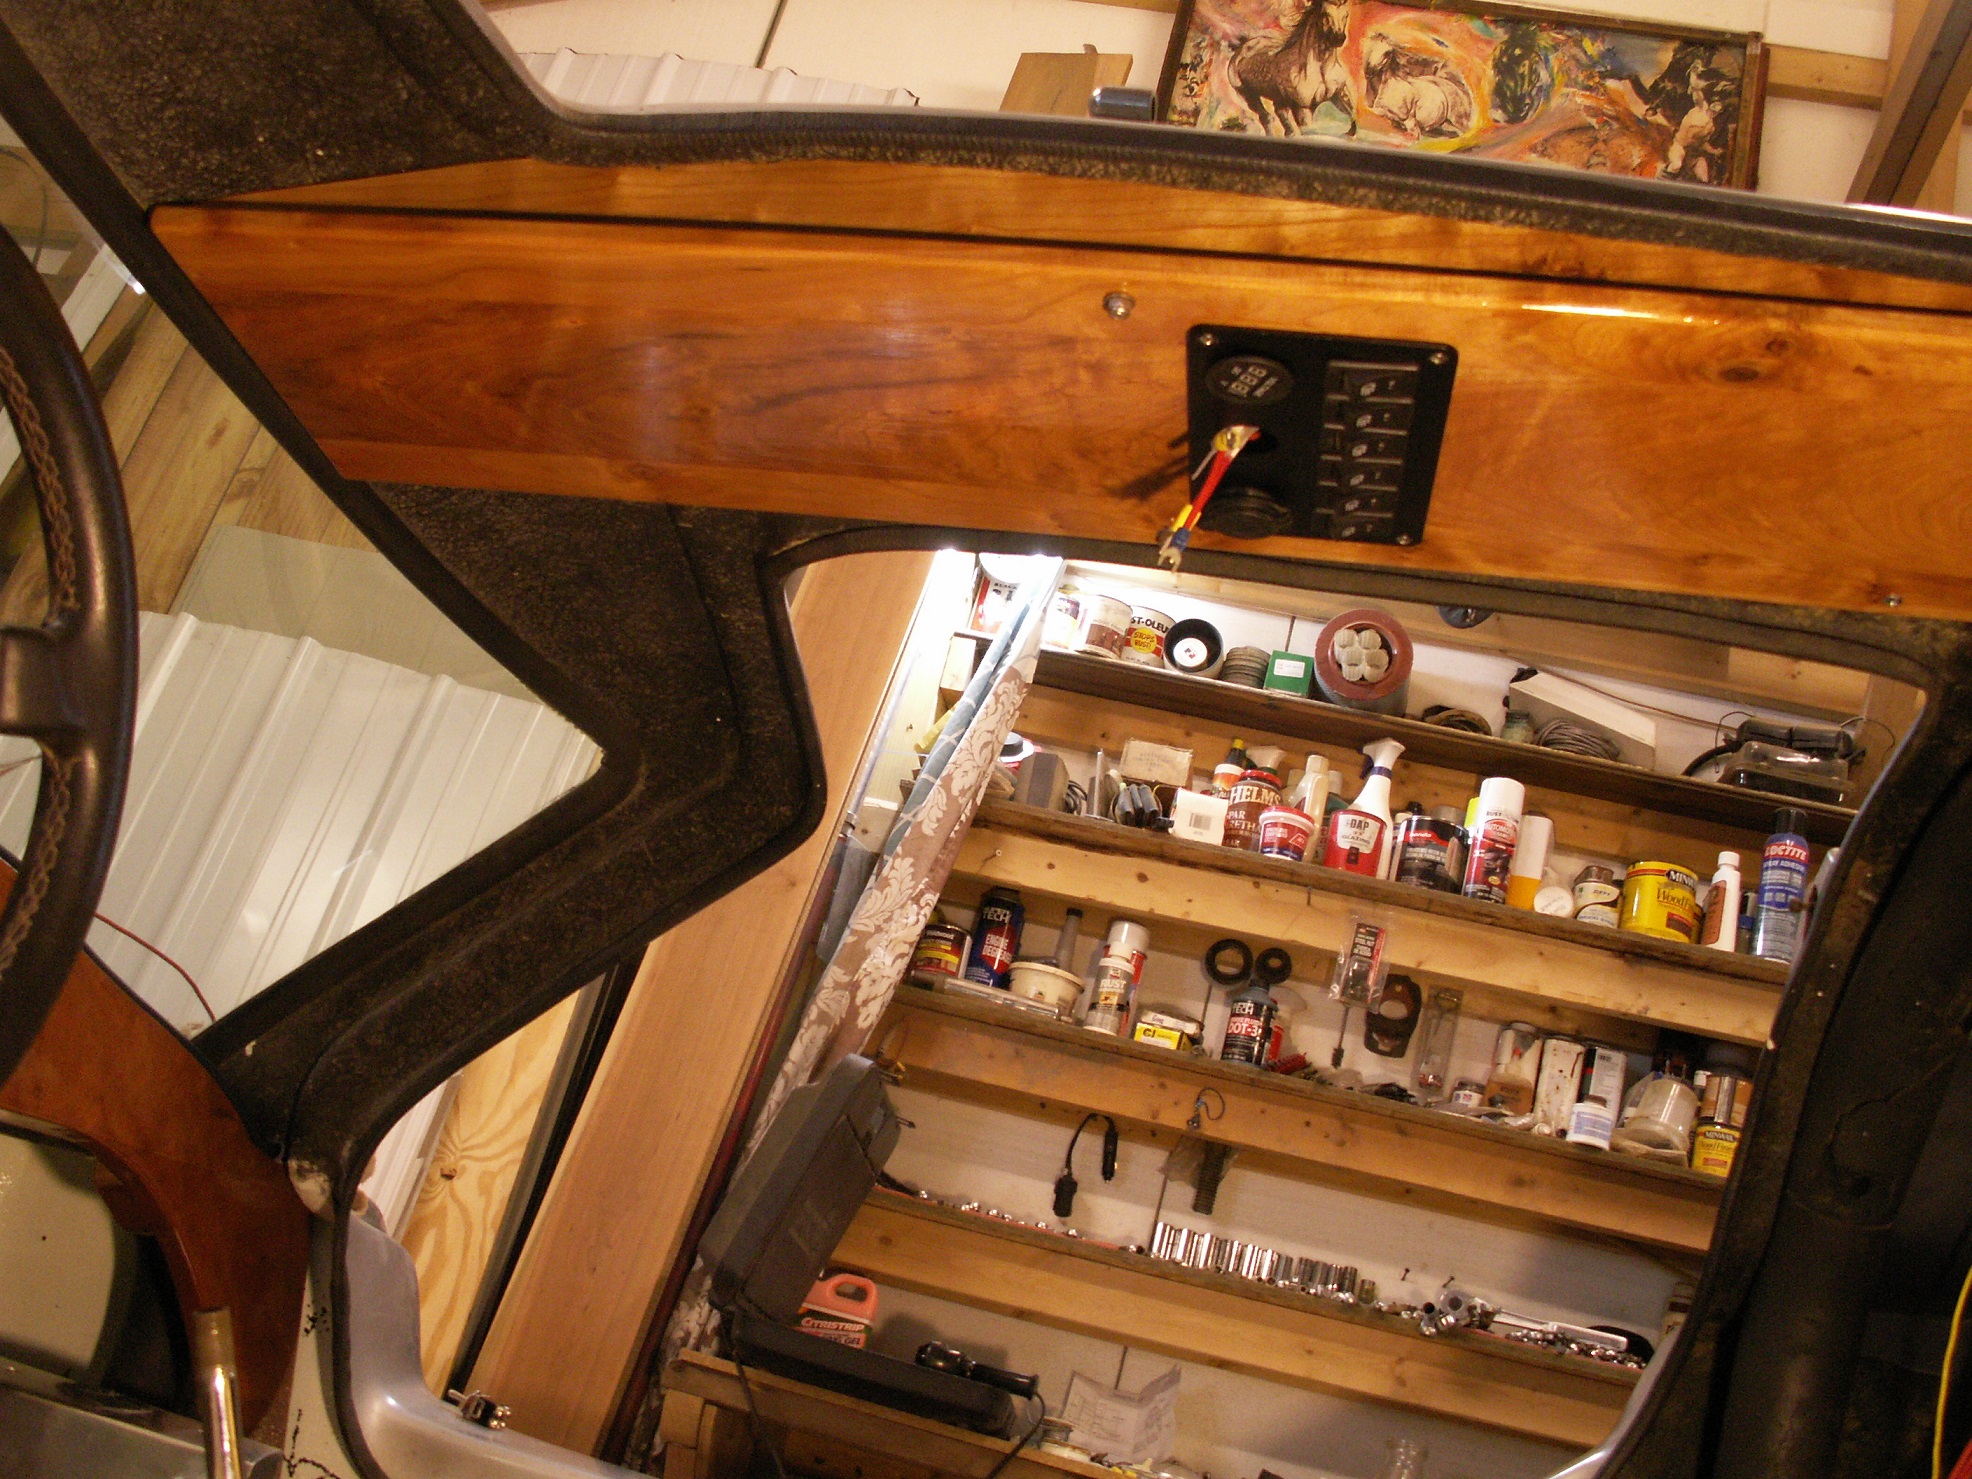
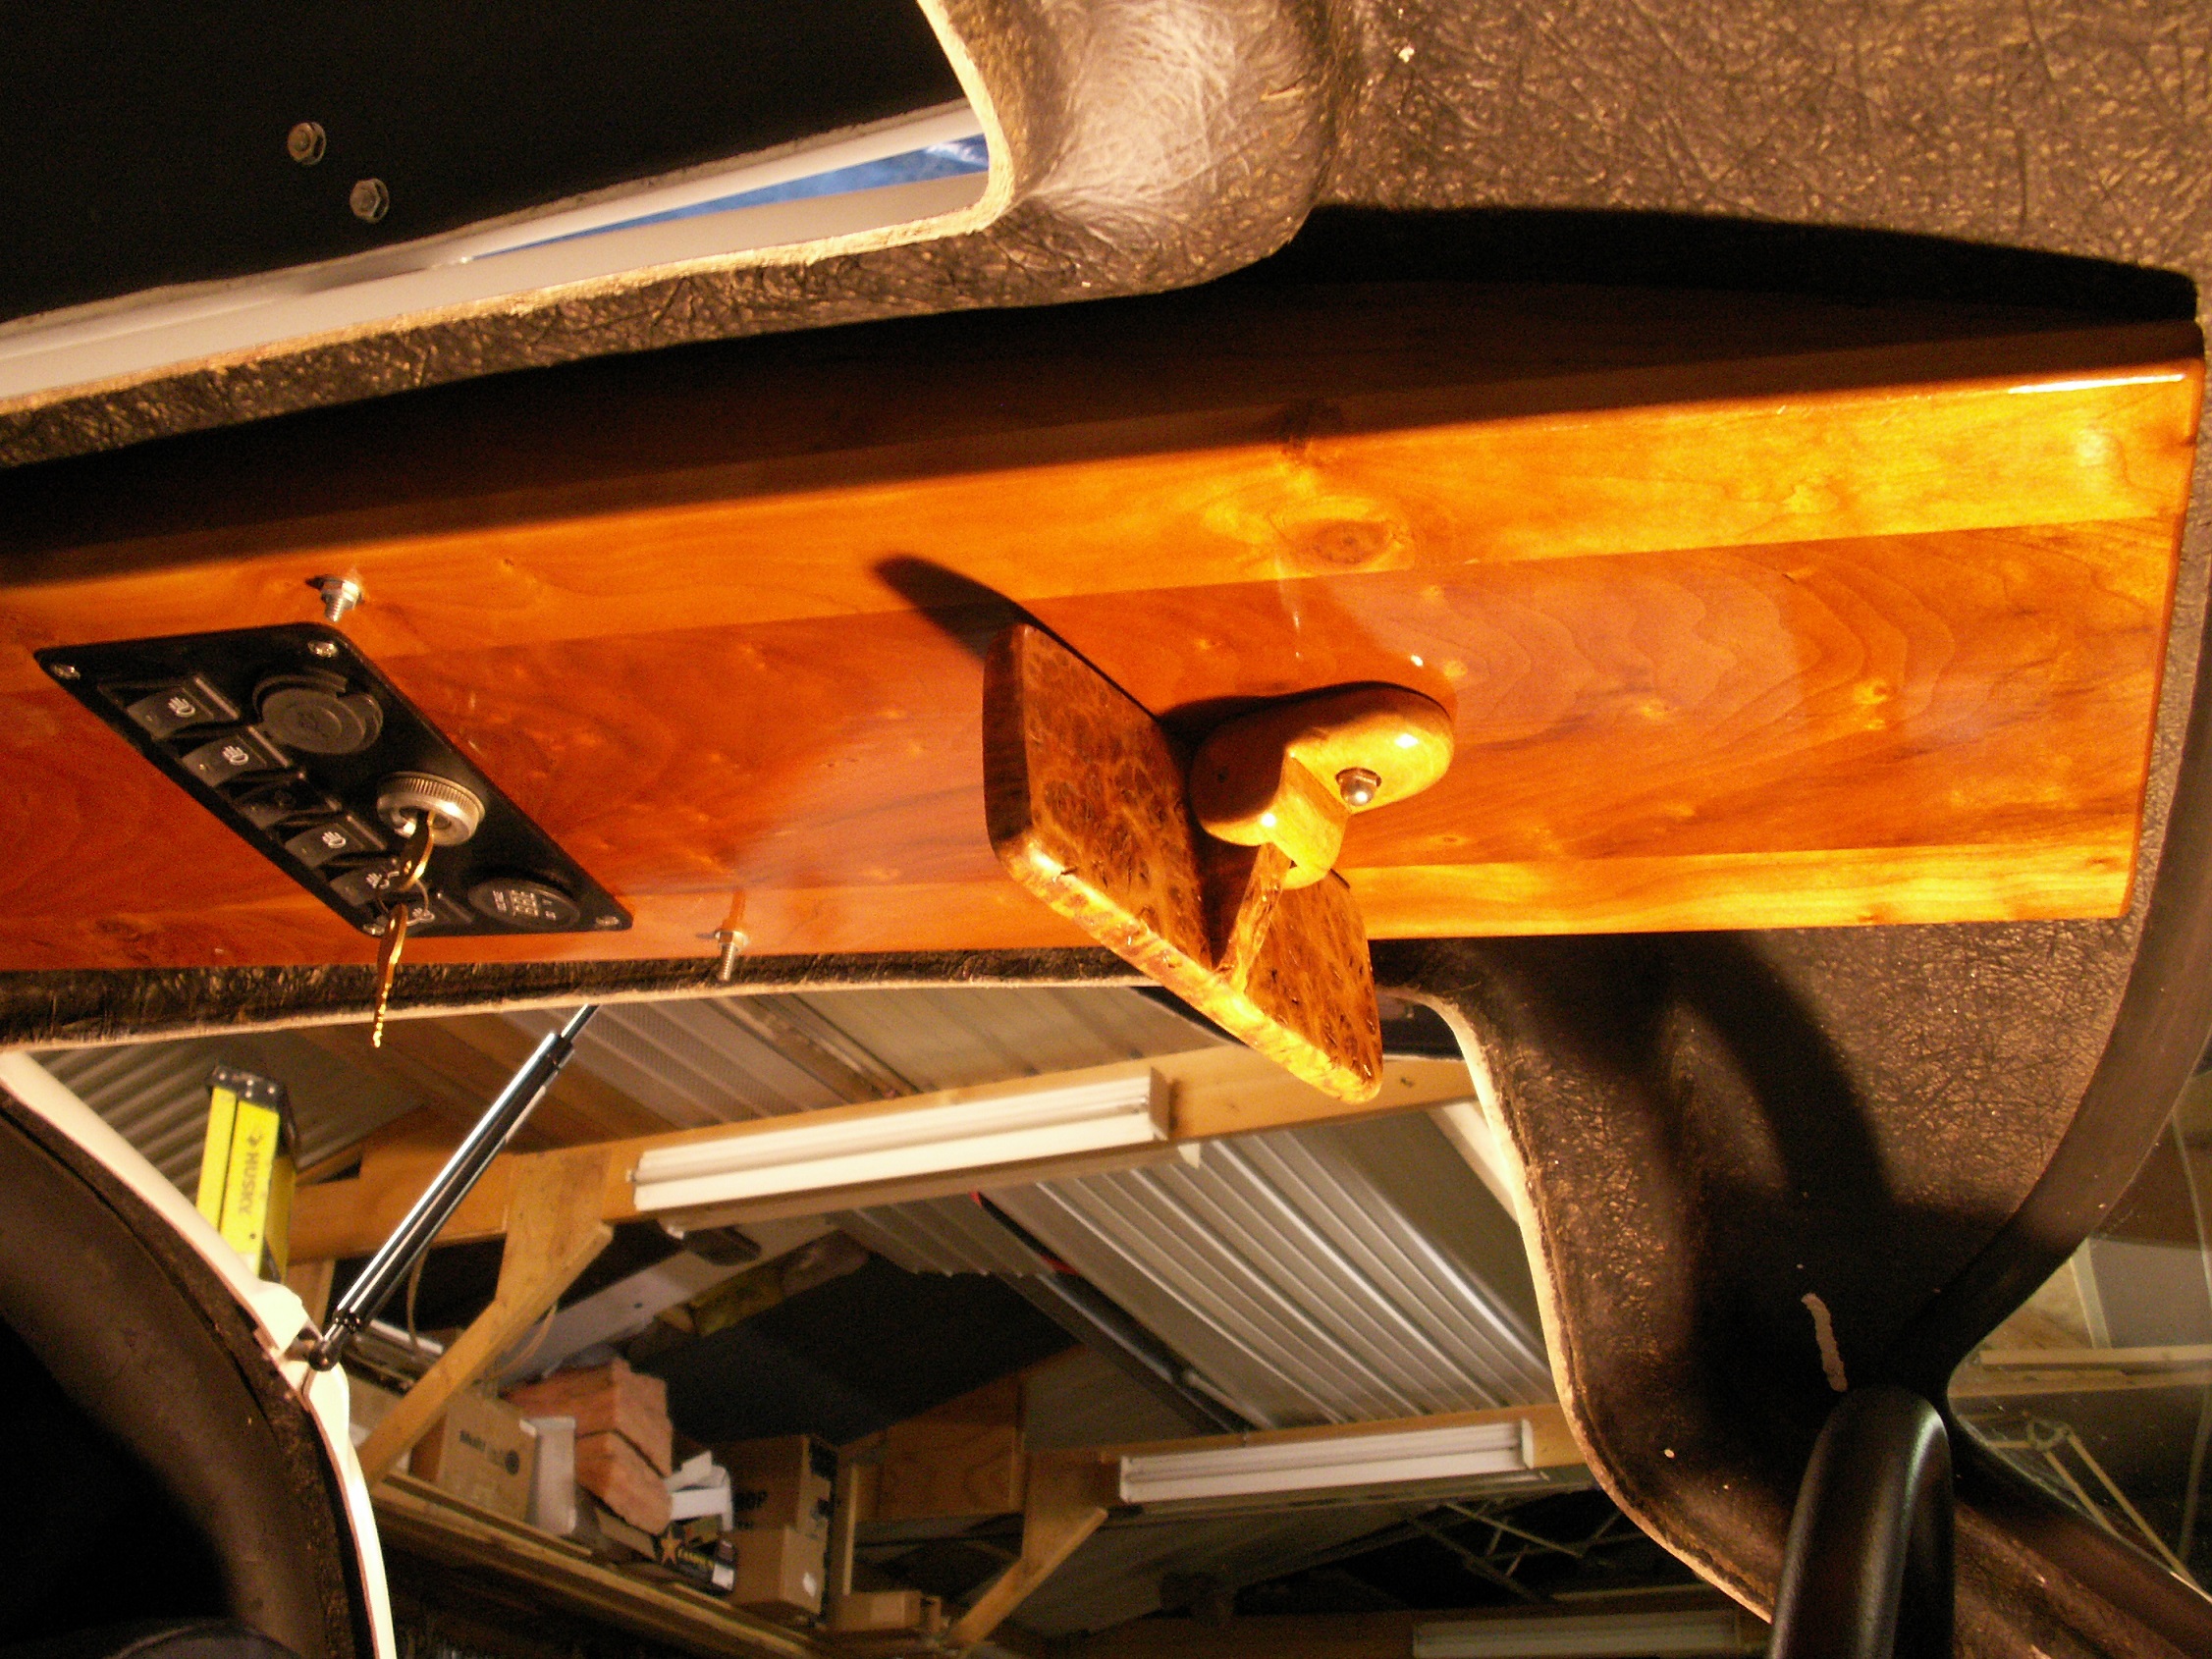
Built the overhead switch panel (cherry of course :-) ) Got it mounted and now finish wireing.
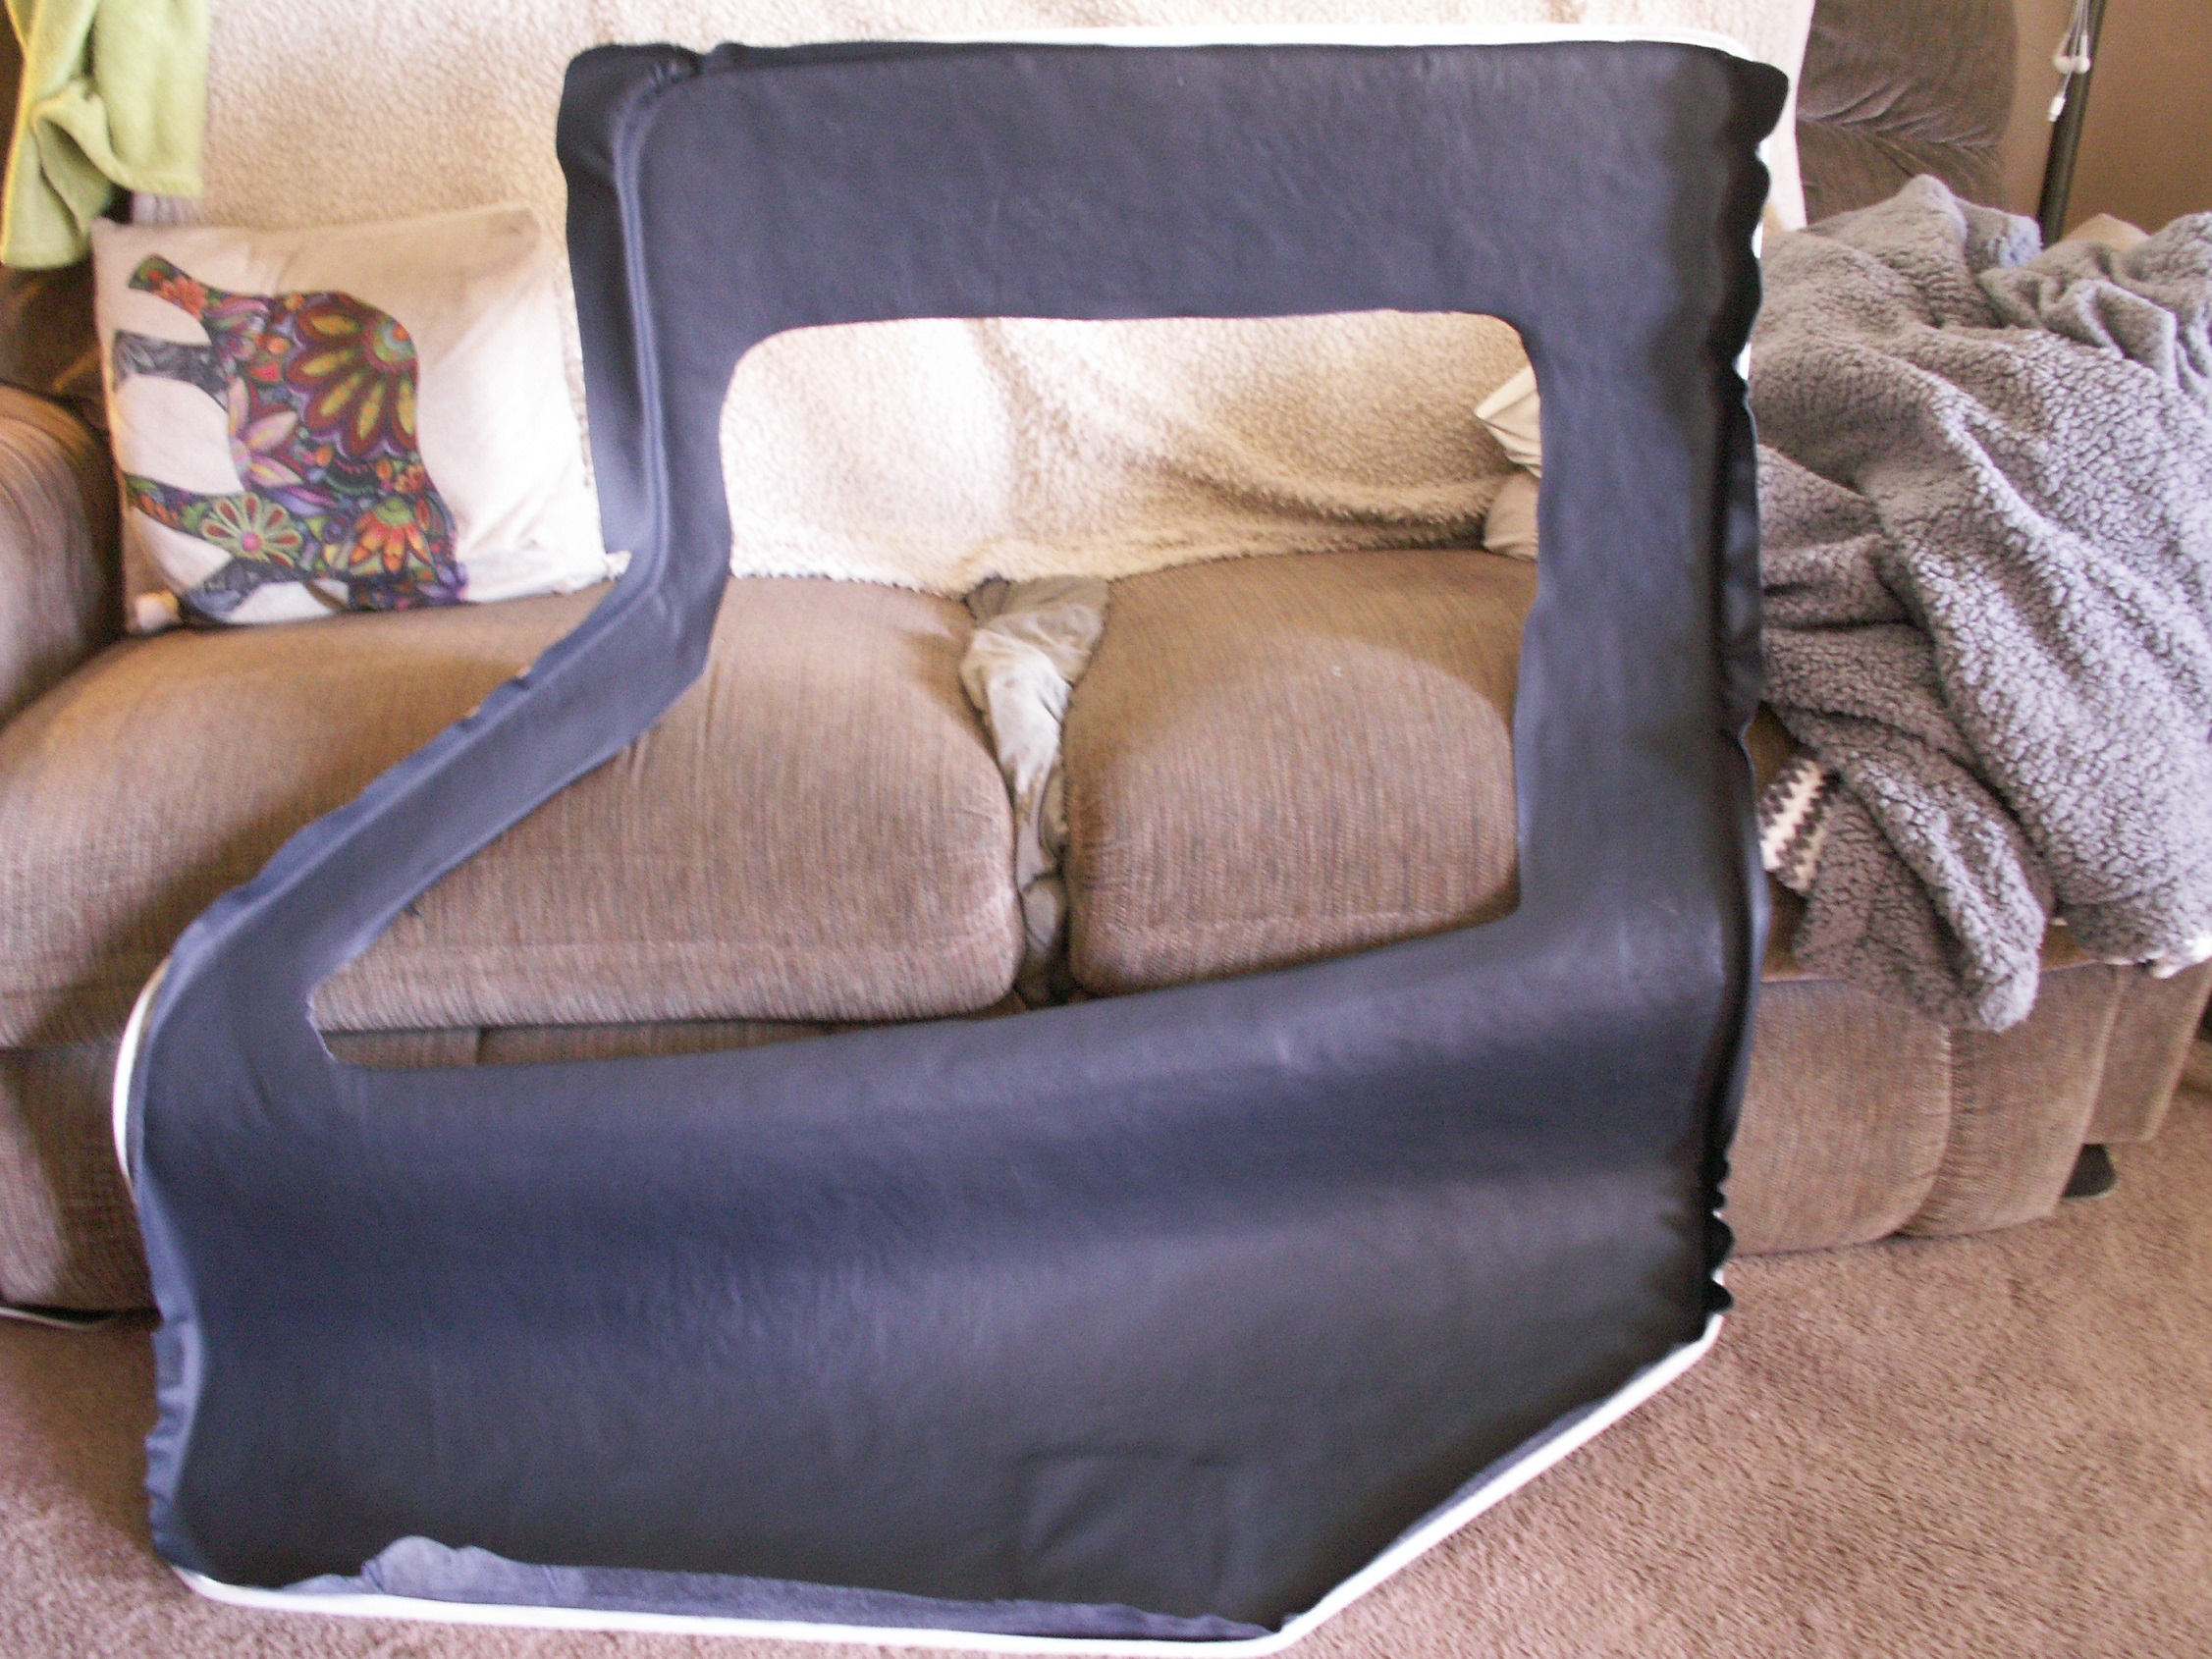
The headliner will be more of the navy blue leather.
One wire at a time. Dash, engine, gauges and ground effects working, wires all run for the lights and speakers just don't have them yet.
10 light blue LEDs for the ground effects lighting. Once it has the wheels back on and on the ground, I think it will be just about right.
Cockpit now.
Figured it was time for an update on our progress. Got new tires for the rear in prep of getting it back down on the ground. But it seems like I just keep coming up with stuff to do first :-)
The wing on the rear is dedicated to Phil Hill of Chaparral fame, He was the one that really got aerodynamics happening in race cars, the wing will be controlled by a lever to go from down force to full wind brake.
8-1-18, Been bummed for almost the last year,,, The car has sat for so long that the clutch was stuck and would not release.
I tried all kinds of things, with it on blocks and the wheels off the ground, I put a block on the clutch to hold it disengaged. Than every couple weeks
I would start the engine with it in gear and try to shock the clutch free by hitting the brake, time after time, NO LUCK...
So I finally decided to pull the engine in order to free the clutch, I moved the engine about 1/8 inch only to discover it has a pull type throw out bearing and you need to drop the transmission
at the same time. So I tried wiggling the engine with the clutch in to brake it loose, bolted everything back up, and it worked !!!! The clutch is now working
and I took the time to mount a new oil tank. A few more things to do while it is still on blocks before we take it for a test drive !!!
11/10/18, After getting it back together and having the clutch working again, I was soon to discover I no longer
had reverse. Well after a lot of figuring it turns out that when I lowered the gear shift it changed the angle of the shift rod. I just loosened
all of the connections and readjusted from scratch and now have all the forward gears and reverse....
Now with winter setting in (it is snowing today) I think I will just keep it on blocks for the winter, it will be easier to finish the interior that way...
Update, 7-23-19.
Donna's birthday and our little town is having it's first car show August 17th, so I took it down off it's blocks
and we went for a couple rides around town. No where near finished, no license plate, no tail lights, no seat belts, etc etc. Don't have the doors on and we rather like it that way, may leave them off for quit a while,
still go ahead and finish them but make them easy to get on and off.
I had forgot how fast it is. I did a compression check and 4 cylinders have 150 lbs pressure 1 has 100 lbs and number 6 only has 50 lbs pressure. So it does not want to idle very well but when I get on the gas it really takes off.
I can see once we get plates and tags on it, I'm going to have to be very careful, it is just too much fun LOL. A number of years ago we had a 280 Z that we decided to sell
before I ended up getting tickets with it :-).
Here are a couple short videos of going around the block and one from the inside on a back street. It has a 5 speed and 2nd is really hard to hit without ending up in 4th.
|
Update, 11/22/19.
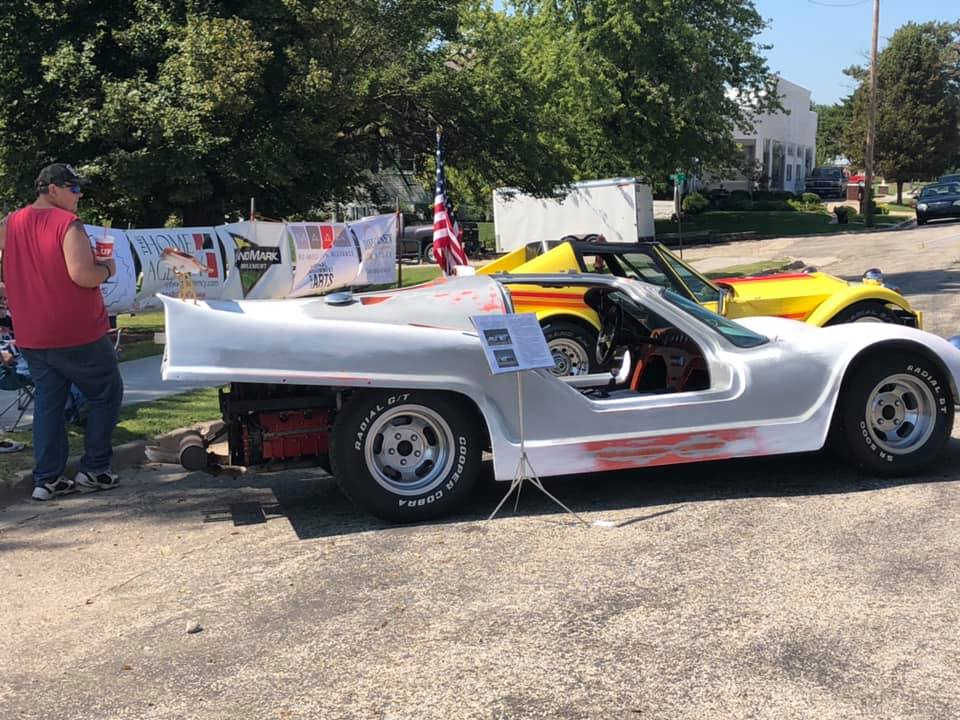
This summer we did get it licensed, plate # 917 007 (pretty cool) and we were in a couple local car shows. This show
was about 30 miles away, and what we thought was pretty cool not having the doors on for around town turned out to be way too windy at 60 to 70 mph,
so the doors are definitely going back on (with lift assist).
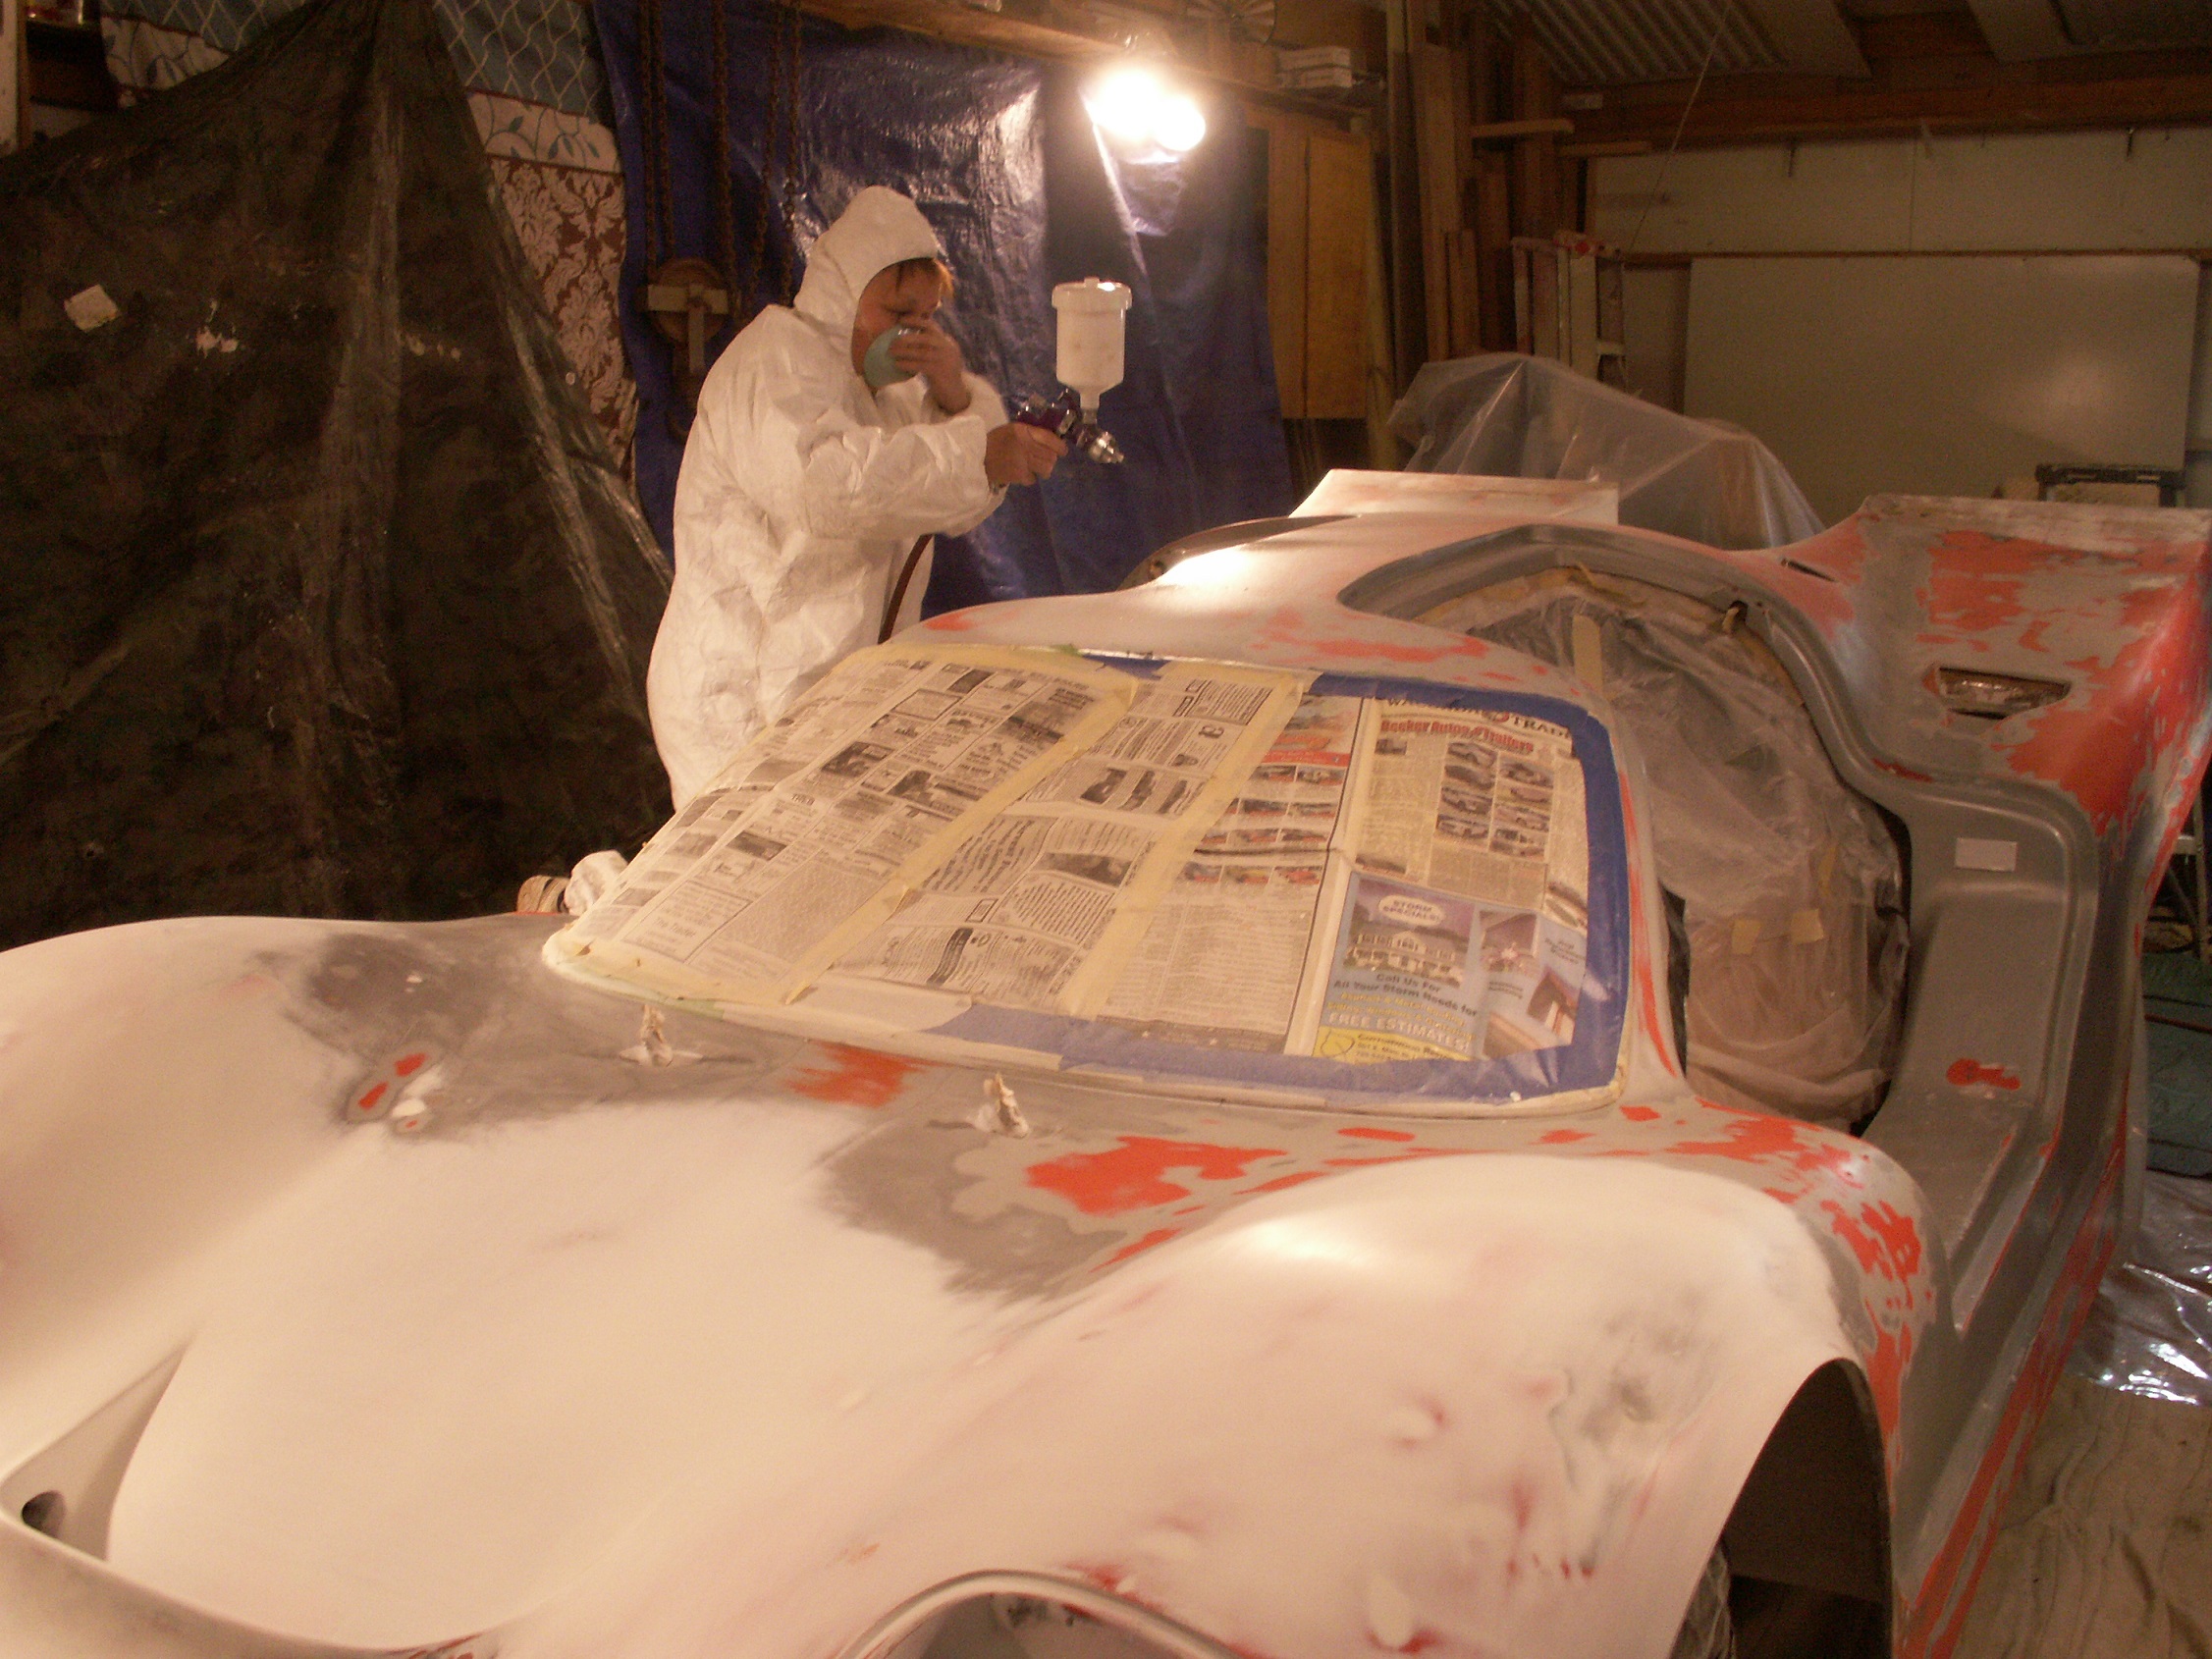
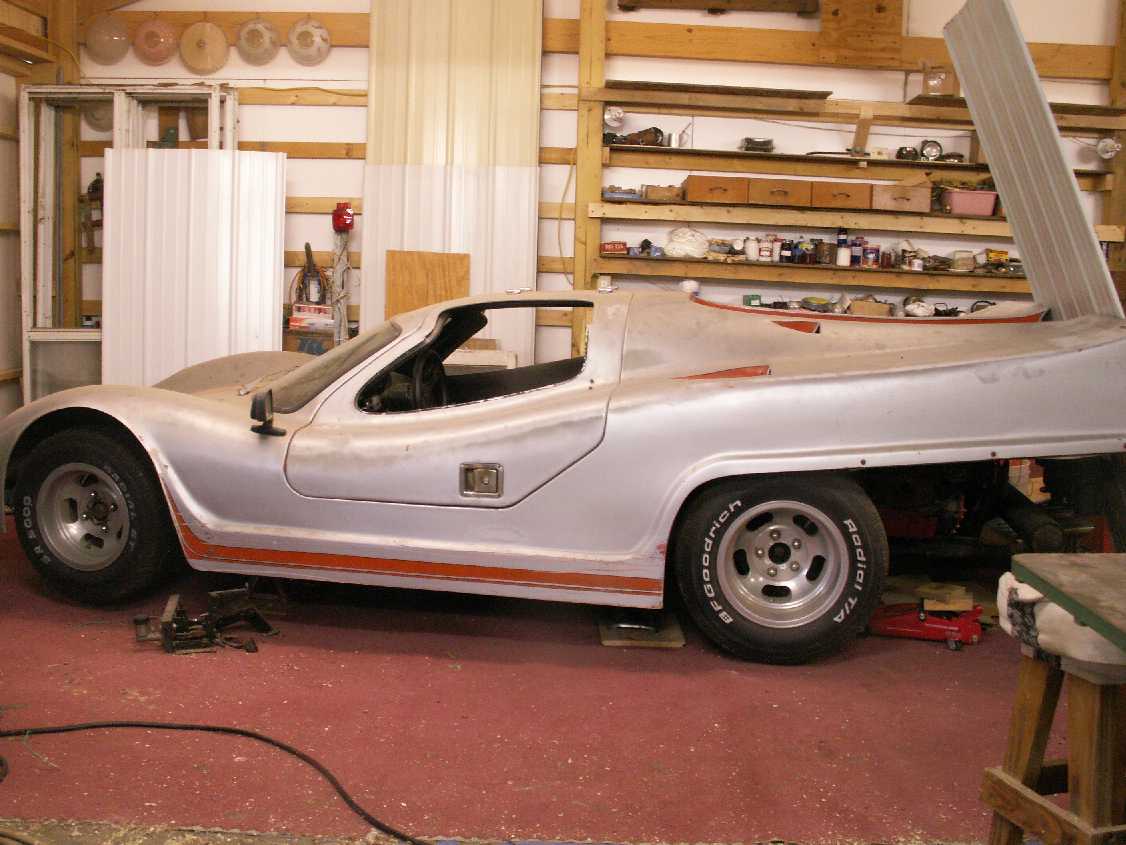
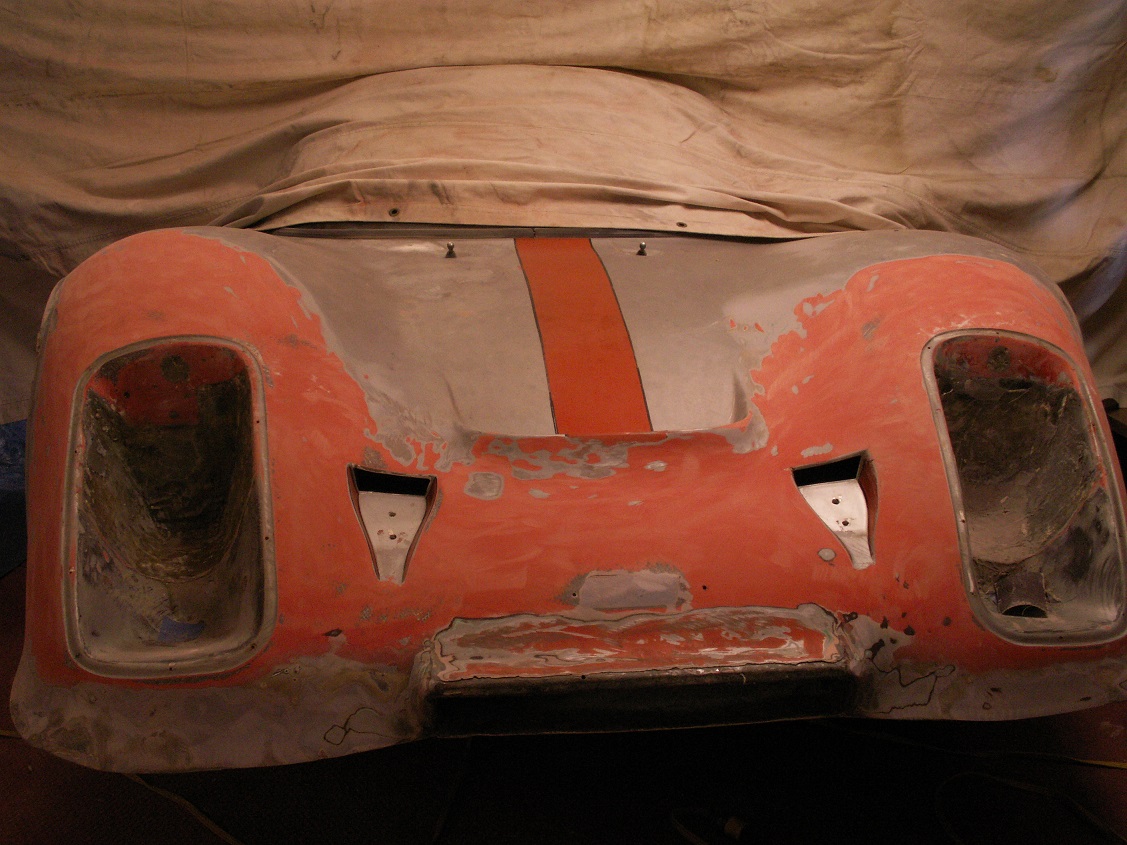
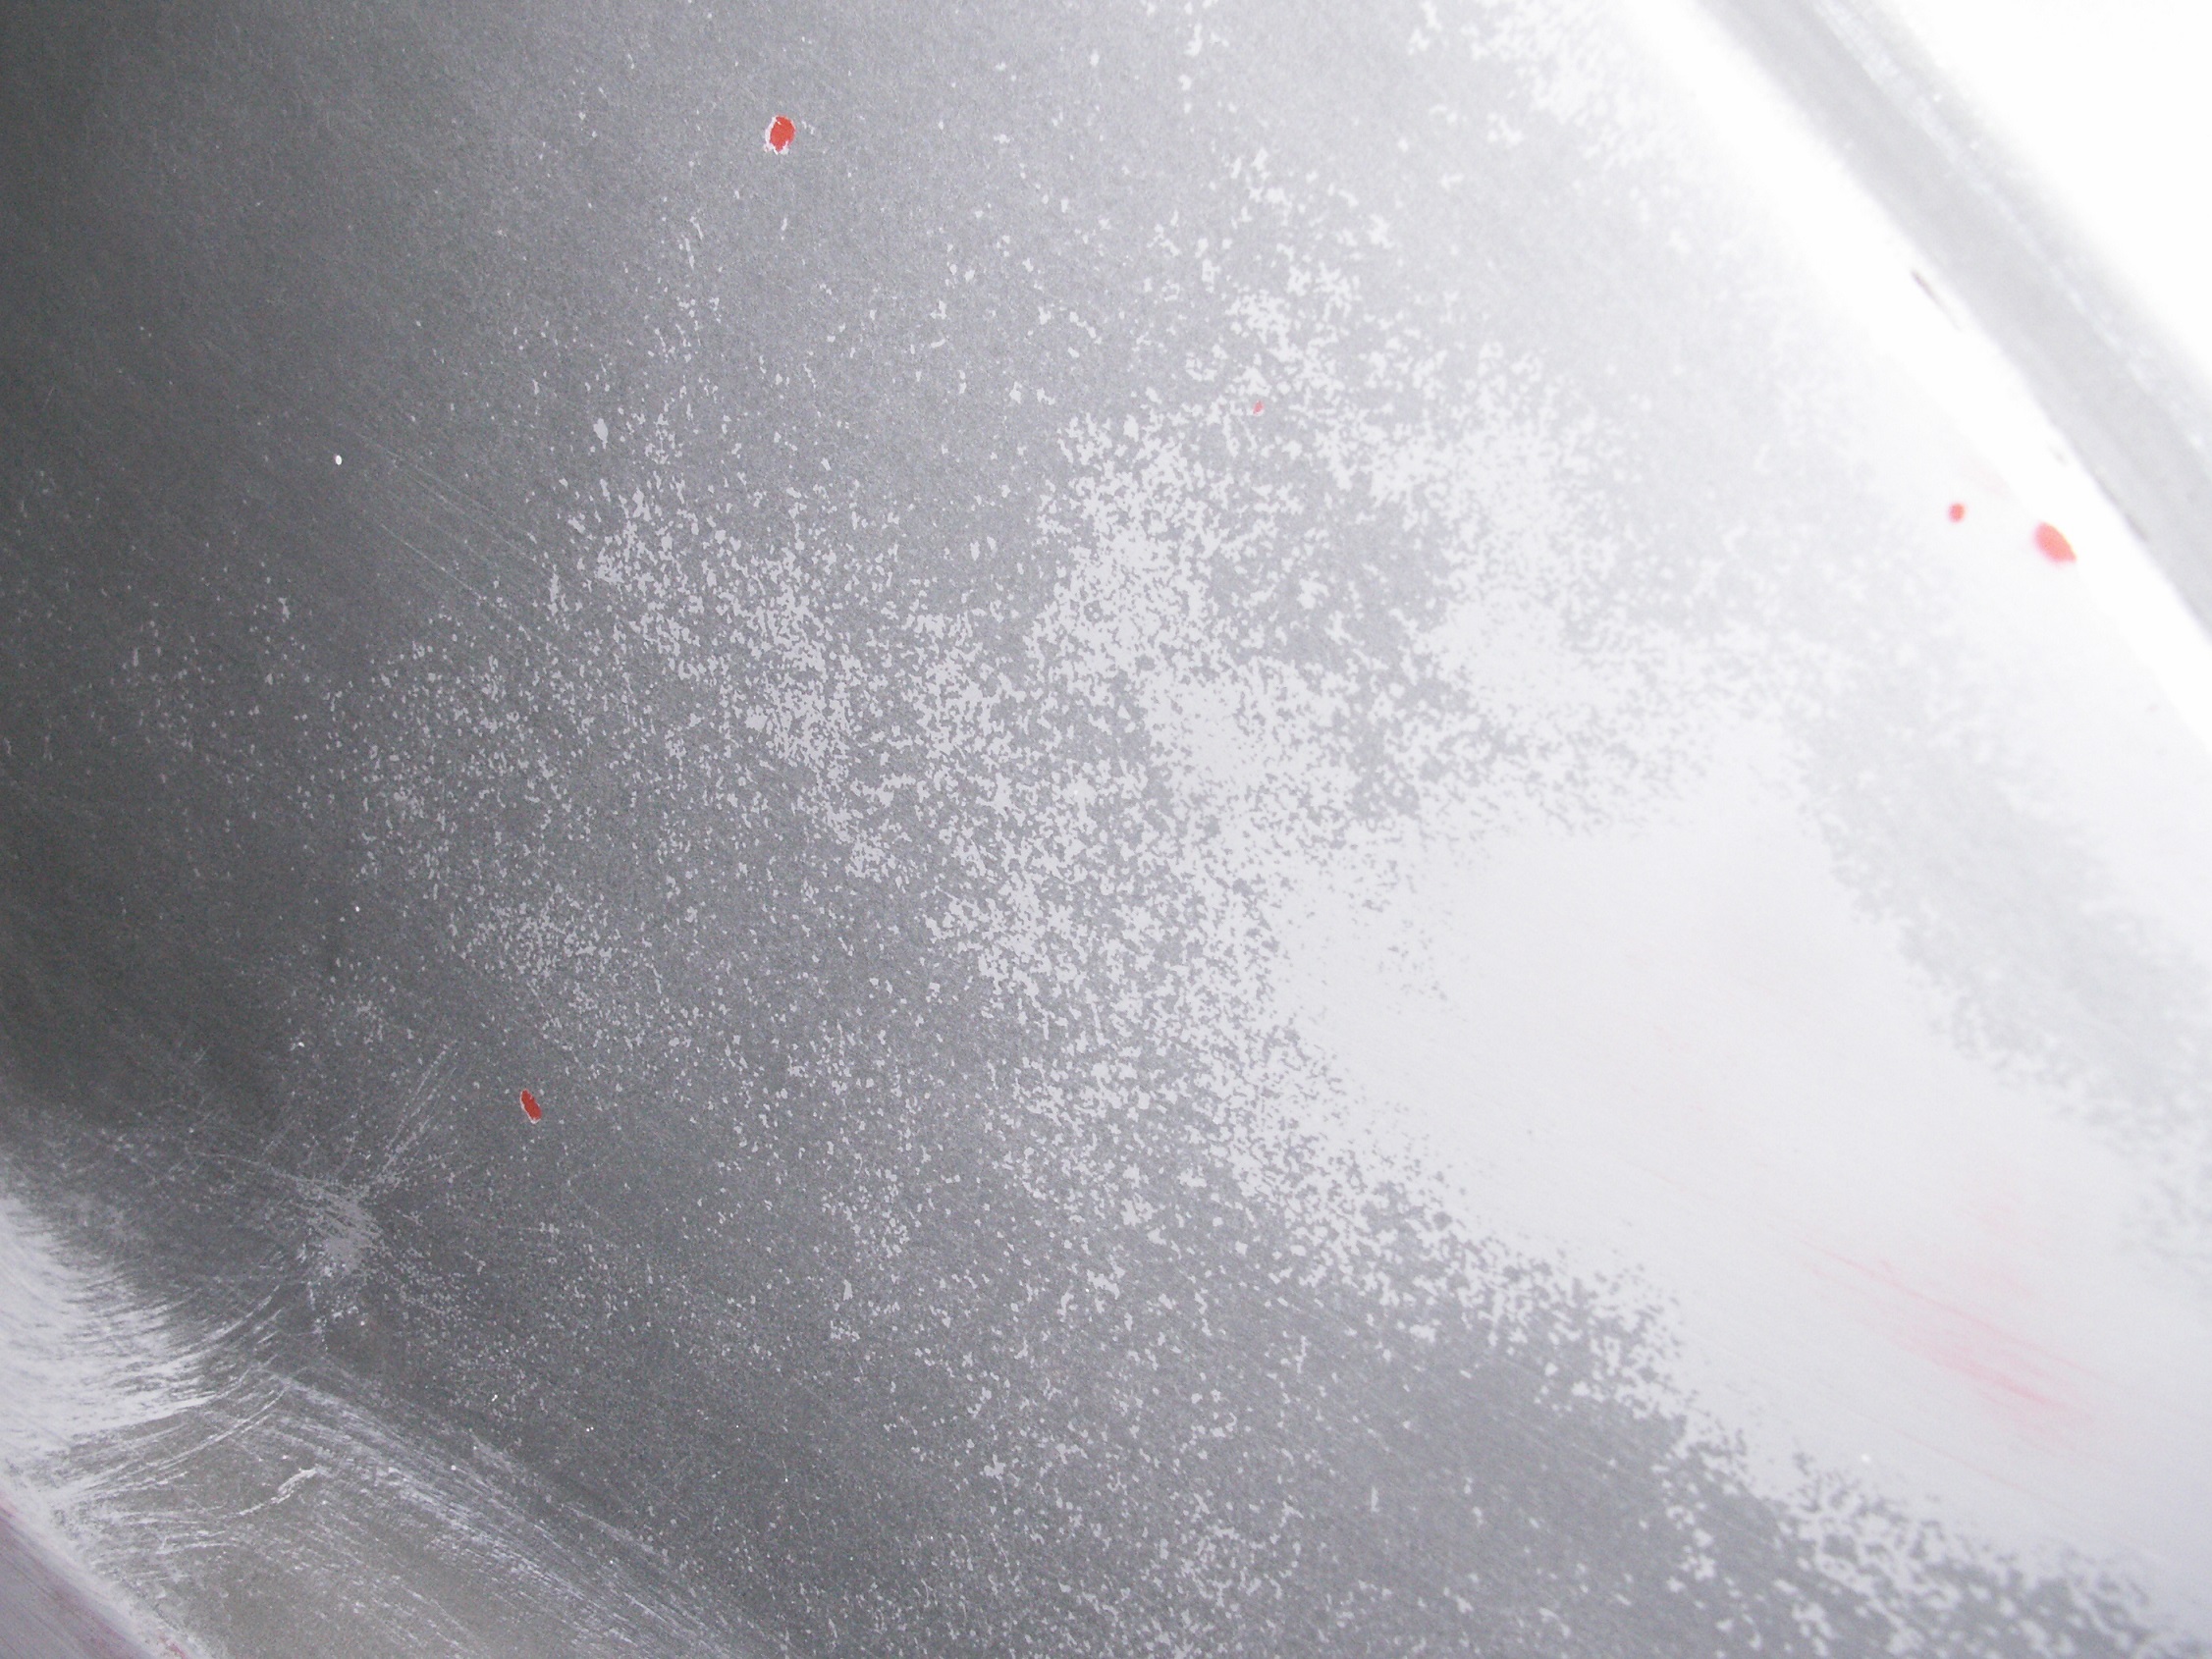
So now back in the shop for the winter, first lets see if I can get it sanded and at least primered. Don't know if you can see it, but
the silver paint has a bunch of like little holes in it,(probably from the Arizona sun when it lived there) so I now have to try and sand ALL the old paint off.
Did I mention, I really dislike body work, I guess because I've never been very good at it...
Anyway, so now I sand for an hour or so than do something else to rest my arm than back to sanding...
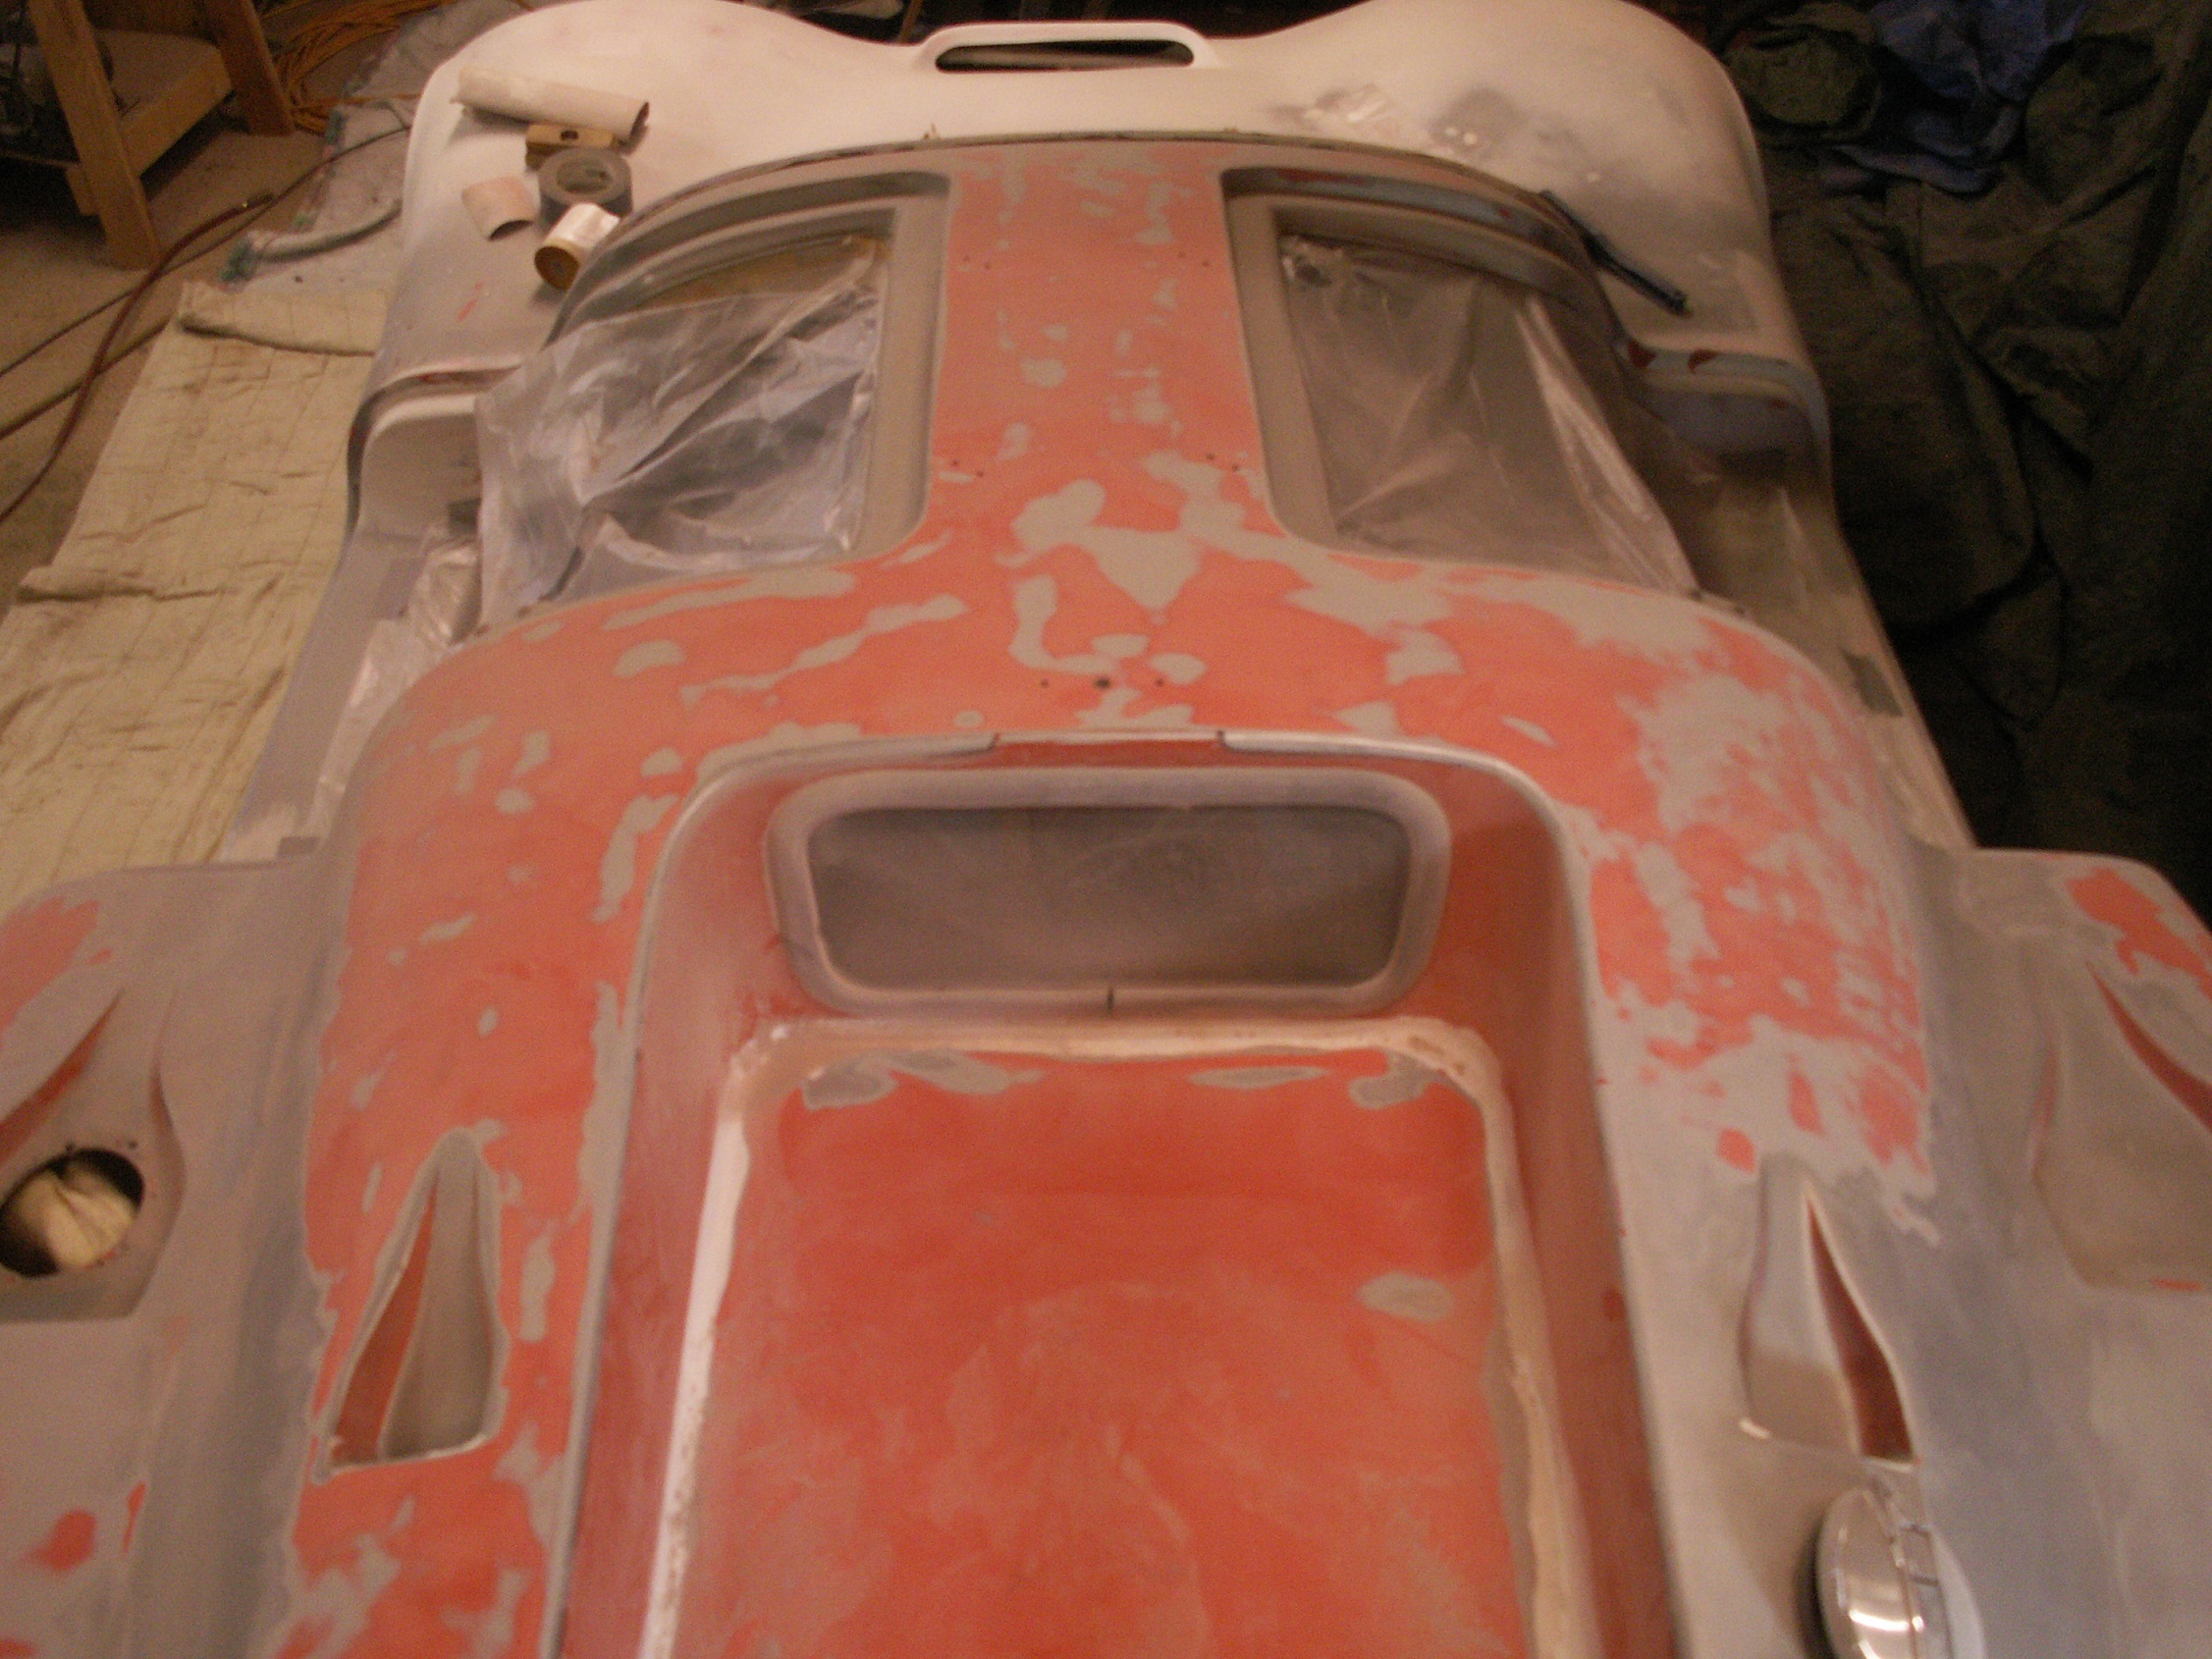
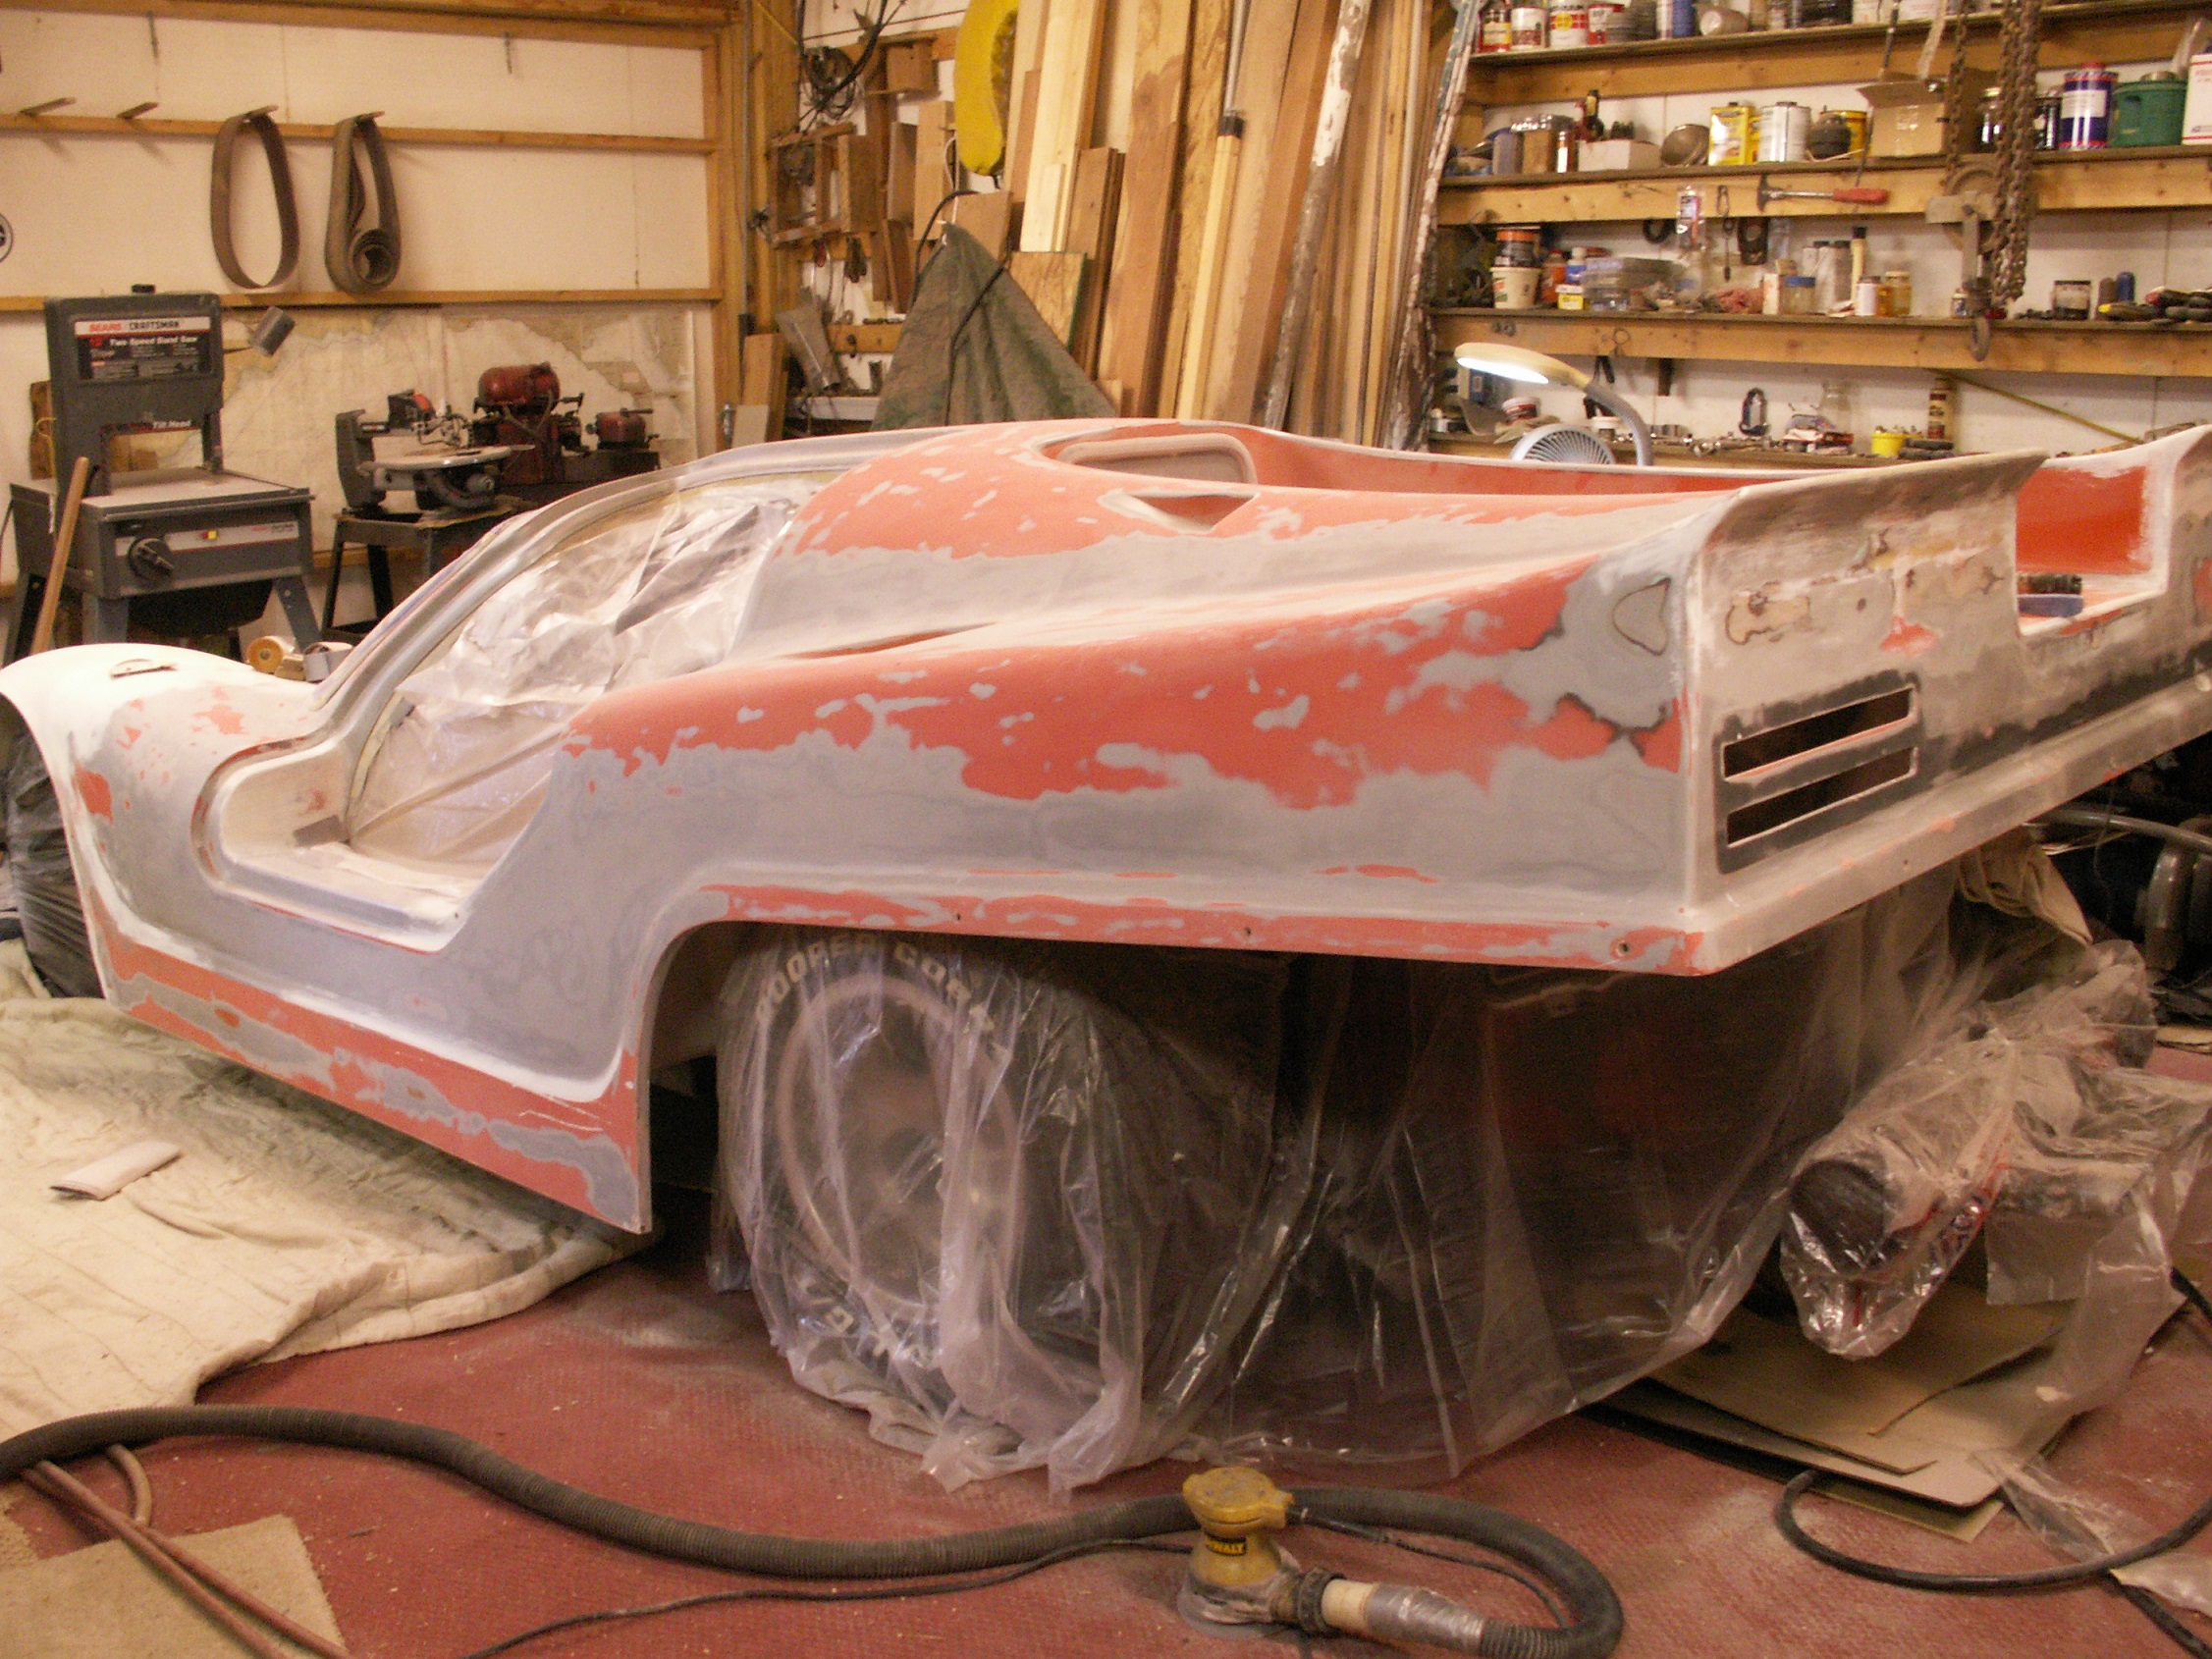
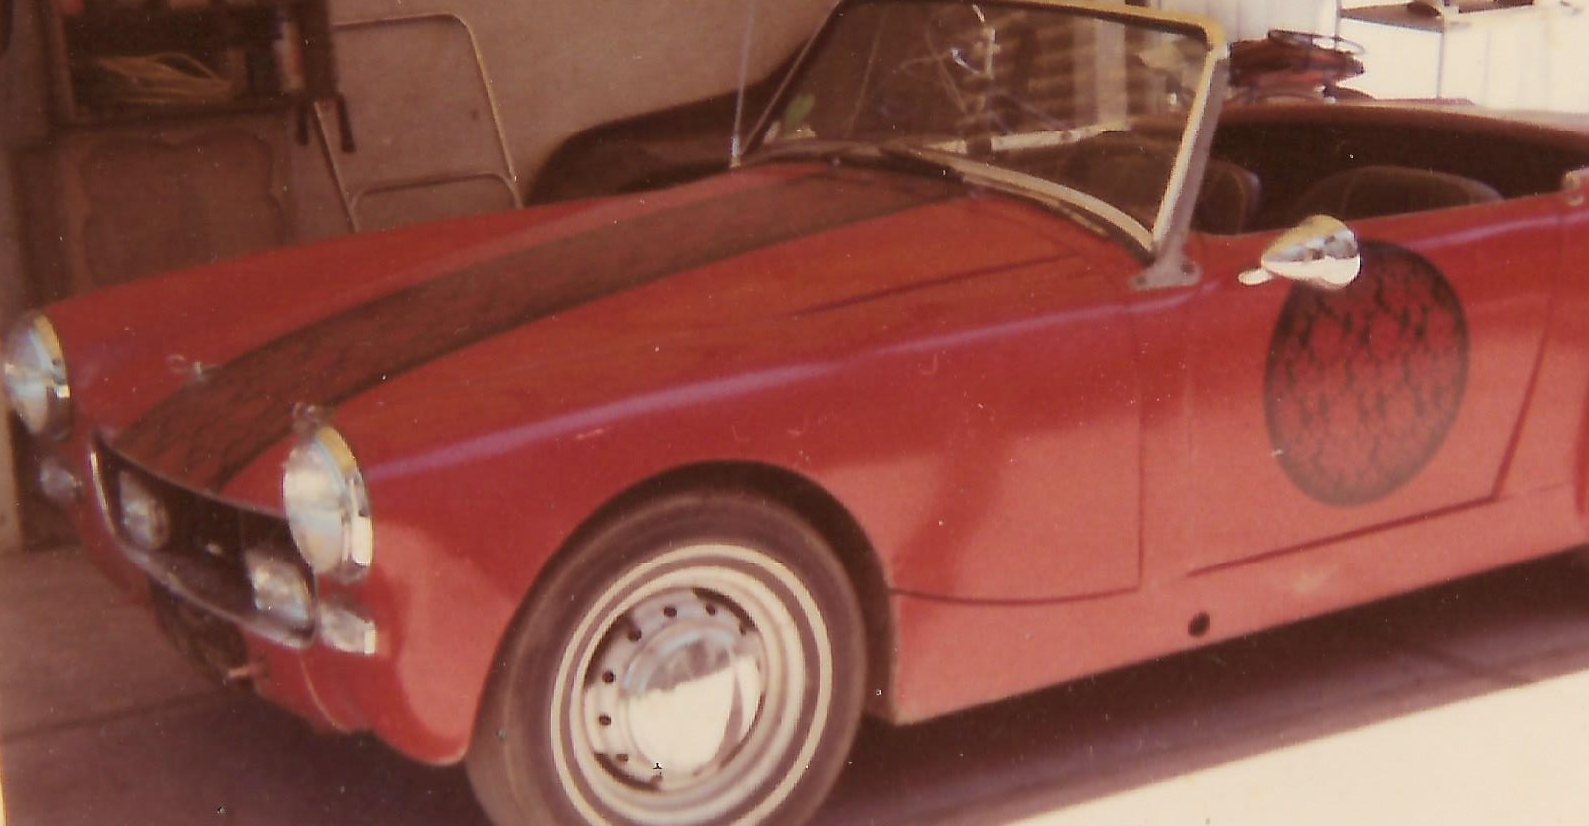
Apparently it was a nice shiny red when it was born, Arms are getting tired, really just want to get paint on it, but keep telling myself
'this is my only chance to prepare the surface, slow down' LOL...
Color will be White with a Blue Lace Strip down the middle with Red accents in keeping with our red, white and blue theme.
Just for fun, this is the one and only car I have ever painted, Red with Black Lace, did it in my Uncle Gino's shop about 1970.
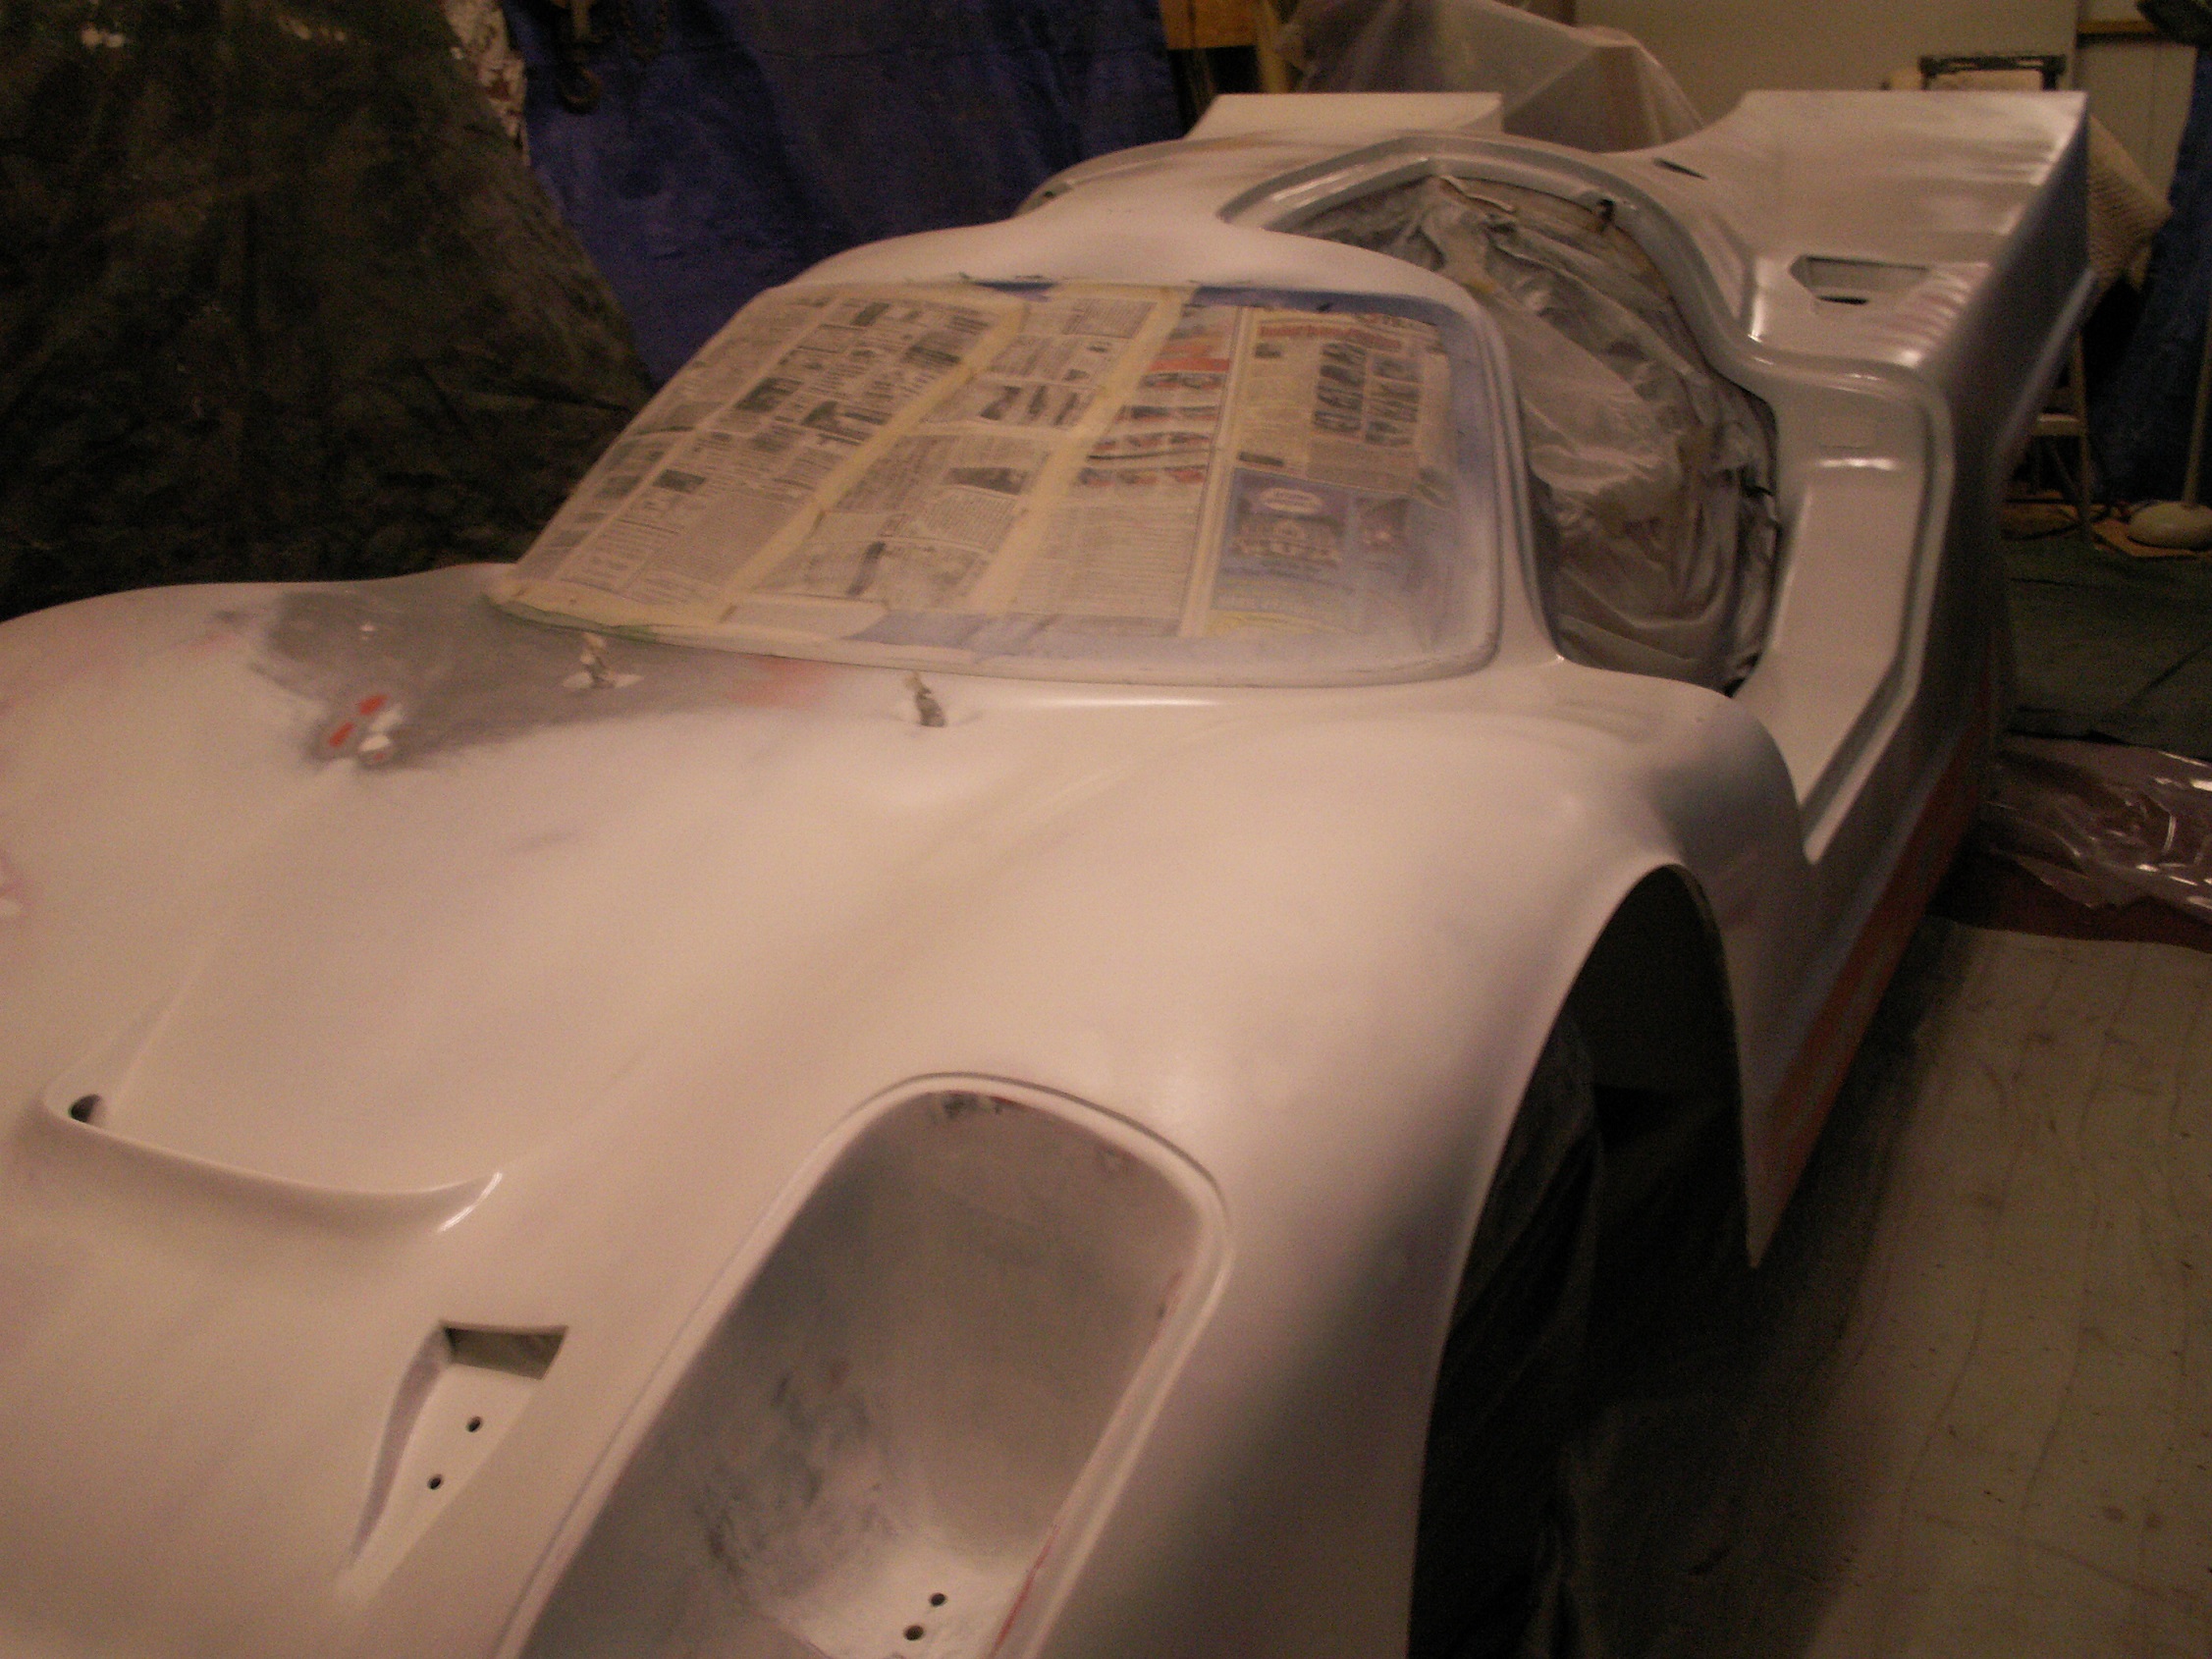
Sanding is done, setting up to paint !!!
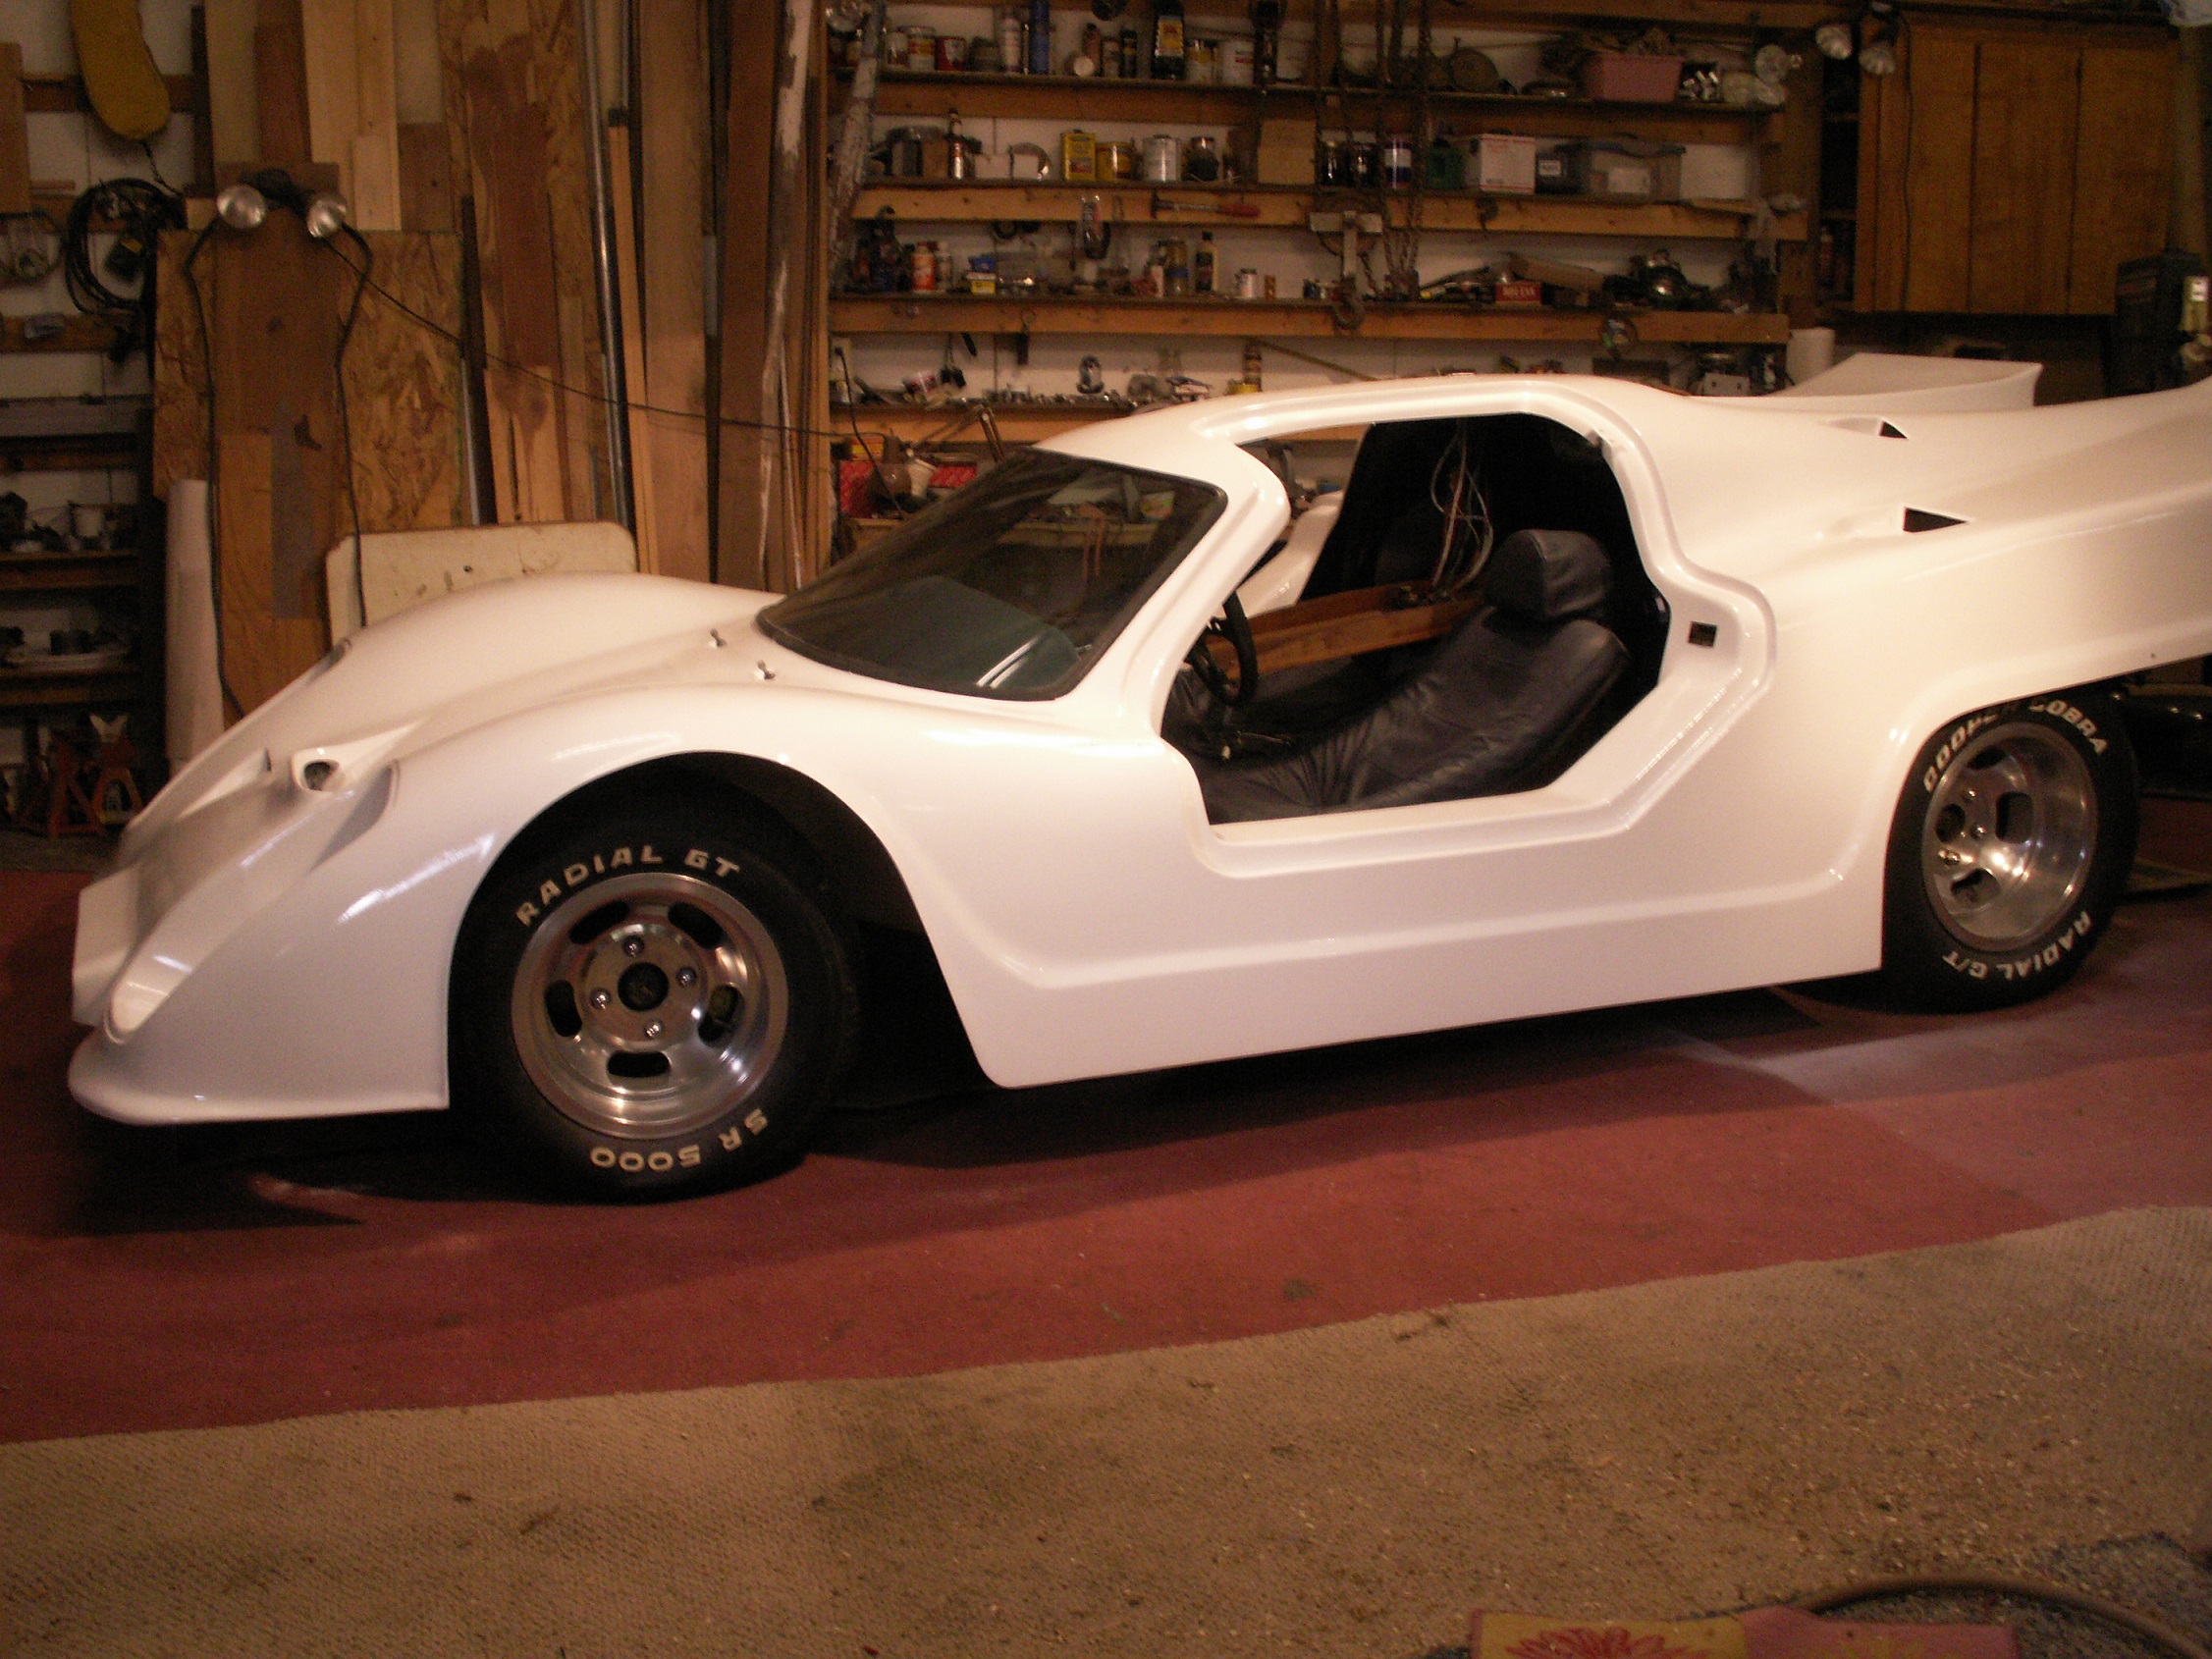
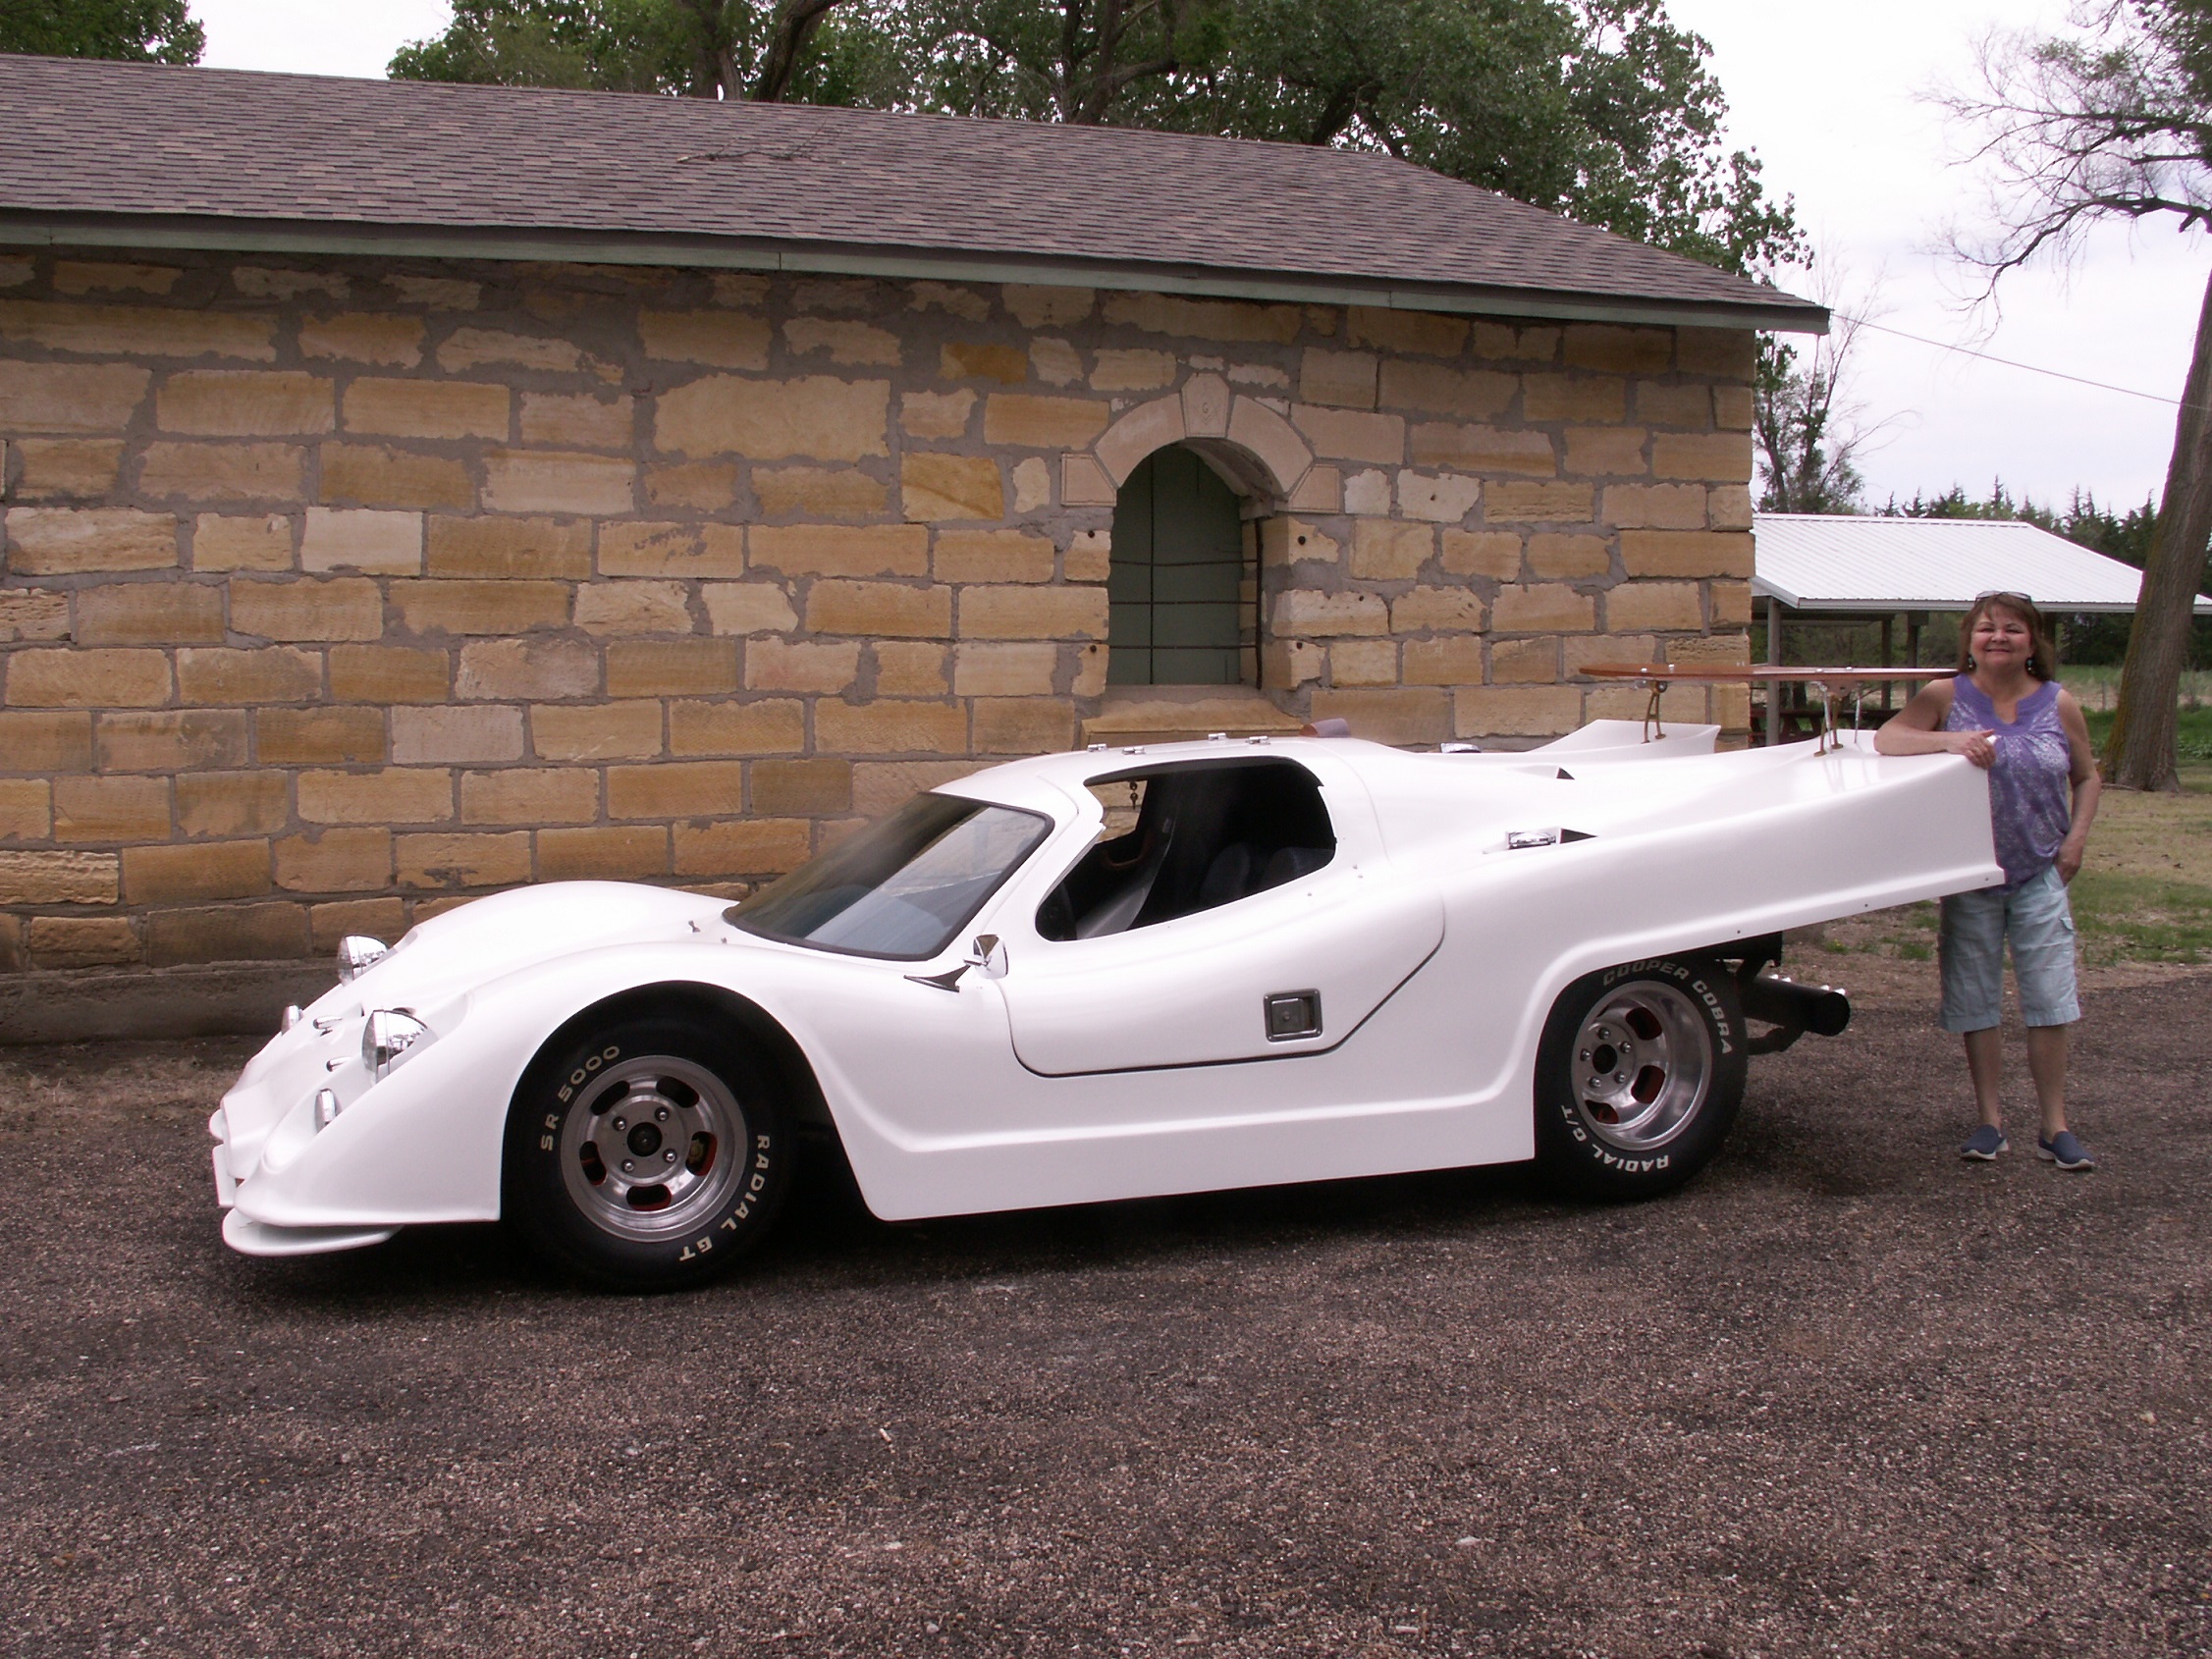
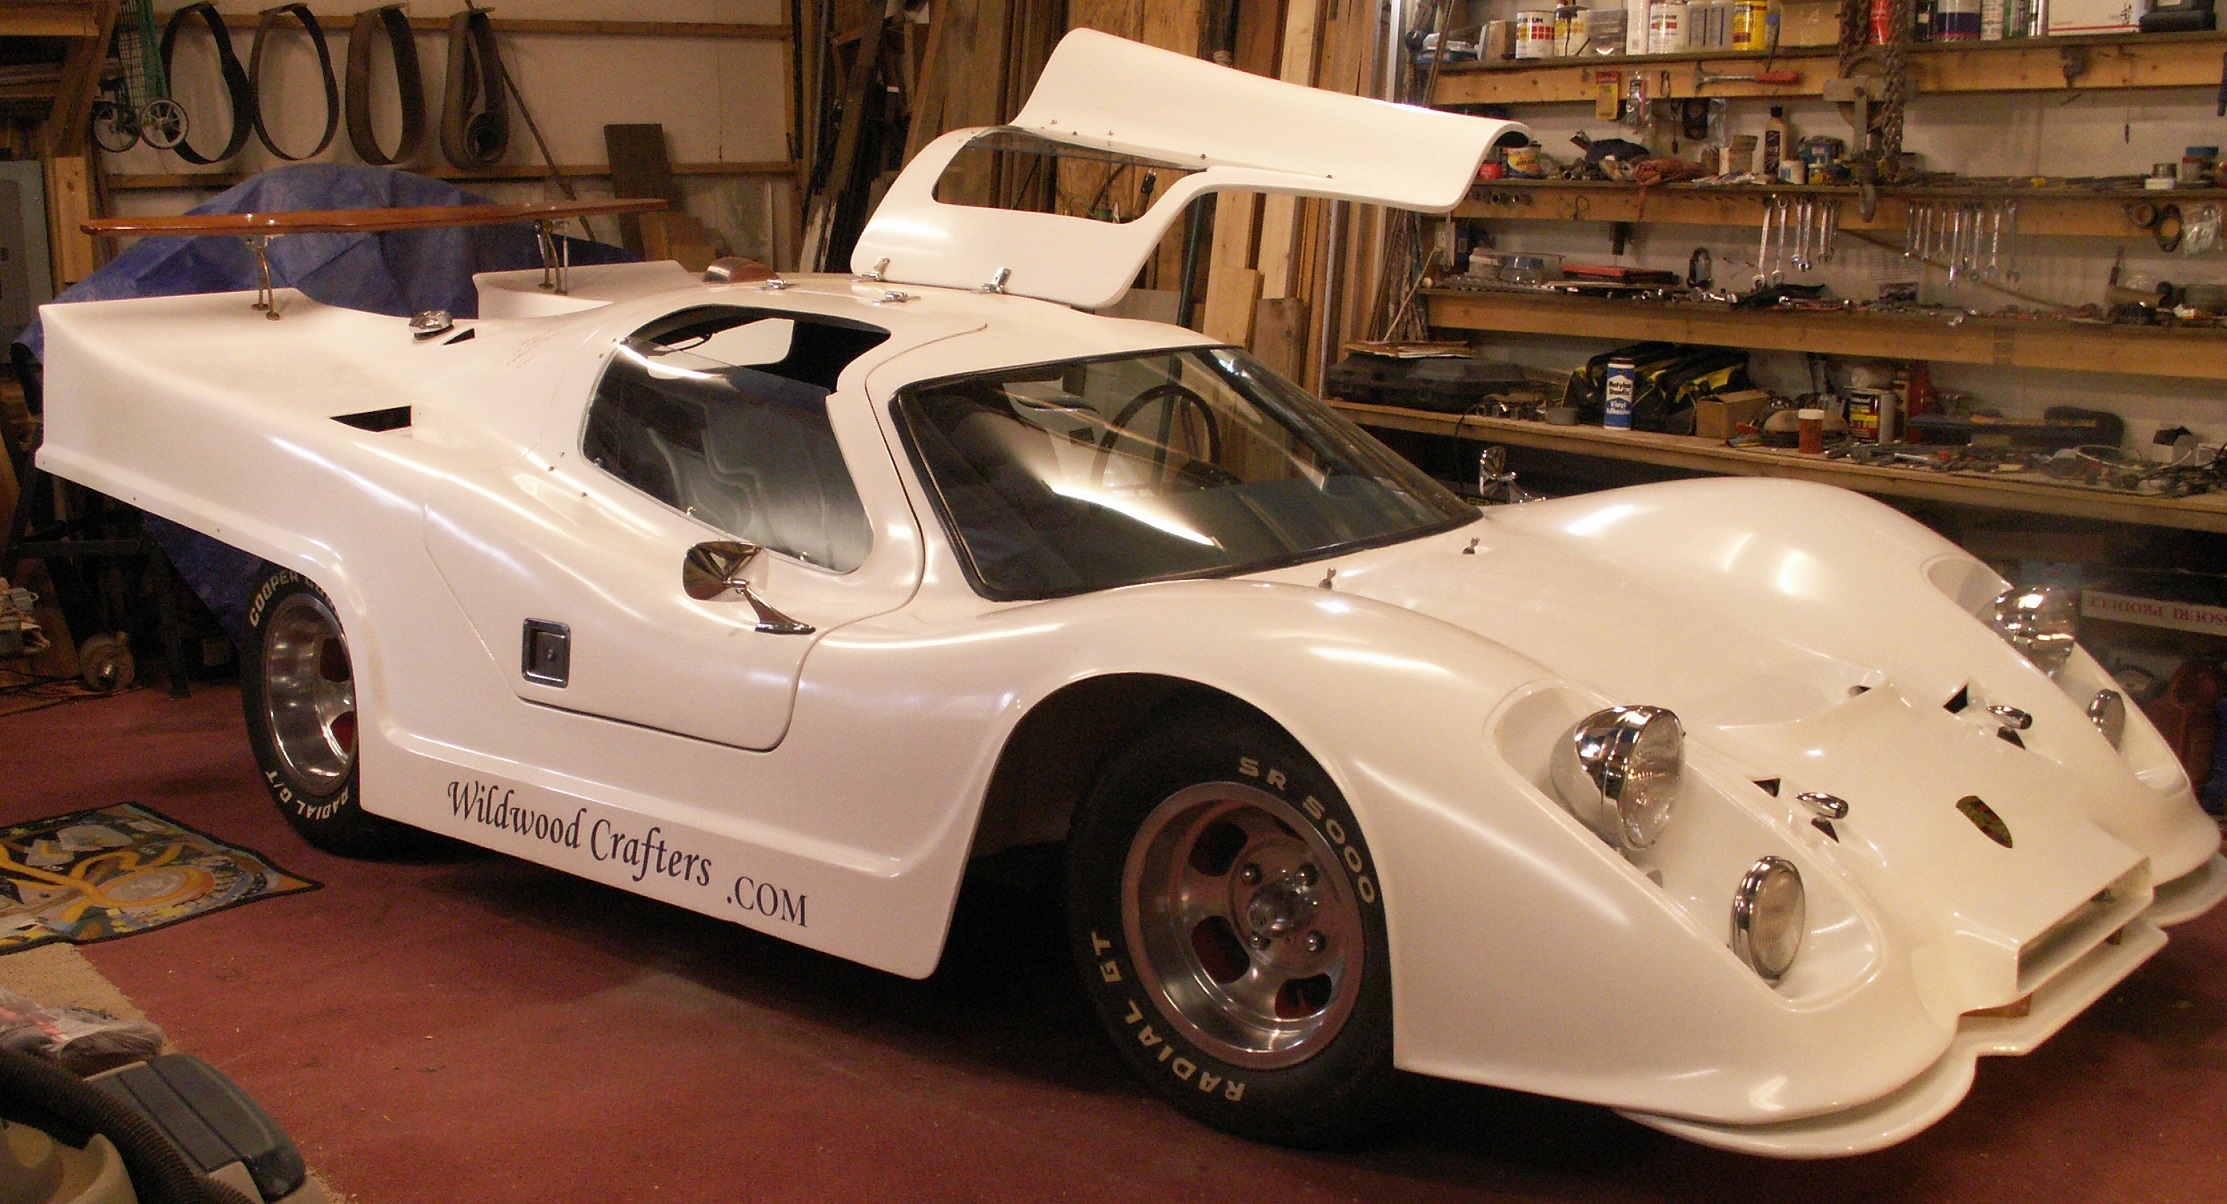
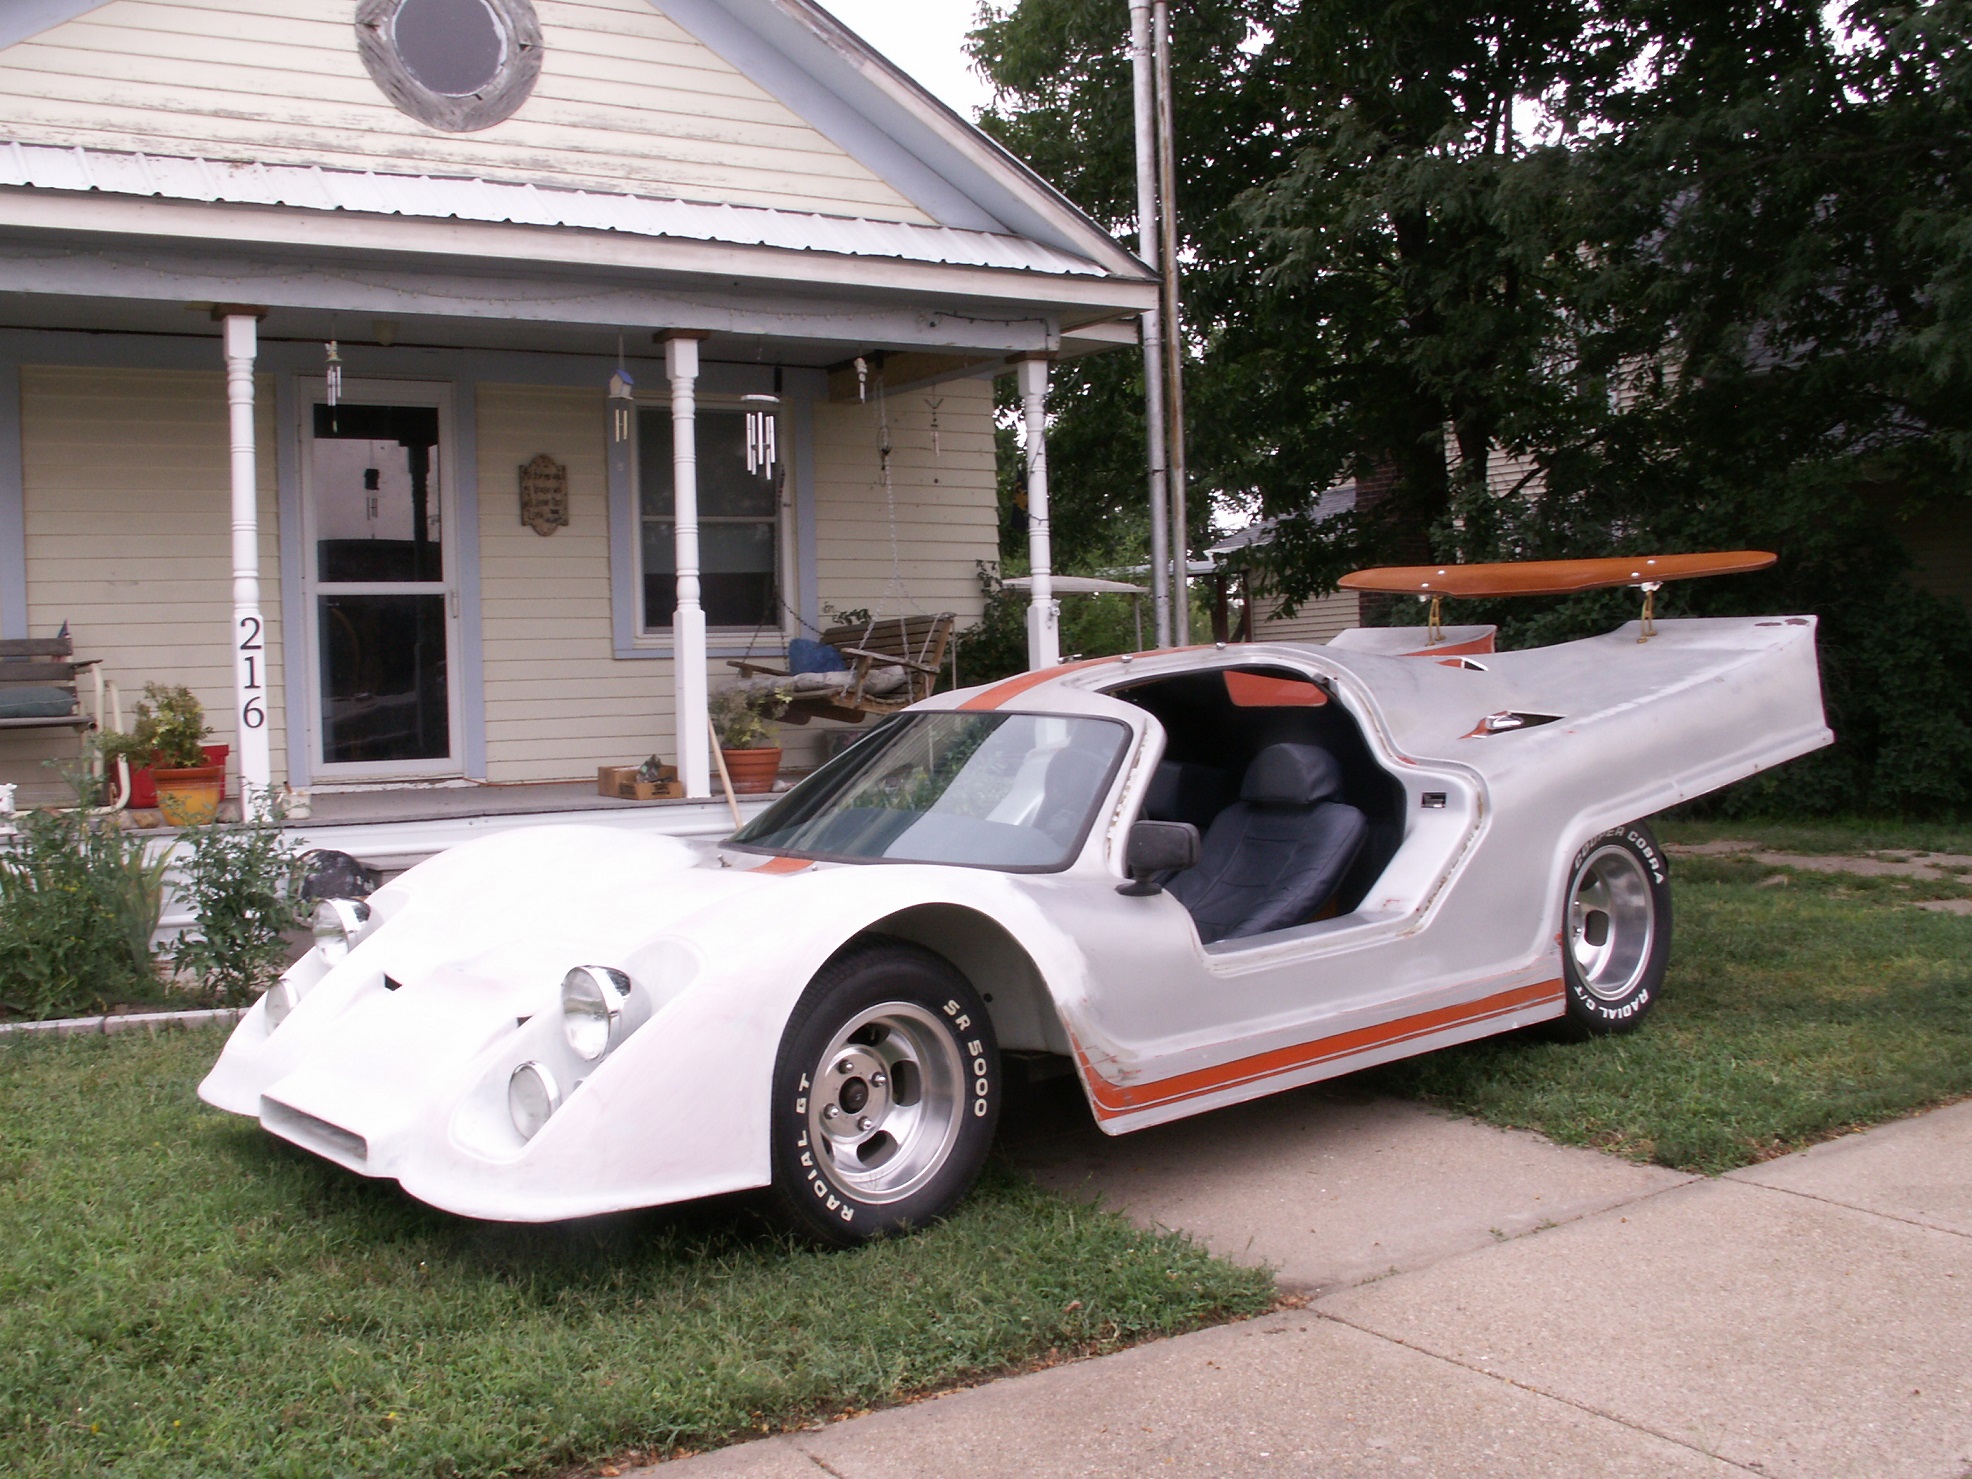
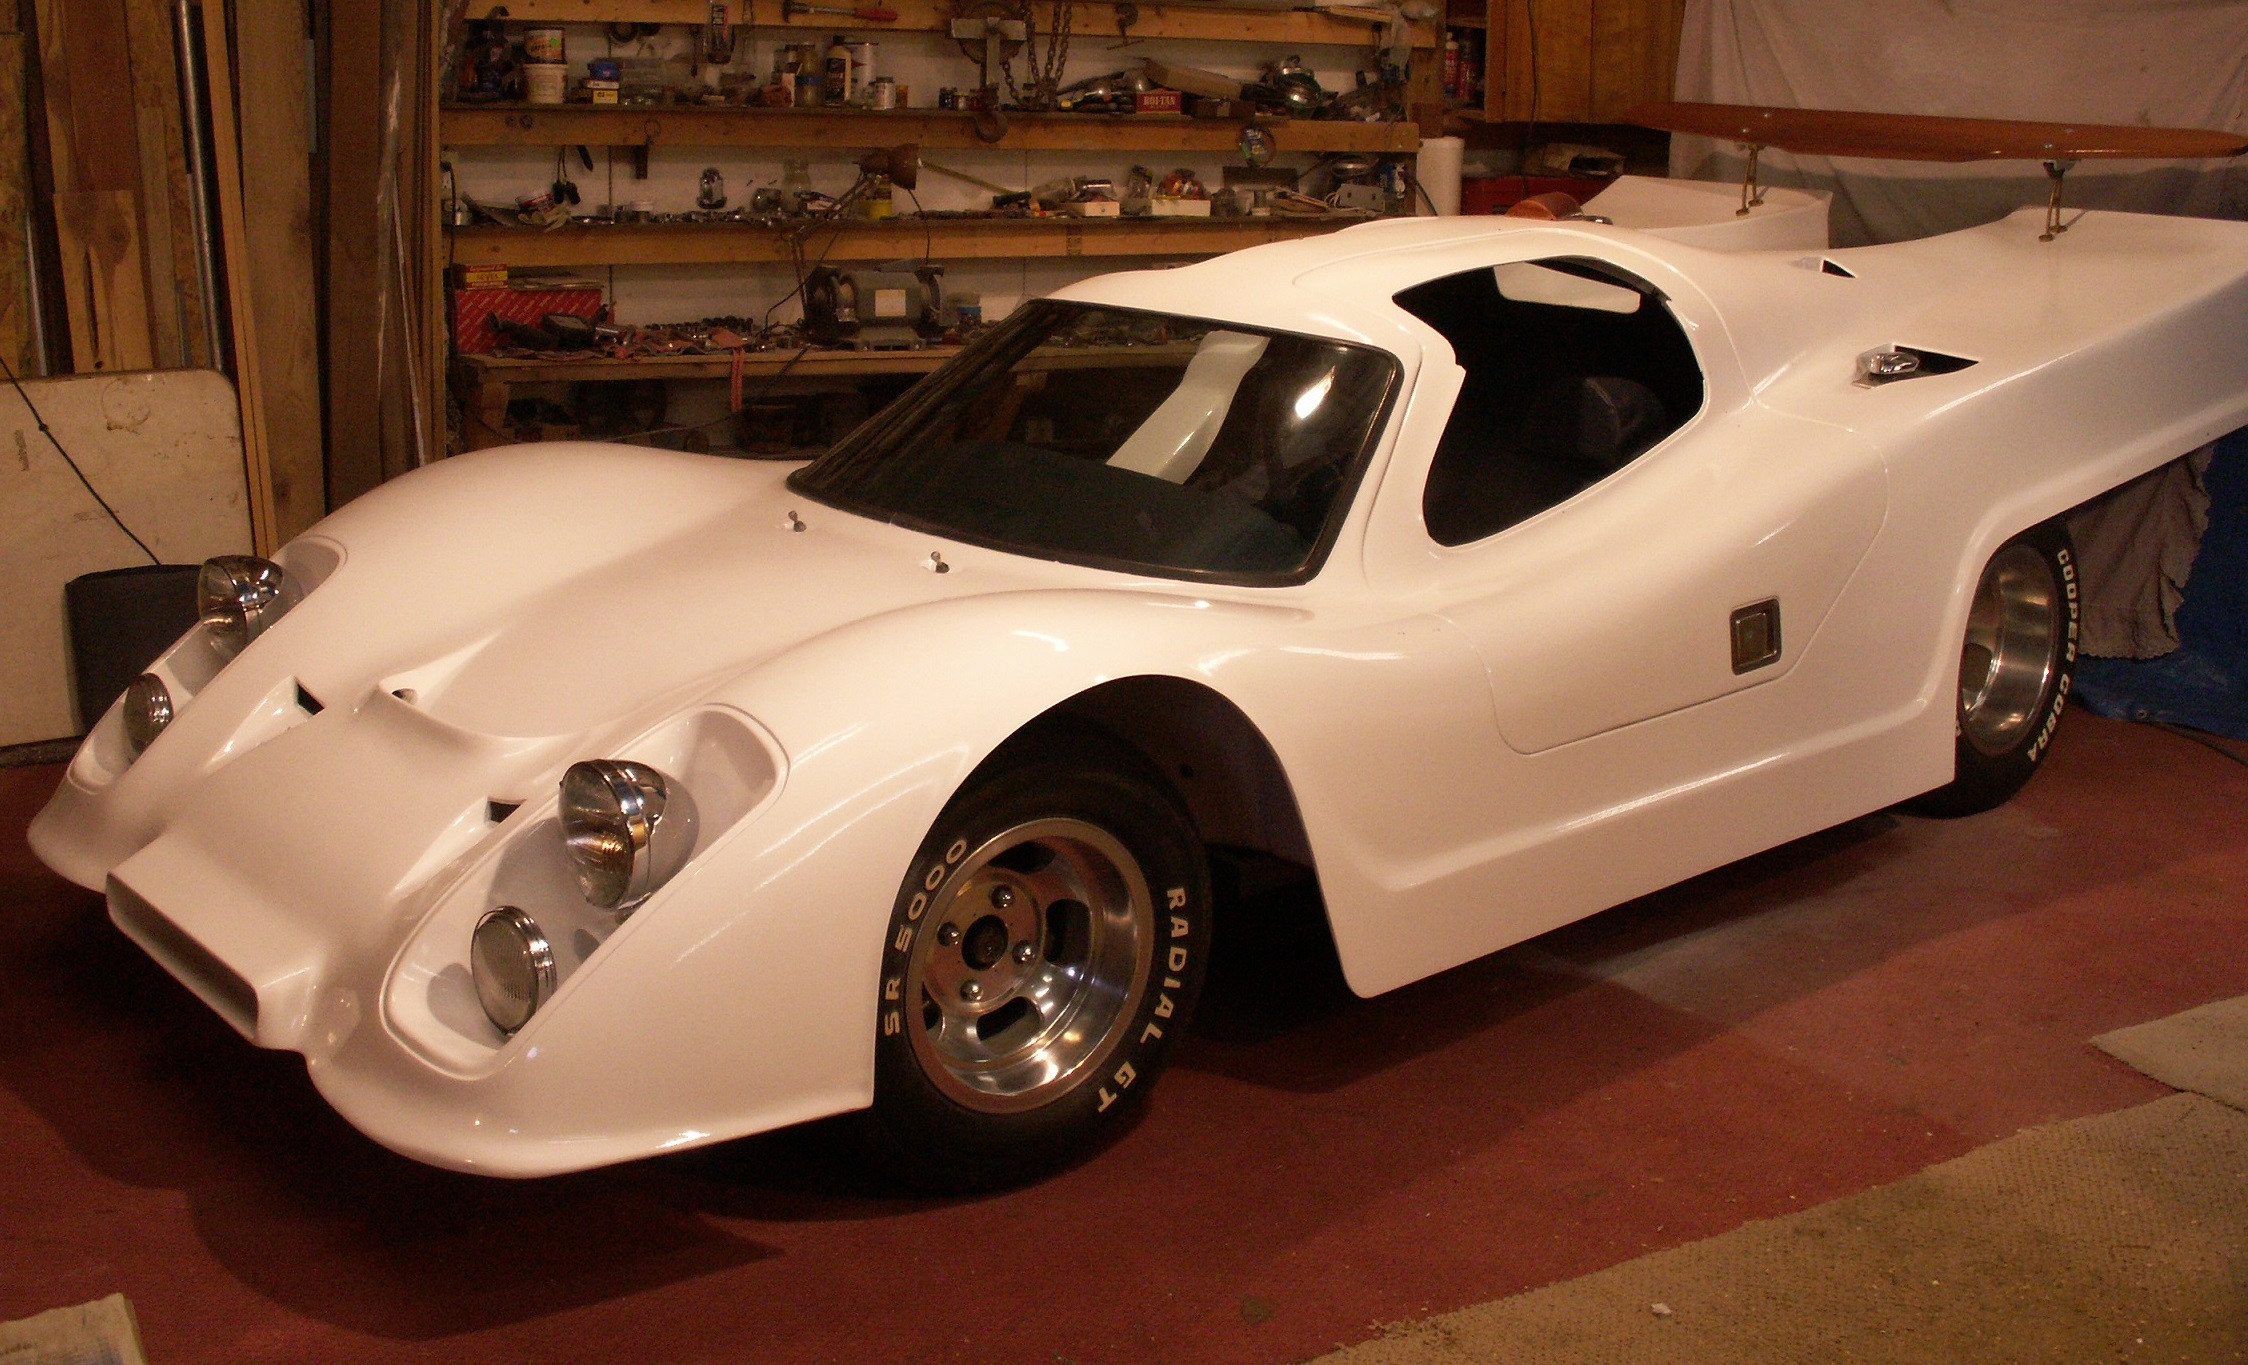
Update, 1-17-2020. We got the main color of white on and started putting it back together and went ahead and did a quick photo shoot. We will paint the dark blue
graphics this spring and some parts are not on it yet.
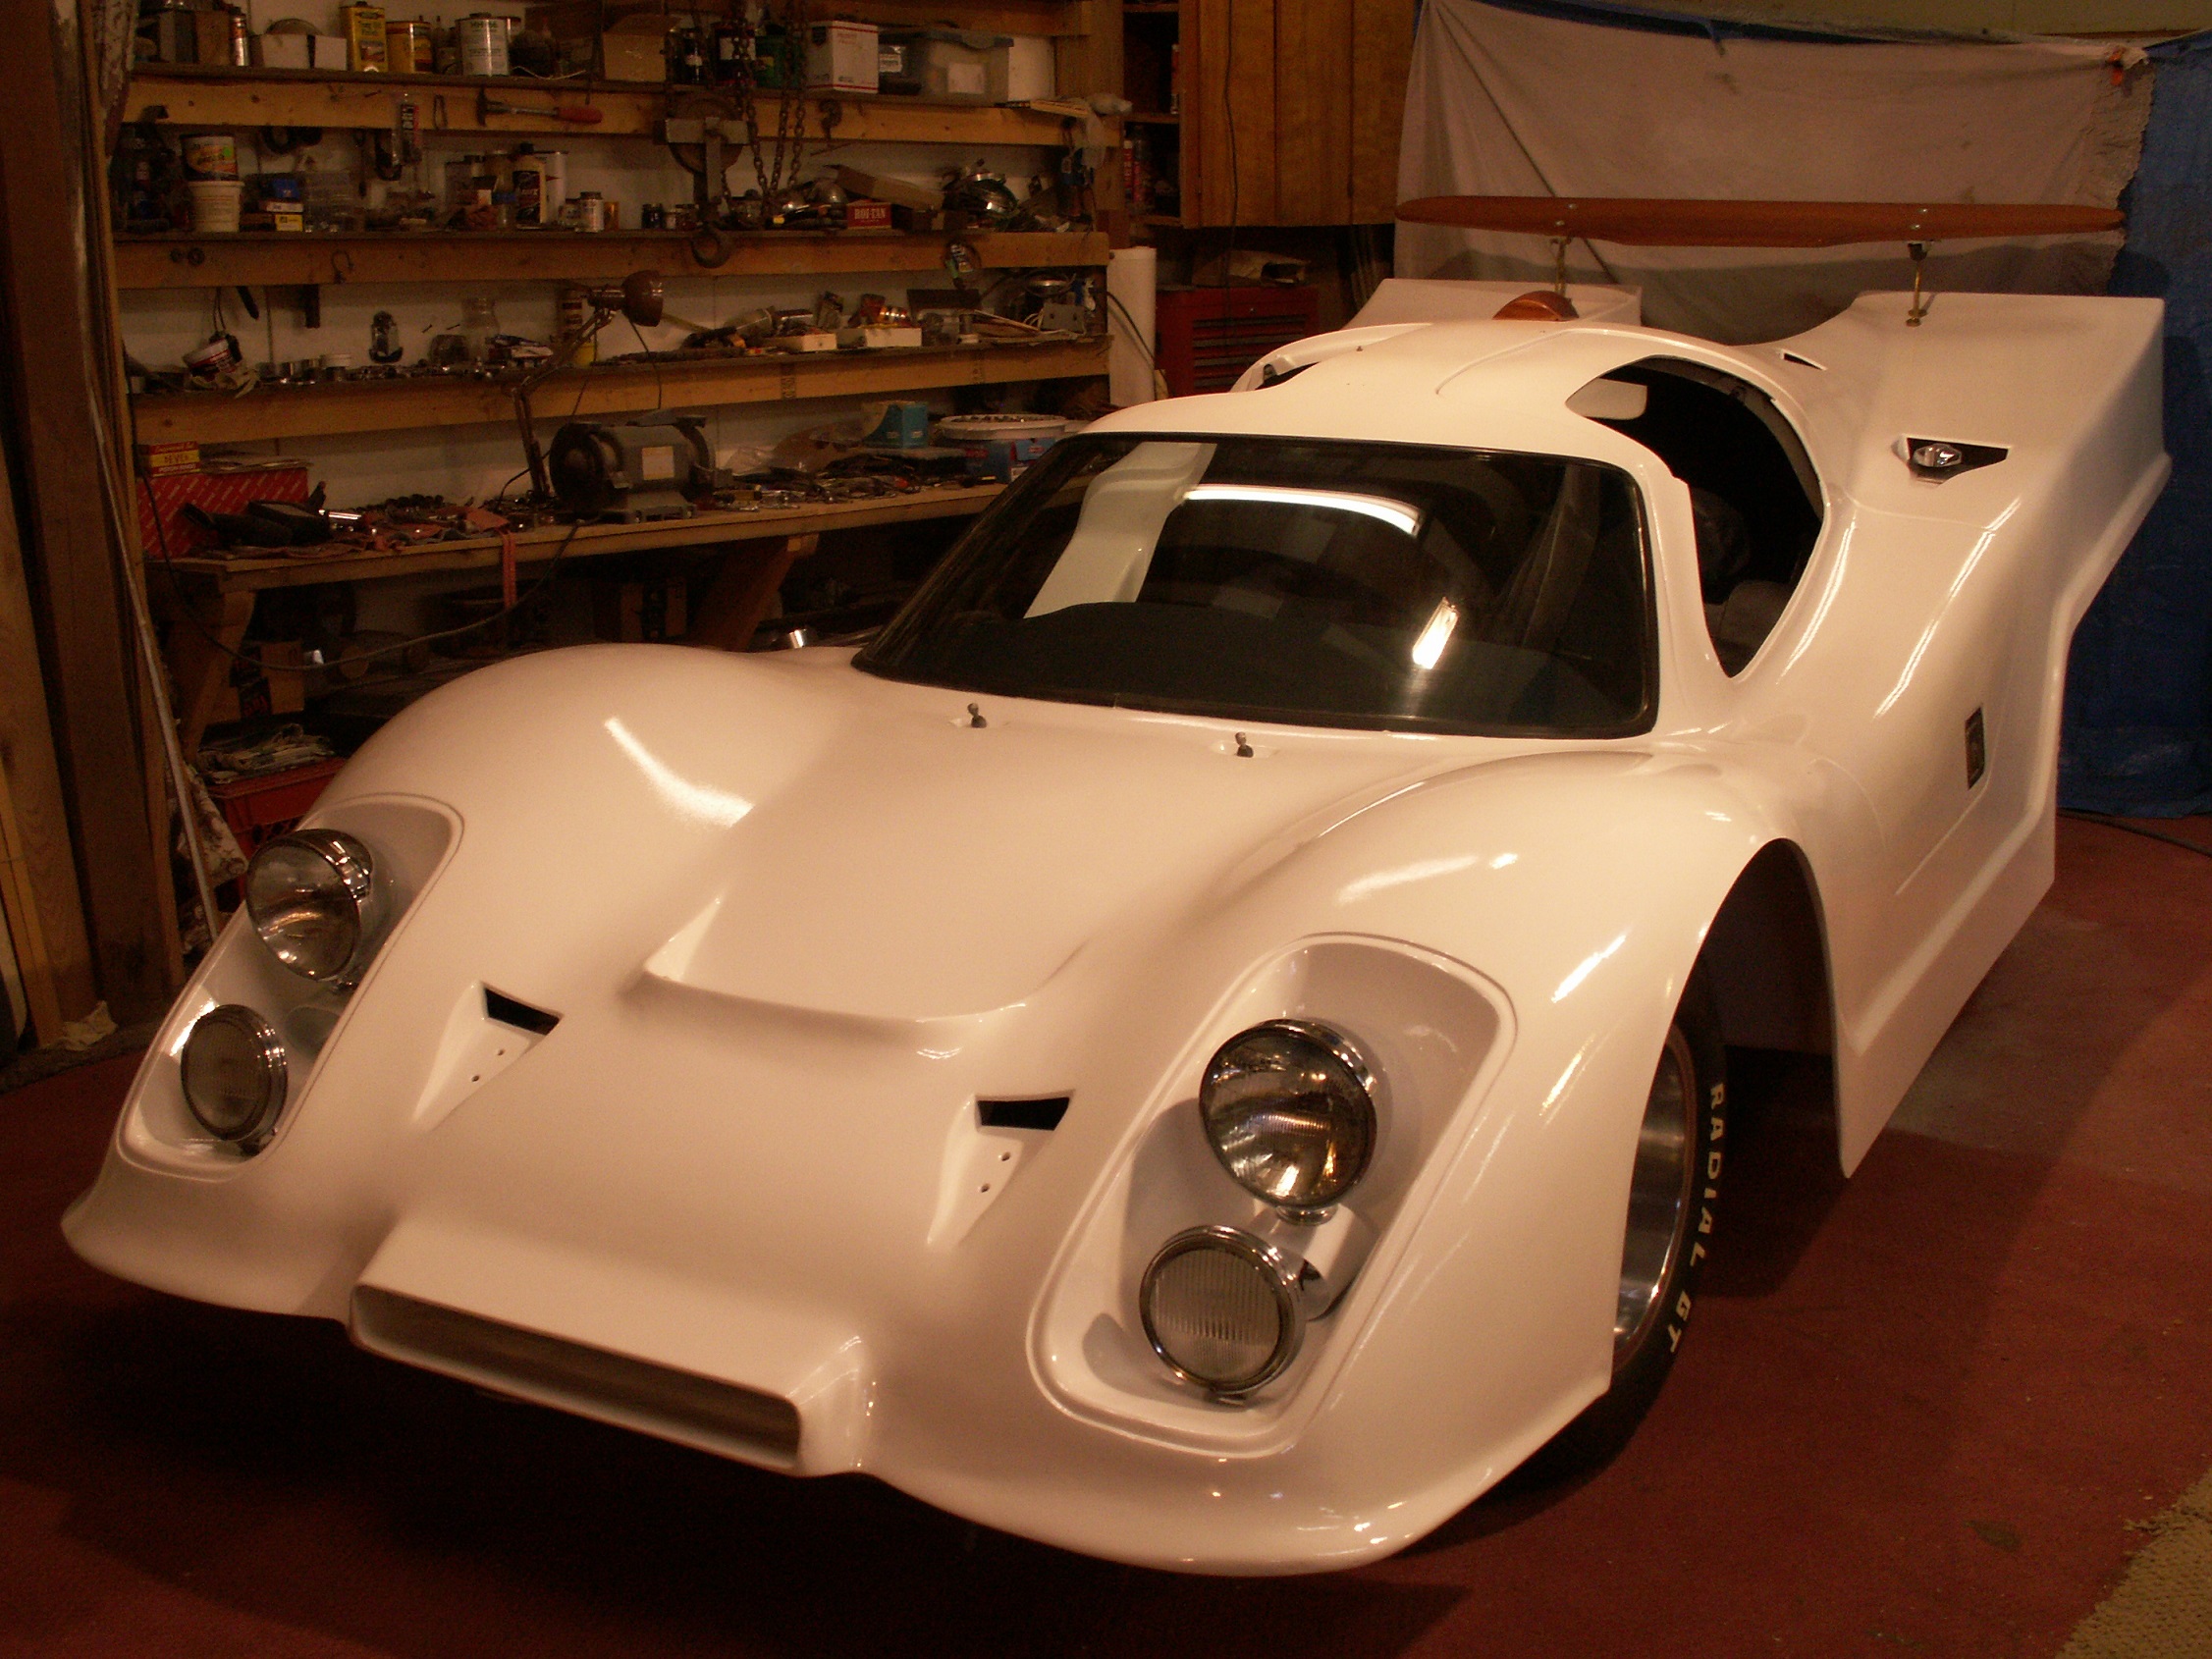
Most of the body repairs were in the front end. I got a little creative with the fiberglass.
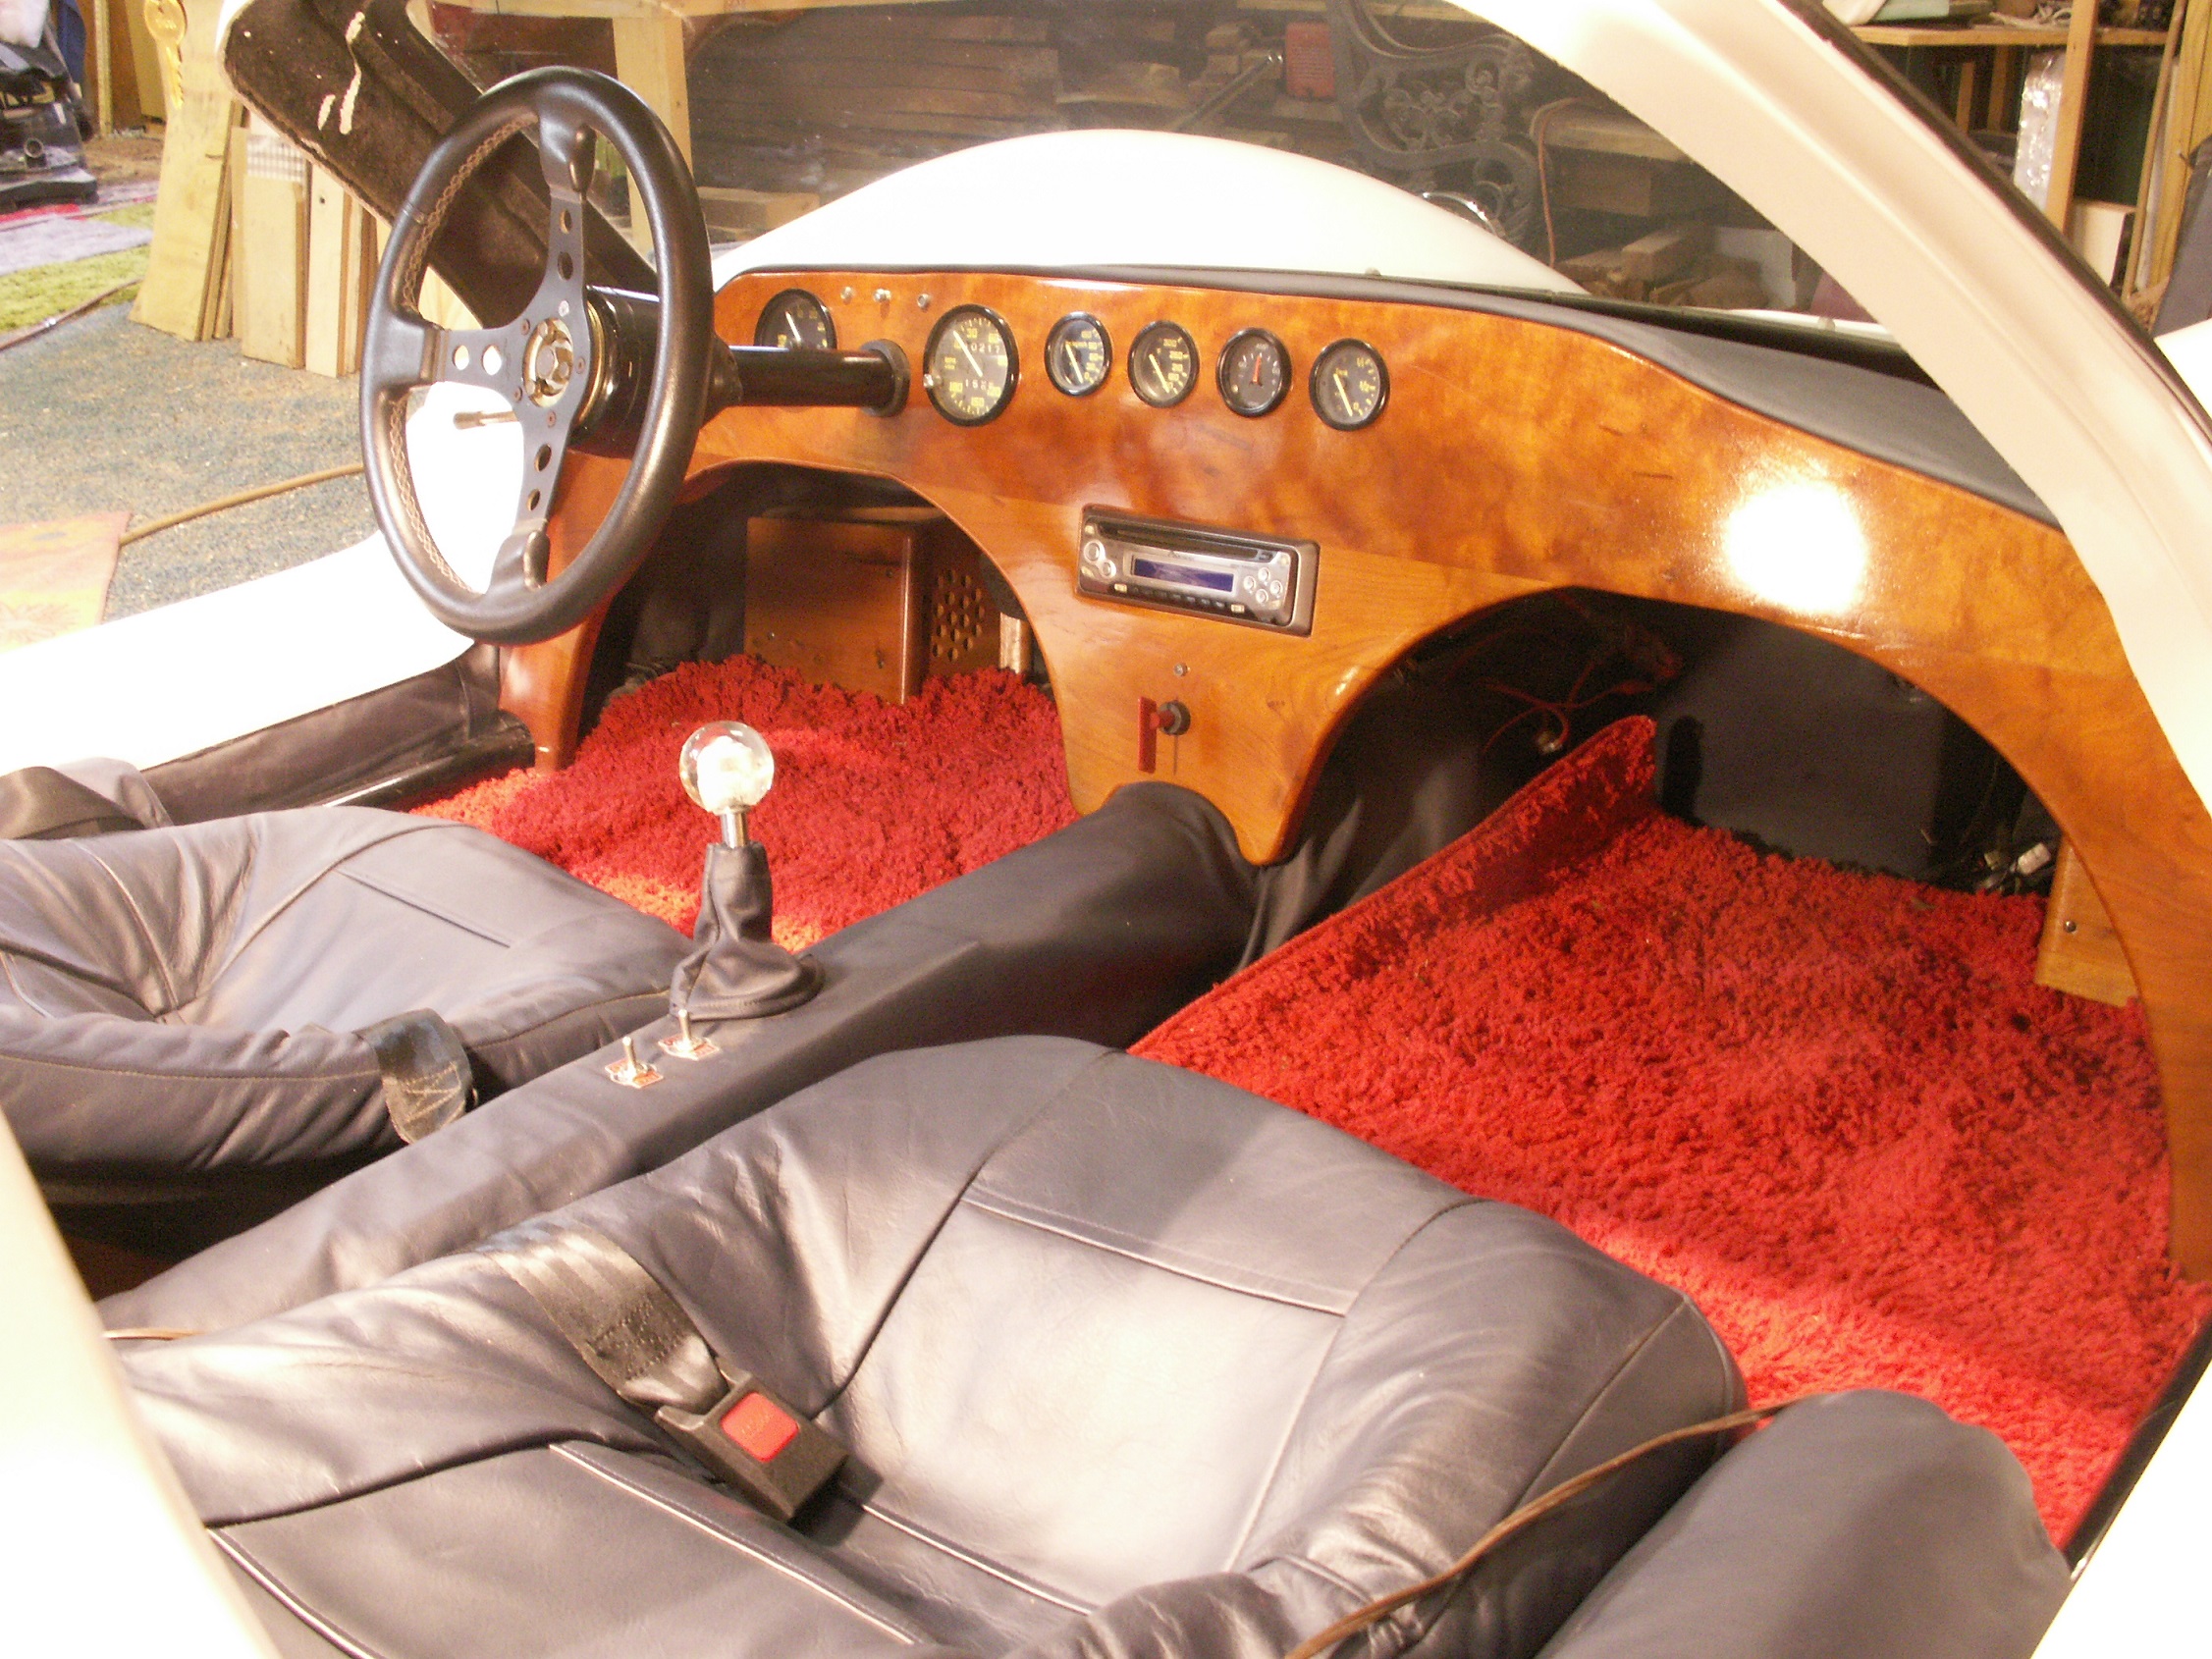
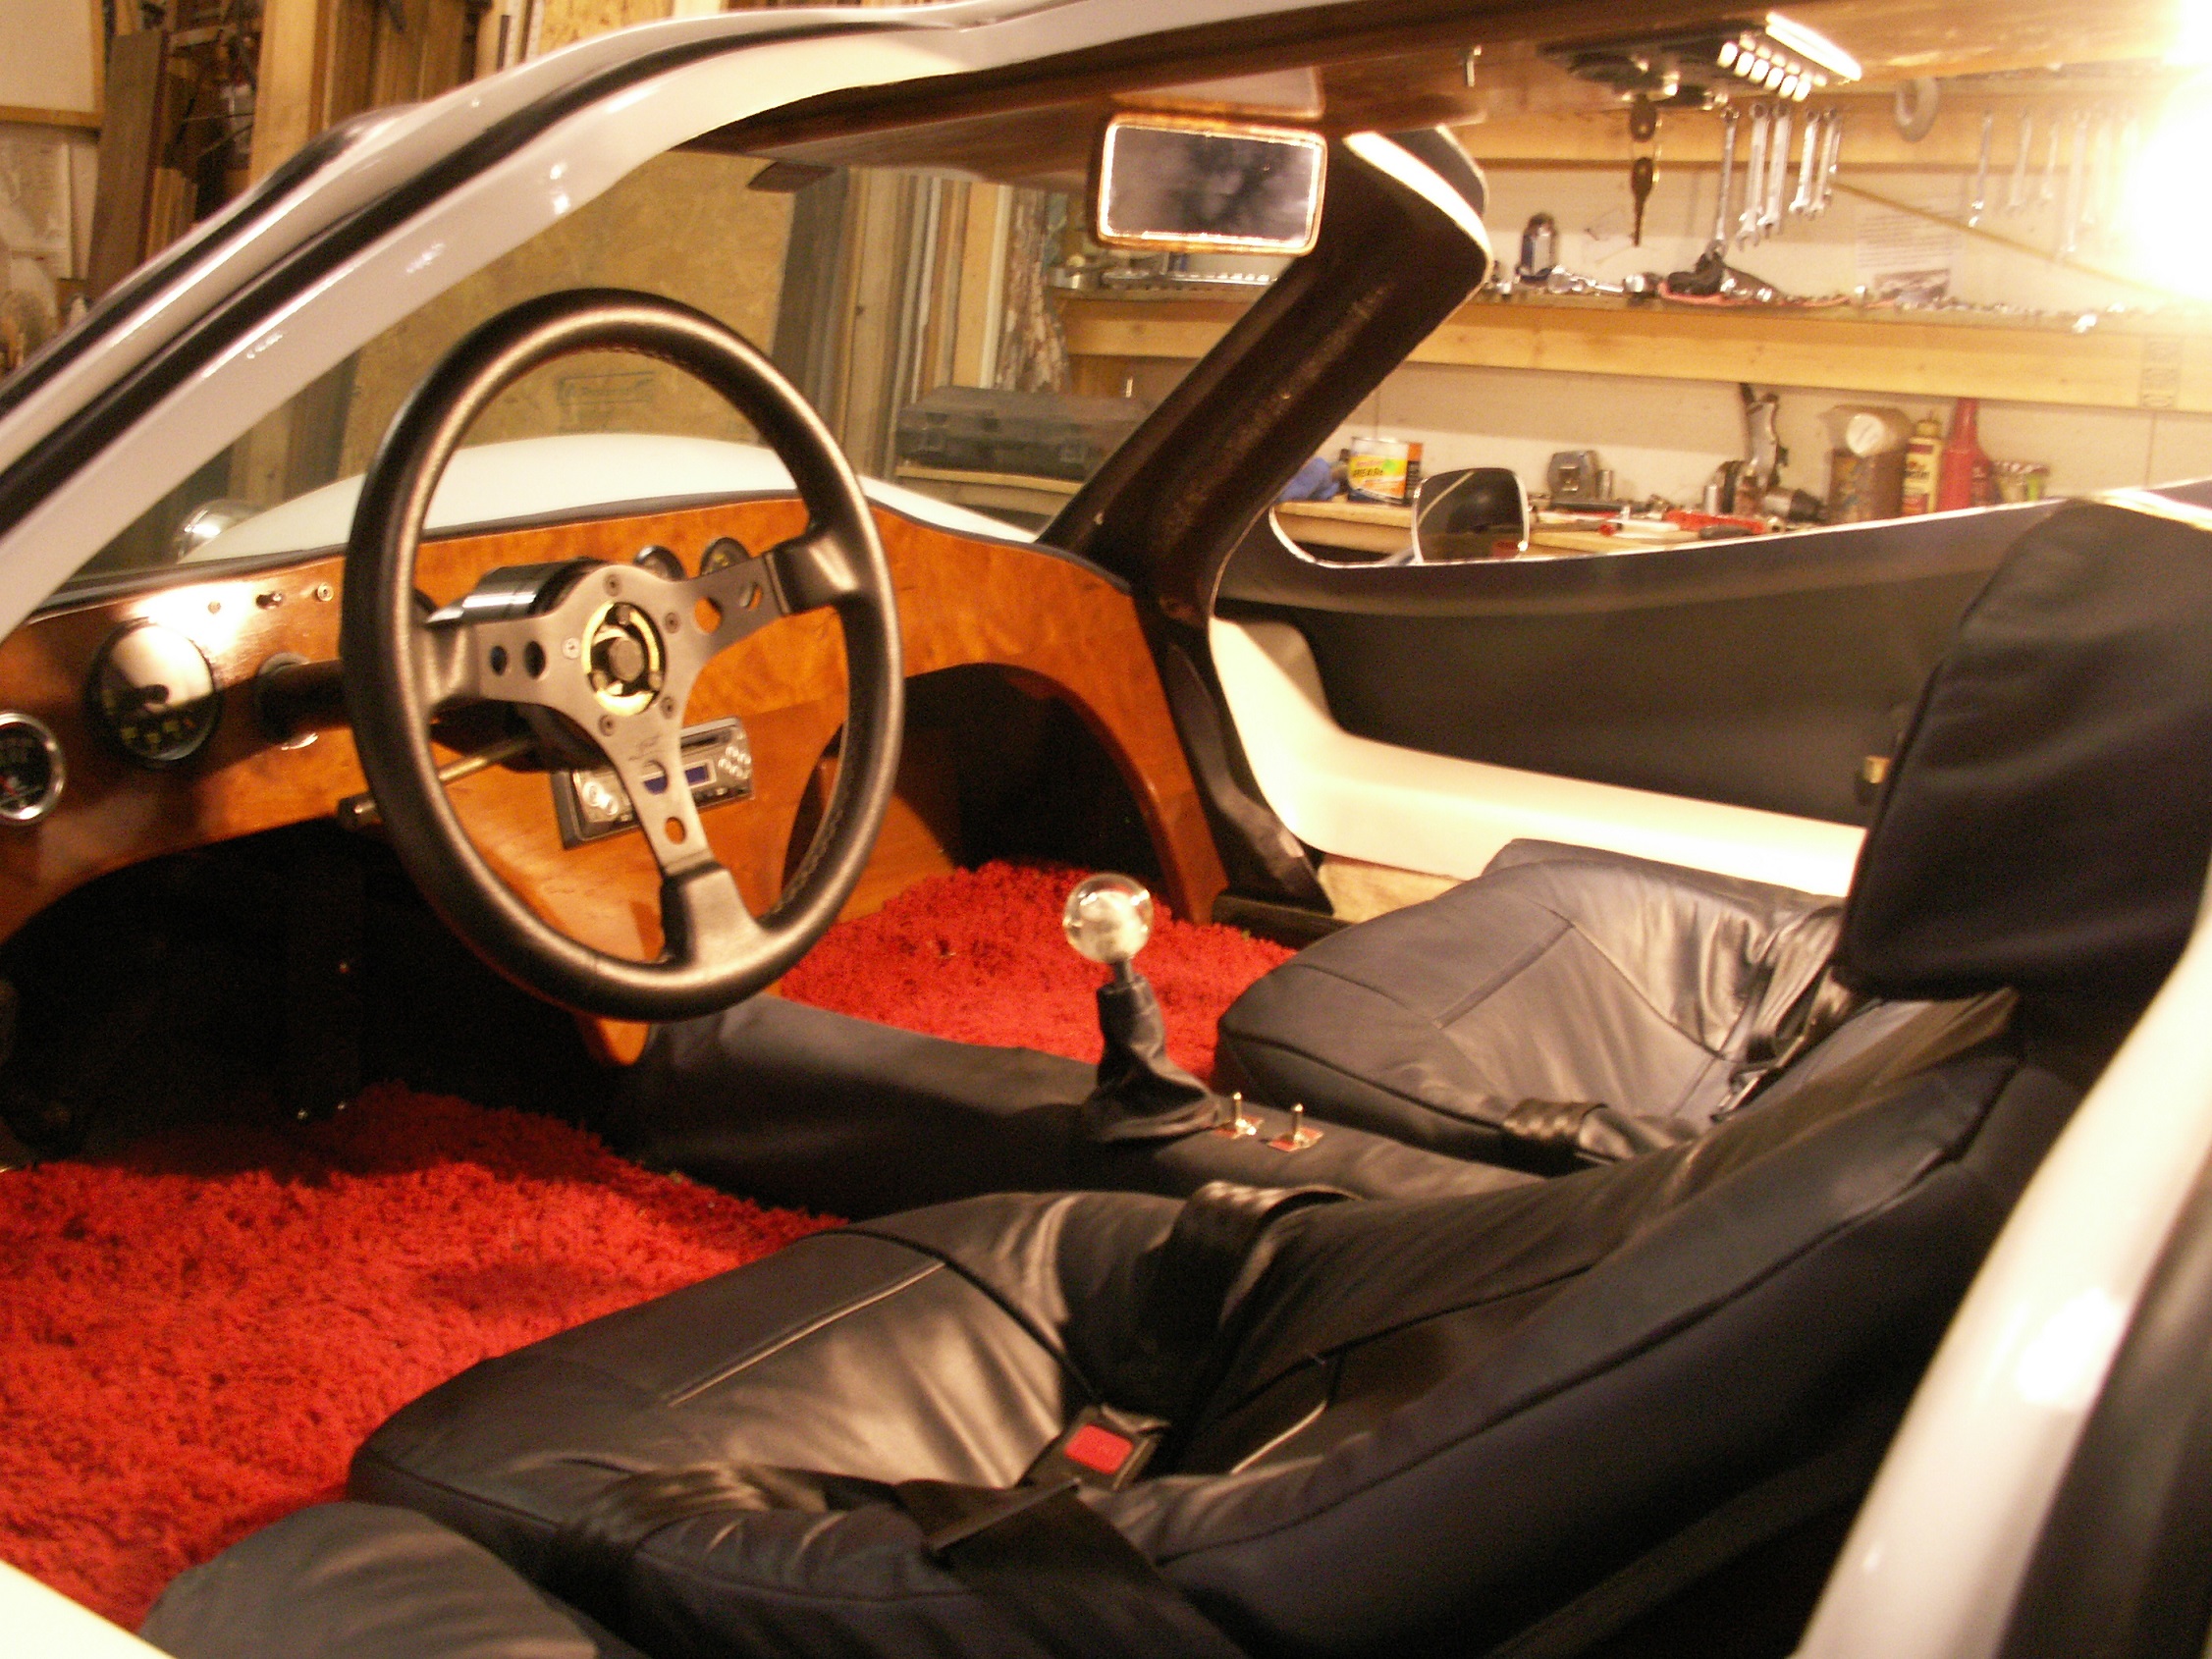
Cherry wood dash. Custom pedal assemble moved for my short legs. High & low beams and the turn signal switches are by the shift lever that has been lowered 2 inches.
Tilt steering to make getting in and out easy.
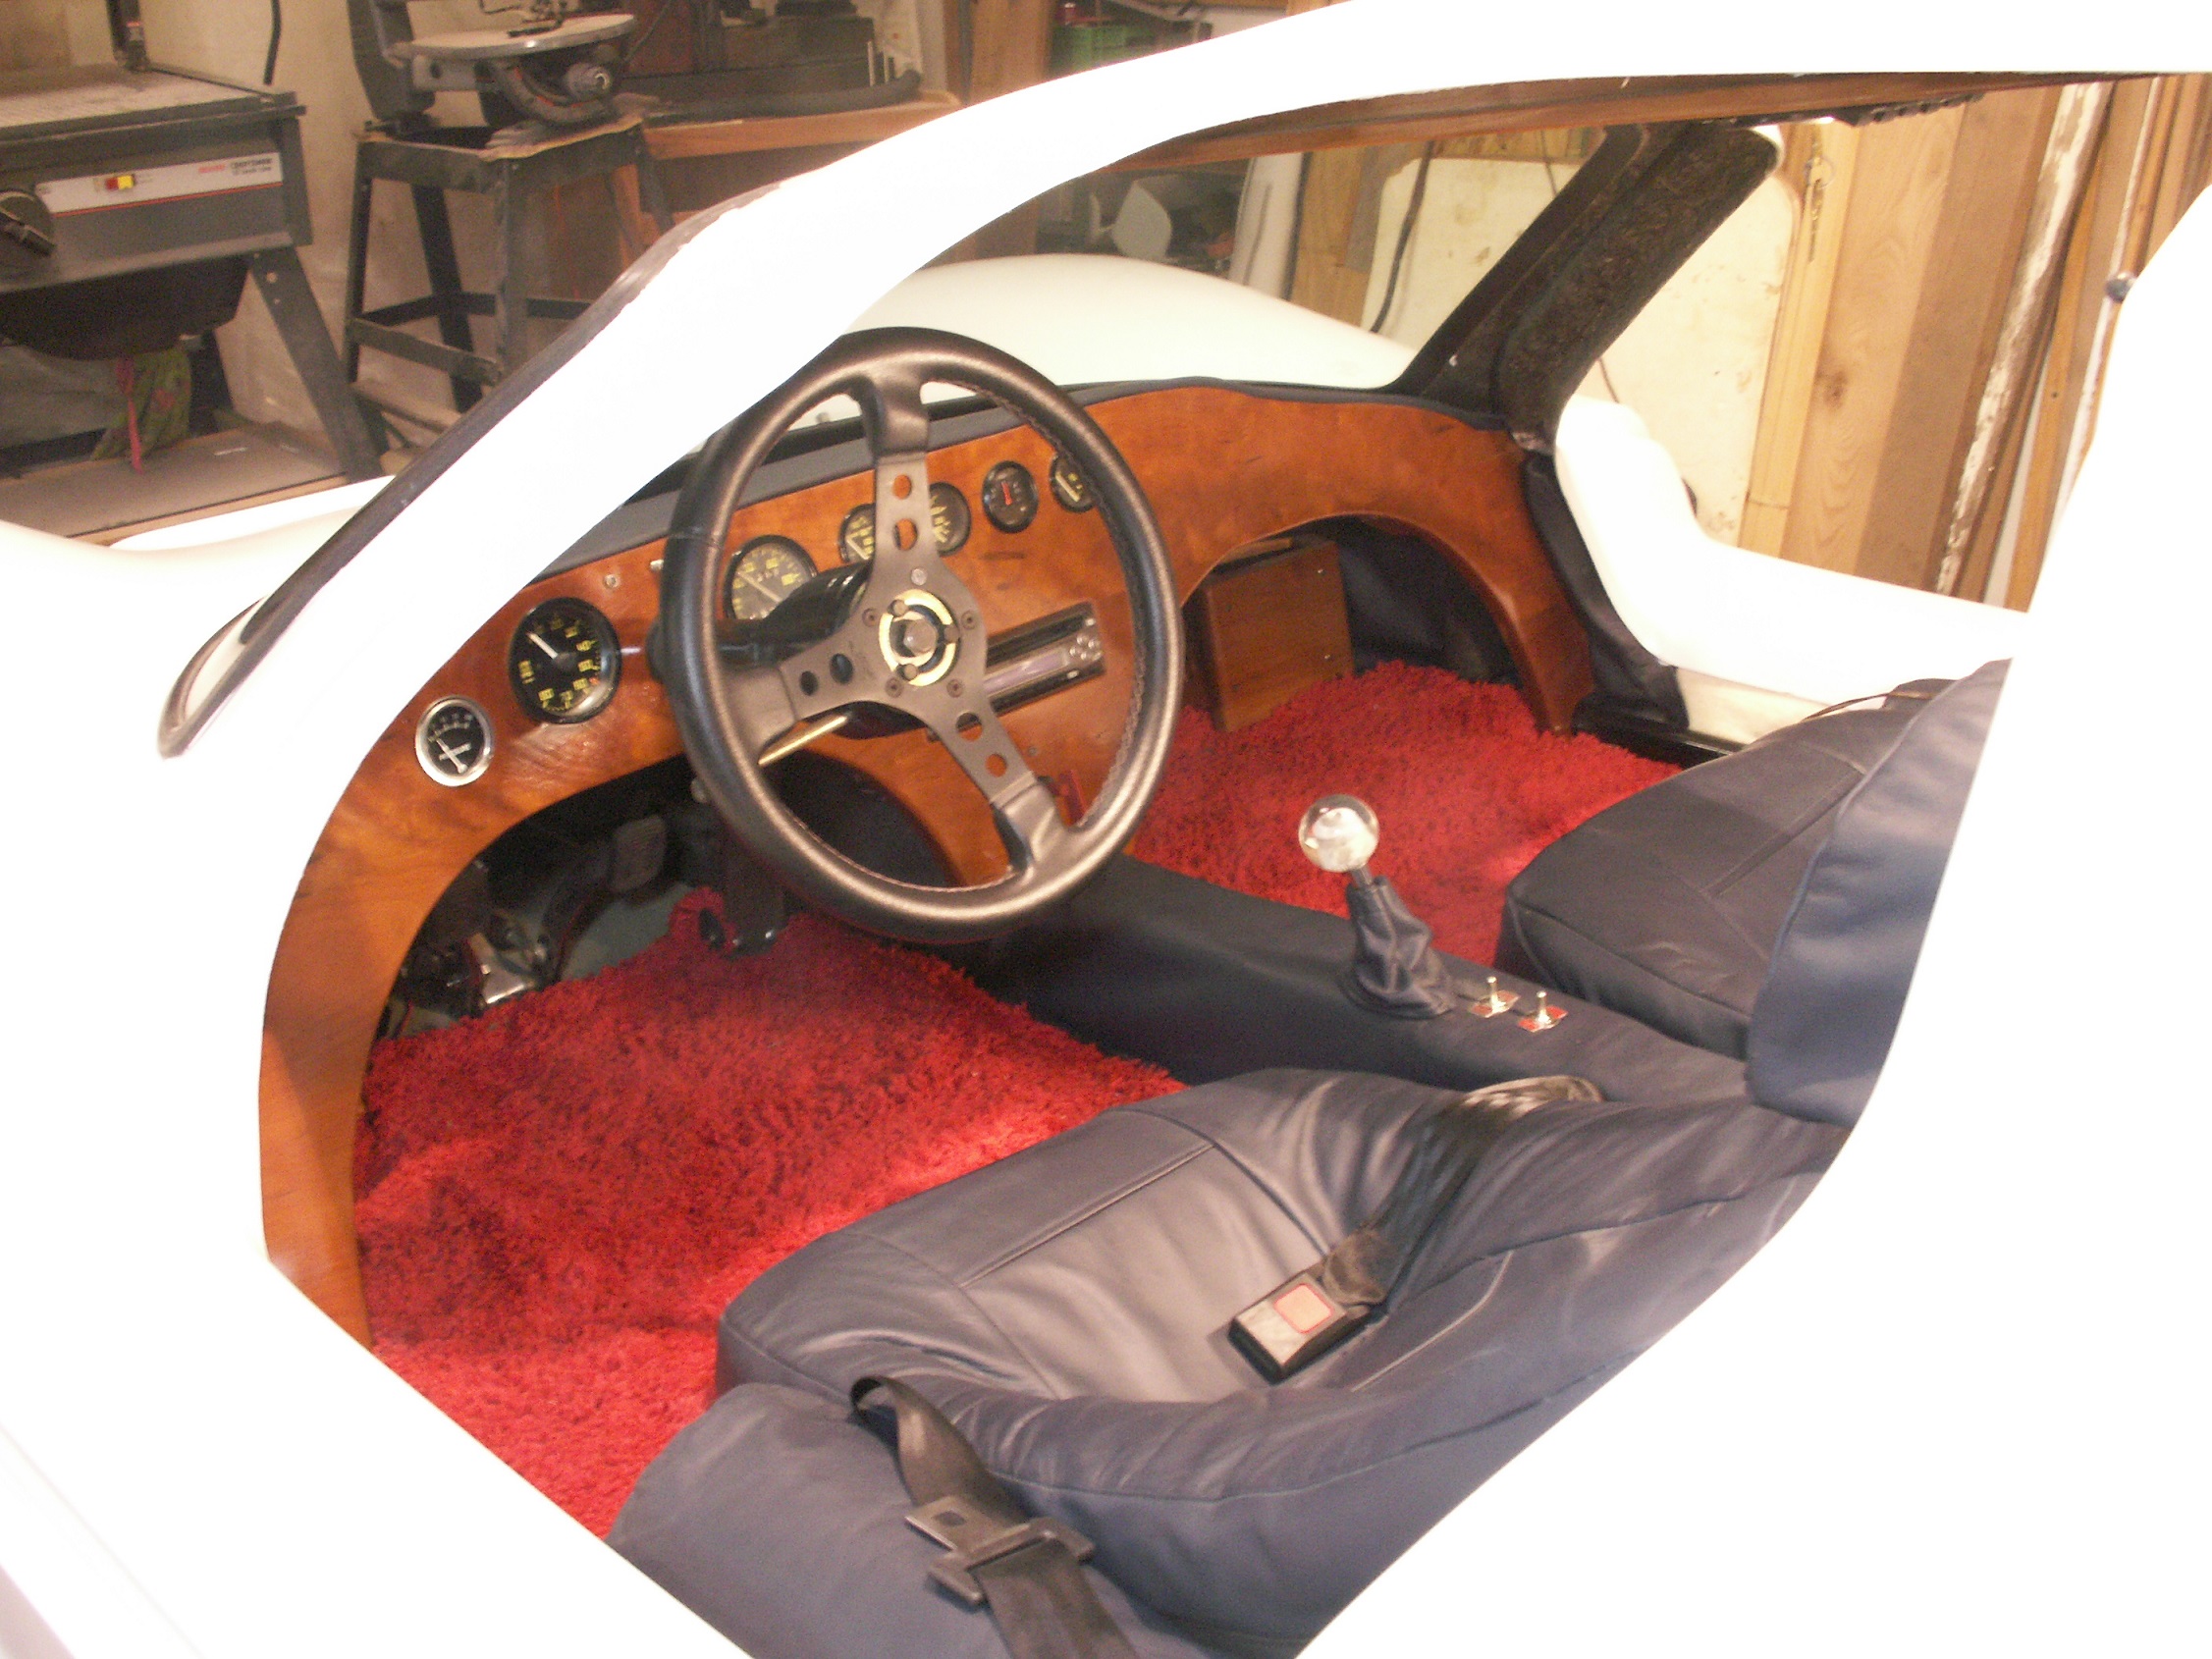
Dark blue and red in keeping with the red, white and blue theme.
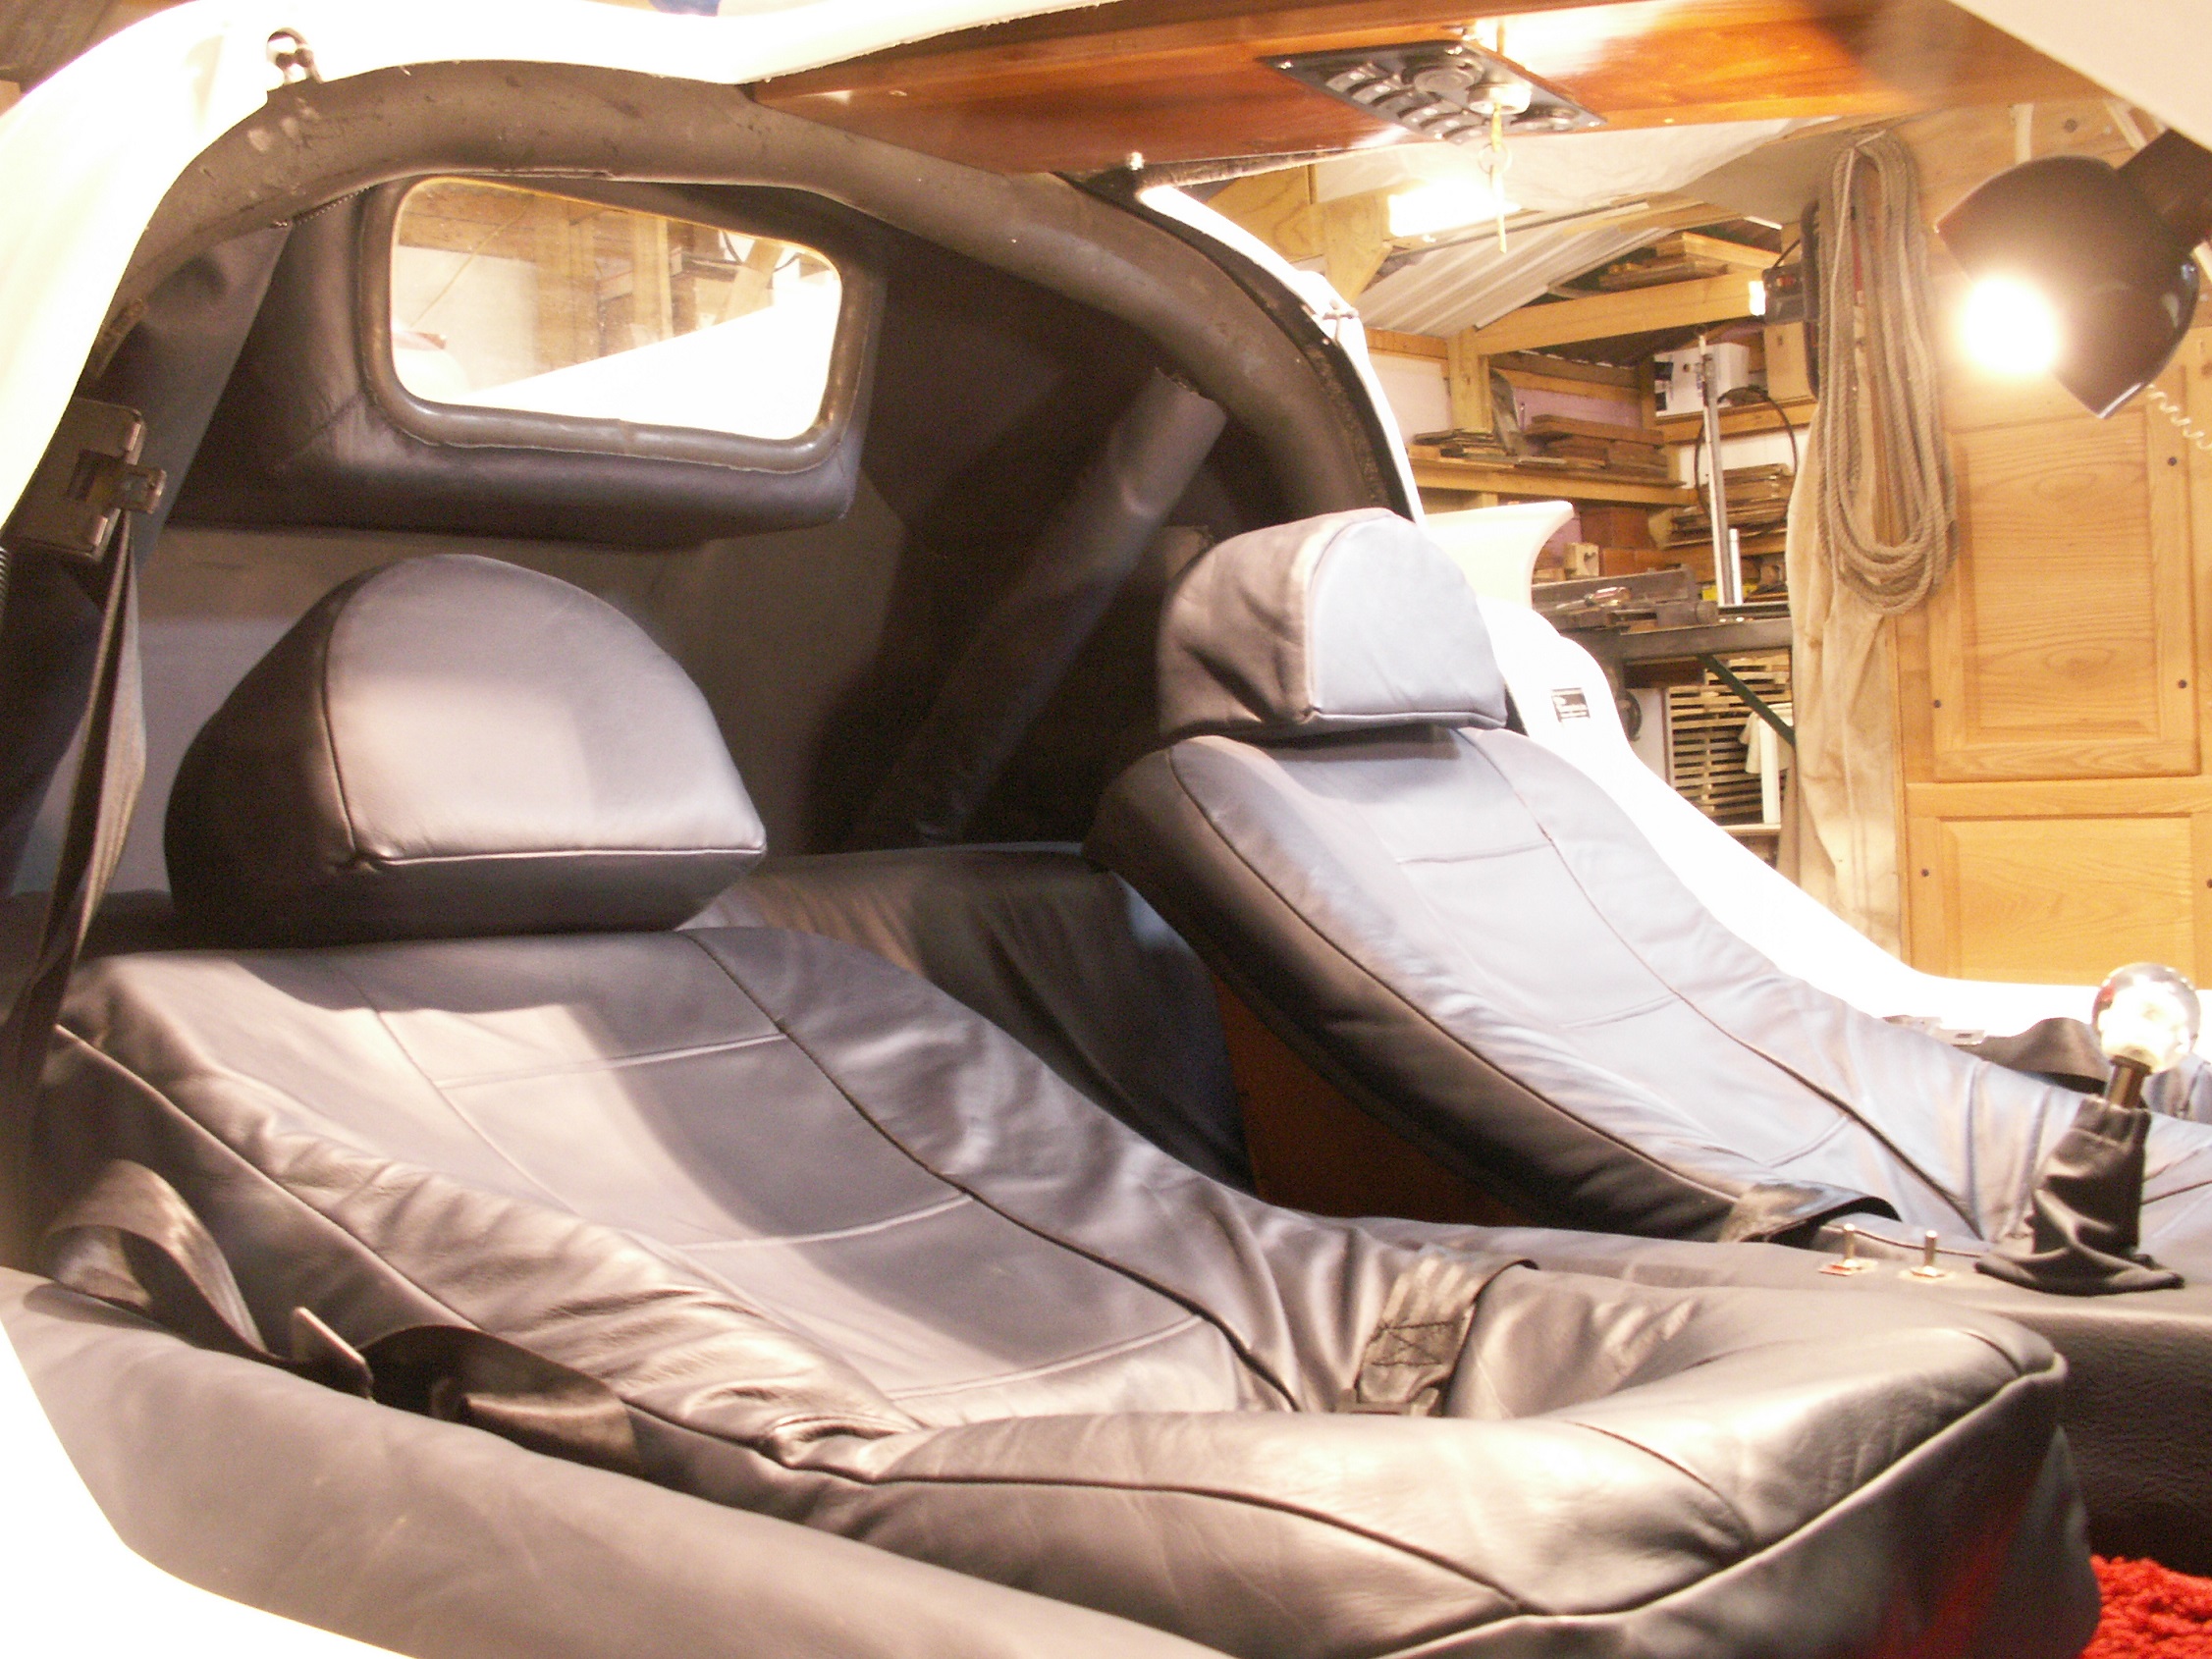
Seats, interior panels and top of dashboard all custom made from dye matched dark blue leather.
Cherry wood speaker/foot-rest boxes on each side. Battery is located forward of the passengers feet.
Full roll bar with side impact bars and roll bar behind dash.
All the leather panels at the back of the cockpit have 3/4 inch felt and 1 inch memory foam to keep down engine noise.
The seats are in custom wood frames, to hold the seats in our preferred position and bolted down.
Custom made cherry wood overhead switch panel.
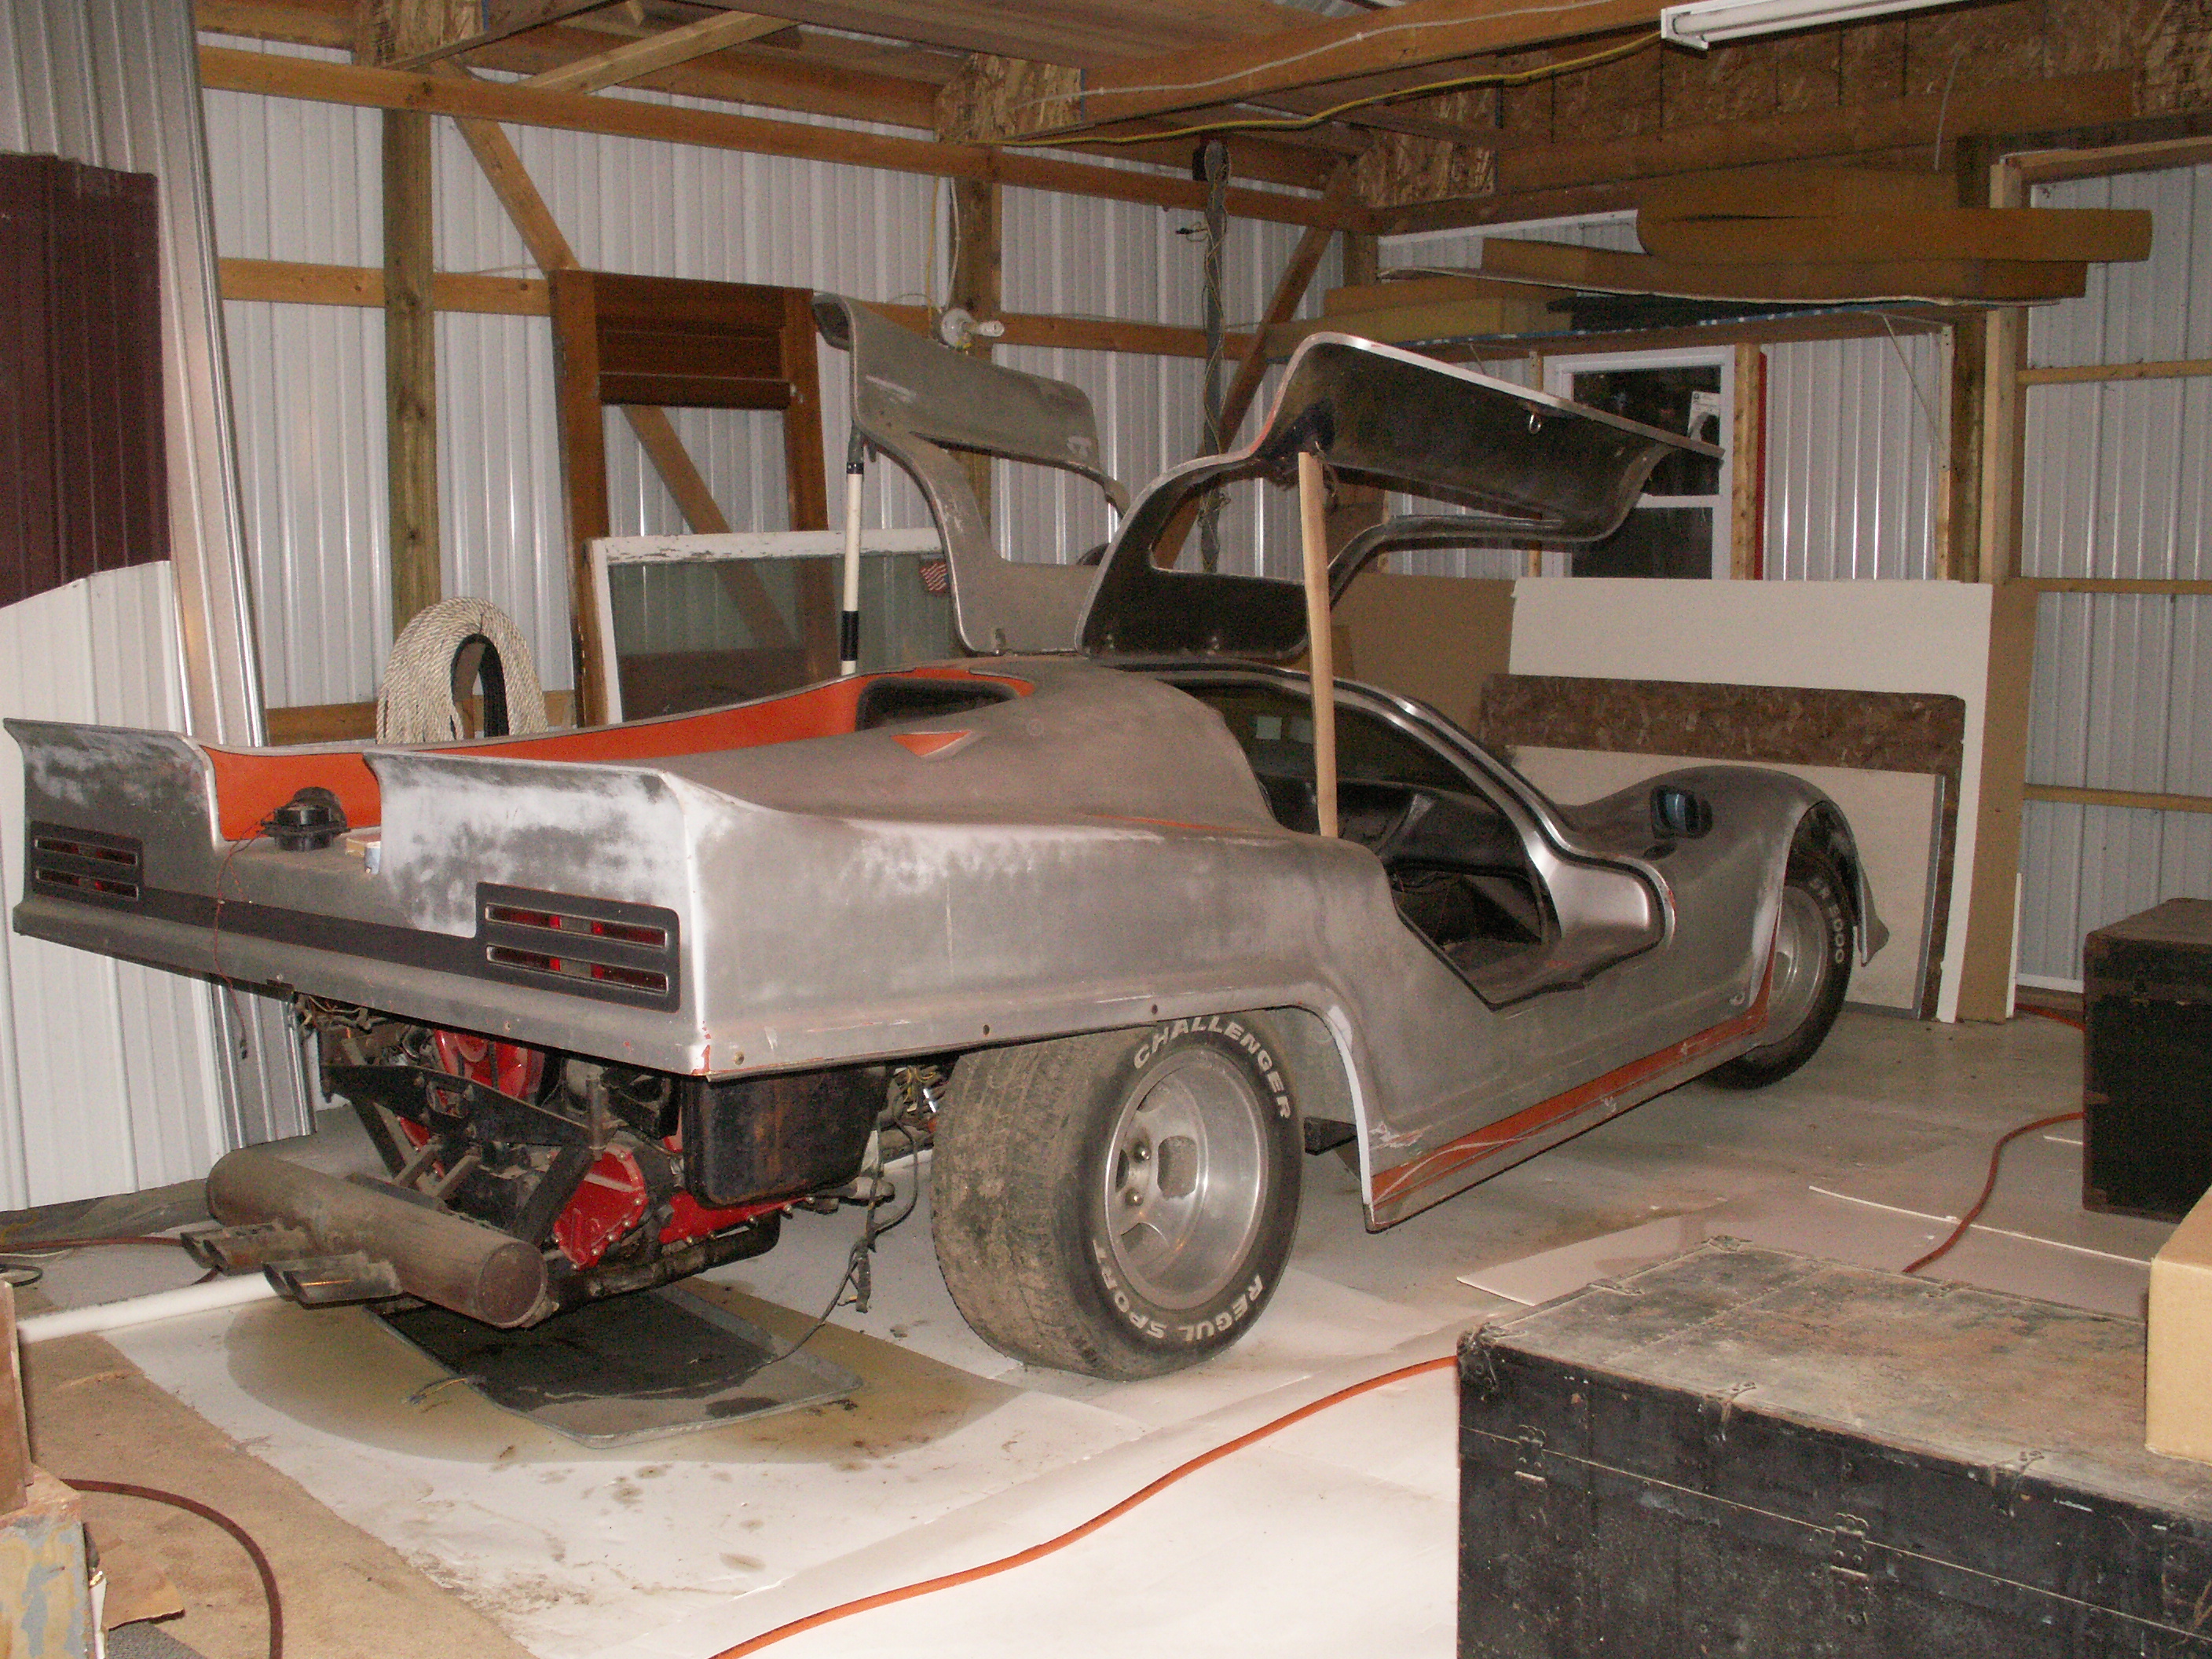
Update, 2-11-2020. Now it is time to start on the engine. I have not rebuilt an engine in quit a while and It's something I enjoy, so
I decided to take my time and not be in a hurry. After removing most of the outside parts, now it's time to start braking down the engine.
Lot's of parts, boy I'm having fun now :-)
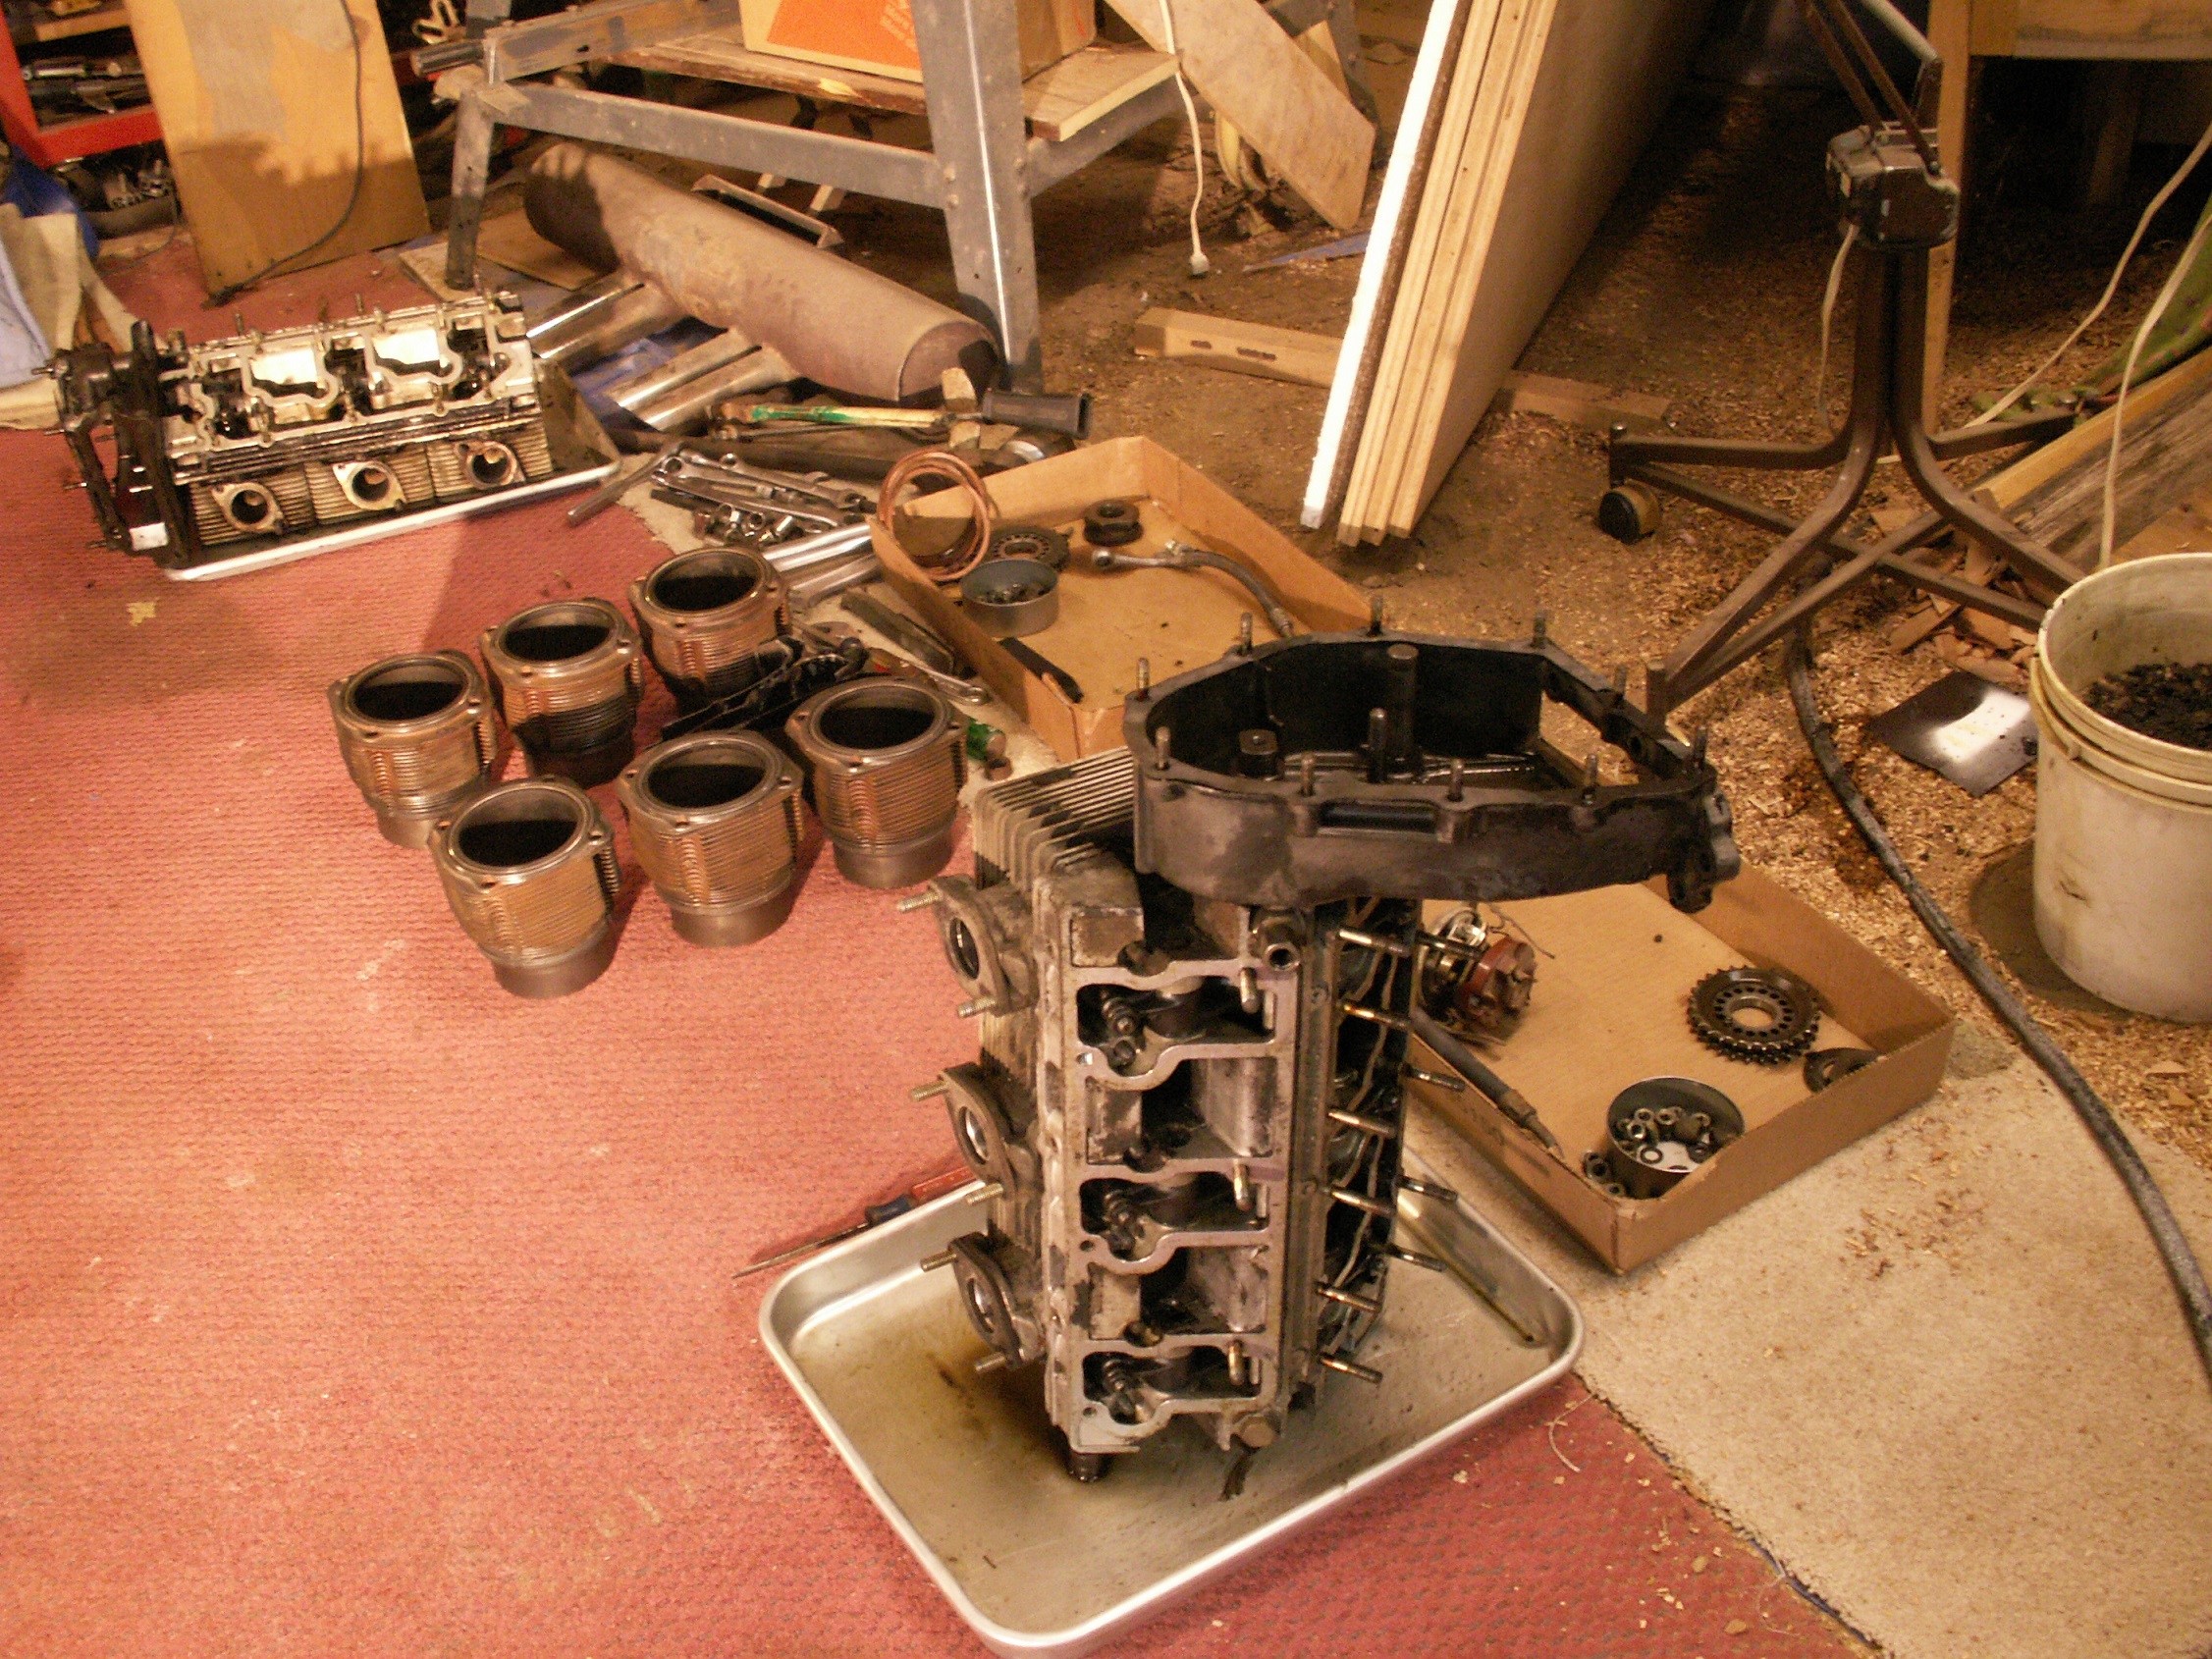
Brake down the heads,

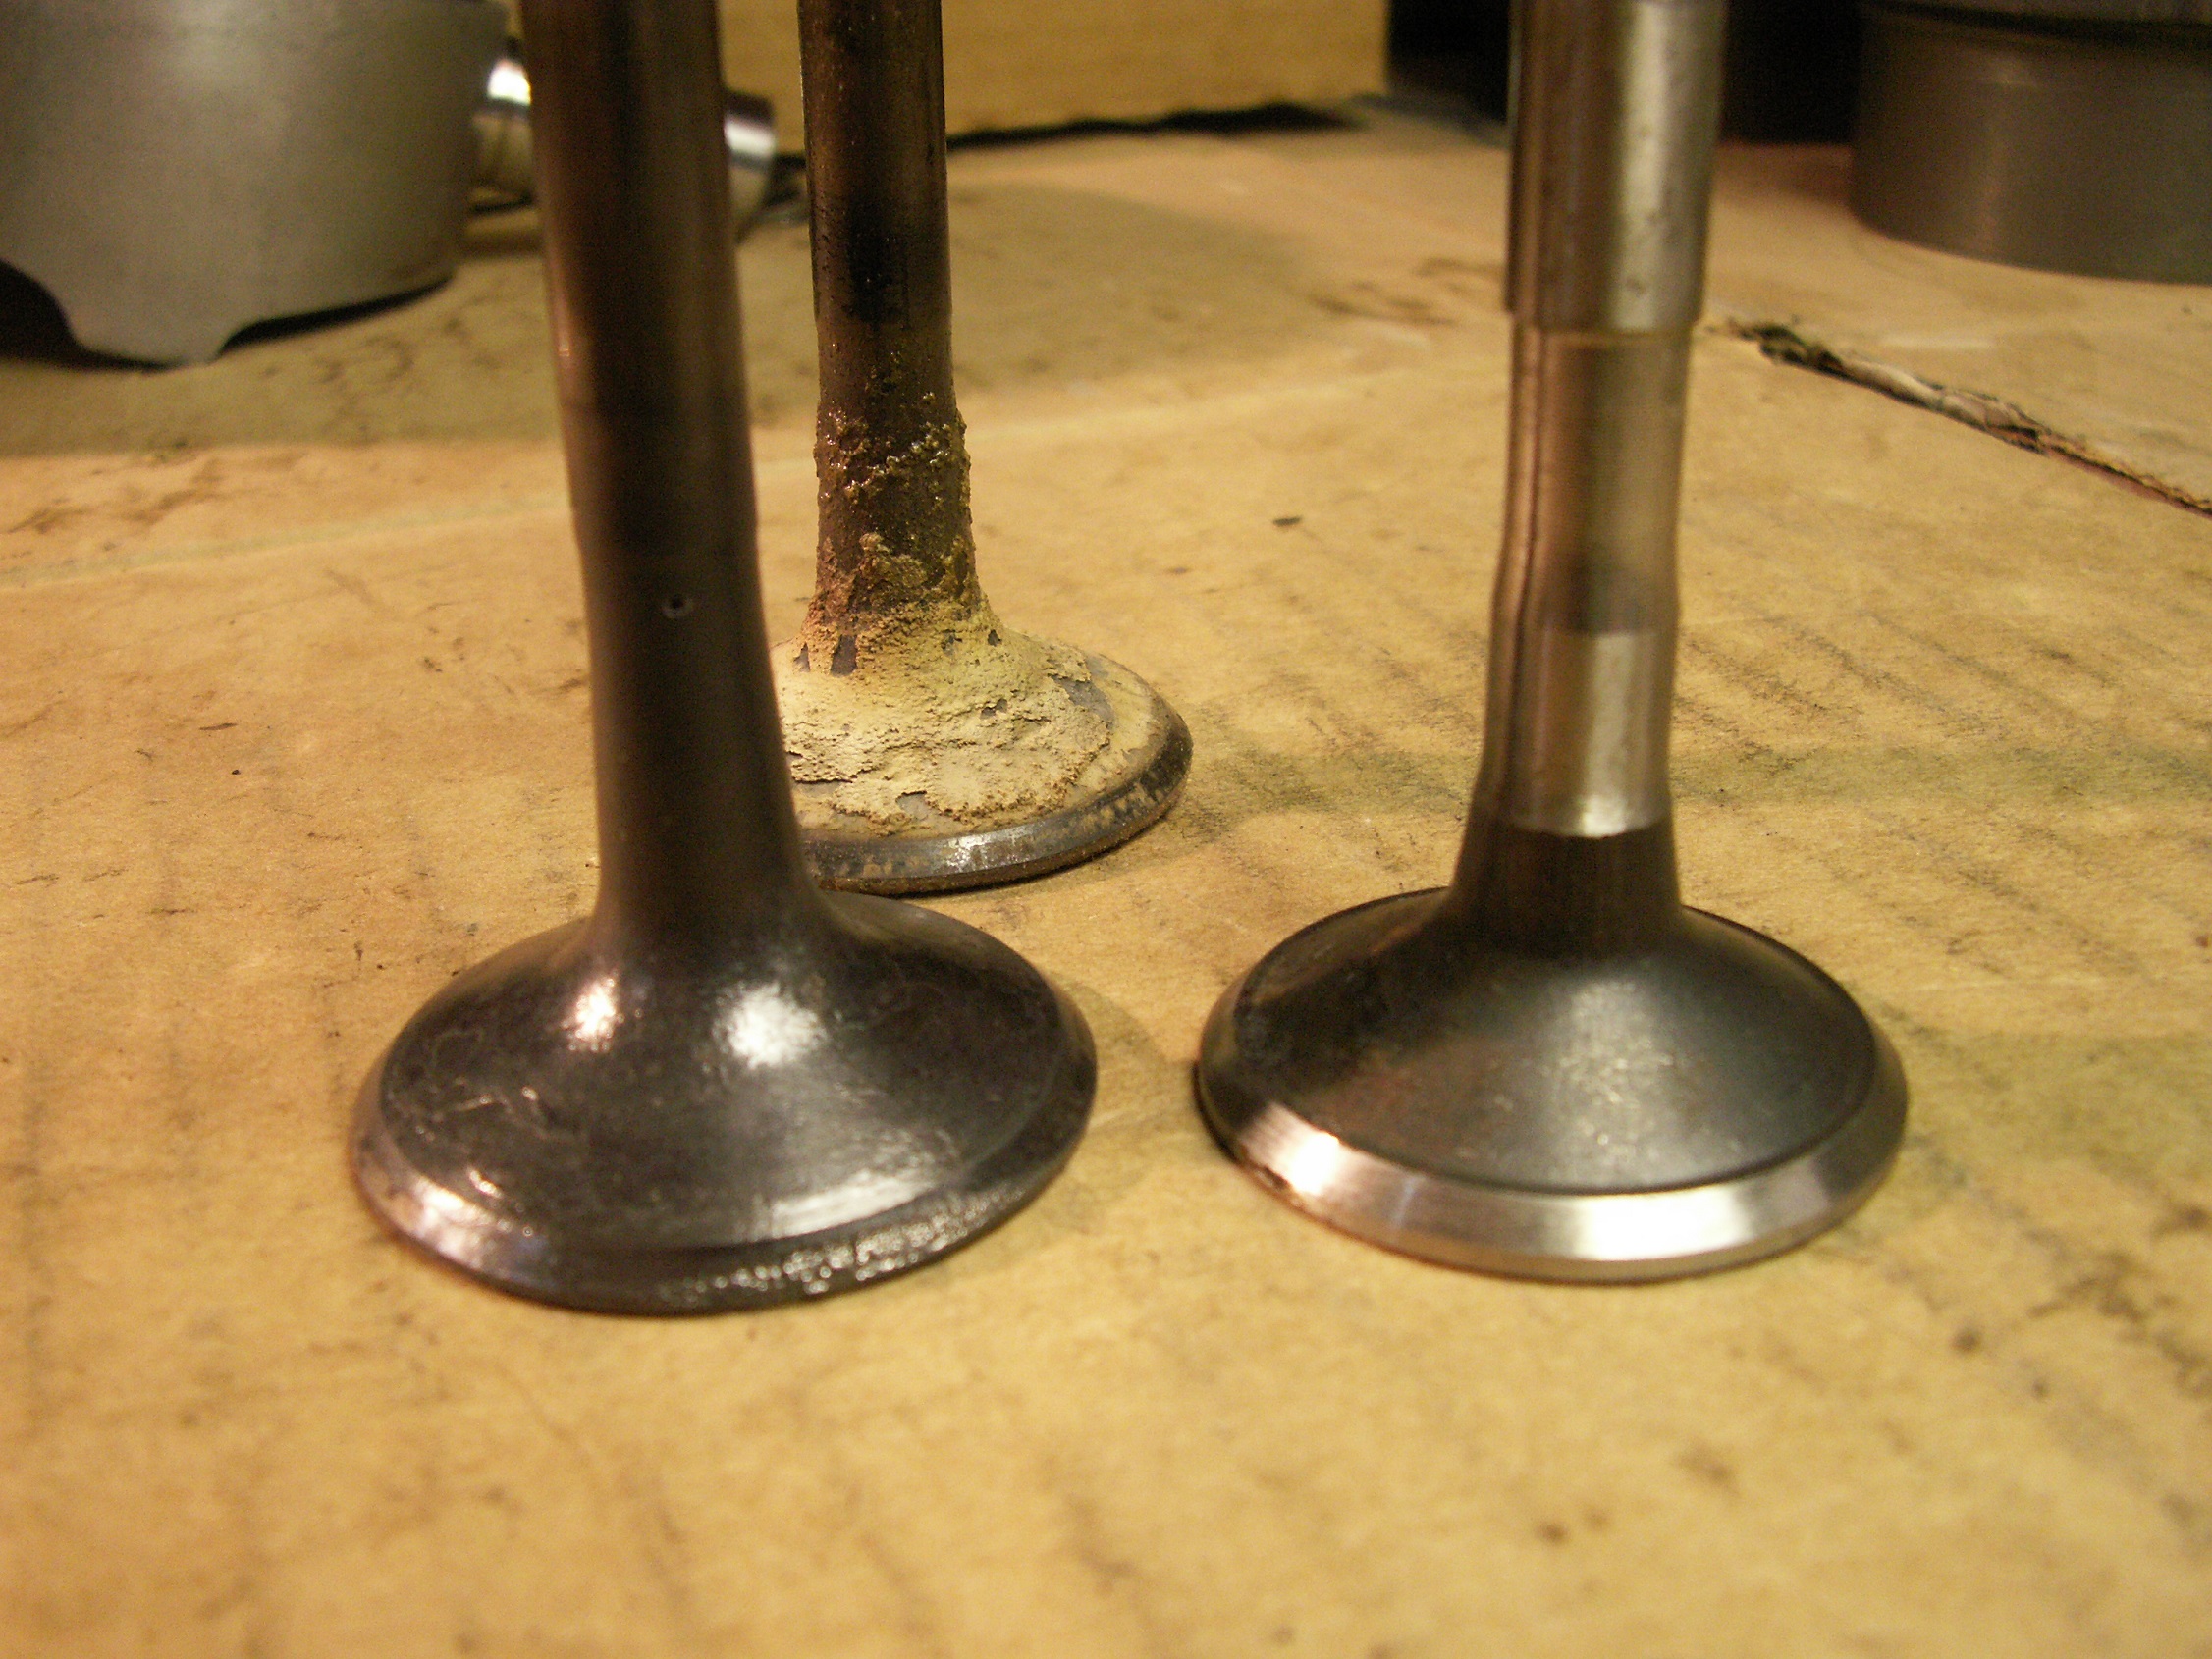
Number 6 exhaust valve is burnt beyond repair, several others show signs of leaking. (the valve on the left)
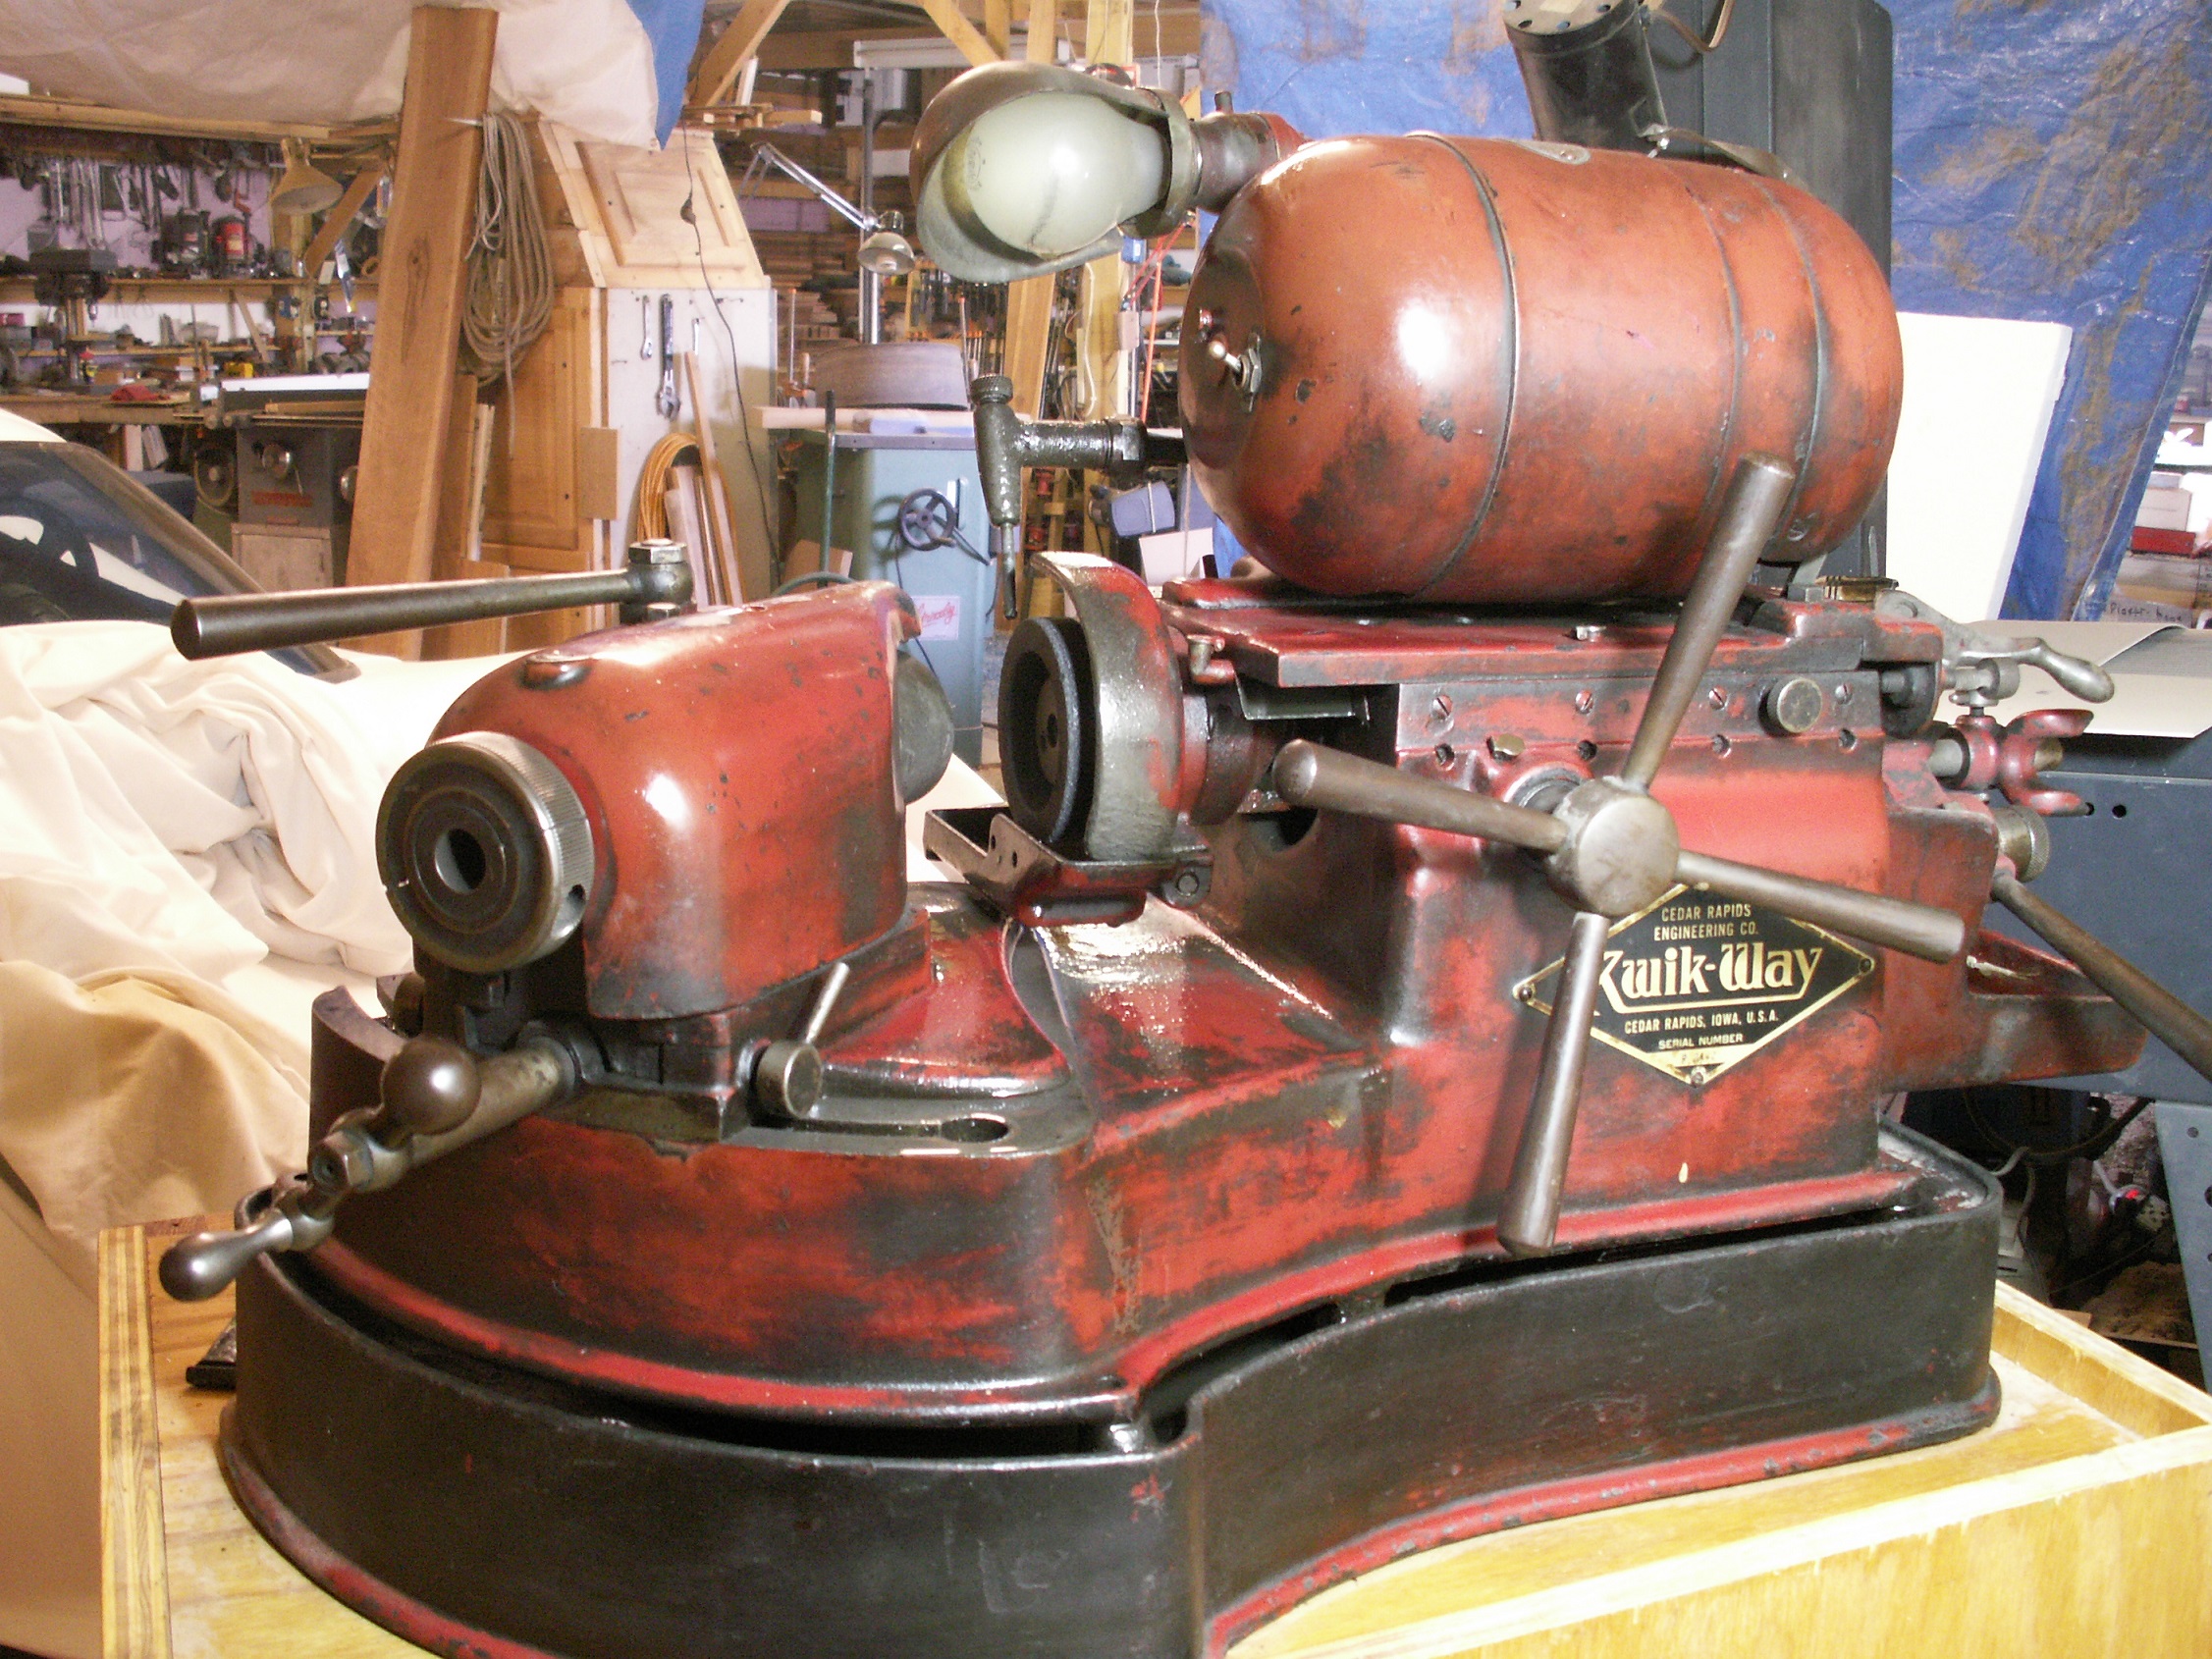
Grinding the valve seats.
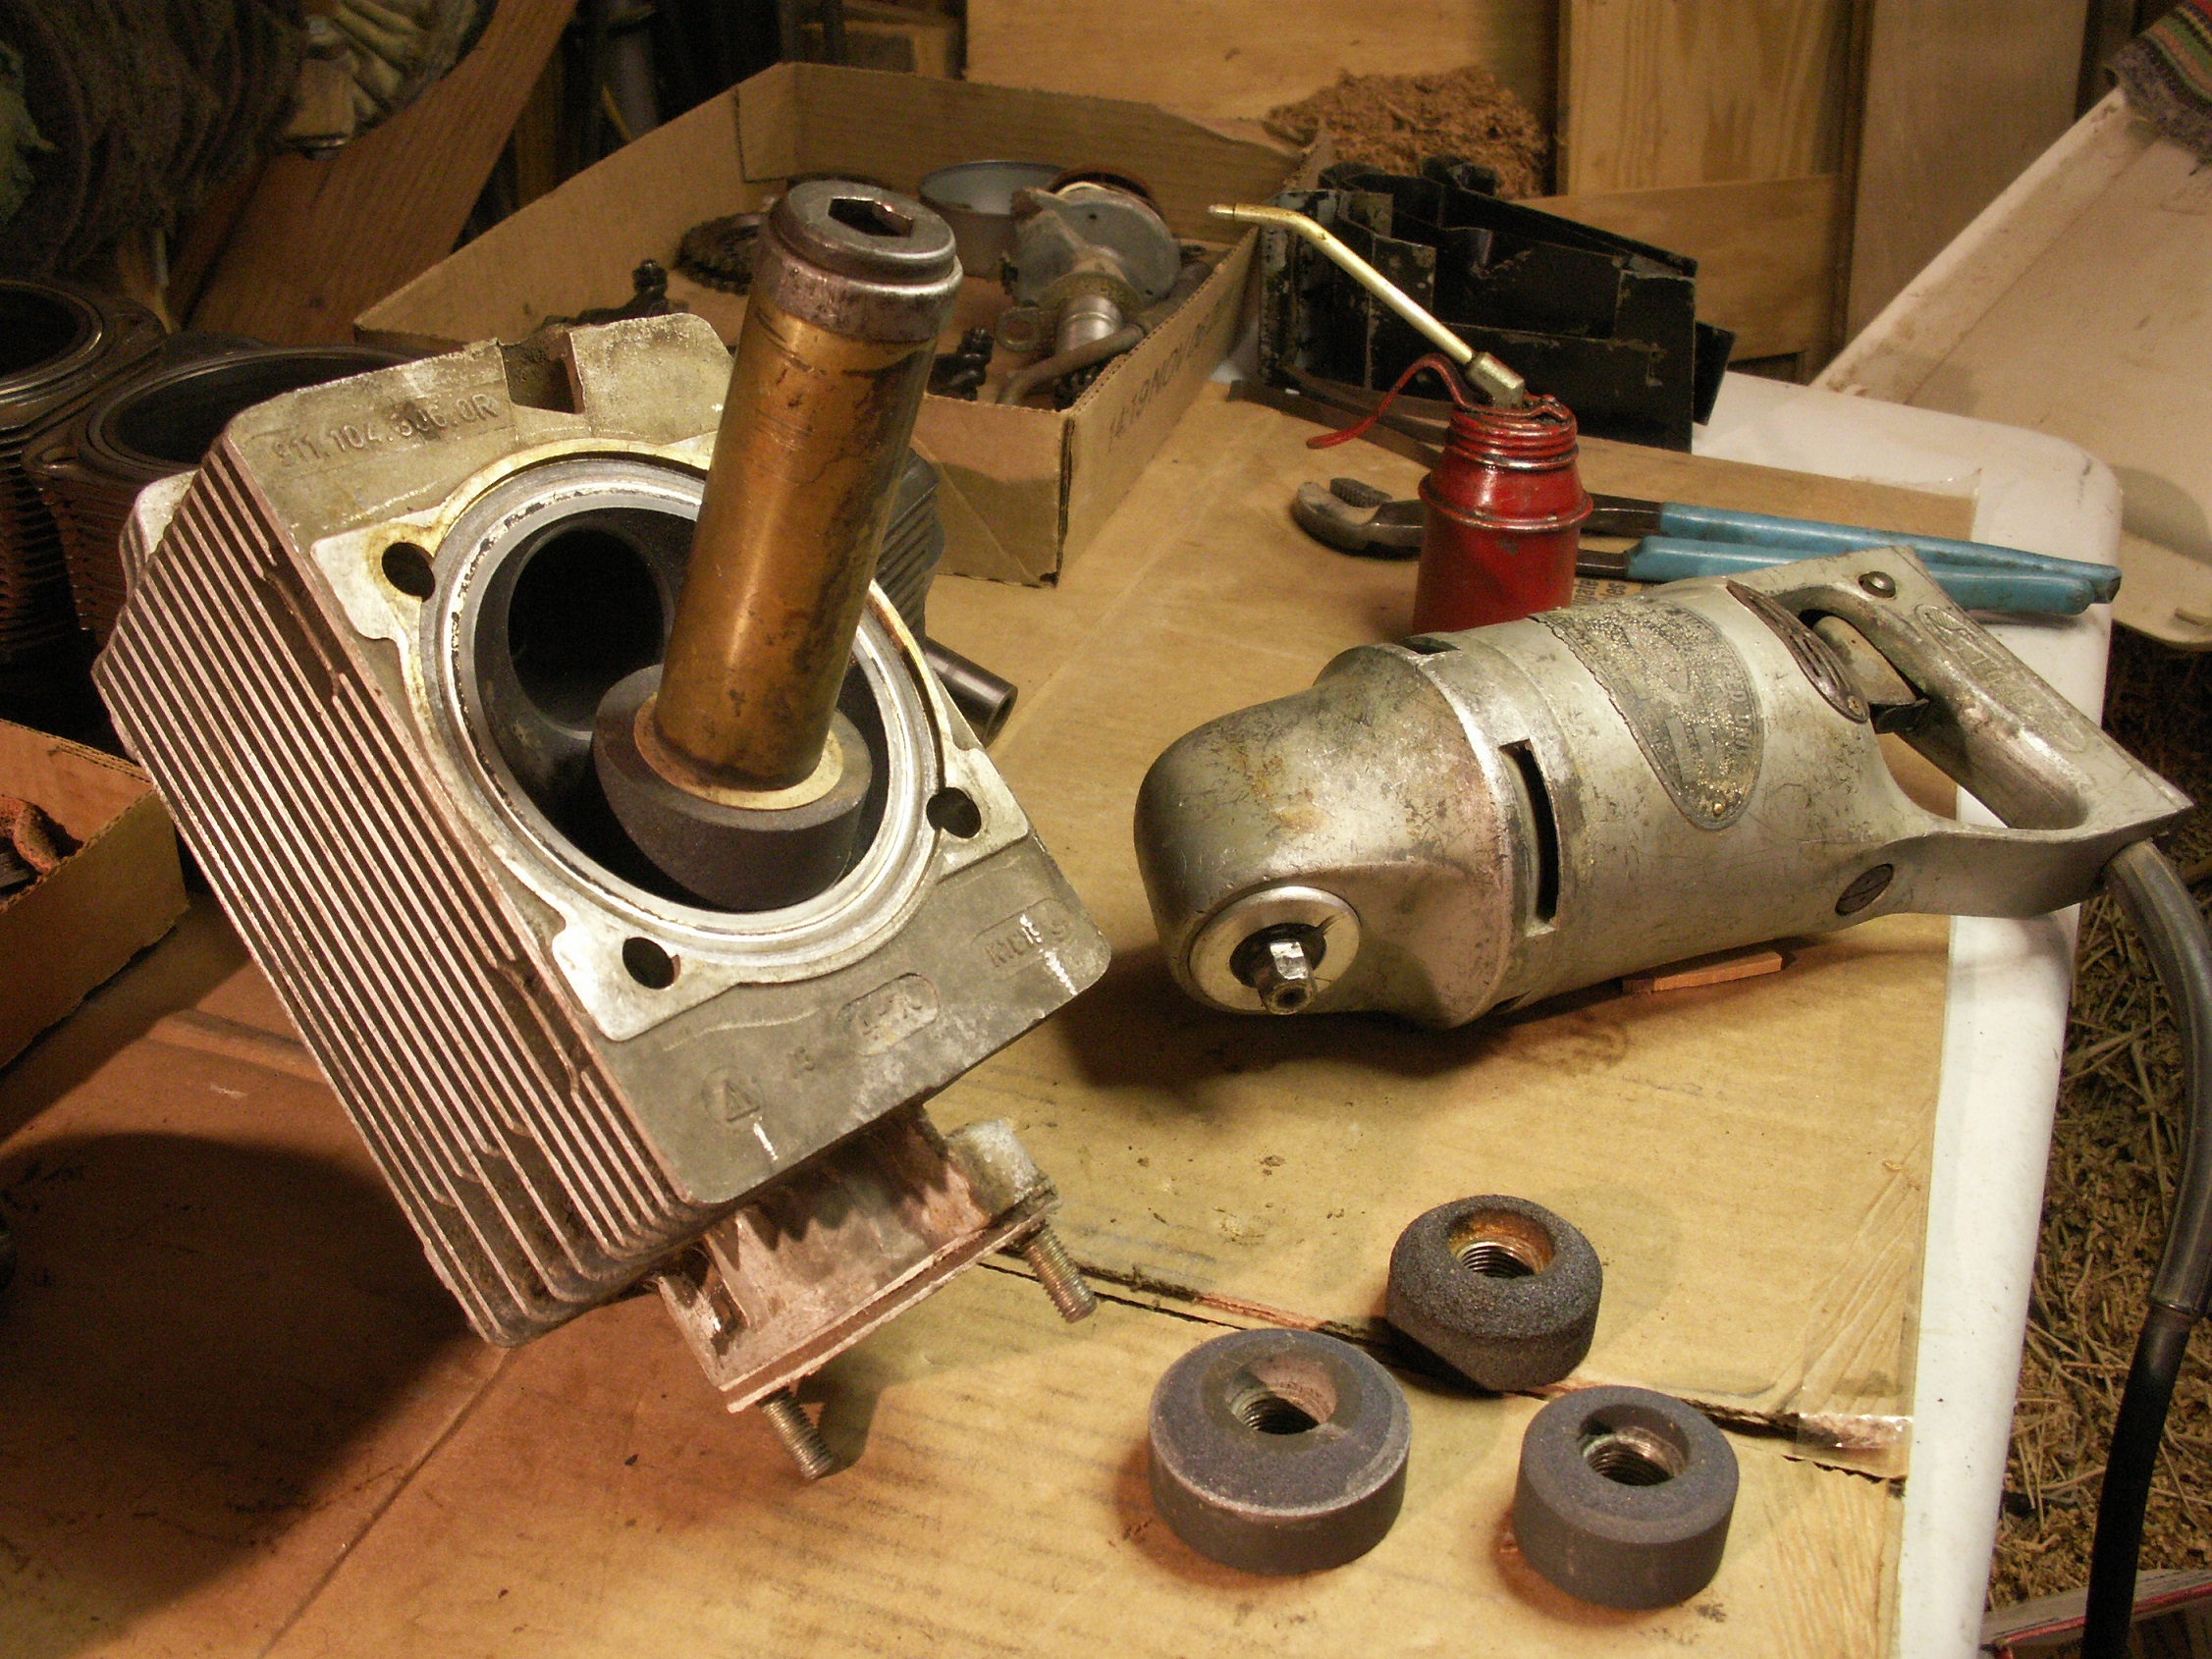
The valve grinding machine, I have not used one of these since high school. I think I have a better touch now than I did than. You can see a video of me grinding
a valve, Kwik-Way model P 2462
Update, 7-28-2020. The engine went back together nicely, even though getting the cams set to their proper timing
was about as scary as it comes. You set them with timing marks and a dial-micrometer, keeping in mind if you get it wrong the valves could hit a piston, on start-up and destroy the whole engine.
Yea, start-up was a little scary :-)
So here we are today, engine is running tip-top except for a slight miss once and awhile, that I thing changing from the old points in the distributor over to electronic ignition will take care of that.
The other thing to do back here is, a new larger oil tank that has fittings that don't leak ...
Made a front spoiler that not only provides extra down force, it is also a curb bumper and is mounted to the frame. There are 4 little skid shoes under it to keep it from dragging on the road.
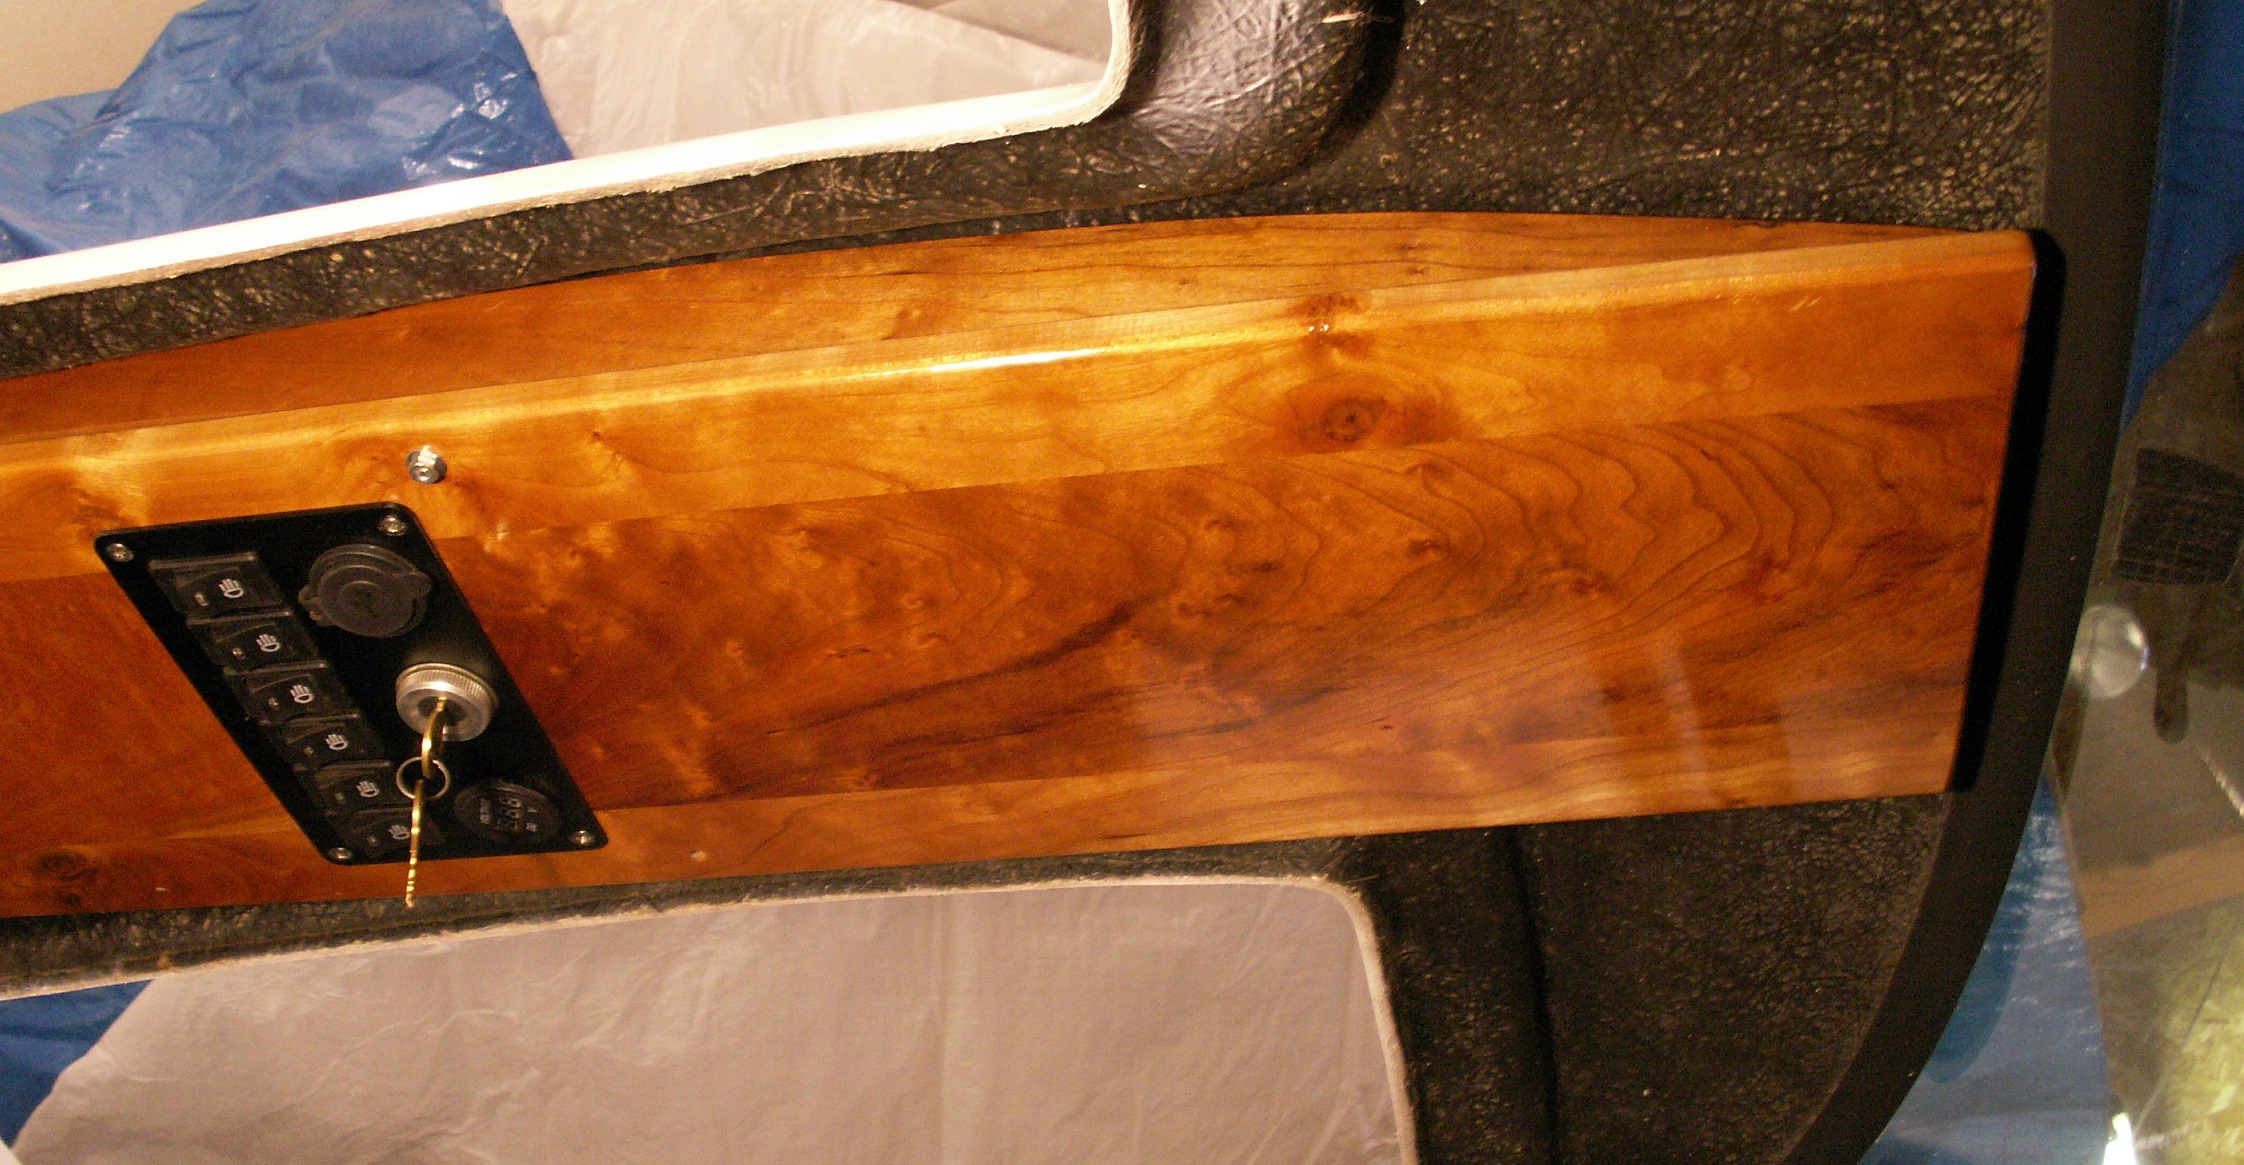
Lined the inside of the doors with leather and made new inside handles that also mount the new lift struts.
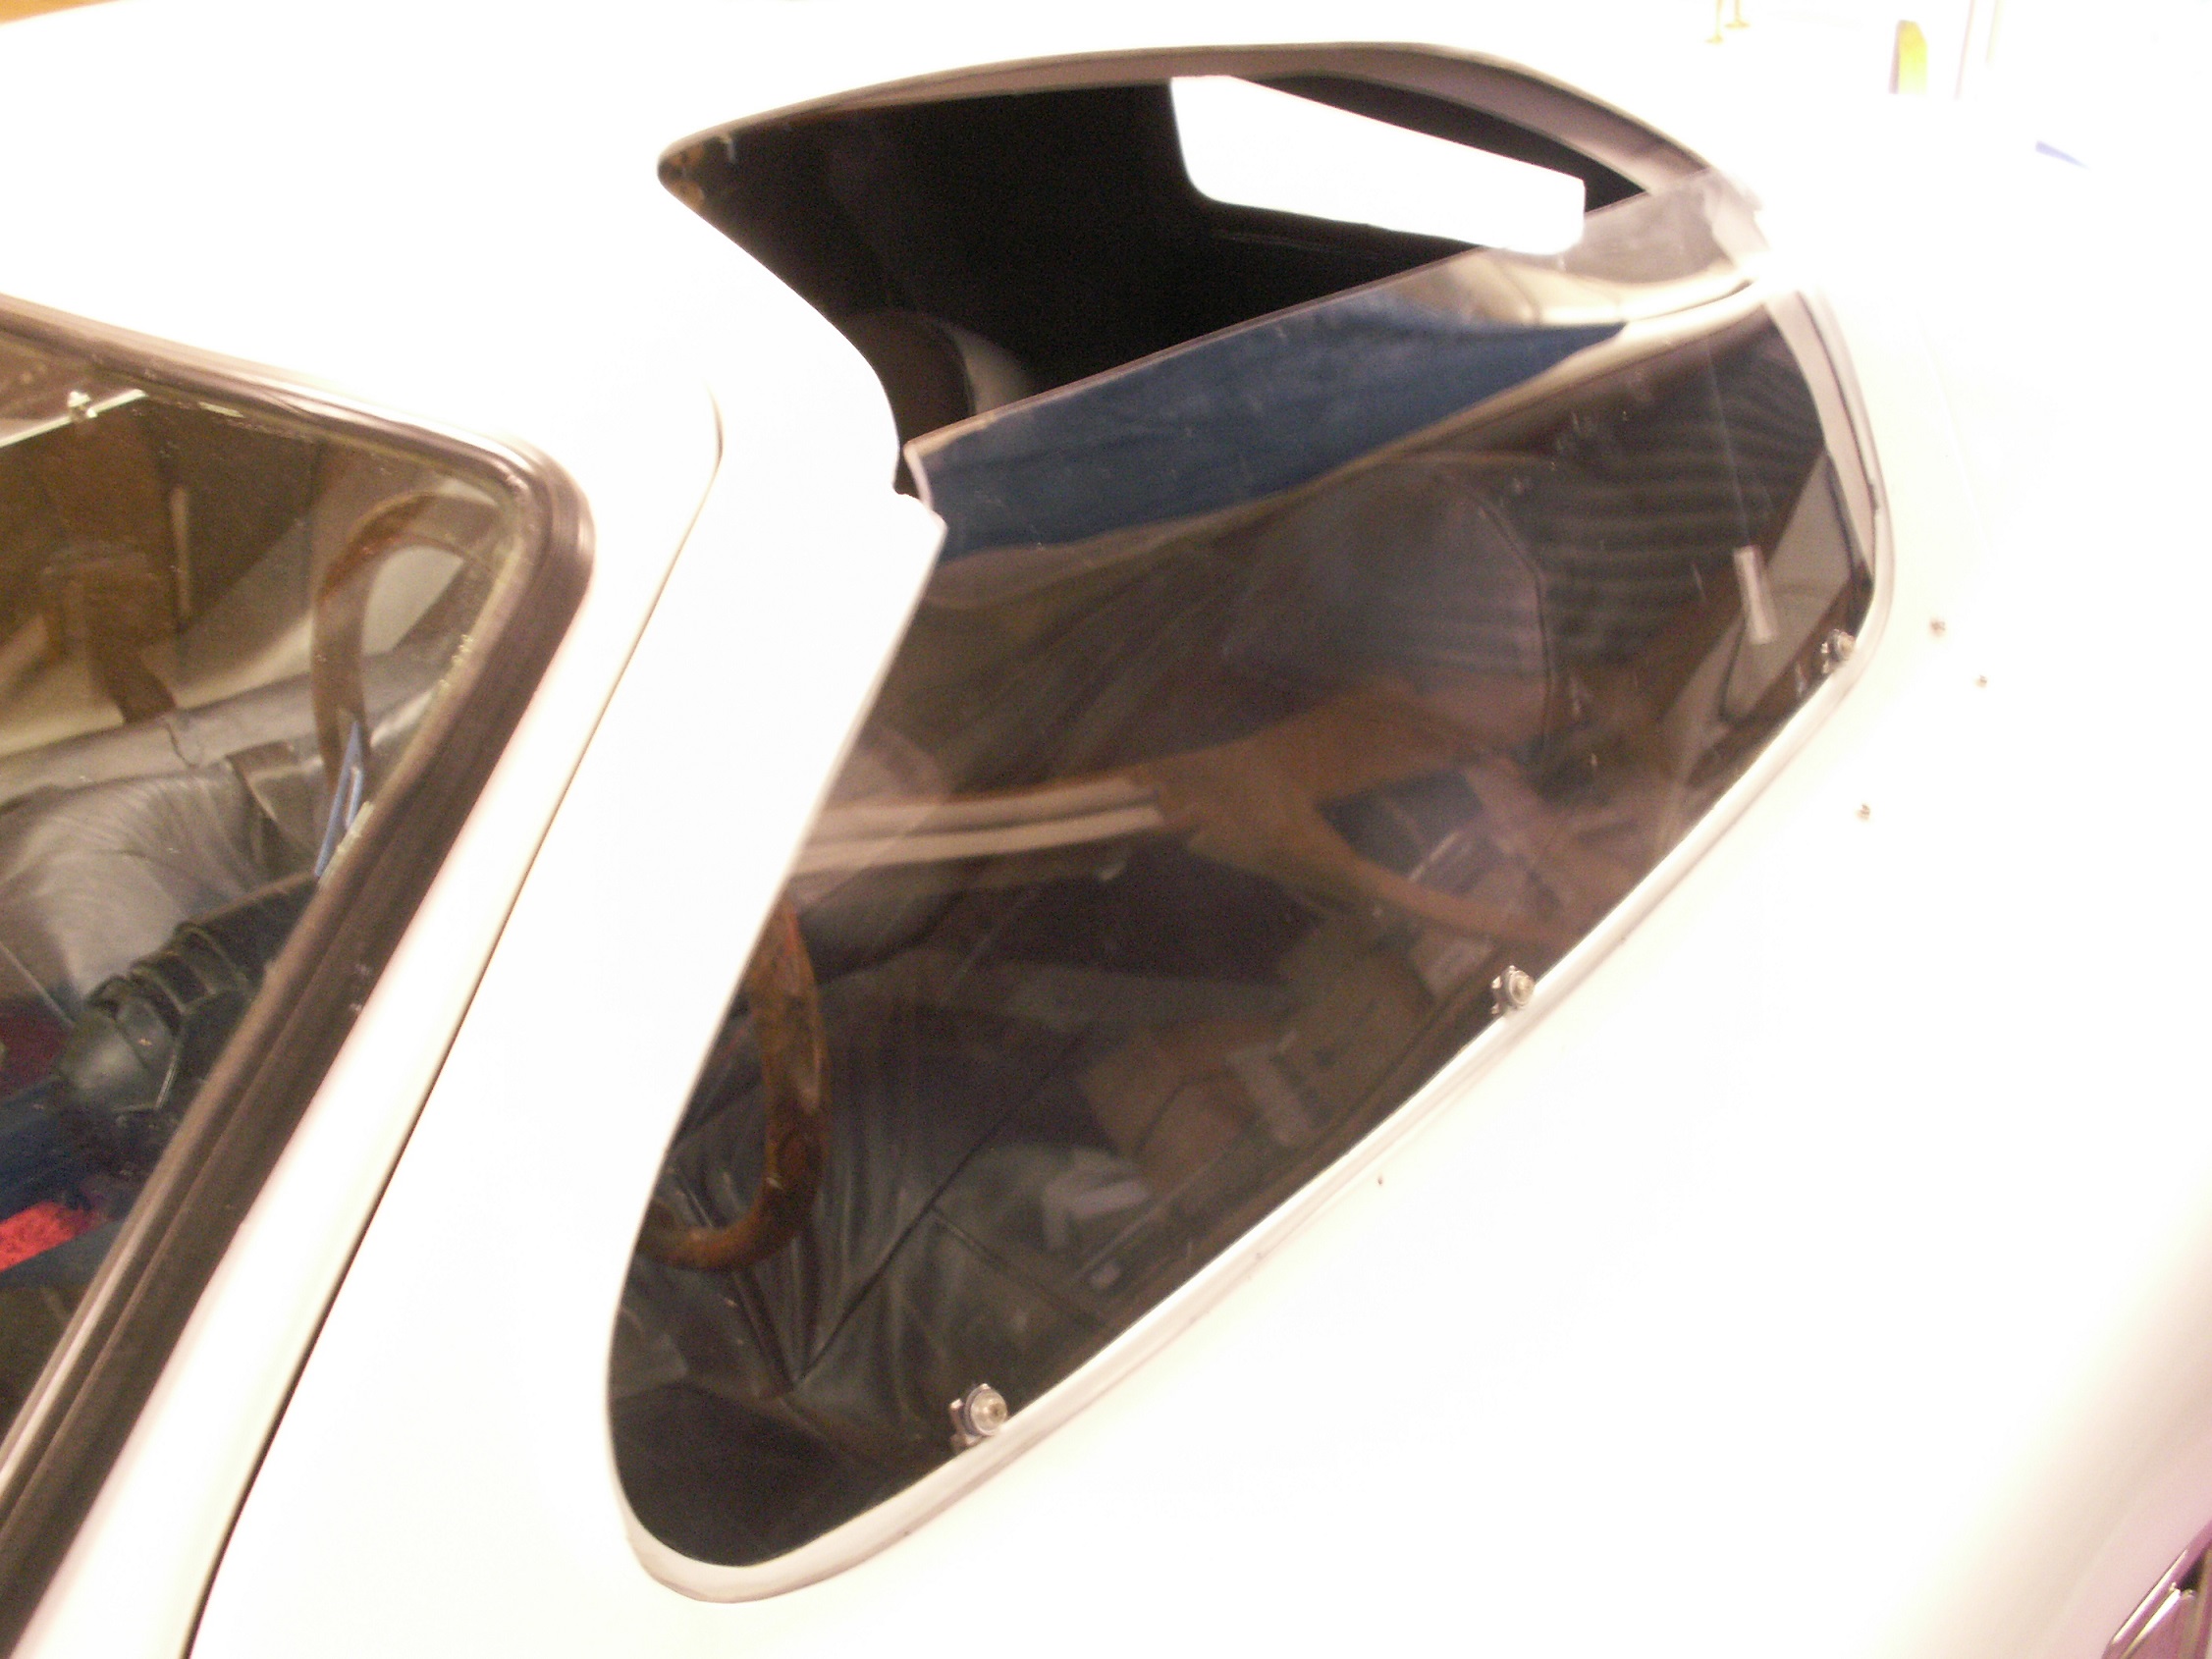
A little too much air with no side windows. This car originally had fixed top half window, hinged to an outward opening bottom half. In trying to made that I have made some fixed bottom half so far, and it works out well.
It keeps out 95% of the wind and lets out hot summer temps, just don't let it rain...
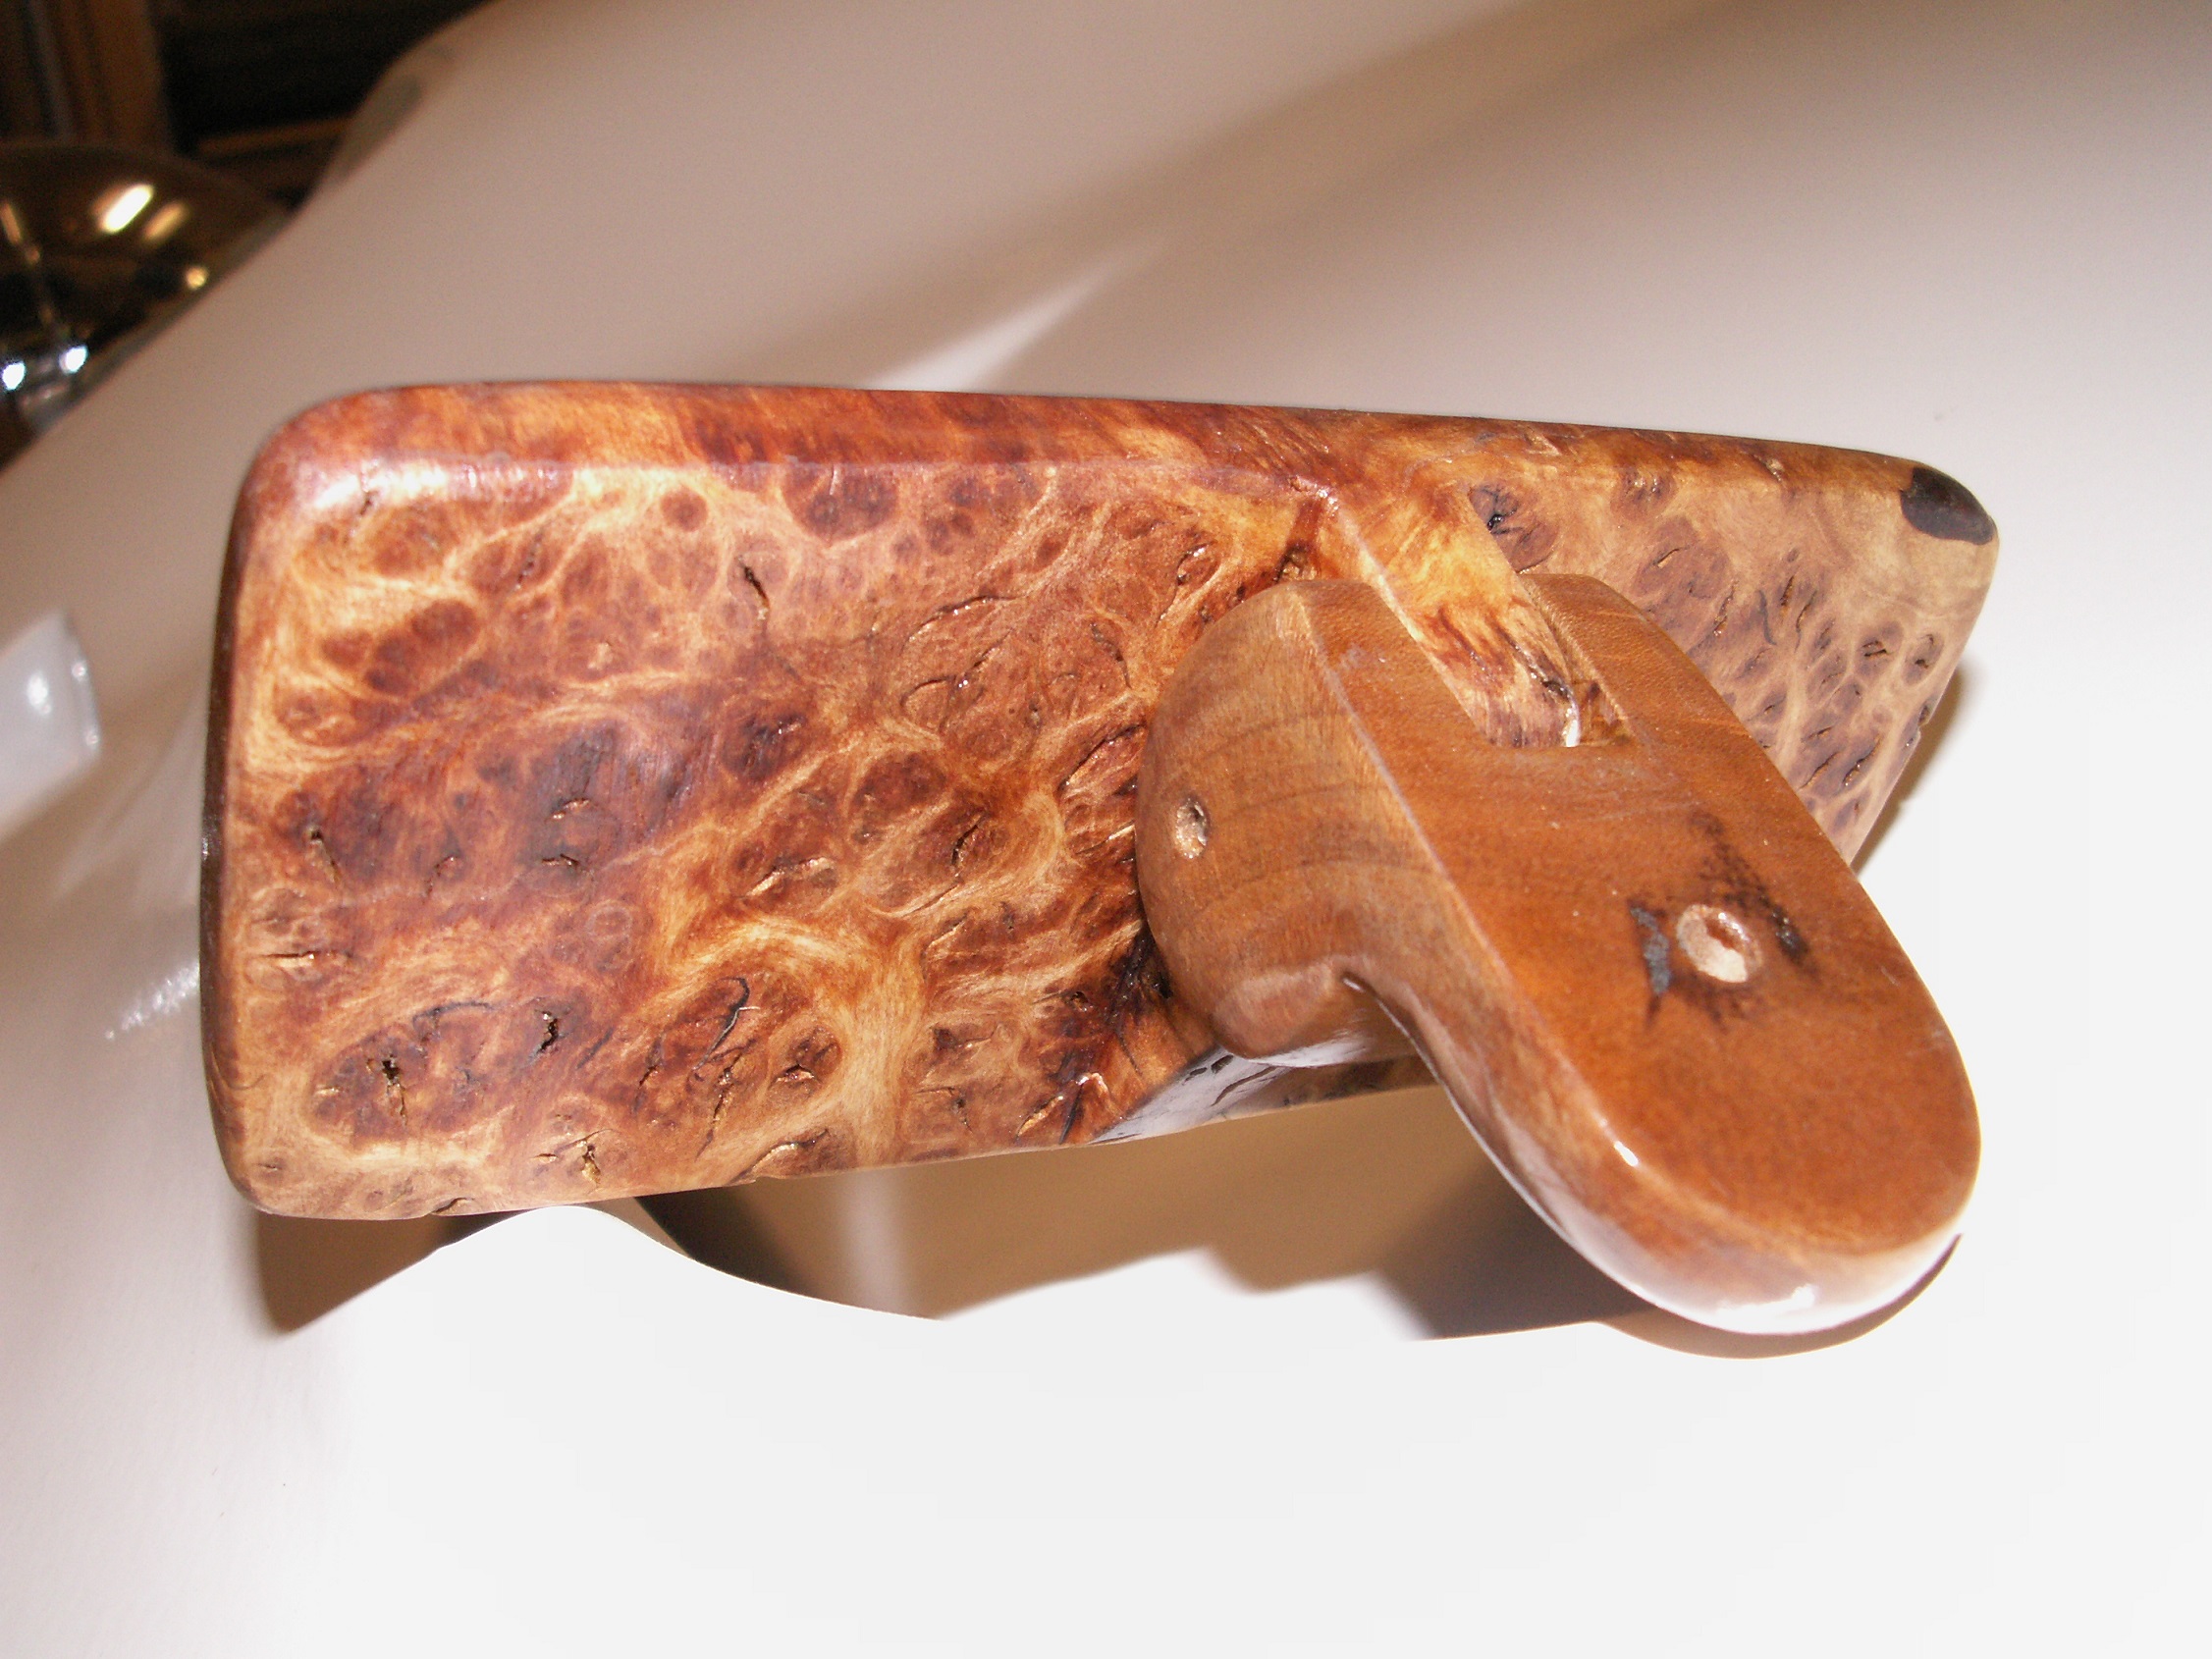
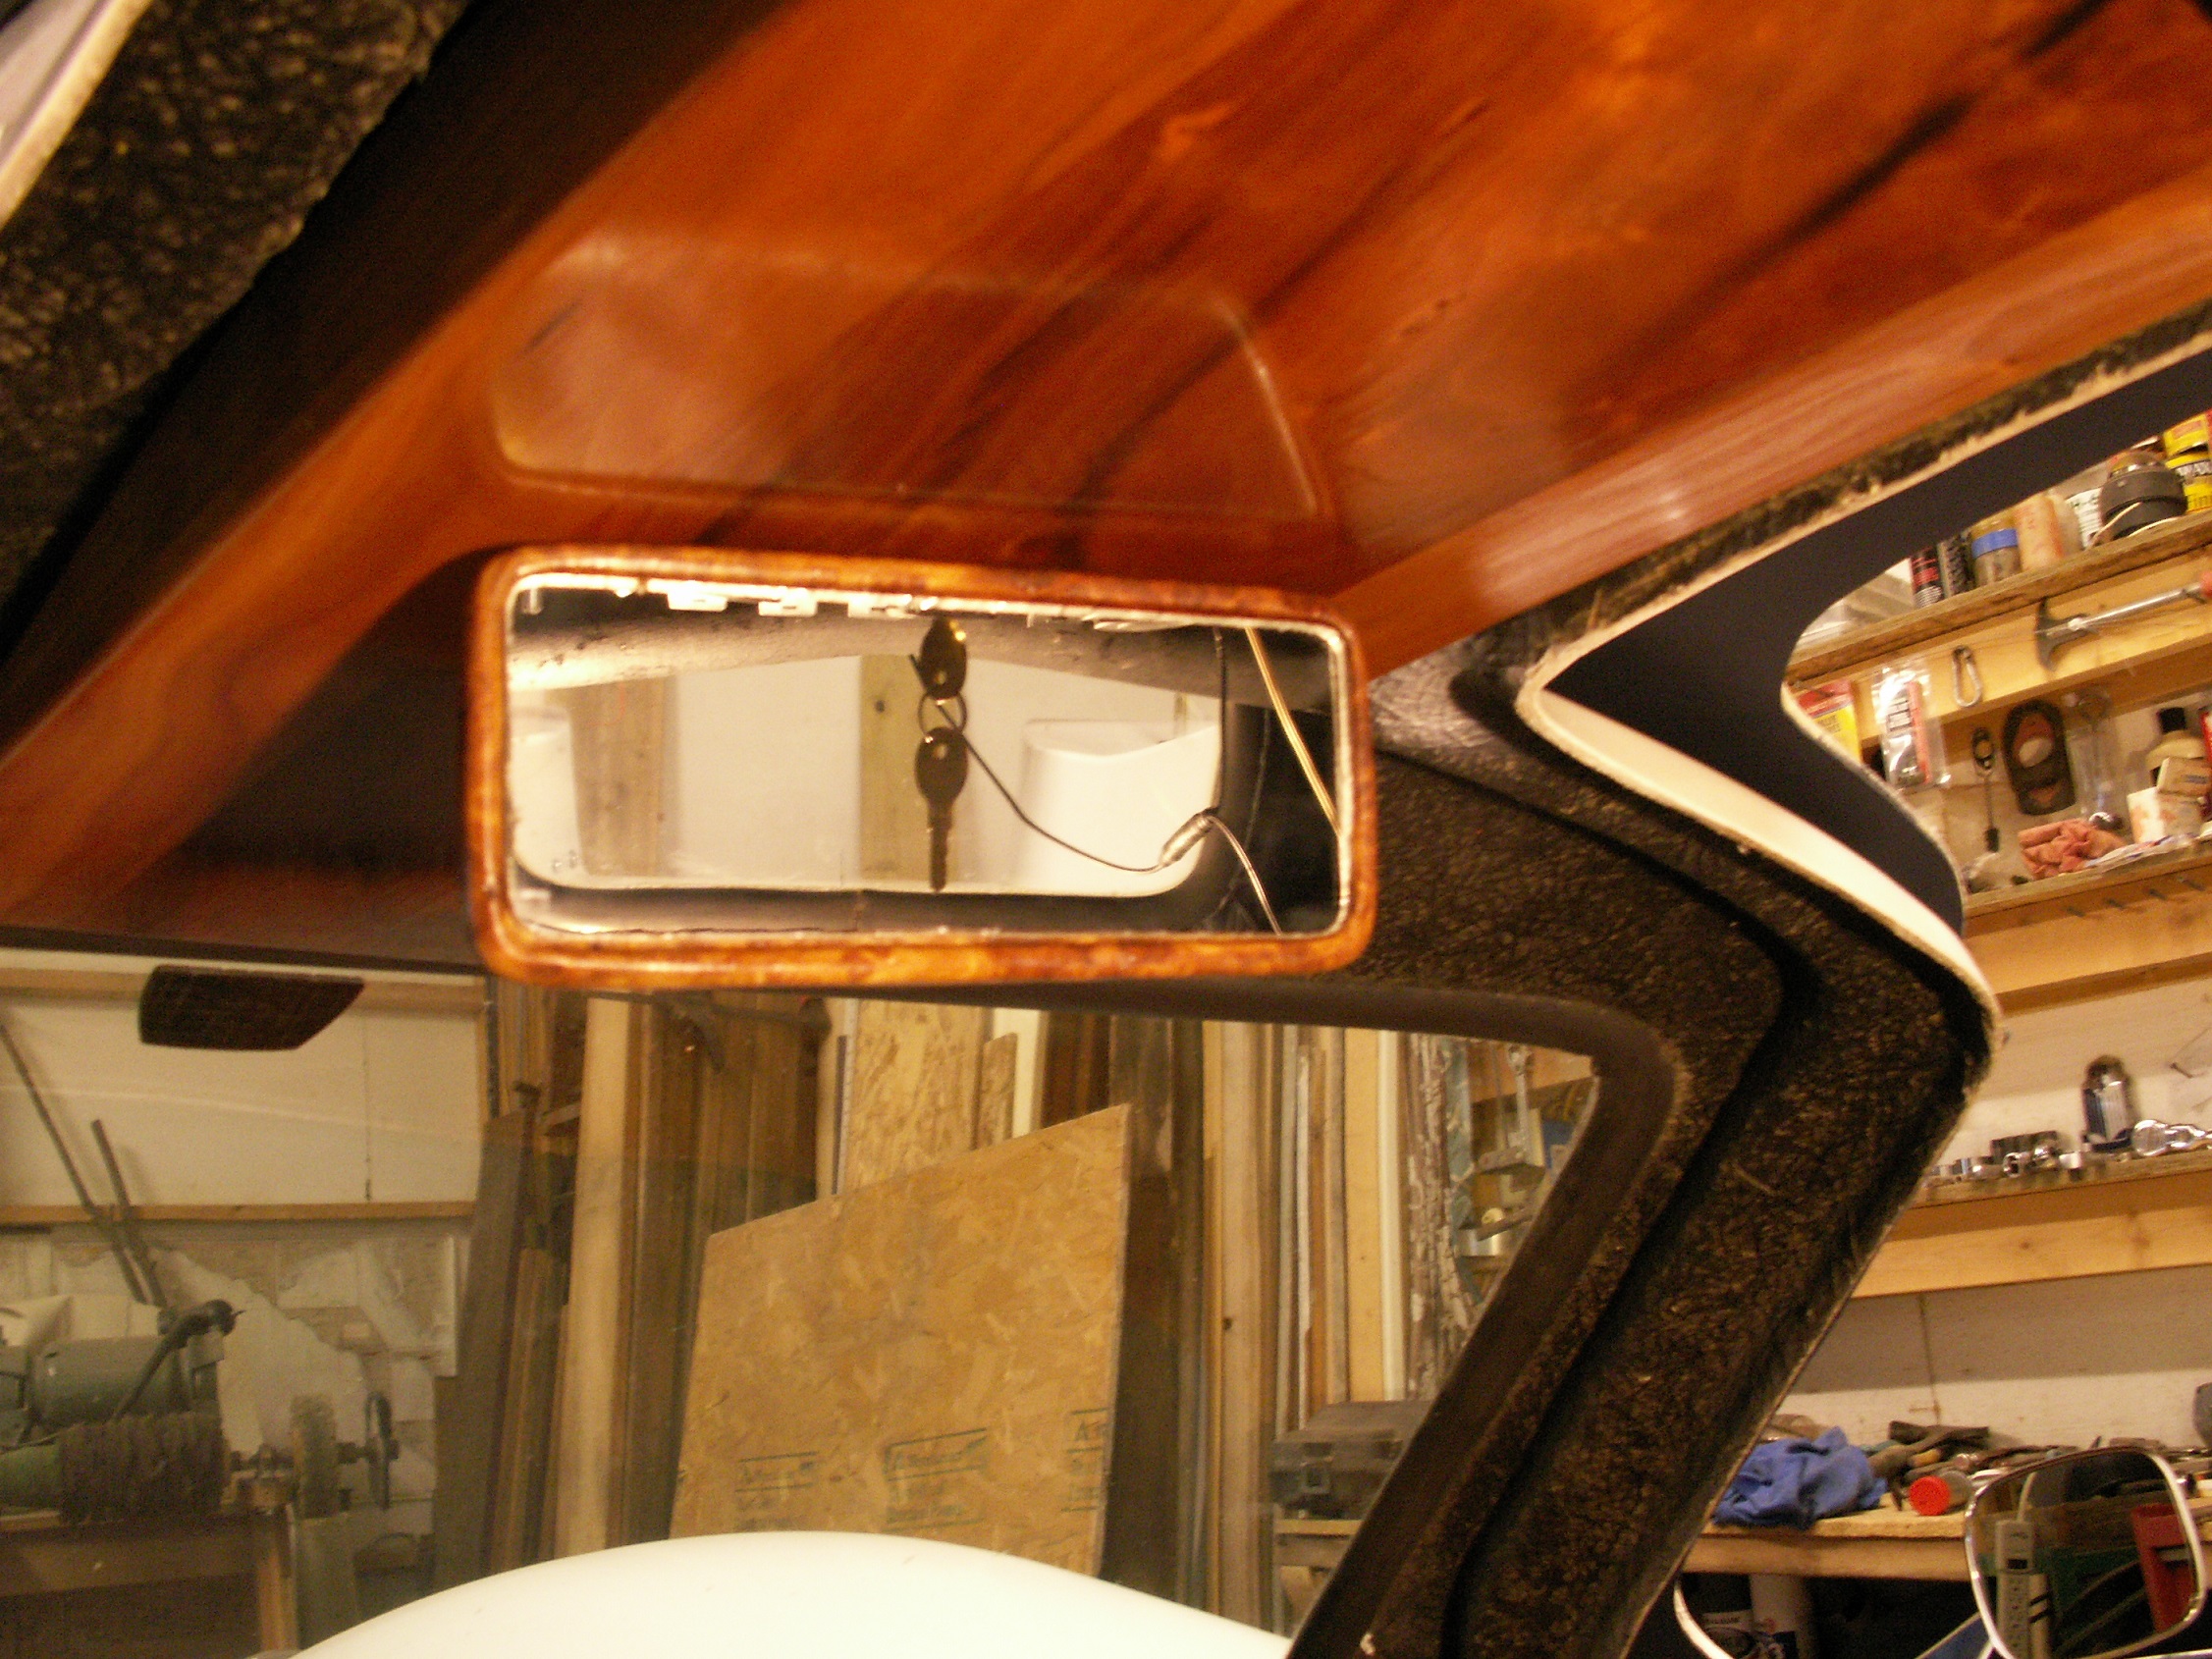
It's really hard to see beside and behind you, have a rear view camera set up, but it is to wide a view except for backing. Made a Redwood Burl rear view mirror and it's working out real well.
Where I have it mounted, I can see right down the 'tunnel' and under the rear wing...
Here are some pictures of a photo shot we did May 20, 2020...
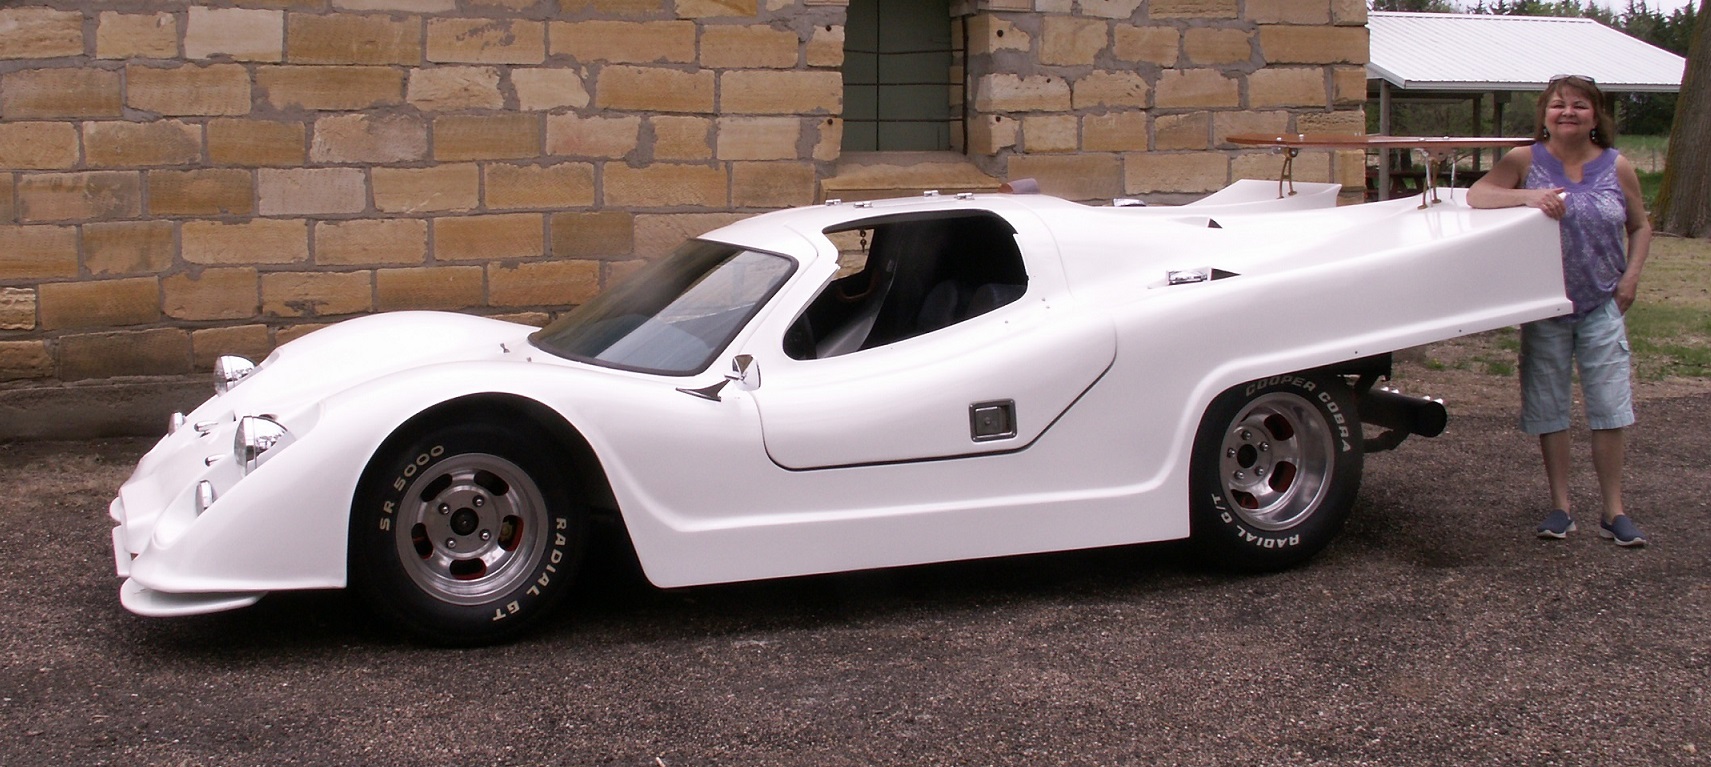
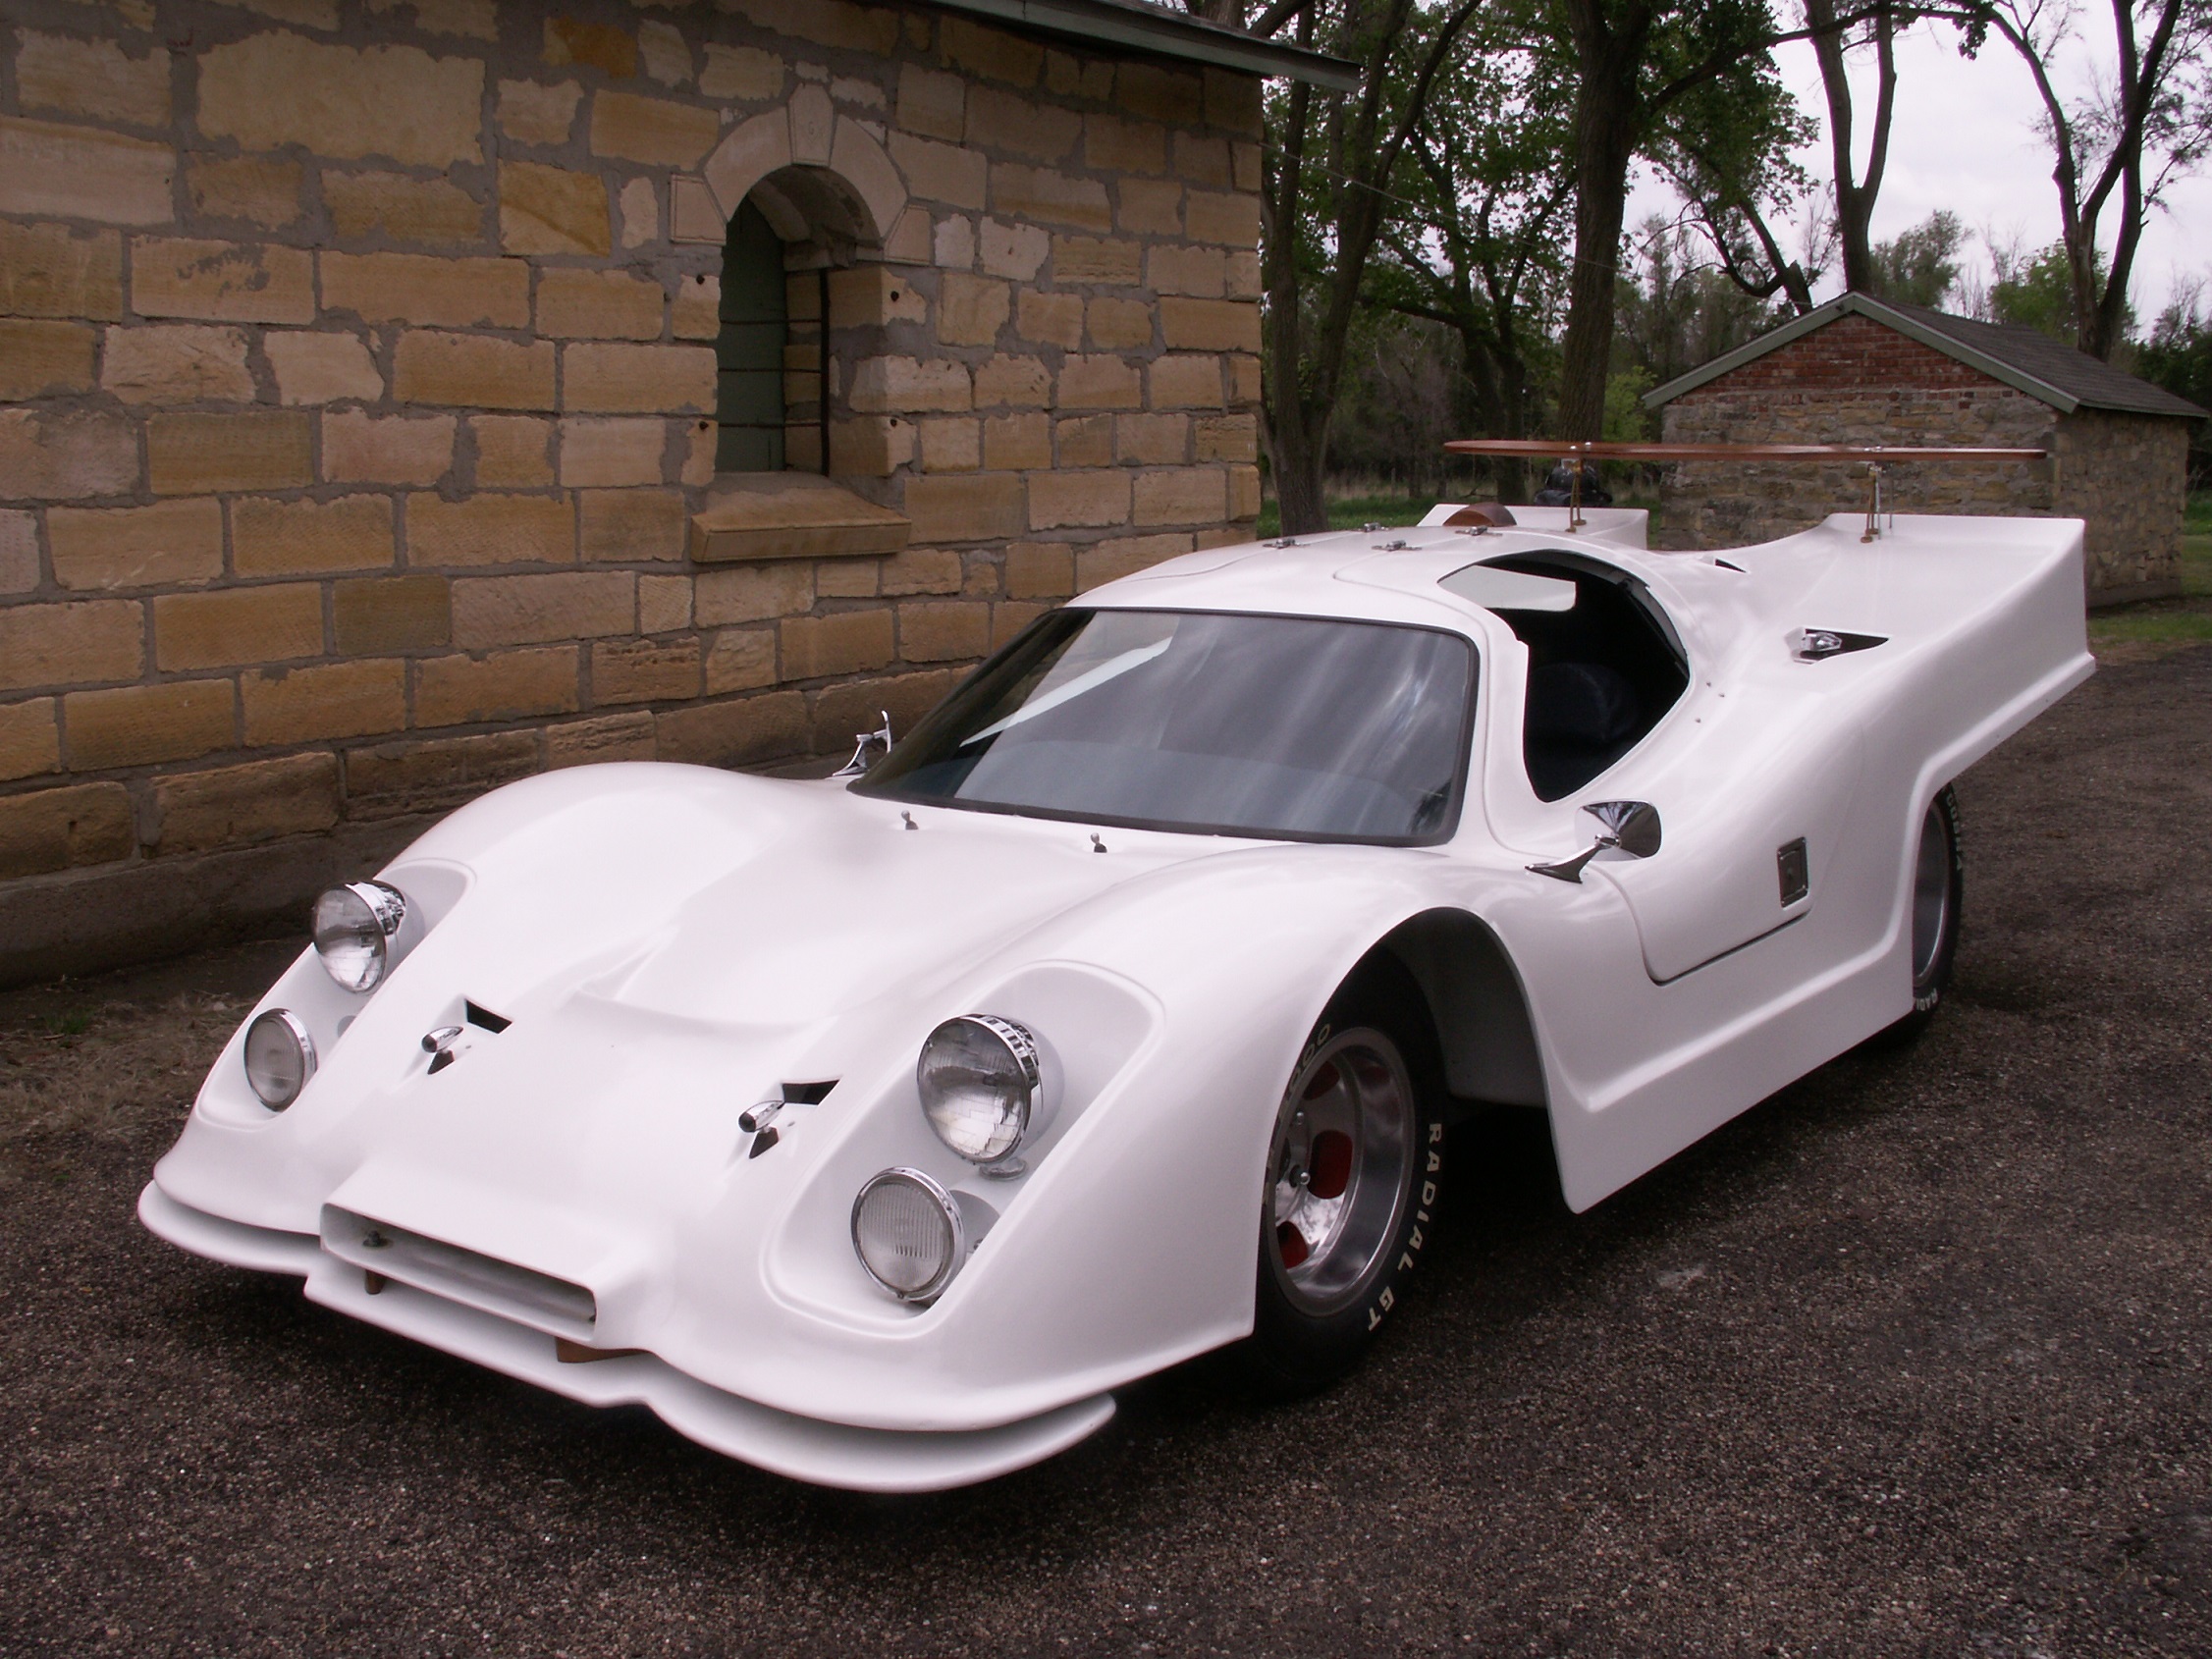
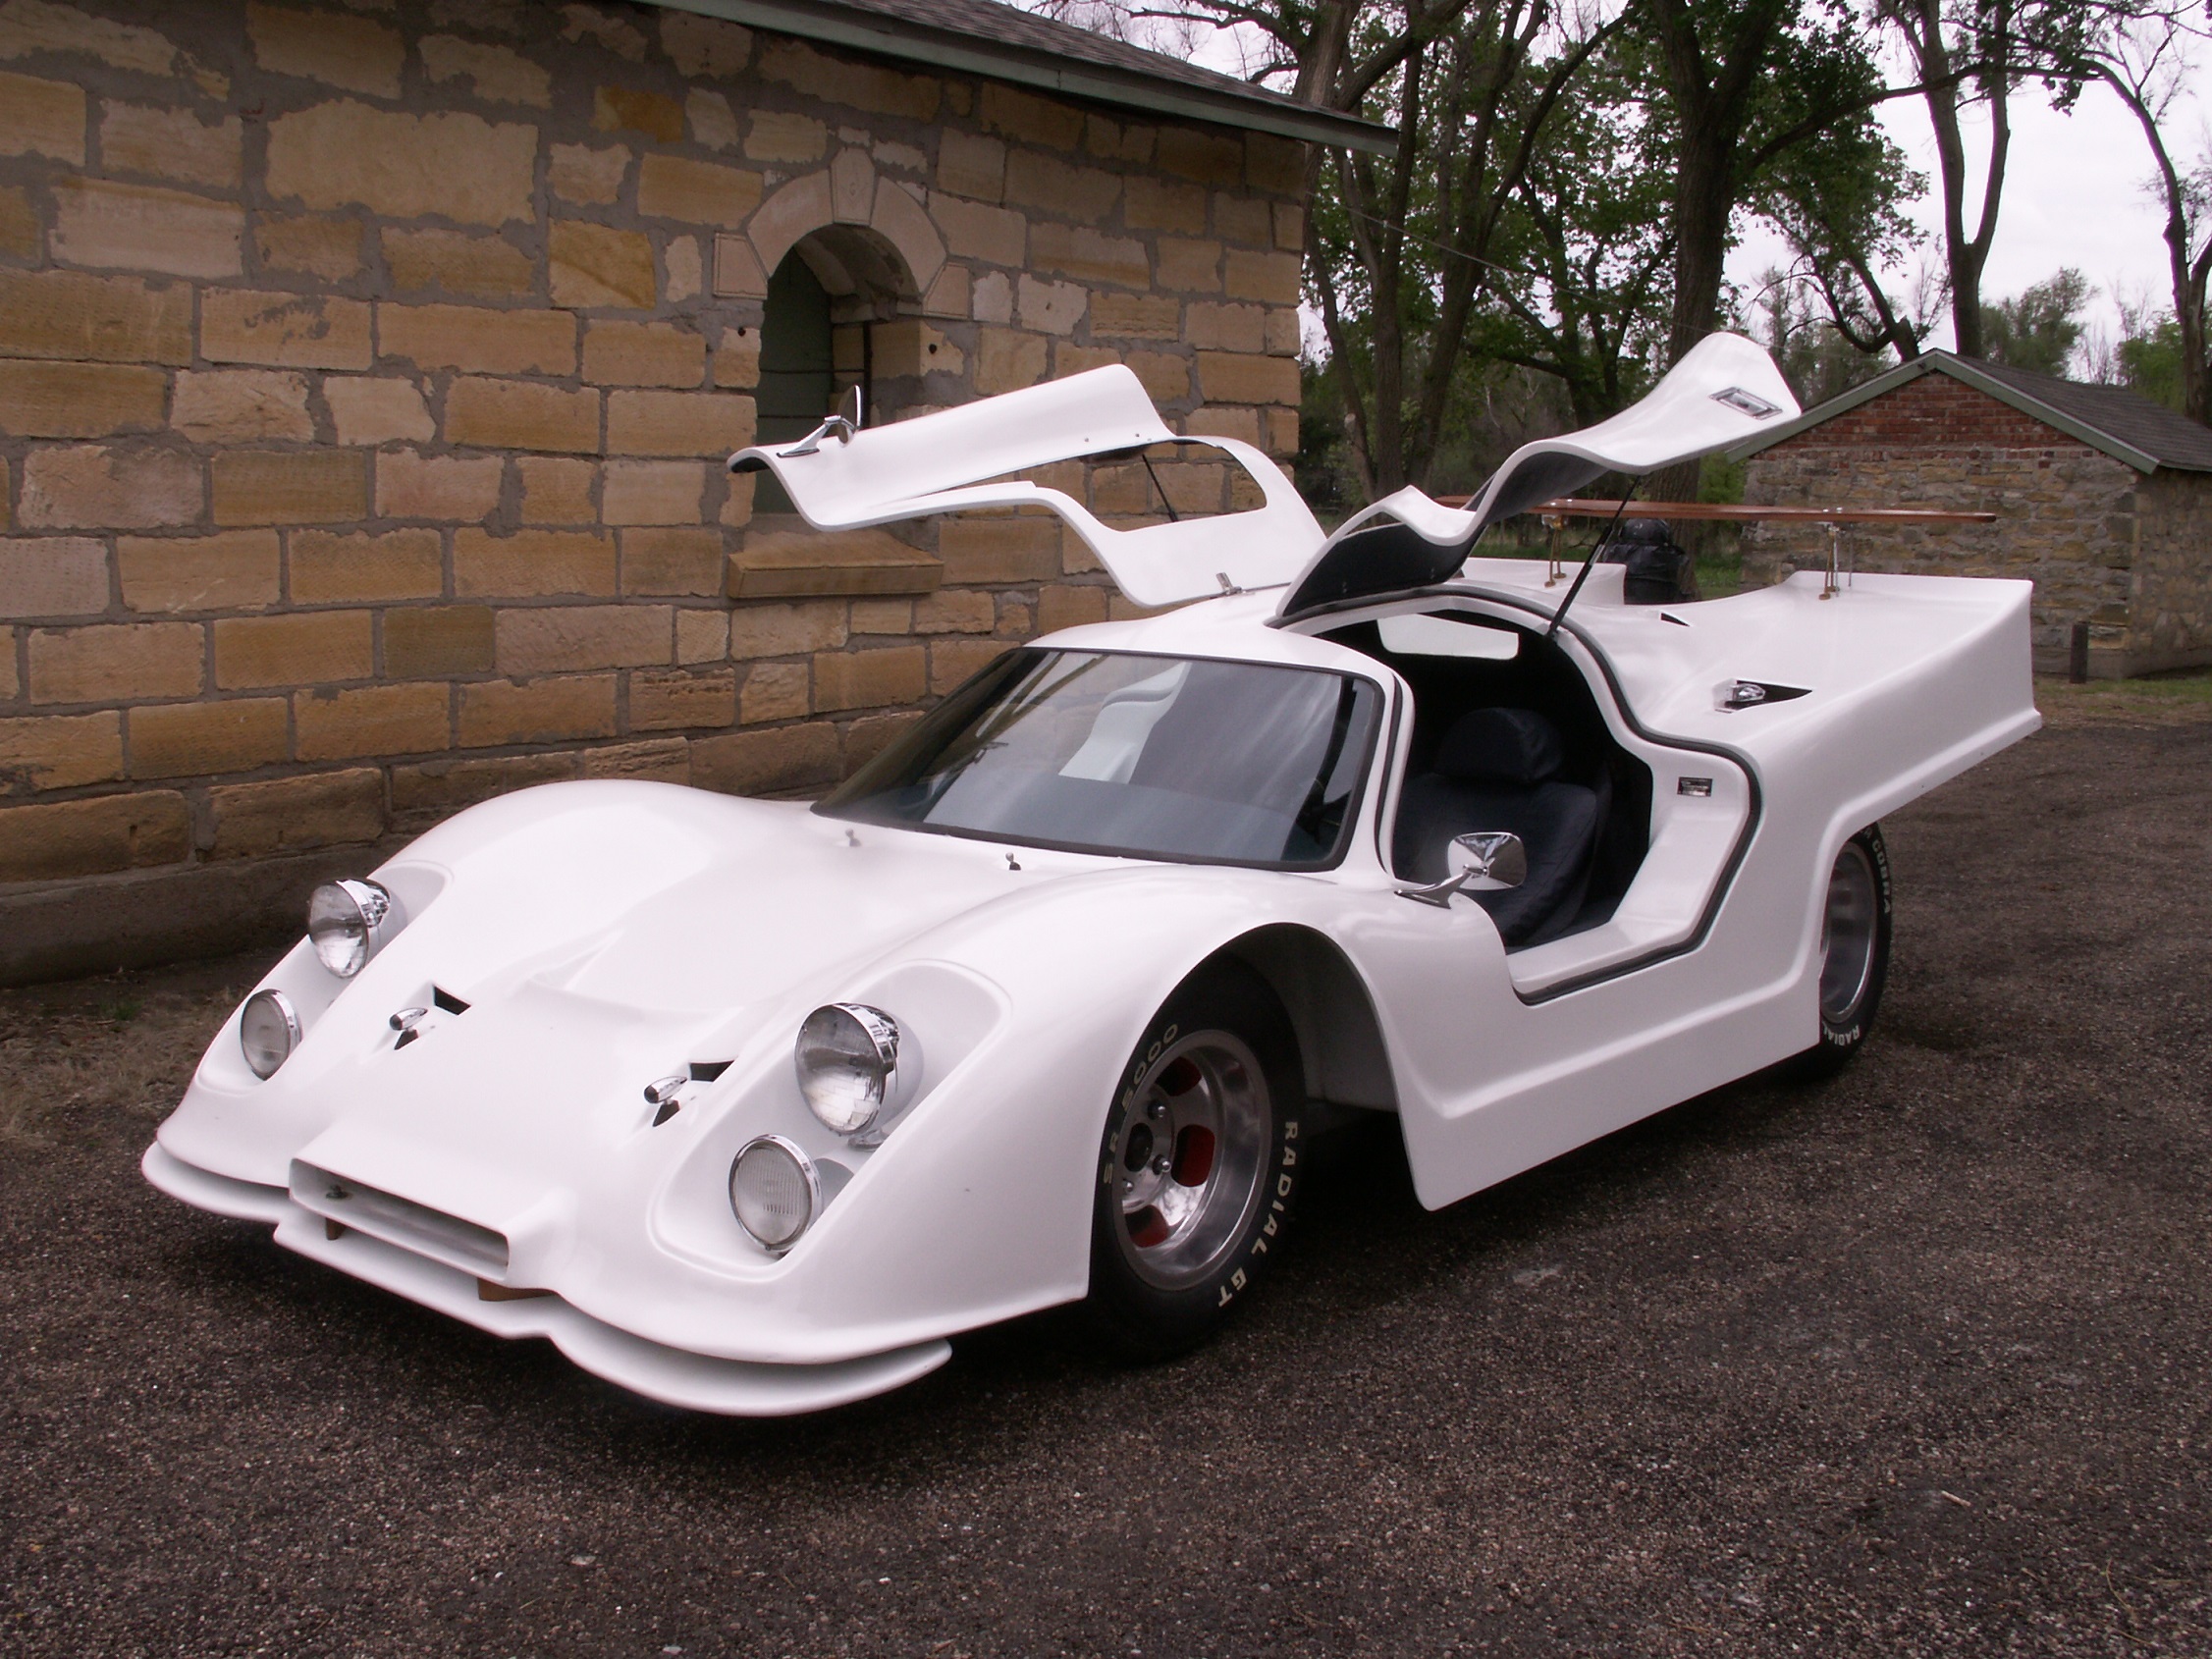
Picture Gallery,
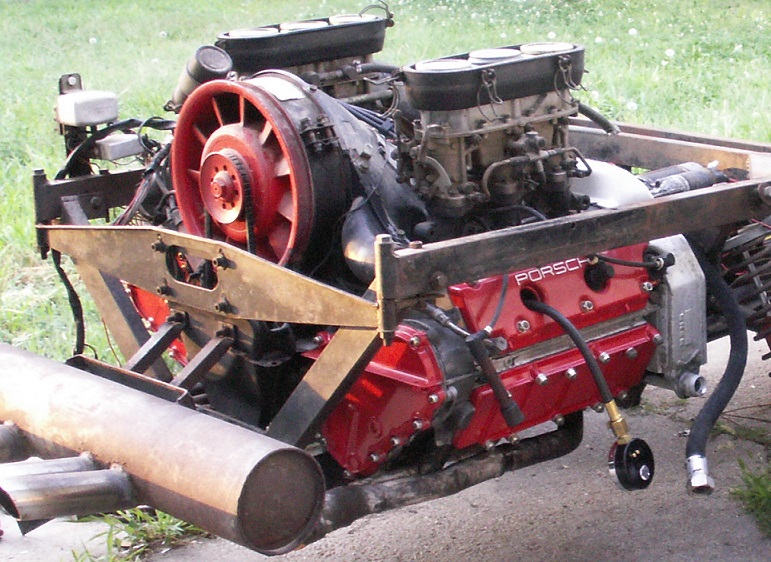
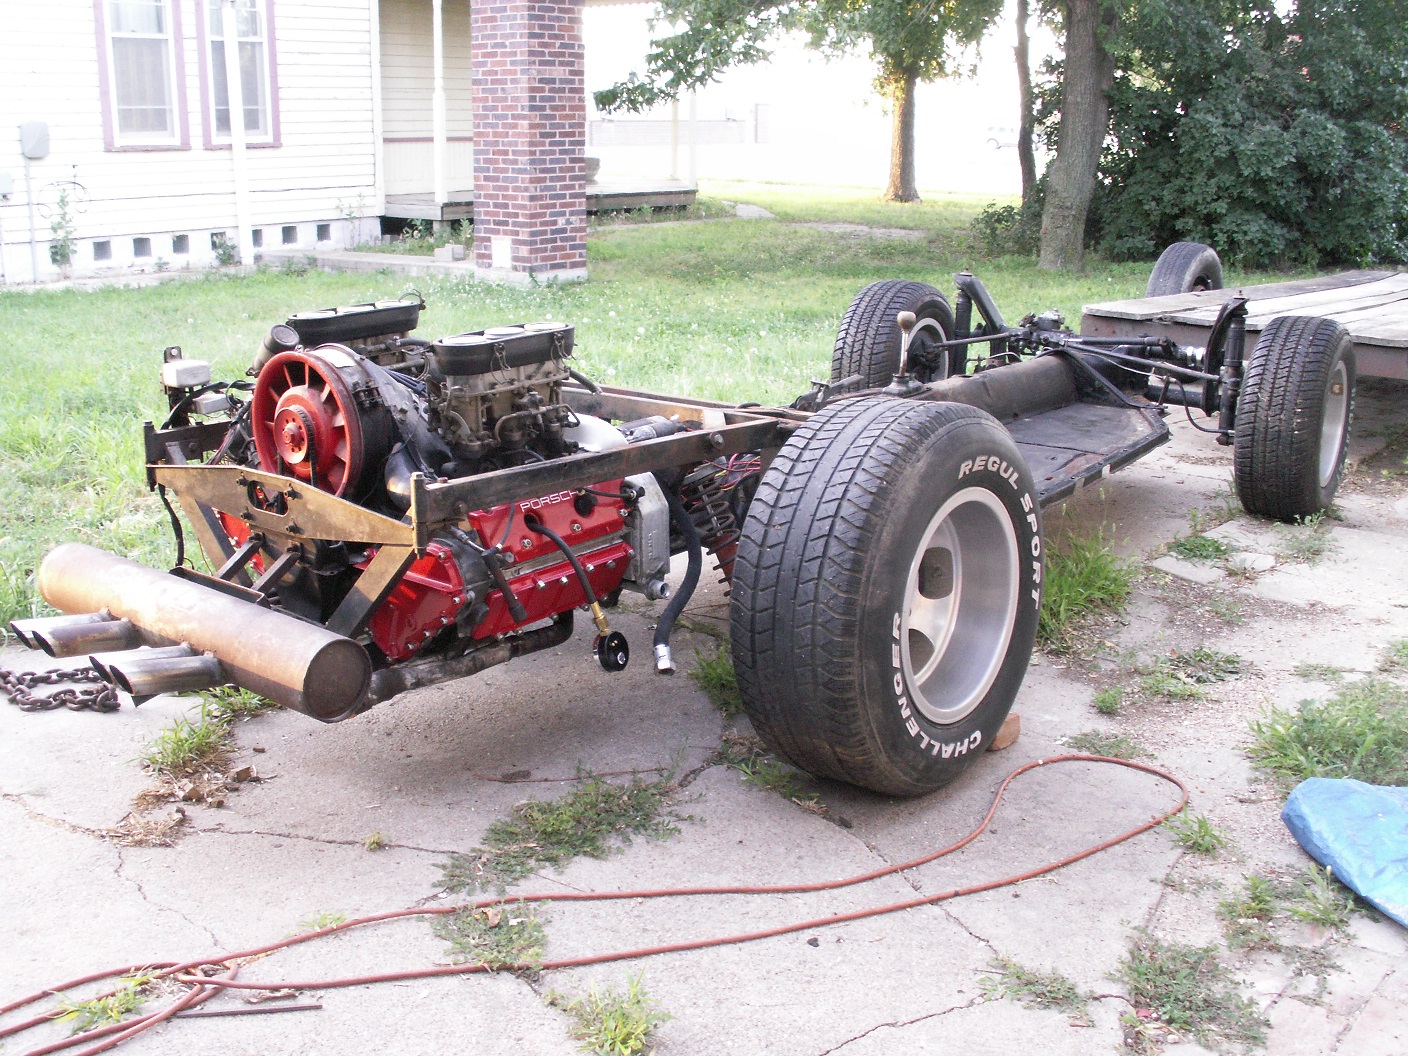
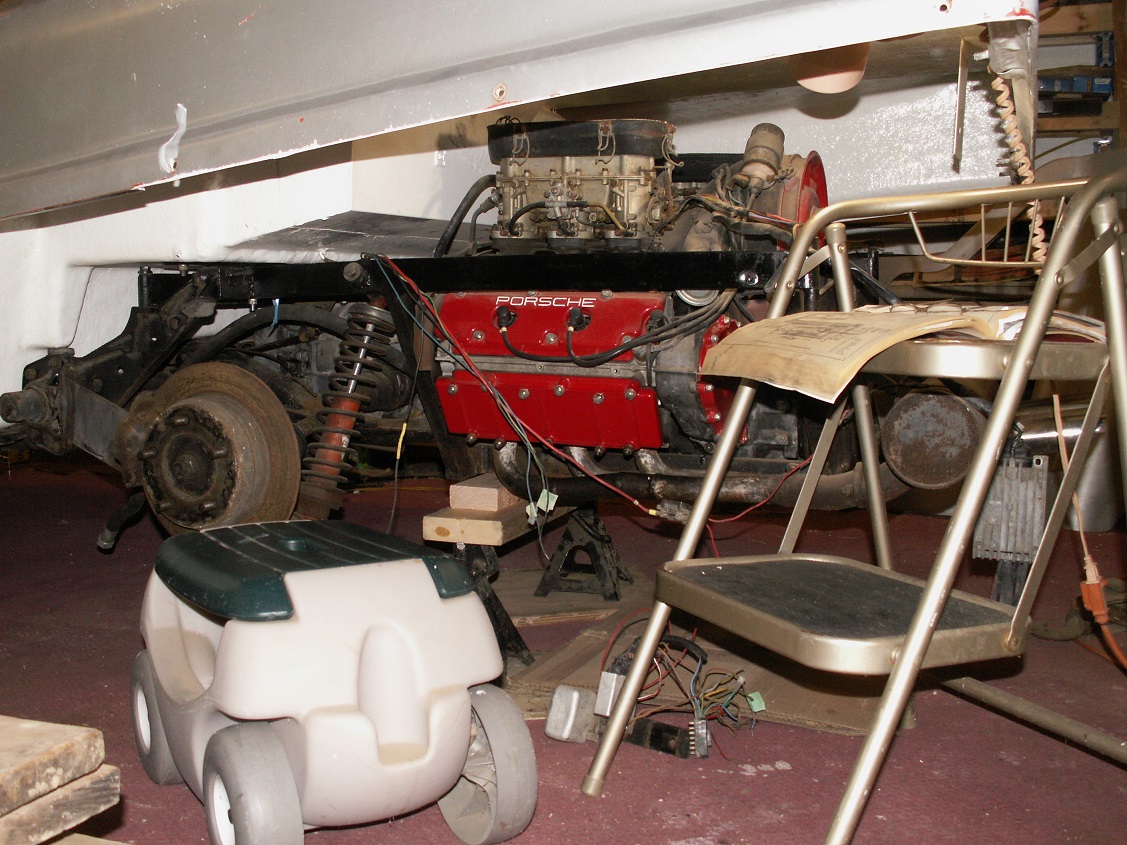
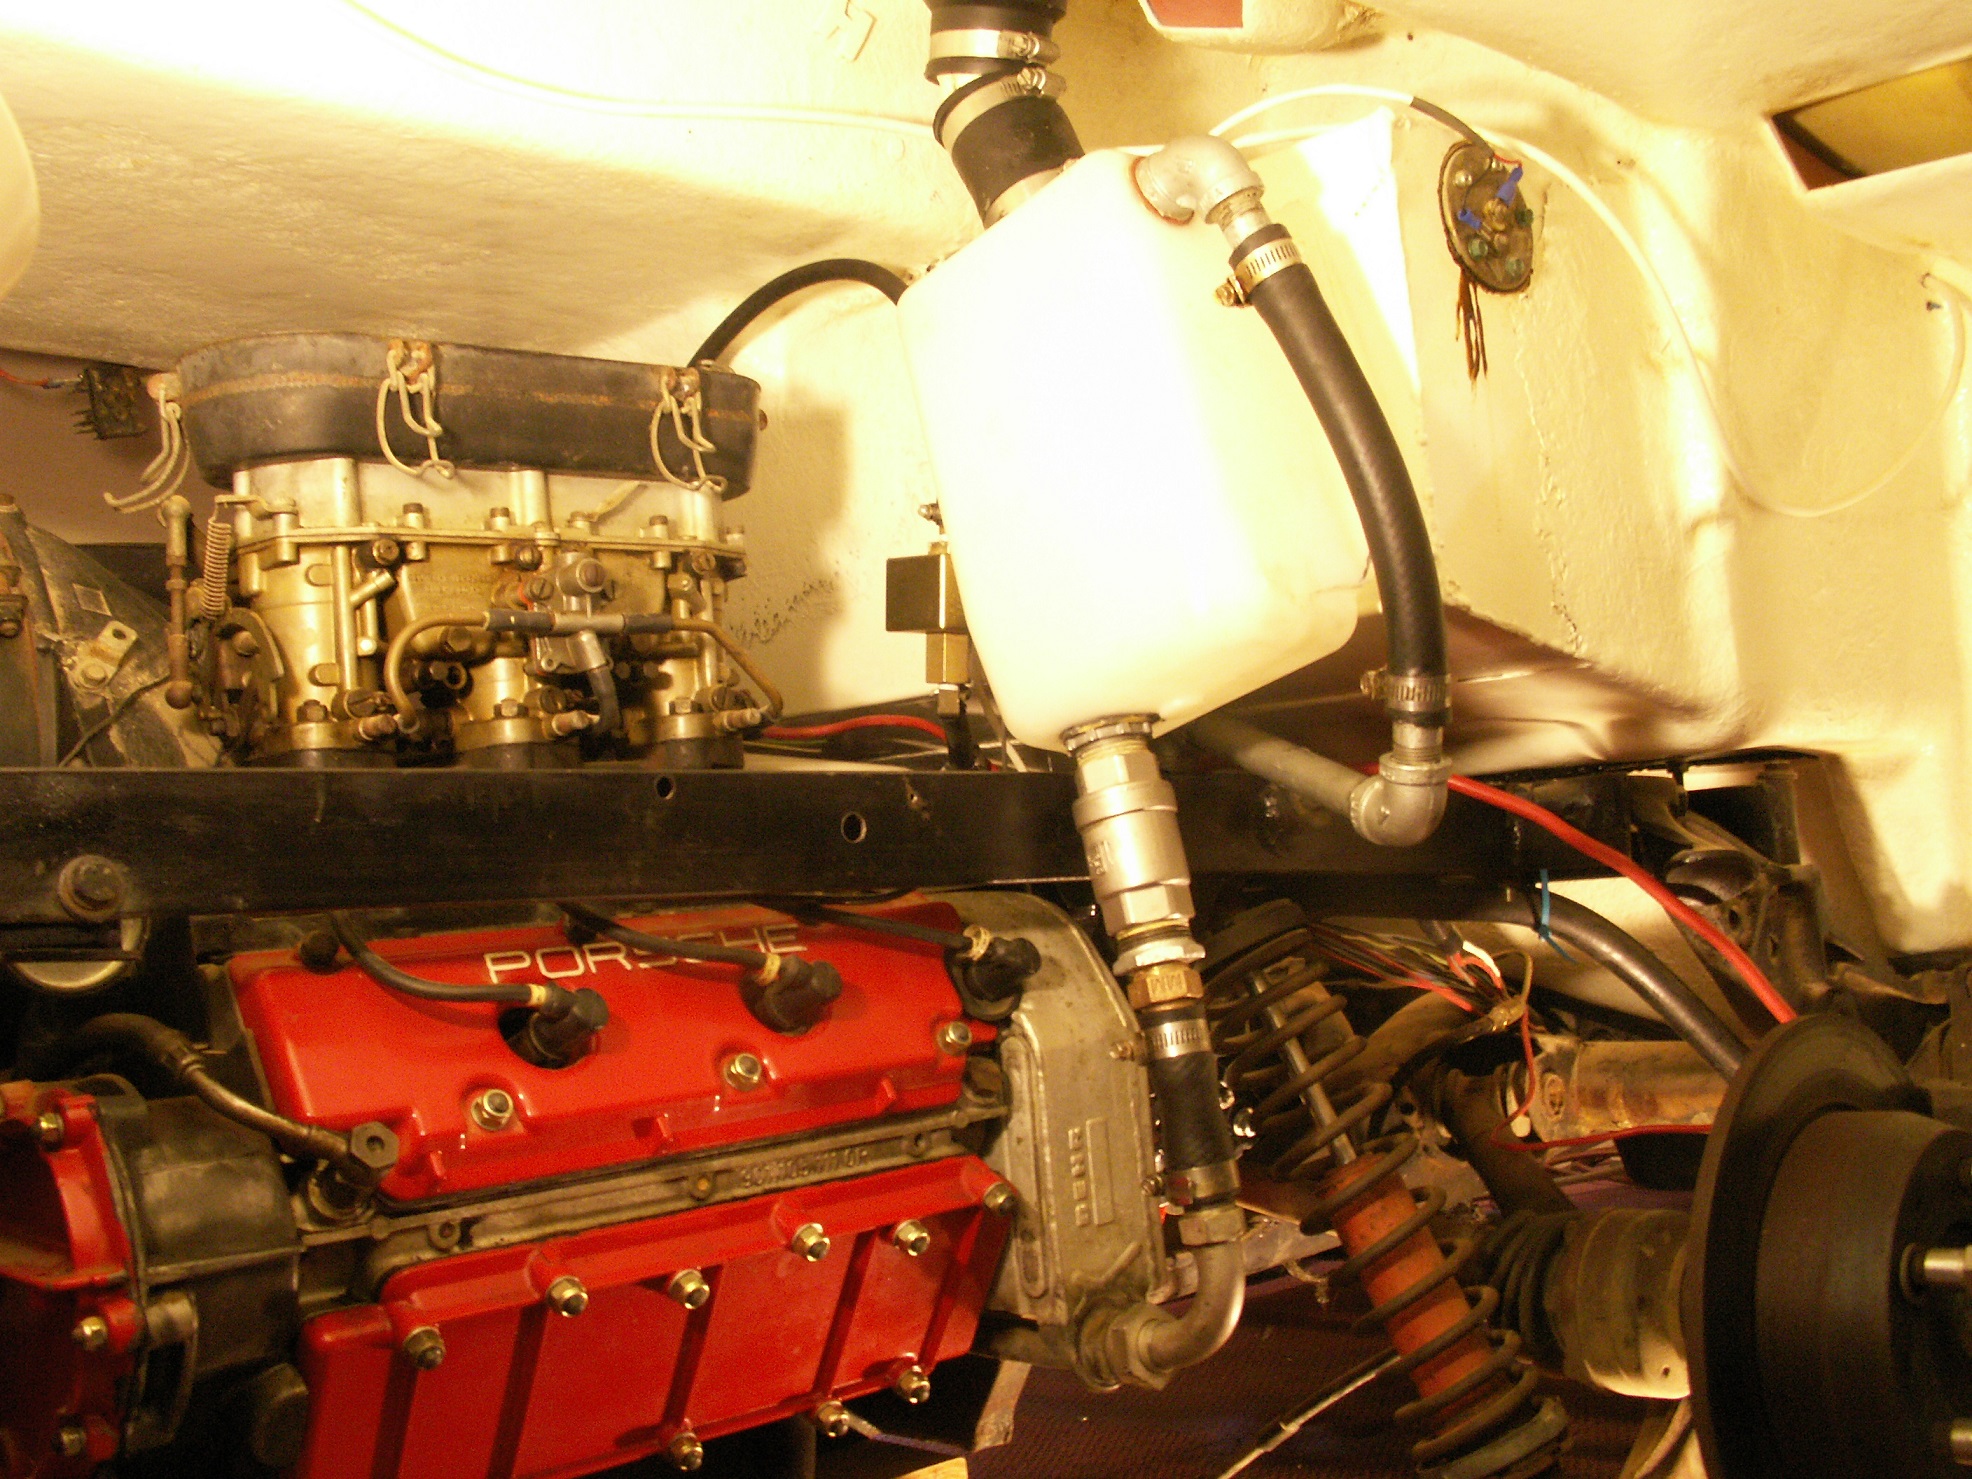
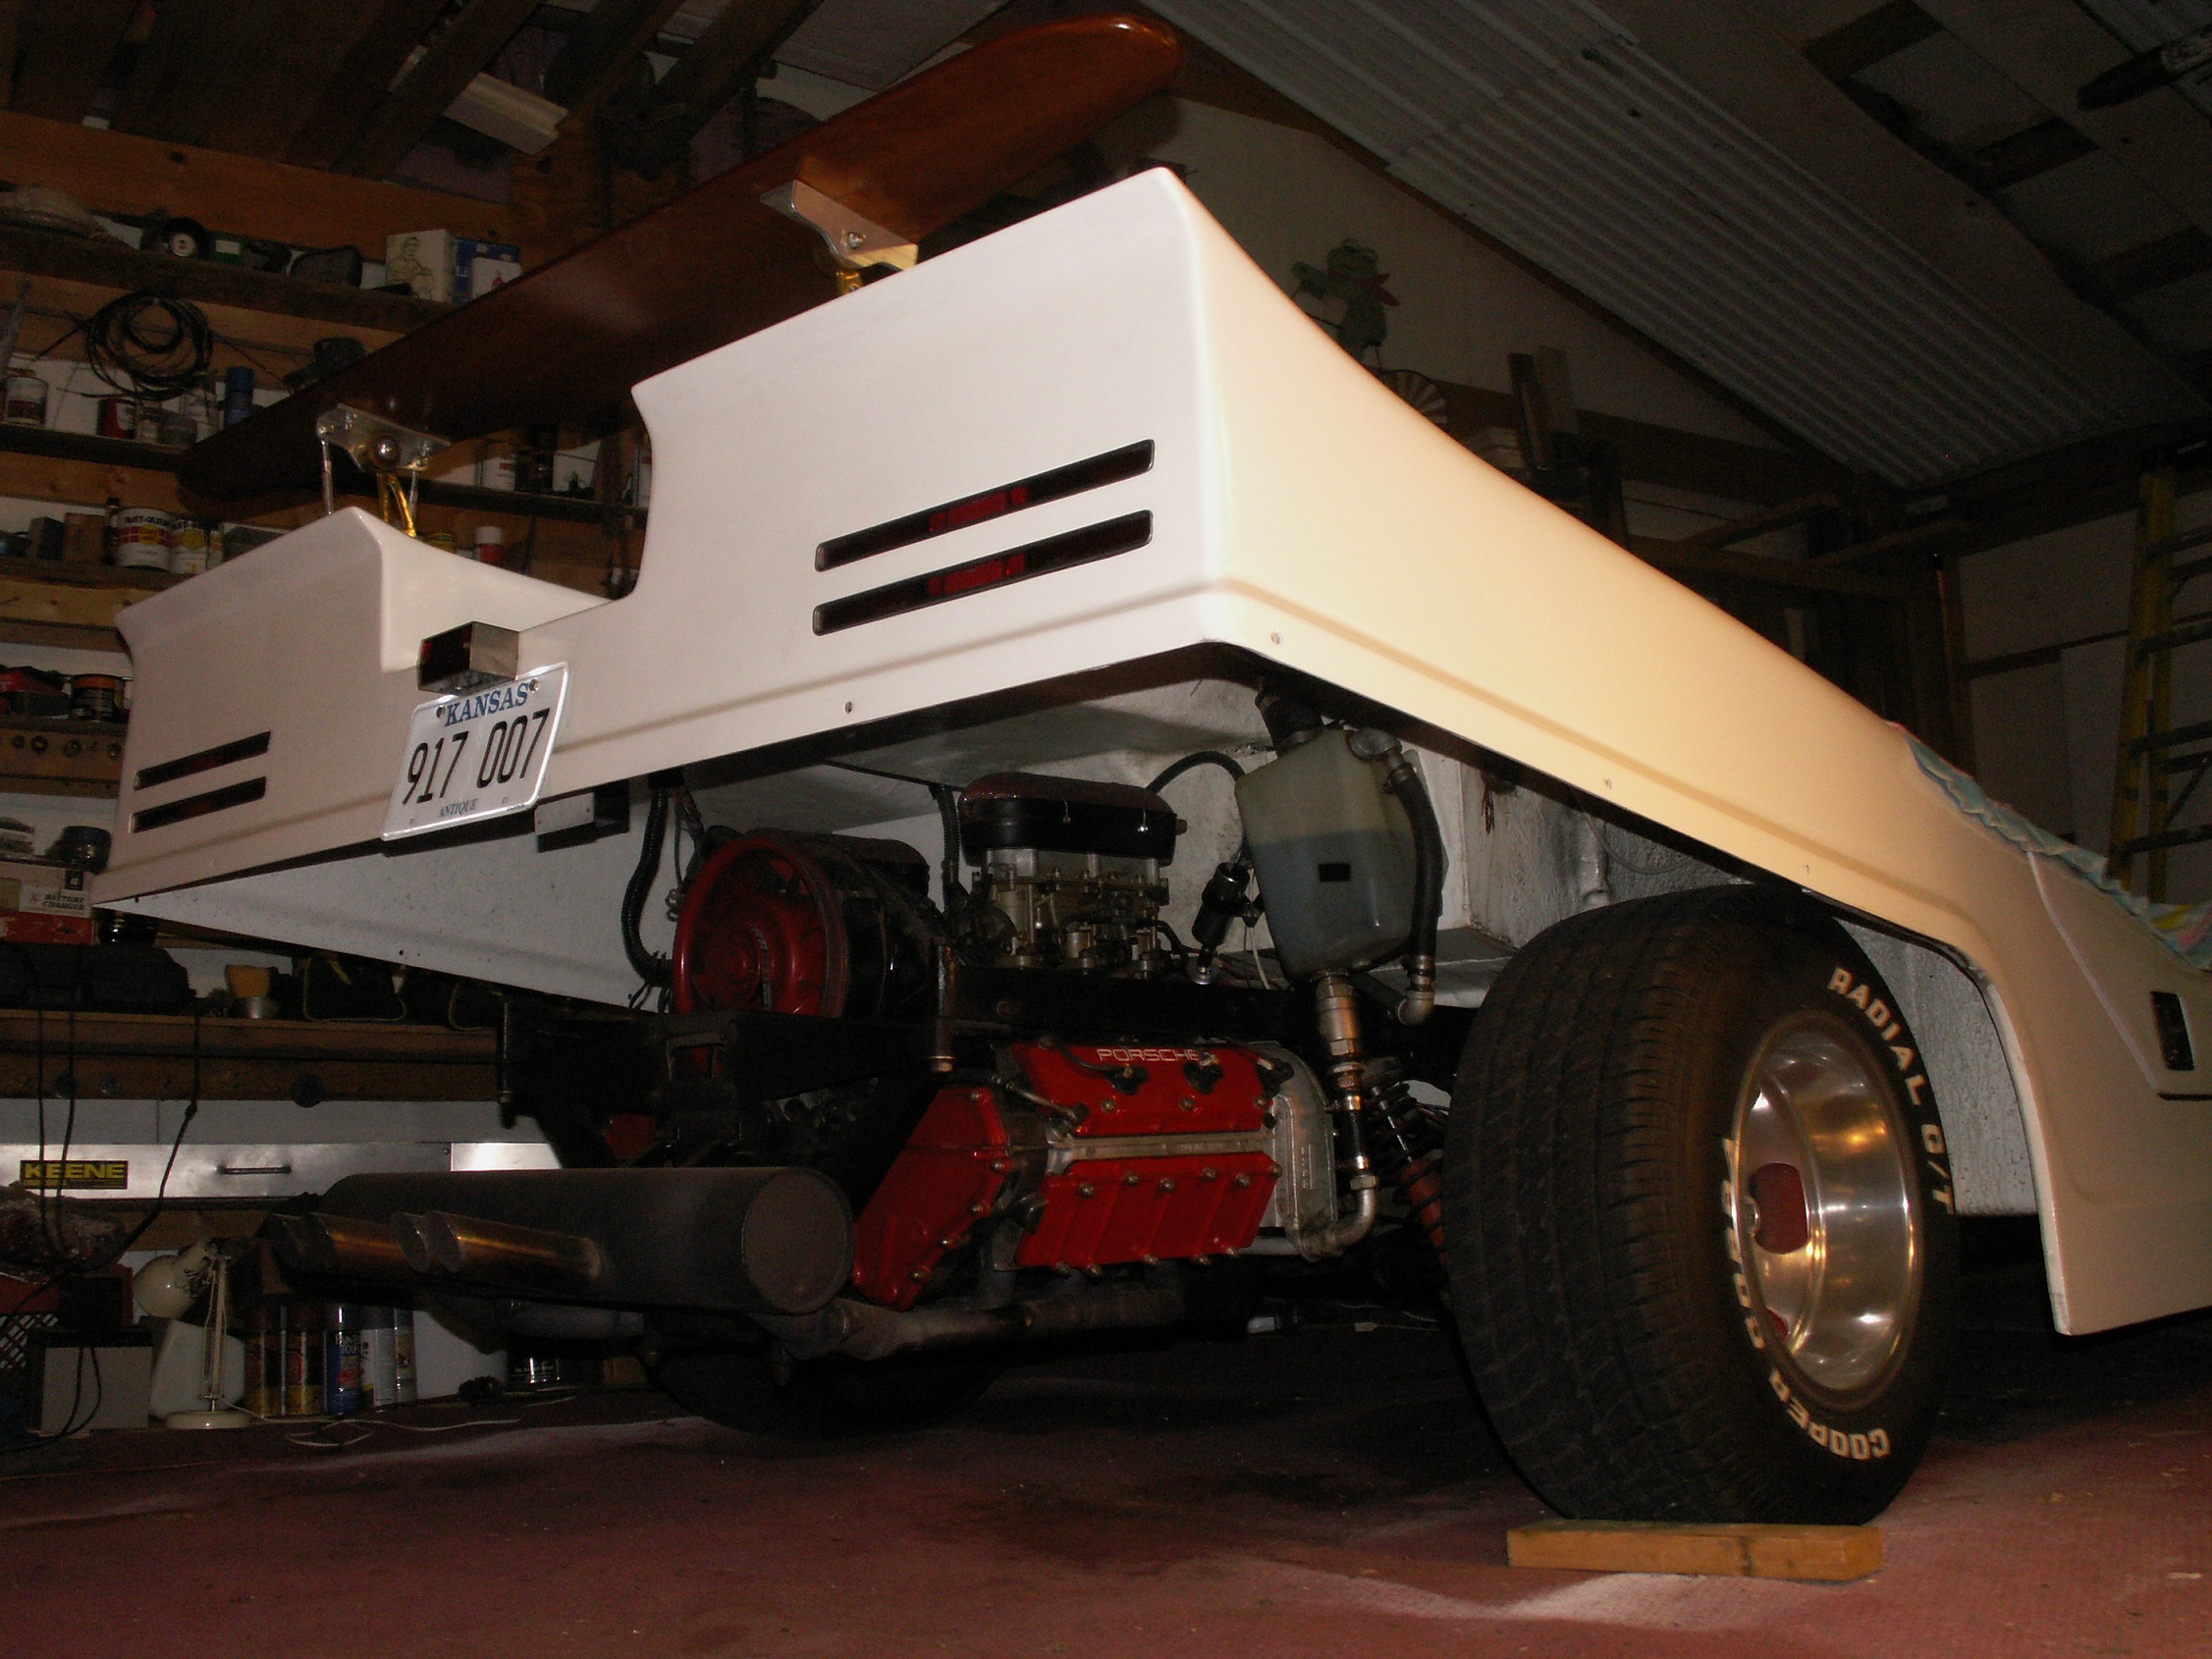
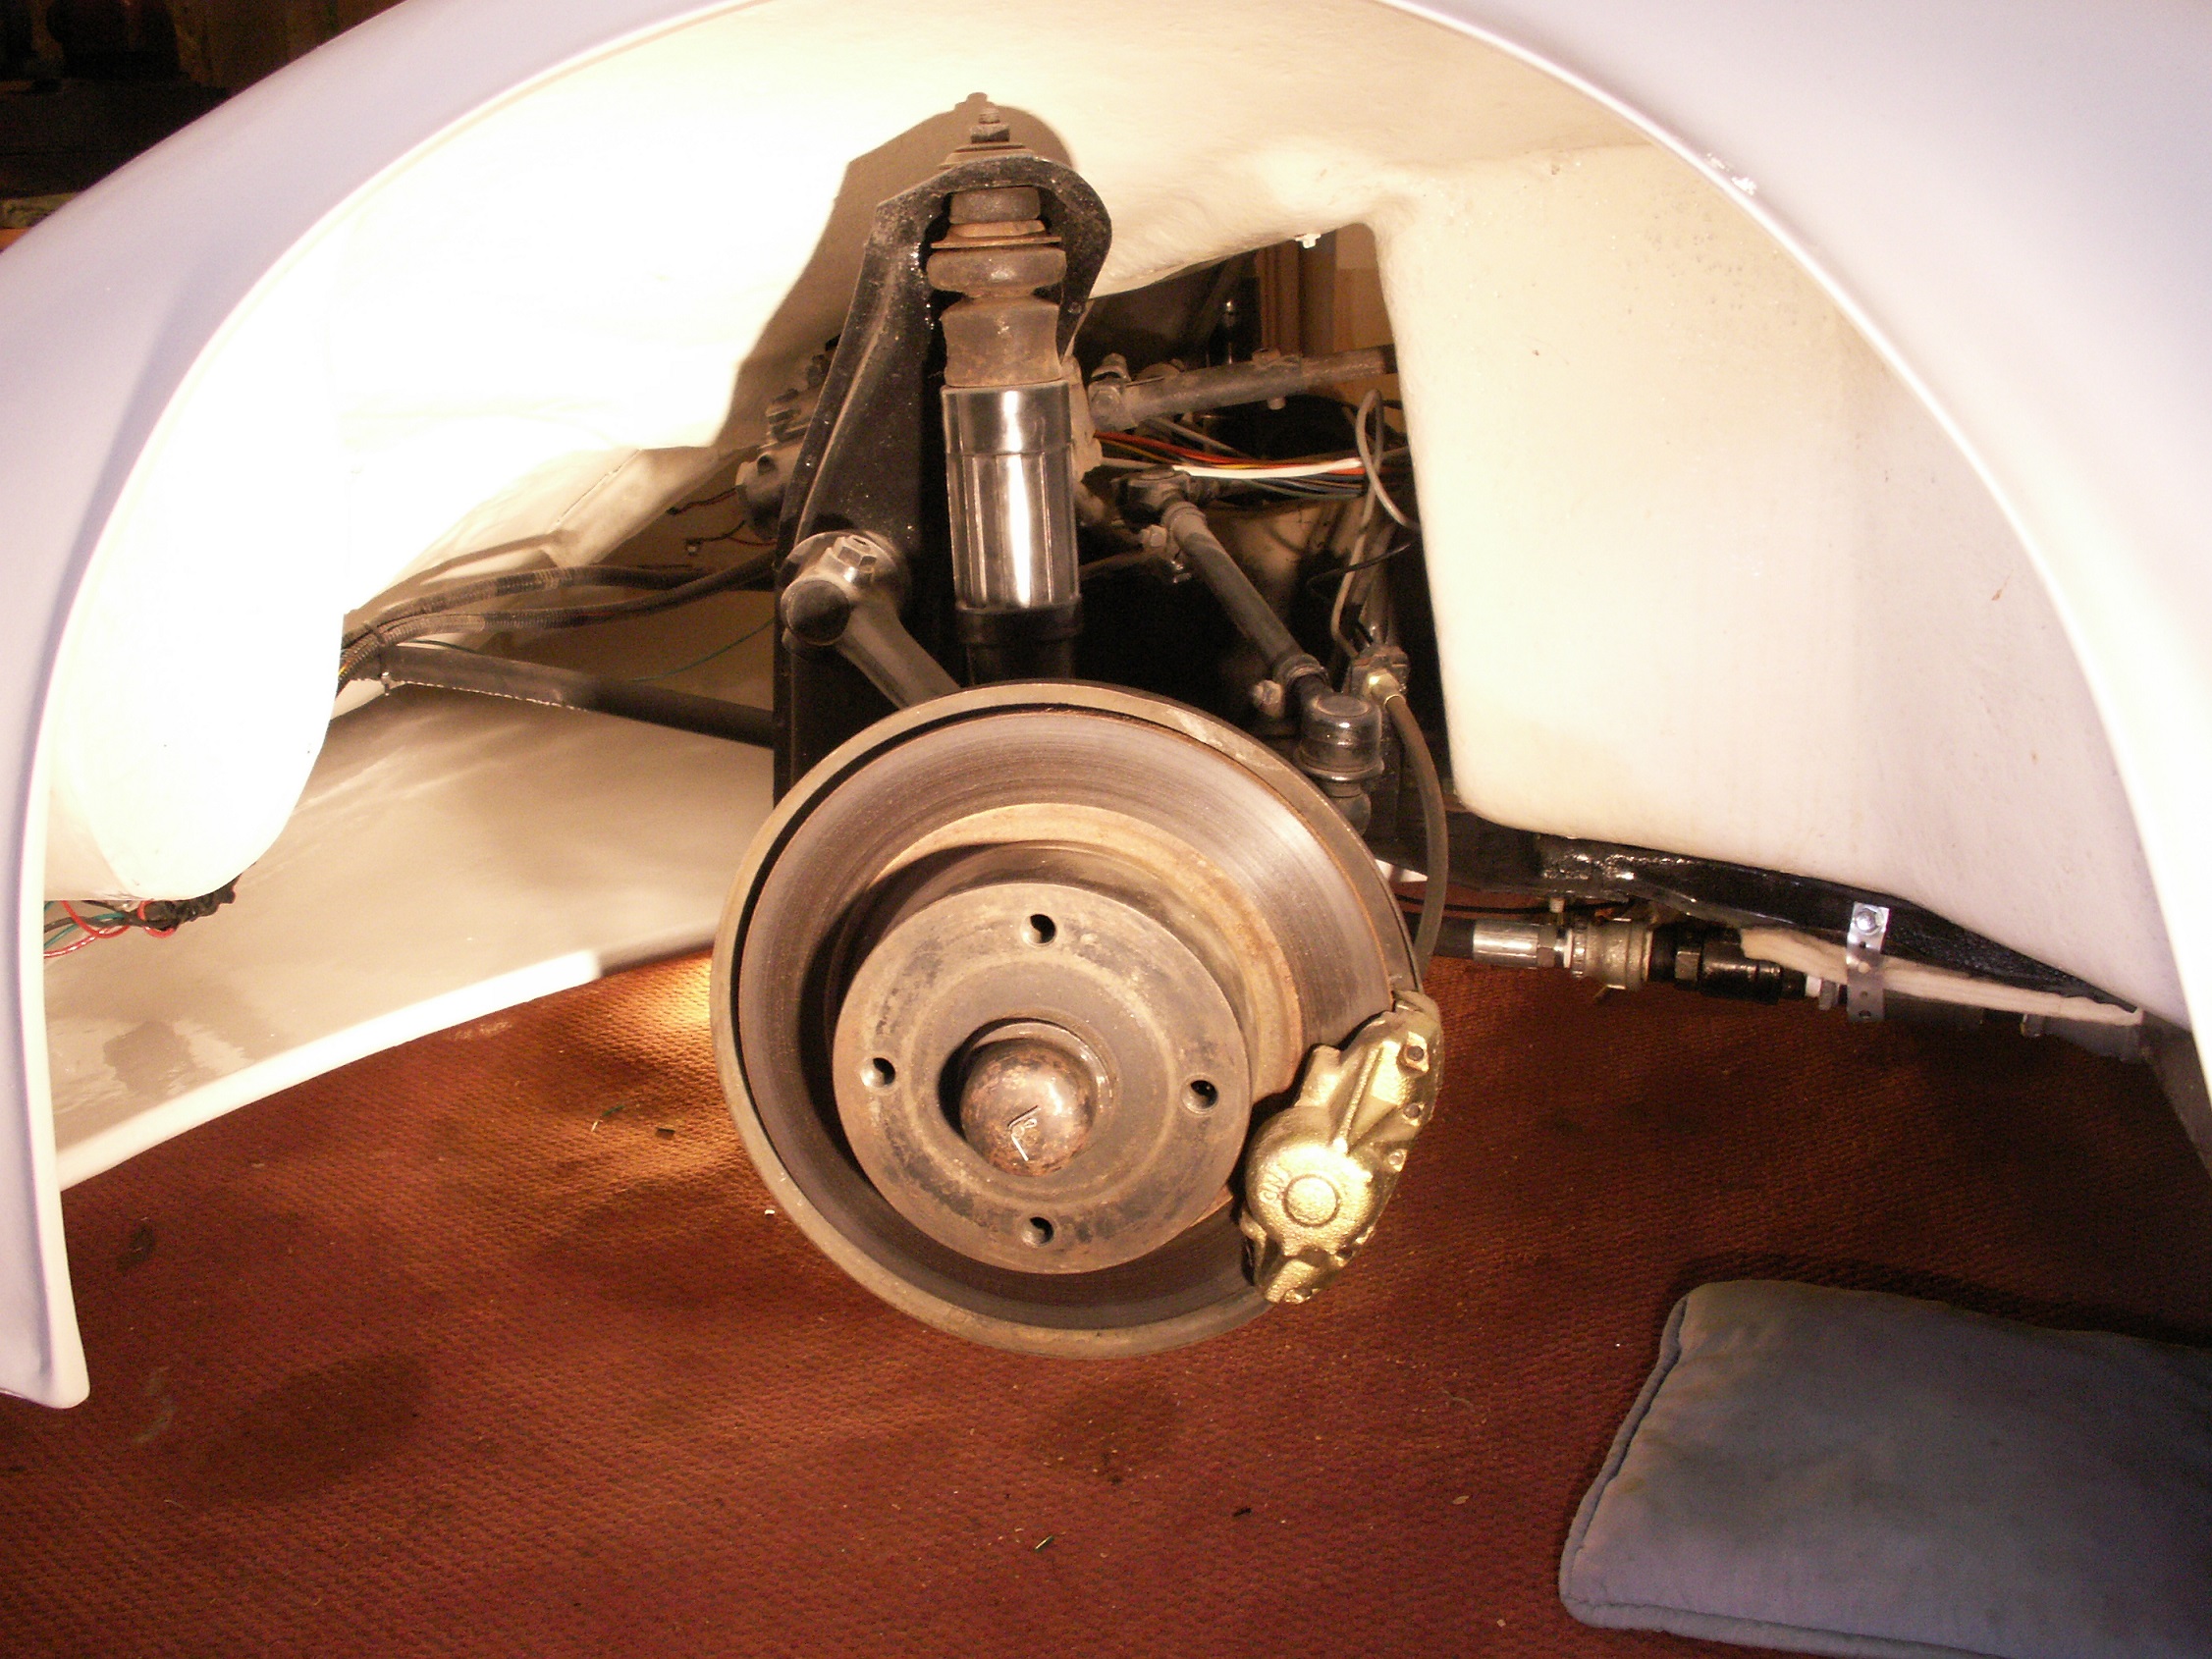
The running gear, Carmen-Gia disc brake front end, VW Bug floor pan, Porsche rear suspension, Porsche 5 speed
transaxle, 1971 Porsche 911 T flat 6 over-head cam engine.